Avaya Messaging can be setup to securely send and receive faxes through the Dialogic SR140 fax software. The transmissions use Transport Layer Security (TLS) to encode the data. This method complies with JITC requirements for secure communications.
Sites receiving secure faxes must also be setup to use the TLS protocol. Incoming faxes must also be secured using TLS protocols.
Install the Avaya Messaging program onto the computer that will act as the Voice Server. Ensure that the Hardware Fax Driver option is enabled at the Features Selection screen during program installation. This will ensure that the necessary program elements are included with Avaya Messaging.
For High Availability (HA) installations, the SR140 can be installed on the Primary or any of the Secondary servers.
|
Important! Secure Fax using the SR140 fax software requires 2 licenses from Dialogic; the standard fax license, and a secure fax license. |
Once the Dialogic SR140 and the Avaya Messaging voice server are both operating, the fax software must be configured to communicate with the UC platform.
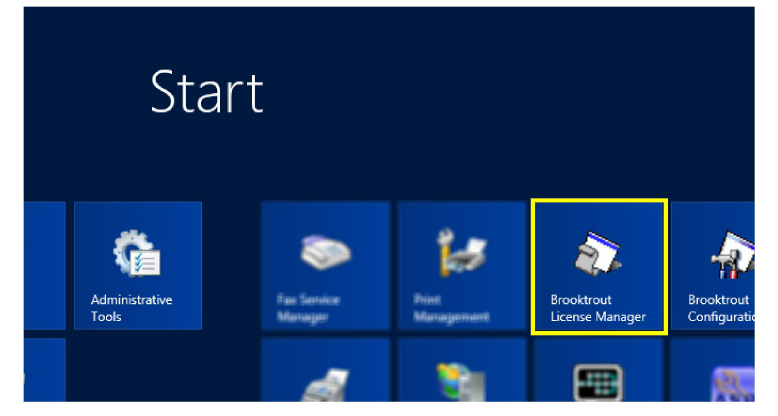
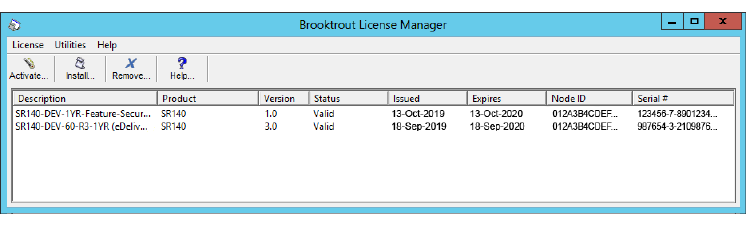
1.Open the Brooktrout License Manager program.
2.Enable the SR140 license by clicking the Activate button.
|
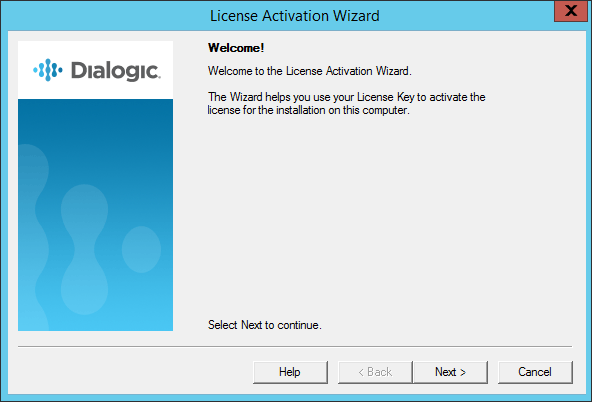
Note: The procedure shown here uses the Activation Wizard and an Internet connection. |

3.Click Next.
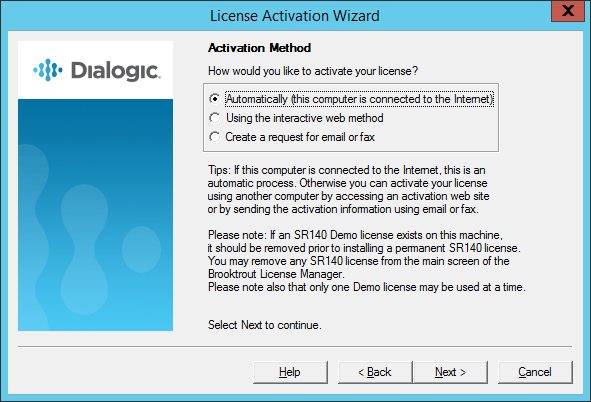
4.Enable Automatically... as the Activation Method, then click Next.
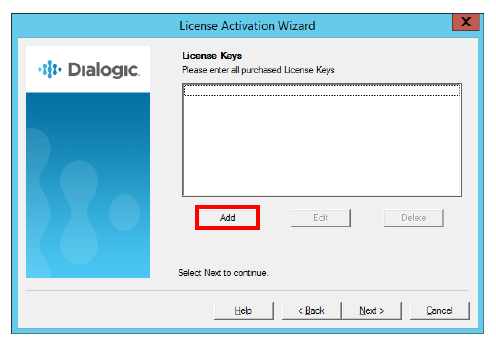
5.Currently, no License Keys are installed. Click Add.
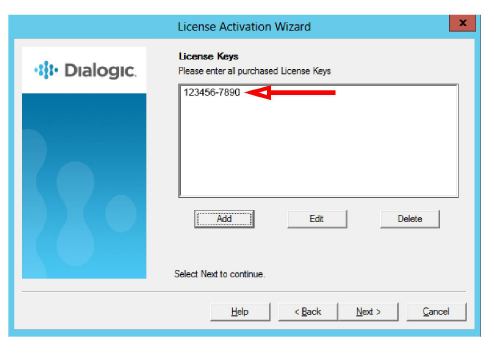
6.Enter the SR140 standard license key number that came with the fax software package. Click OK when ready.

7.The new license key has been successfully added to the system. Click Add.
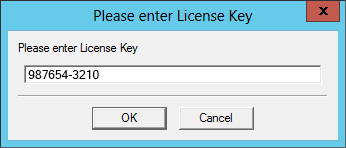
8.Enter the SR140 secure fax license key number. Click OK.
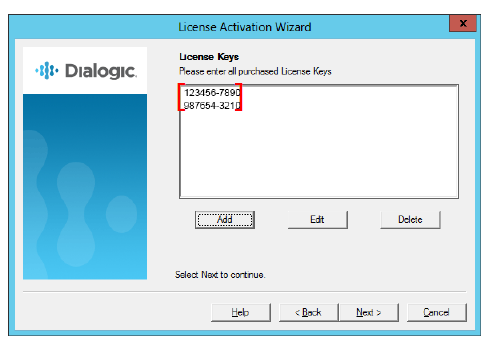
9.Both license keys have been successfully added to the system. Click Next.
10.Click Next to continue to the Product Registration pages.
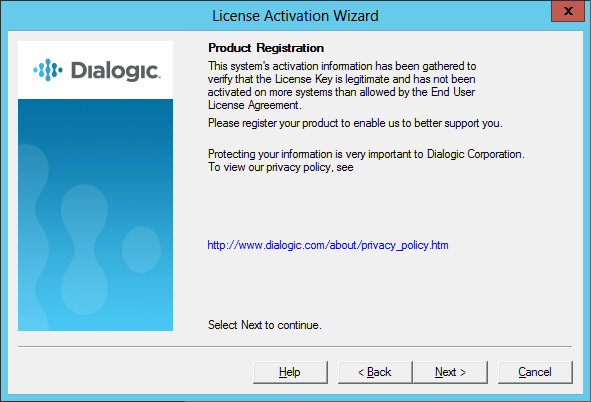
11.Enter the details of the site administrator. All fields are required for registration. Click Next.

12.Enter the details for the location where the software is installed.
Click Next to continue.

13.The program will connect to the Dialogic servers to upload the registration details. This requires a working Internet connection, and must be completed before the license will be activated.
When it has finished, click Next to continue.
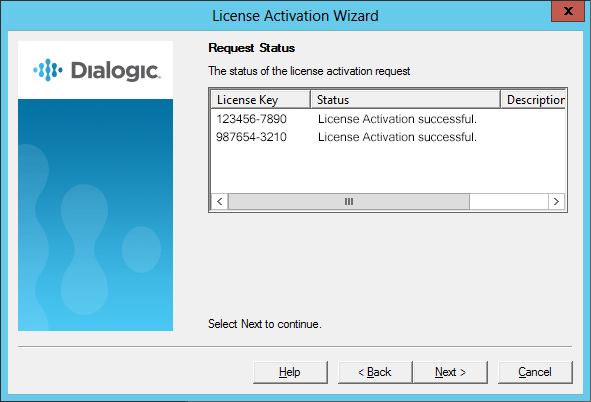
14.The new licenses have been activated on the system. Click Next.
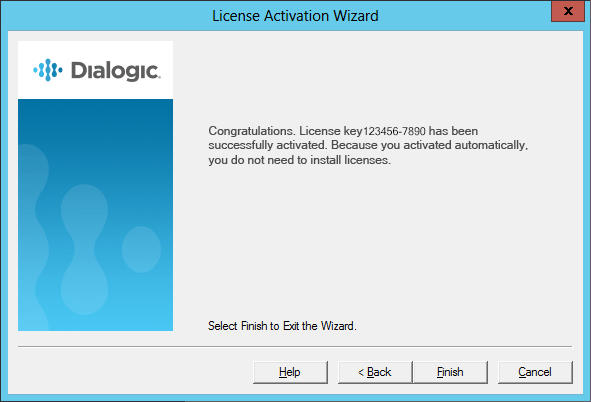
15.Click Finish to complete the Wizard.
16.The added licenses appear in the Brooktrout License Manager.
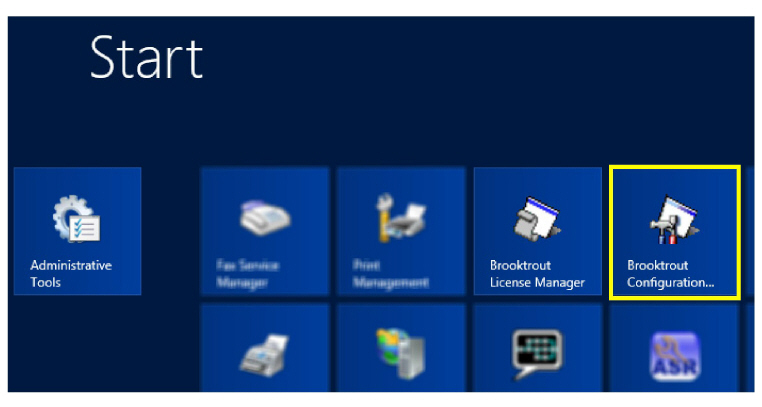
1.Open the Brooktrout Configuration Manager program.
2.At Configuration Tool - Preferences, change Boston Host Service Start Mode to Automatic and click OK.
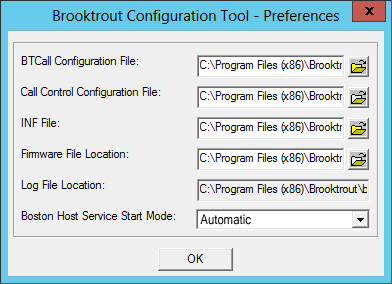
|
Hint: This screen will only appear the first time you run the program. Thereafter, this screen will be skipped. |
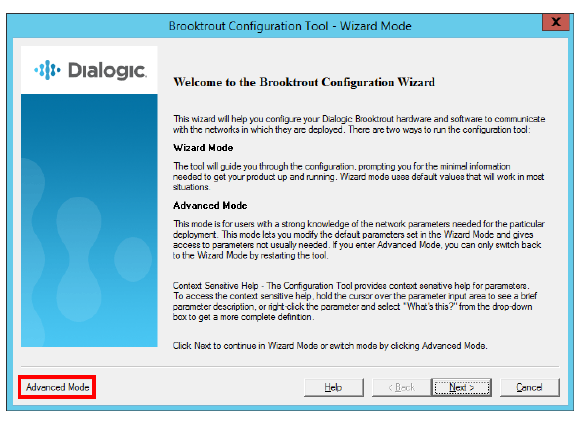
3.When the Configuration Wizard starts, choose Advanced Mode.
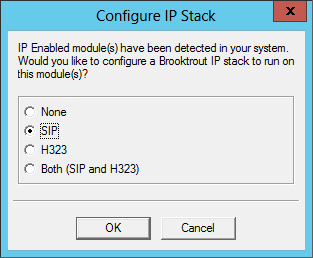
4. Enable the stack option for SIP, then click OK to continue.
|
Hint: This screen will only appear the first time you run the program. Thereafter, this screen will be skipped. |
5.In the left-hand panel, click SIP beneath IP Call Control Modules. Go to the IP Parameters tab and specify the following for your site.
Primary Gateway: Enter the IP address of the Avaya Aura Communication Manager server. This was initially configured on the device. Add the port value that the CM uses for faxing in the second field.
From Value: In this field, (including the quotes) type “ETBTFax” <sip:etbtfax@ followed by the IP address of the Avaya Messaging voice server. For example: “ETBTFax” <sip:[email protected]> .
Contact IPv4 Address: Add sr140@ followed by the IP address and the port used by the Avaya Messaging voice server. For example: [email protected]:5061 .
Session Name: Enter sr140 in this field.
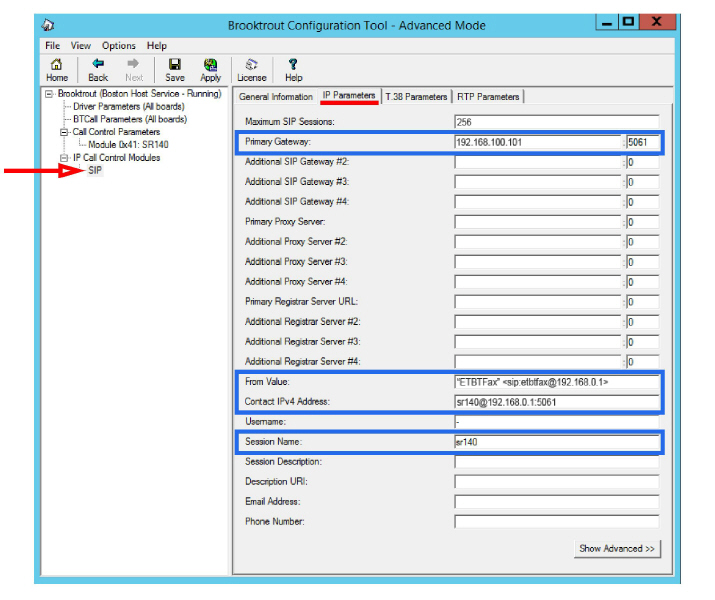
When ready, click Show Advanced>>.
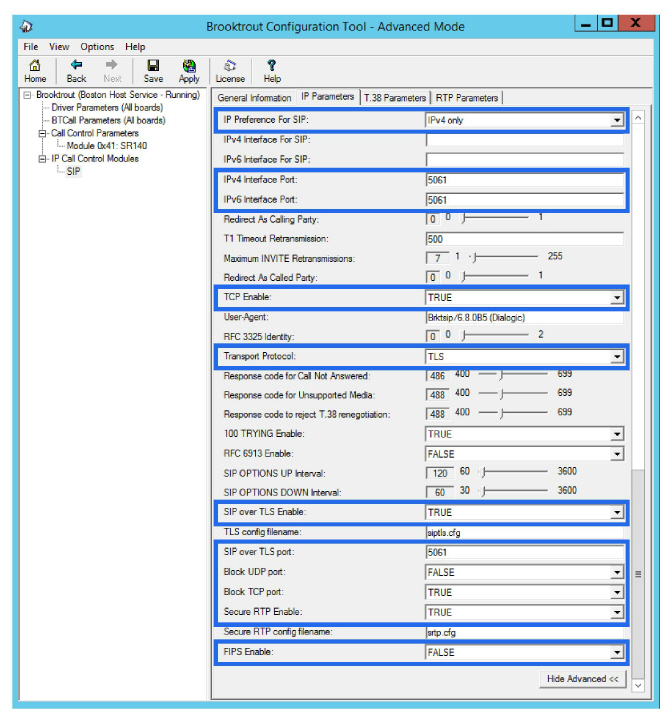
6.Specify the following for your site.
IP Preference for SIP: Select IPv4 only from the dropdown list.
IPv4 Interface Port: Enter the port used for faxing.
IPv6 Interface Port: Enter the port used for faxing.
TCP Enable: Set this to TRUE.
Transport Protocol: Choose TLS from the dropdown list.
SIP over TLS Enable: Set this to TRUE.
SIP over TLS Port: Enter the port used for faxing.
Block UDP port: Set this to FALSE.
Block TCP port: Set this to TRUE.
Secure RTP Enable: Set this to TRUE.
FIPS Enable: Set this to FALSE.
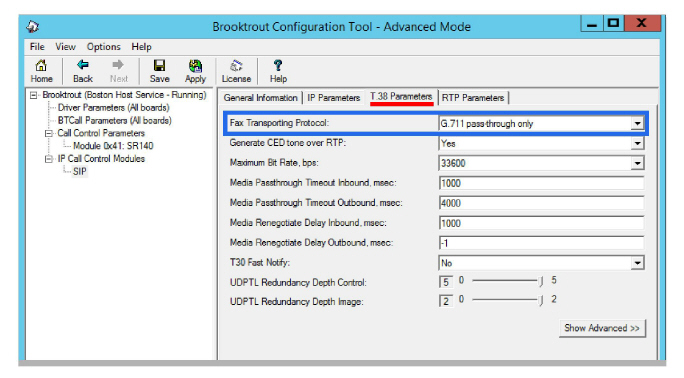
7.Go to the T.38 Parameters tab and specify the following for your site.
Fax Transport Protocol: Select G.711 pass-through only from the dropdown list.
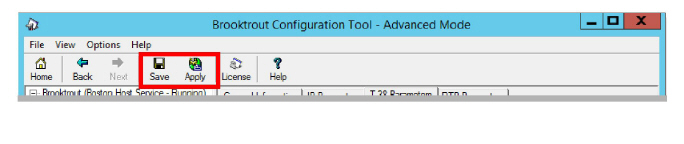
8.Click Save, then Apply.
9.On the Avaya Messaging voice server, go to the installation drive and locate the folder
\Program Files (x86)\Brooktrout\config .
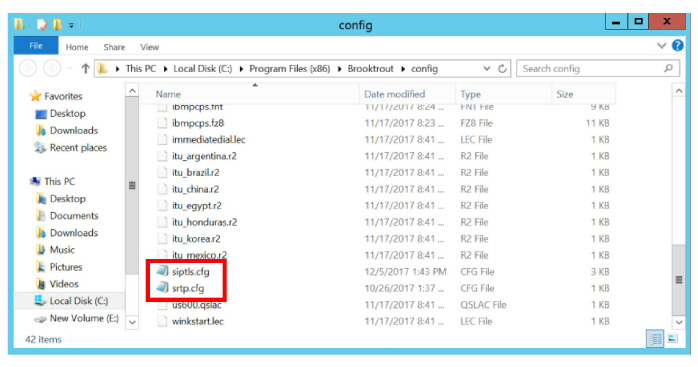
10.In the folder, open the SRTP.cfg file using a text editor such as NotePad.
Remove the # (uncomment) at the start of the following lines, and verify their values are as shown.
srtp_accept = true
srtp_enforce = true
srtp_crypto_suite = AES_CM_128_HMAC_SHA1_80
srtcp_unencrypted_flag = true
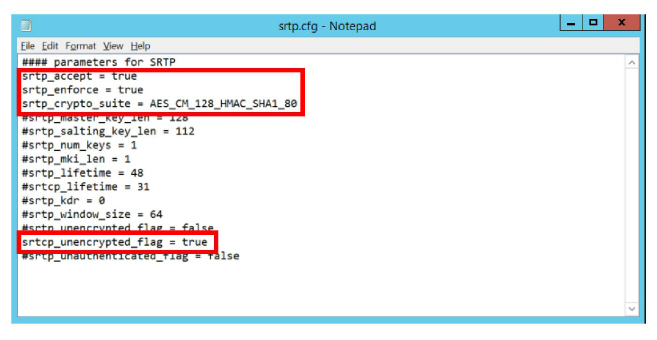
Save the file when finished.
11.Open the SIPTLS.cfg file.
Remove the # (uncomment) at the start of the following lines, and verify their values are as shown.
sip_tls_method = : Leave this field at its default value.
local_rsa_private_key_filename = : Enter the path to the location of your private key file.
local_rsa_cert_filename = : Enter the path to the location of your server certificate file.
ca_cert_number = : Put the number of the cert you are using here. Add as many as are required.
ca_cert_filename = : Put the name of the certificate file you are using here. Add as many as are required.
(optional) chain_cert_number = : Put the number of the cert you are using here. Add as many as are required. This is only required if you are using Intermediate certificates.
(optional) chain_cert_filname = : Put the name of the certificate file you are using here. Add as many as are required. This is only required if you are using Intermediate certificates.
client_cert_required = false
allow_self_signed_certs = false

12.When finished, restart the UC BTFaxServer and the Dialogic Corporation Boston Host Service services on the computer, or reboot the server.
Avaya Aura Communication Manager Configuration
The certificate files must be copied to the AACM server.
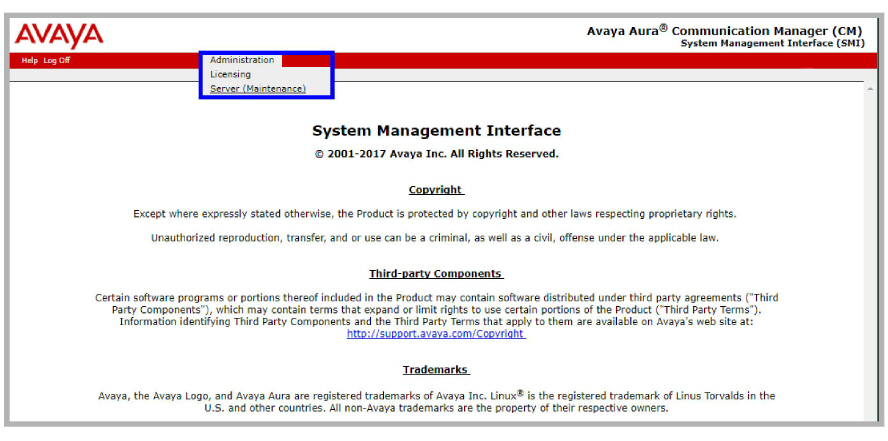
1.Login to the AACM server using administrator credentials. Go to Administration > Server (Maintenance).
2.Go to Miscellaneous > Download Files.
Enable the File(s) to download from the machine I’m using to connect to the server radio button.
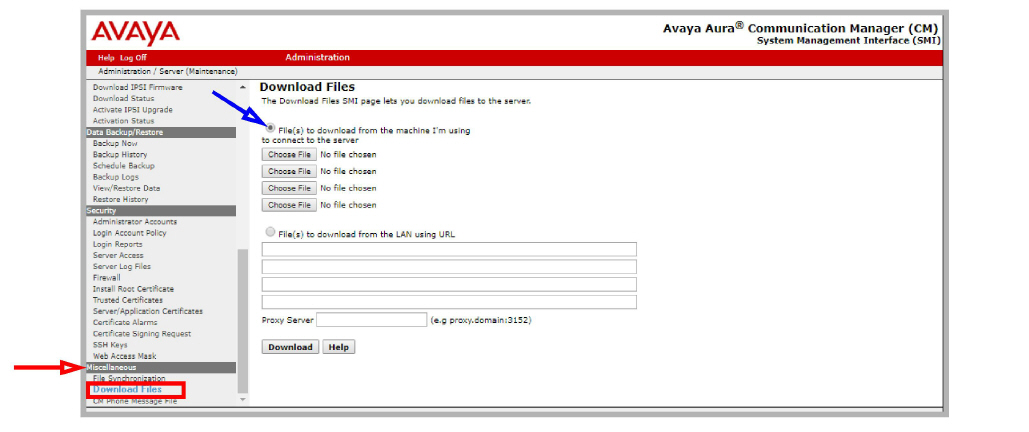
3.Click Choose File and find the certificate file. Select the file and click Open to add it to the list.
Repeat for each certificate file (CA, Intermediate, Server, etc.).

When finished, click the Download button to copy the files to the server.
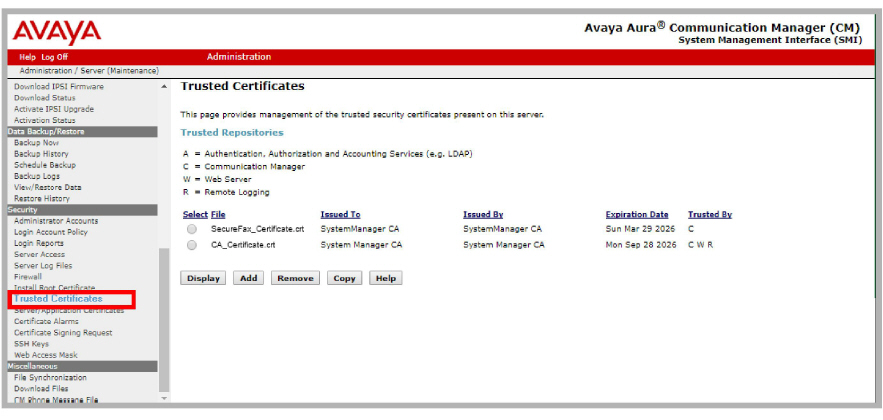
4.In the left-hand column, select Security > Trusted Certificates.
Click Add and attach each of the CA and Intermediate certificates downloaded in step 3.
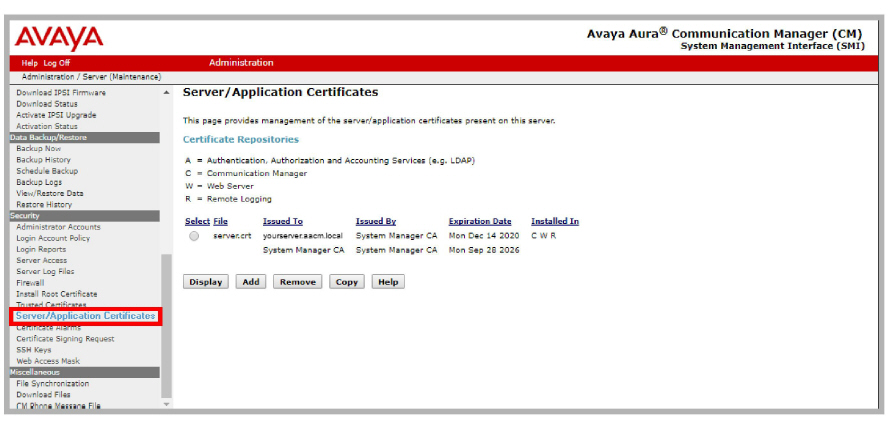
5.In the left-hand column, click Server/Application Certificates.
Click Add and attach the server certificate downloaded in step 3.
6.Close the Communication Manager console.
Avaya Aura System Manager Setup
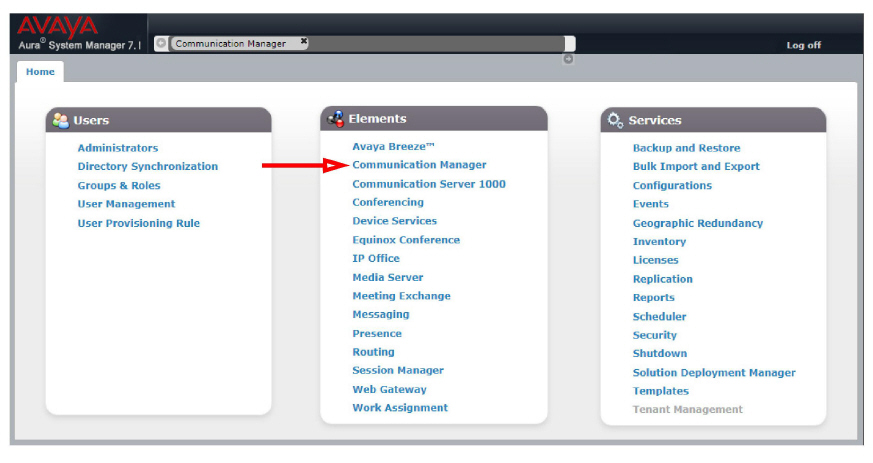
1.Login to the System Manager using an administrator account.
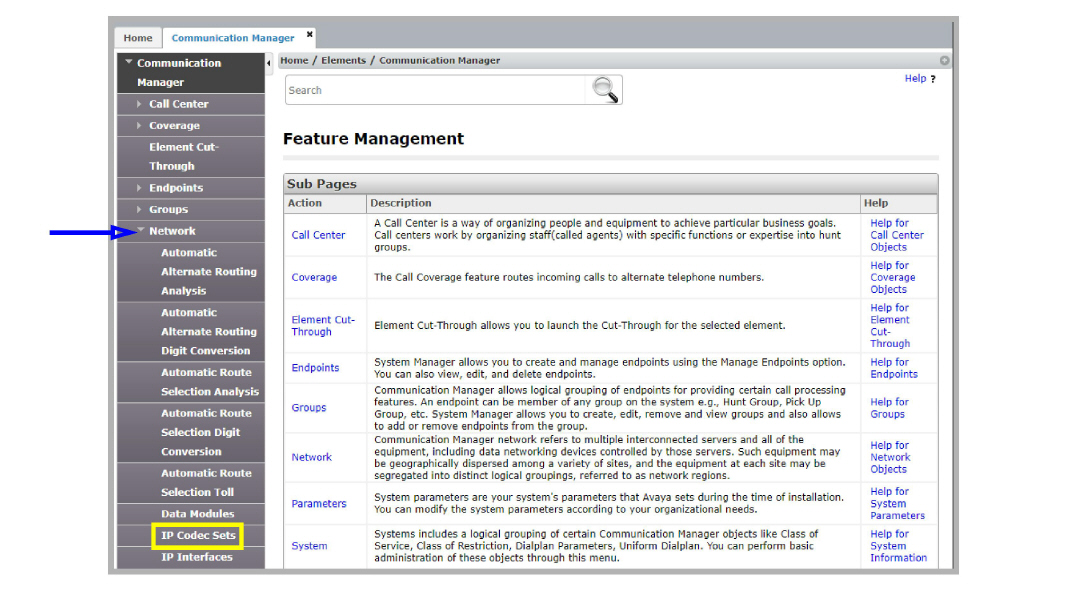
Under Elements, select Communication Manager.
2.Go to Network > IP Codec Sets.
3.Add / Edit an audio codec set.
Audio Code c: Set this to G.711MU.
Silence Suppression: Choose n.
Frames Per Pkt: Enter a value of 2.
Media Encryption: Select 1-srtp-aescm128-hmac80 from the dropdown list.

4.Go to IP Network Regions in the left-hand column. Click New to create an entry.
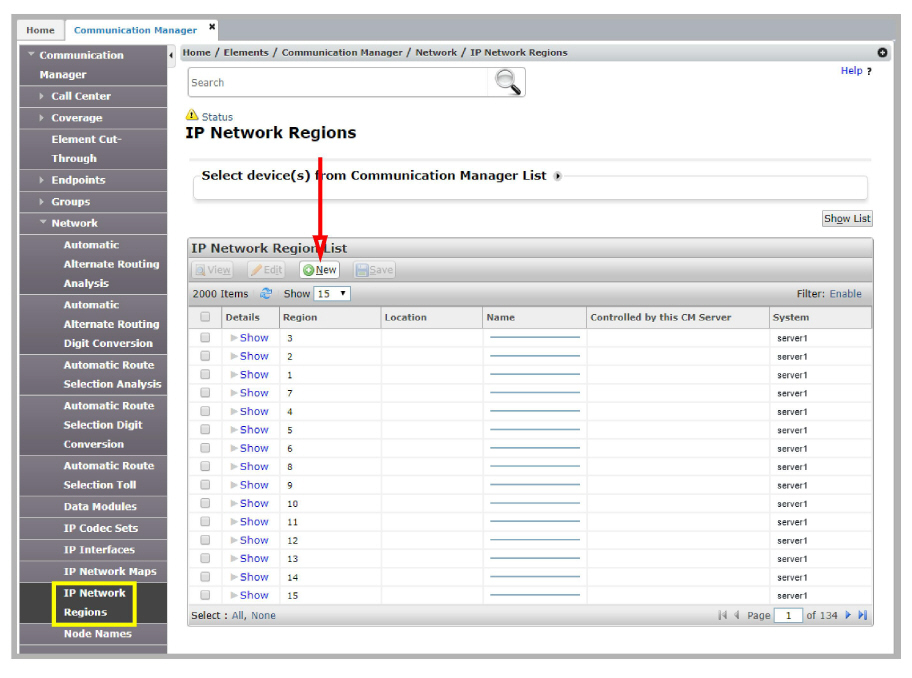
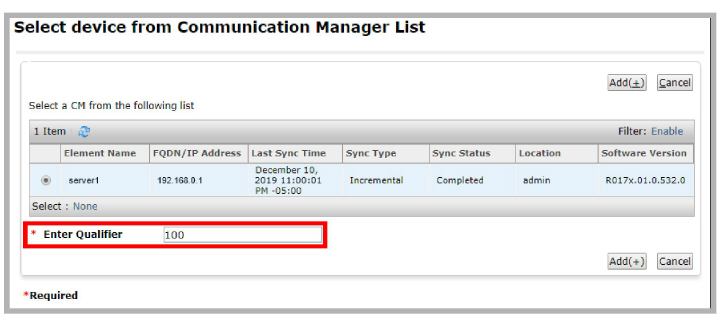
5.Enter an available Network Region qualifier (a number between 1-250), then click Add.
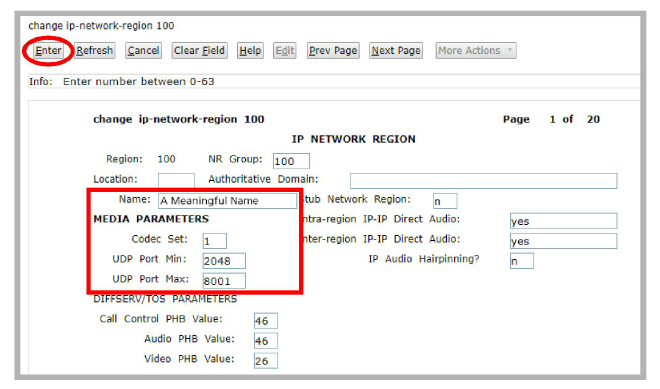
6.Enter the following parameters.
Name: Enter a meaningful, human readable name.
Codec Set: Set this to the codec set number configured in step 3.
UDP Port Min: Enter 2048 here.
UDP Port Max: Enter 8001 here.
Click the ENTER button when finished.
7.Open Node Names in the left-hand column. Click New.
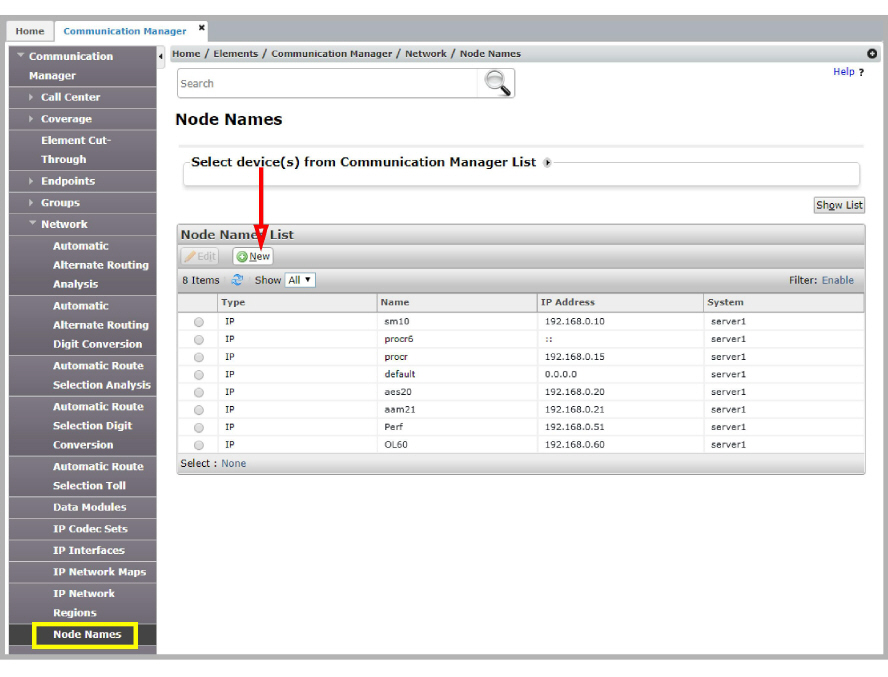
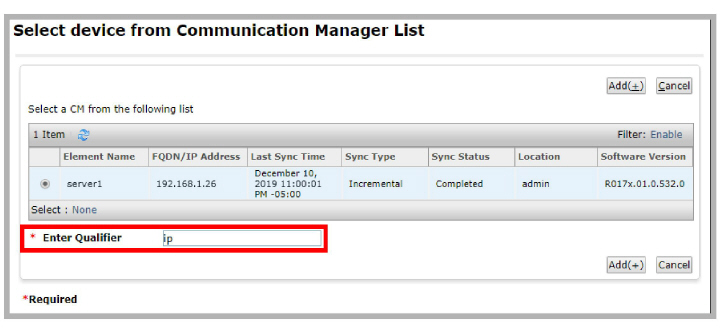
8.Select IP from the qualifier dropdown list, then click Add.
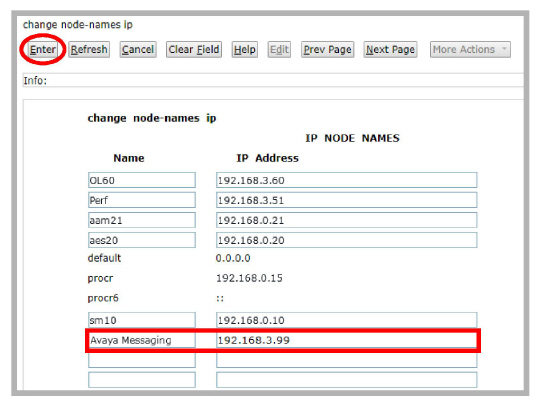
9.In a blank space on the page, name the node, then enter the IP address of the Avaya Messaging voice server.
When ready, click the ENTER button.
10.Open Signaling Groups in the left-hand column. Select an existing group (typically group 1) to edit, or create a new group. If creating a new group, when prompted for a Qualifier, enter NEXT.
Enter the required values.
Group Type: Choose SIP from the dropdown list.
Transport Method: Select tls from the dropdown list.
Enforce SIPS URI for SRTP: Set this value to n.
Near-end Node Name: Enter the value procr in this field.
Far-end Node Name: Enter the Node Name from in step 9.
Near-end Listen Port: Enter the port number used for faxing.
Far-end Listen Port: Enter the port number used for faxing.
Far-end Network Region: Enter the network region used as the qualifier in step 5.
When ready, click the ENTER button.

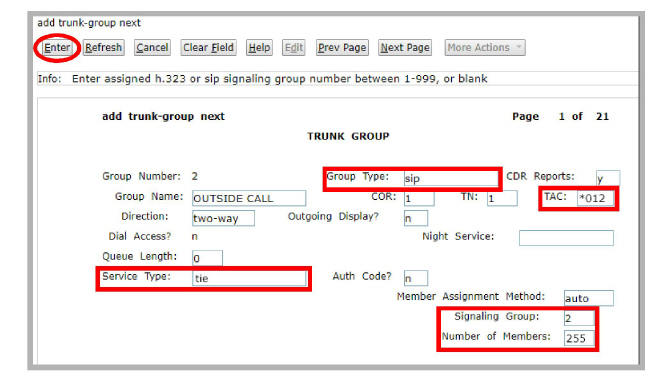
11.Open Trunk Groups in the left-hand column. Select an existing group (typically group 1) to edit, or create a new group. If creating a new group, when prompted for a Qualifier, enter NEXT.
TAC (Trunk Access Code): Enter any unique number. Any four digits, or # and *
Group Type: Select SIP from the dropdown list.
Signaling Group: Enter the number of the signaling group from step 10.
Service Type: Select tie from the dropdown list.
Number of Members: Type in 255 for this value.
When ready, click the ENTER button.
12.Open Route Pattern in the left-hand column. Click New to create a group. Give it the number of the Trunk Group specified above (step 11), then click Add.
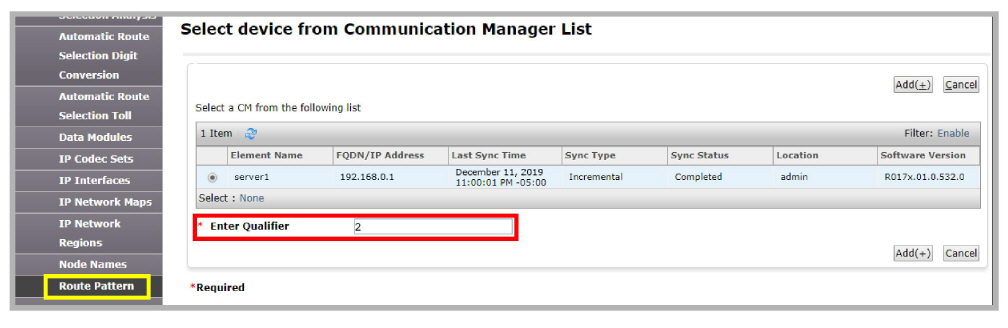
13.Enter the values required.
Grp No : Enter the trunk group number configured in step 10.
No. Del Dgts: Usually, set this value to 0.
Pattern Name: Give the route pattern a human readable name.
Numbering Format: Select lev0-pvt from the dropdown list.
When ready, click the ENTER button.

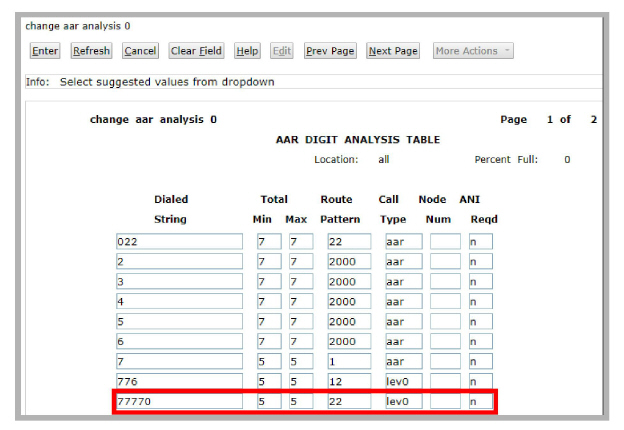
14.Open Automatic Alternate Routing Analysis in the left-hand column. Click New and enter the hunt group number for your system. Or select an existing extension and choose Edit. Click Add.

15.Modify a Dialed String entry.
Min / Max: Set these values to the longest or shortest number that can be entered.
Route Pattern: Enter the number of the Route Pattern created in step 12.
Call Type: Select lev0 from the dropdown list.
When ready, click the ENTER button.
The voice server must be configured to send faxes to the SR140, and to prepare to receive them across the same channel. A setting for incoming, and another for outgoing faxes must be configured on the server using Avaya Messaging Admin.
1.Go to Start > All Programs > Avaya Messaging > Avaya Messaging Admin, or click the Avaya Messaging Admin icon on the server desktop. Enter the username and password at the prompt.
2.Open Configuration and click on Fax Settings.
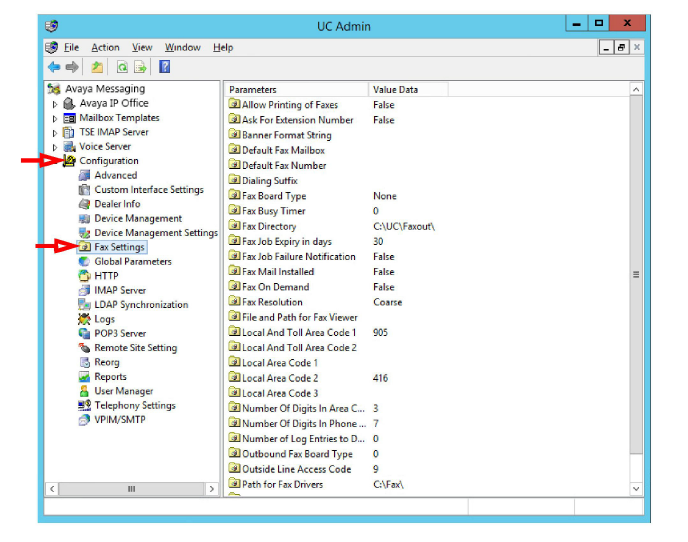
3.In the right-hand pane, locate the entry for Fax Board Type. Double-click to open its settings.
From the dropdown menu, choose Brooktrout SR140.
Click OK.
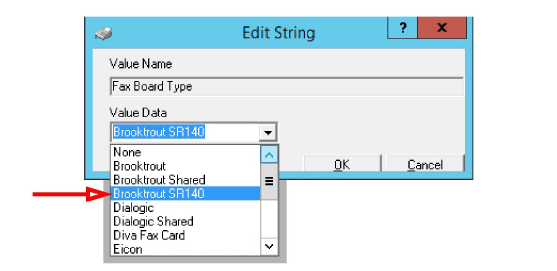
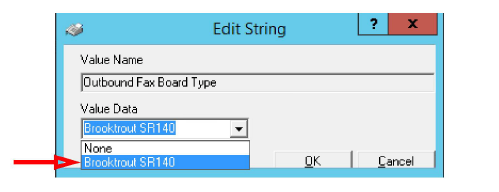
4.Double-click on Outbound Fax Board Type. Choose Brooktrout SR140 from the dropdown menu.
Click OK.
|
Hint: If faxes will only be received through the SR140 software, the Outbound Fax Board Type can be set to another value if required. |