
This chapter contains a list of system folders and their contents. All Avaya Messaging files are stored in either the Application or Windows folders. This chapter also details the system file backup process and the system file restoration process.
Handling the Application Folder
The Application folder can be specified during the installation process. The default is C:\UC. Within that folder:
UMMonitor.exe is the user interface for Avaya Messaging.
TOLee.exe is the Voice Server service.
Within the application folder, there are several other important folders.
Admin (AM Administration program folder)
TOLAdmin.dll modifies the configuration of the system.
AppWebFolder
This page has links to the WebClient and WebReport applications. Under IIS, the root virtual folder for voicemail points here.
EEAM21.db is the database file. All of the database information goes into this file.
DBbackup (Backup files of EEAM_DB.mdb)
C:\UC\DBbackup. If Reorg is configured from the Administrator console, the database will be backed up into this directory. By default, numbered folders are created during the Reorg process to hold these files. Each numbered folder represents a day of the week.
|
Folder |
Day of the Week |
|
1 |
Sunday |
|
2 |
Monday |
|
3 |
Tuesday |
|
4 |
Wednesday |
|
5 |
Thursday |
|
6 |
Friday |
|
7 |
Saturday |
DBCOM (Database component folder)
EEAM.dll is the database access layer that manipulates the COM Object.
Messages (Message file folder)
Company ID (System creates the folder for Company 1 by default).
Fax contains all the fax type files.
Mime contains all of the files of this type.
Other contains all the files other than fax, text, and voice types.
Text contains all the email type files.
Voice contains all the voice type files.
Company is the company greeting file folder. This folder is subdivided by Company ID (the system creates the folder for Company 1 automatically).
Personal is the personal greeting file folder. This folder is subdivided by Company ID (the system creates the folder for Company 1 automatically).
System folder is subdivided by LanguageID (the Language 1 is created by default).
UMST (Unified Message Service Tasks service Folder)
UMSTService.exe sends email, forwards messages, delivers distribution lists and communicates with desktop applications (iLink Pro Desktop).
VPIMServer.exe sends and receives messages for VPIM.
The Temp folder holds the temporary files used by the VPIM service.
Unresolved stores message files that cannot be delivered by VPIM.
Backup keeps the archive of all recent VPIM files.
Holds all the WebClient files including all the HTMLs, ASPs, Java applets and graphics.
ucSoundApplet.jar is the Java sound applet.
UCClientApplet.jar is the file that refreshes the web screen for real-time synchronization.
Download (folder within WebClient)
jre-6u20-windows-i586.exe is the Java runtime engine for downloading.
GrantPermission.EXE is an executable run by the user to grant permission to the web Access application to be able to record on the PC.
UCClientManager.exe is the client CTI application for screen pop-ups and instant messaging.
Holds all the WebReport files, including all HTML files, ASPs, Java applets and graphics.
.class files are used to display report results in graph form.
The default is C:\WINDOWS.
EEAM.ini is the database component configuration file.
|
Files |
Purpose |
|
CSapiTTS.dll |
This DLL sits in the middle layer, providing speech synthesis capabilities for Enterprise. |
|
CV_32DLL.dll |
RHETOREX file format conversion library. Used only for Rhetorex voice boards. |
|
VPIMServer.exe |
Service of VPIM server (C:\UC\VPIM) |
|
VPIMEventLog.dll |
Error messages of VPIM for event viewer (C:\UC\VPIM) |
|
TOLWebClient.dll |
Core WebClient IIS application |
|
MSWCRUN.DLL |
This is the dependency file provides IIS VB application RUN time. |
|
WebReportPrj.dll |
This file is the core WebReport application. |
Avaya Messaging does not have native backup facilities, but instead leverages the facilities provided for server backup in Windows. However, the process is not automatic and must be configure manually.
Avaya recommends that the following folders and their contents be backed up:
•C:\UC\DB
•C:\UC\Messages
•C:\UC\Prompts
|
Note: Other folders can be backed up if necessary. The folders listed above are the minimum required. |
|
Warning: Before backing up any system files, ensure that the following services have been stopped: |
|
|
|
|
Windows Server Backup must be added to the Windows Features set before proceeding.
To back up system files using Windows:
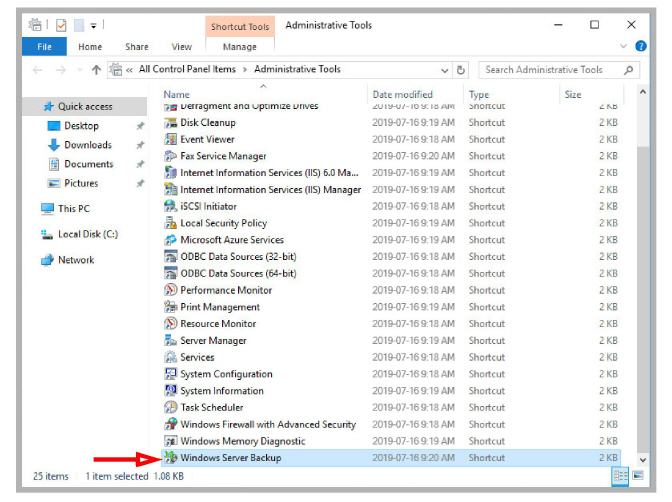
1.Open the Control Panel and launch Administrative Tools.
Double-click Windows Sever Backup.

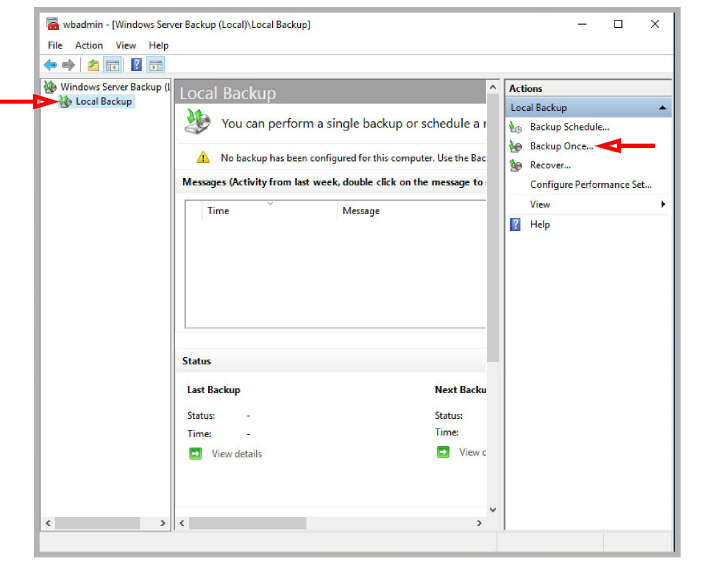
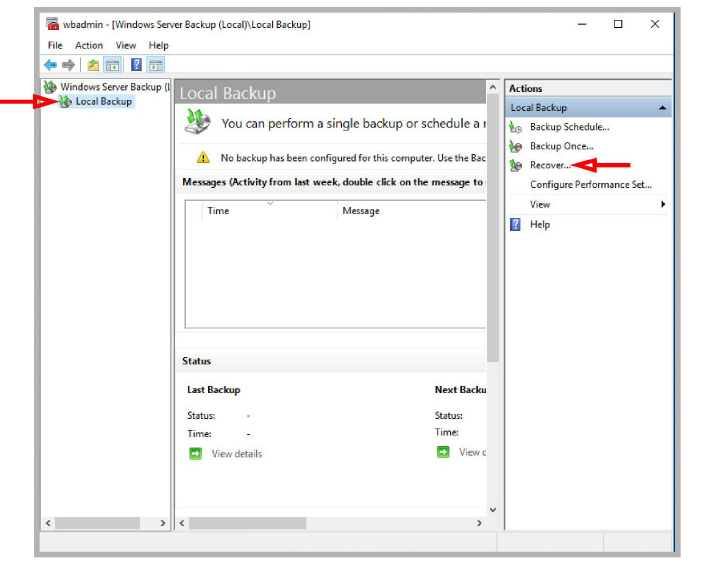
2.In the left-hand pane, select Local Backup.
In the right-hand pane, choose Backup Once.
3.Click Next.
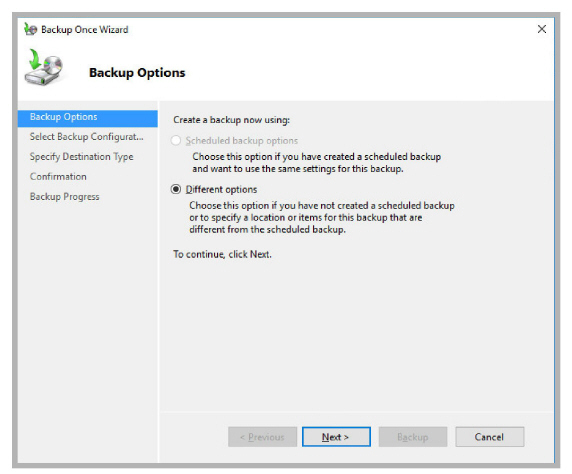
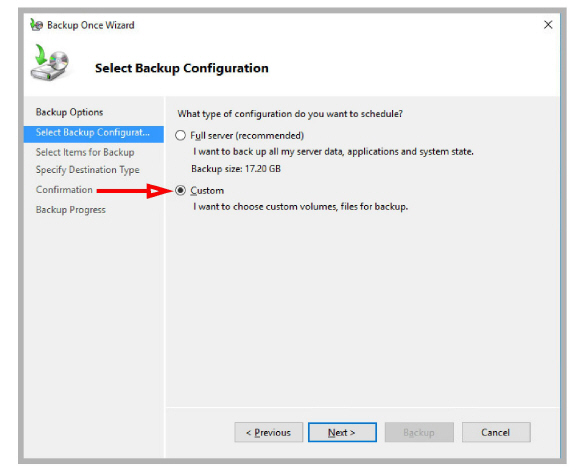
4.Enable Custom, then click Next.
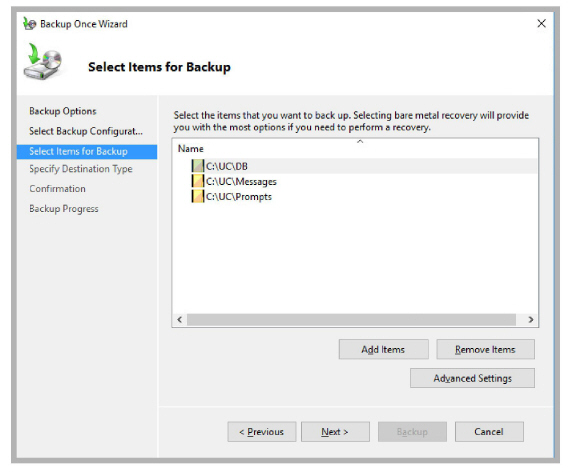
5.Choose Add Items, then select the files and folders to backup.
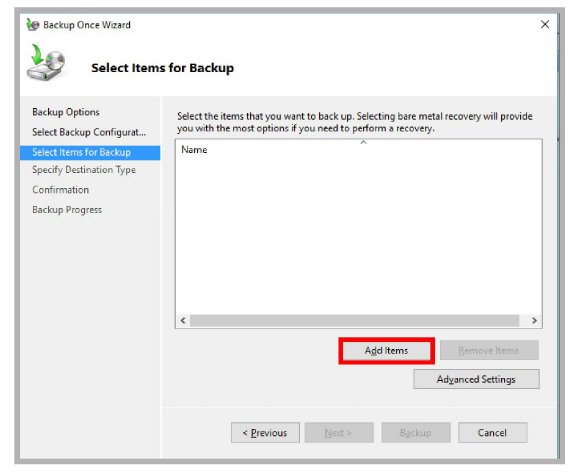
6.Choose all of the files you want to include in the backup.
These must include the UC\DB, UC\Messages and UC\Prompts folders.
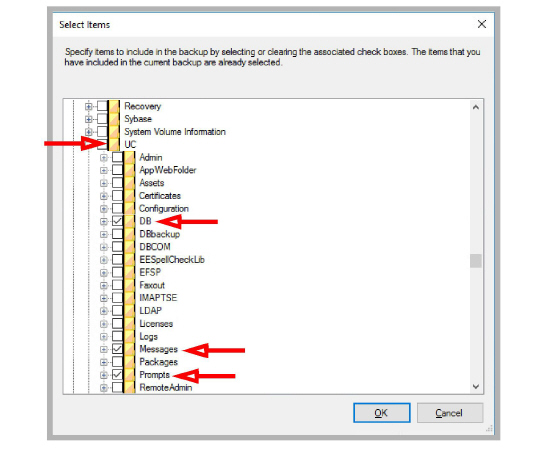
Click OK when ready.
7.Once all of the necessary files and folders have been chosen, click Next.
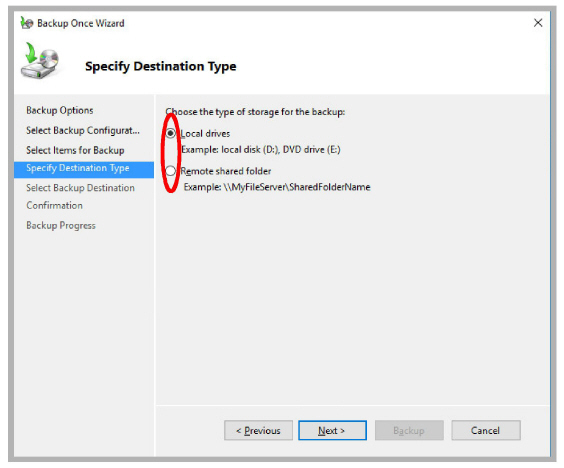
8.Specify where the backup files should be stored. Choose either to a local drive, or to a remote / network location.
Click Next.
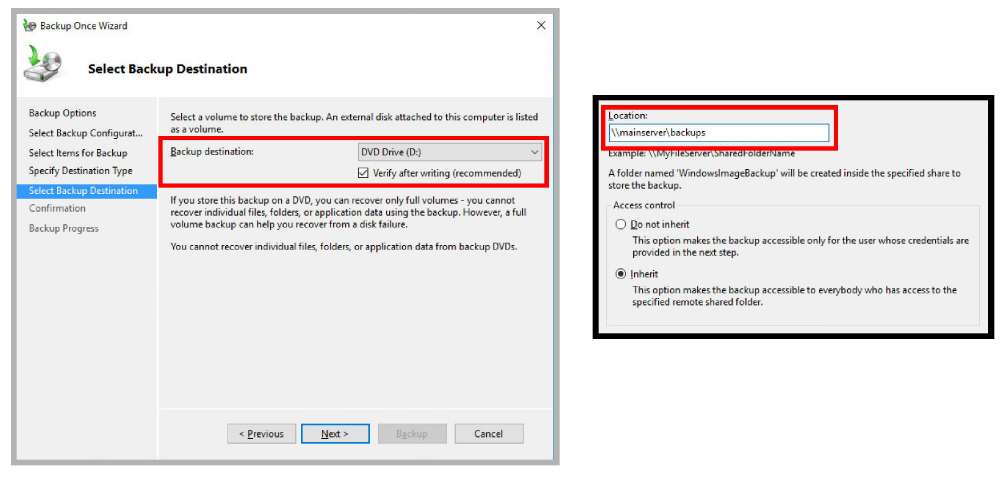
9.Specify which destination drive to save the backup files onto. For a network location, include the complete URL to the storage site. Click Next when ready.
10.Confirm the details and click Backup when ready.
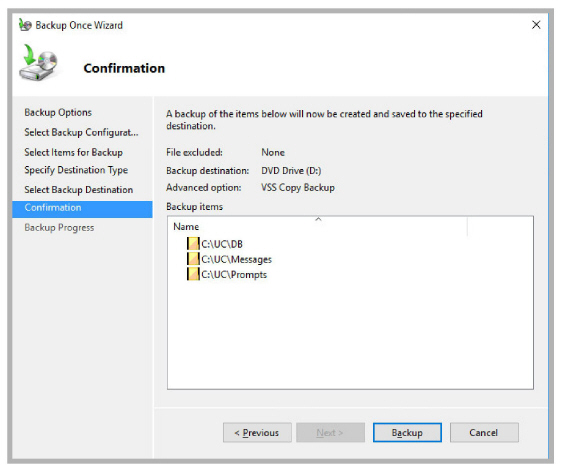
Windows will backup the selected files and folders to the chosen location.
In scenarios where a system breaks down and the restoration from backed up files is needed, you must first completely uninstall Avaya Messaging, then install a fresh copy of Avaya Messaging before proceeding with file restoration.
This section refers to recovering files using Windows’ built-in backup and restoration utility. If you have a different system for backing up files refer to the manuals for that solution.
|
Note: The restoration of files is only possible if the backed up Avaya Messaging files to be restored are of the same version as the system that they are being restored into. |
|
Warning: Before backing up any system files, ensure that the following services have been stopped: |
|
|
• SQL Anywhere - ASADB_UC |
• UC FaxService |
|
Note: If you are restoring the database files (originally in \UC\DB), you must navigate to \UC and delete the original database and transaction log files from the \DB folder. The database files are read-only files and cannot be overwritten by the restore process. These files must be removed before the restore procedure can begin. |
To restore backed up files:
1.Open the Control Panel and launch Administrative Tools.
Double-click Windows Sever Backup.
2.In the left-hand pane, select Local Backup.
In the right-hand pane, choose Recover.
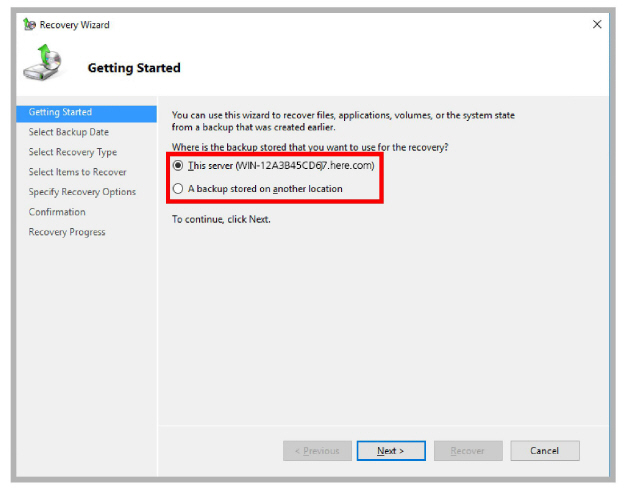
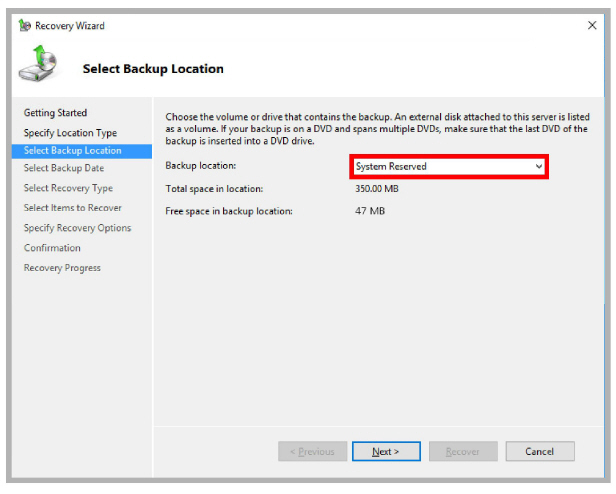
3.Specify the location, local or another computer, where the back up files are stored. Click Next.
4.Select the drive where the backup files are kept. Click Next.
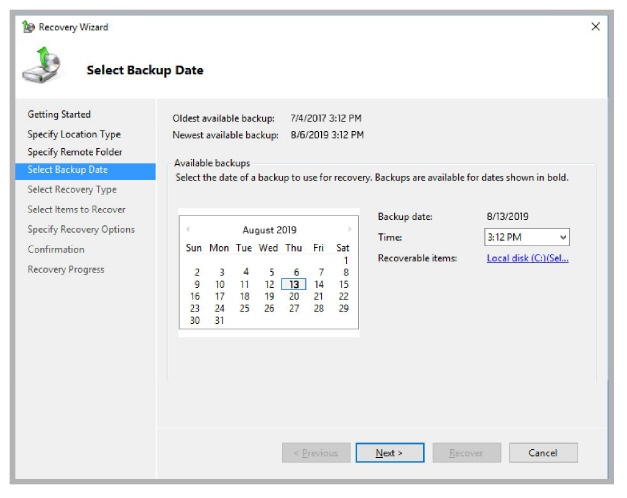
5.Choose the date of the backup to restore the files from. Click Next.
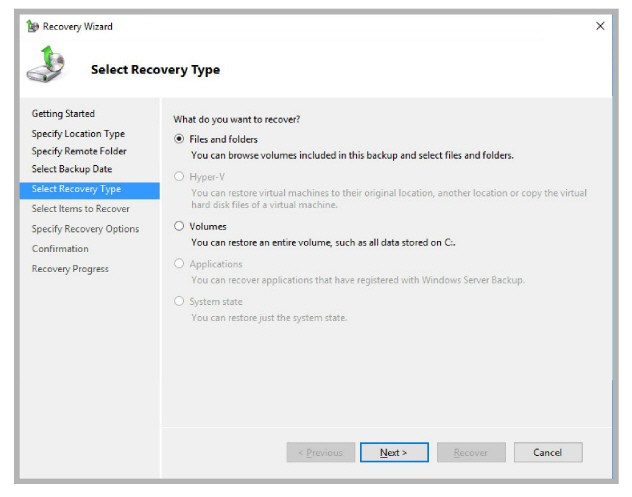
6.Enable the Files and Folders radio button. Click Next.
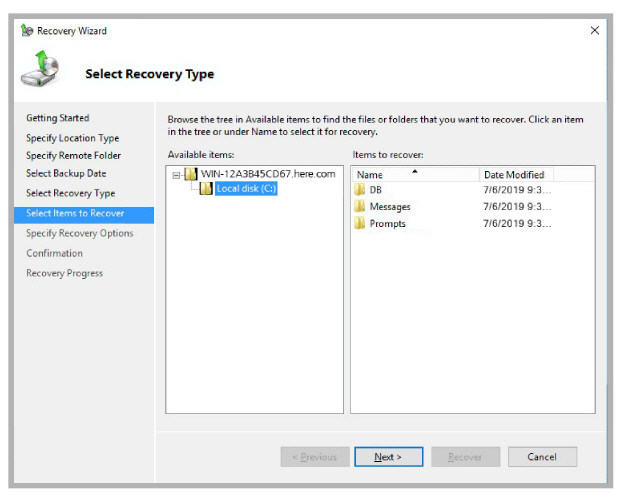
7.Locate the files and folders you want to recover. Click Next.
8.Specify where the files should be restored to on the local computer. Click Next.
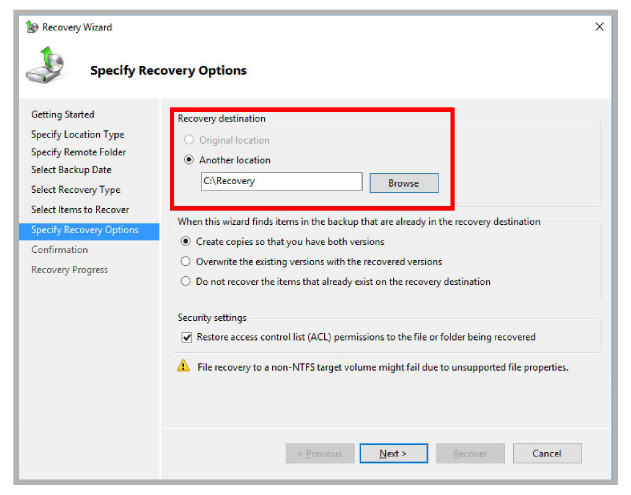
9.Verify the settings and click Recover when ready.
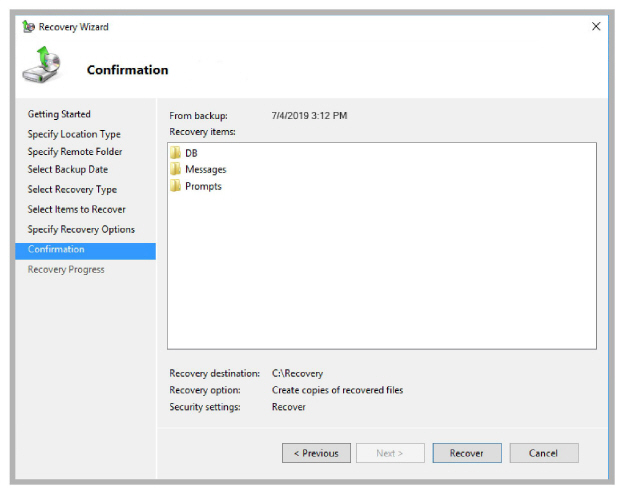
The restoration of Avaya Messaging files is complete and previously backed up data is now recovered on the system.
Database Backup to a Network UNC Path
The database files can be backed up to a network accessible storage location by specifying the UNC path in UC Admin. This can be done with both Single Server and High Availability installations.
This feature is another way to backup the database file from the server(s). It copies the C:\UC\DB\eeam21.db file to the selected location during the daily scheduled Reorg process.
For HA installations, this setup must be performed on each of the nodes on the network (e.g. Primary Voice, all Secondary Voice, the Primary and Secondary Consolidated servers).
The logs folder is included in the backup process.
|
Important: If all of the nodes are being backed up to the same target drive, create a separate directory for each server to ensure that the database files do not overwrite each other. |
On each node:
1.Identify the folder on the network where you want the database to be backed-up. This location must be accessible to the DBCOM user for each node (write permissions as a minimum), and the folder must be shared.
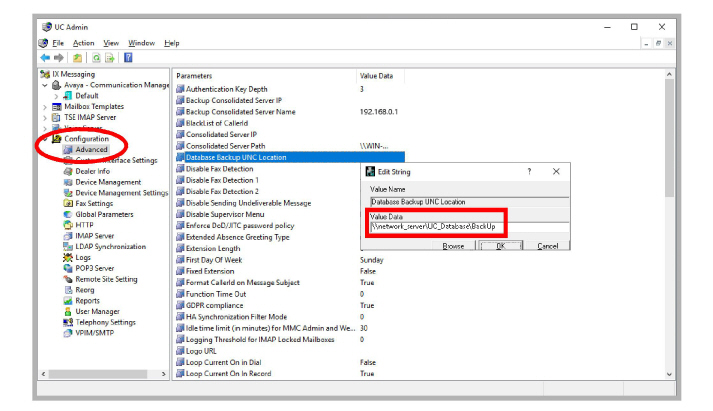
2.Open UC Admin and go to Configuration > Advanced.
3.In the right-hand pane, double-click Database Backup UNC Location.
If this value is left empty, then the database will not be backed up as part of the Reorg process.
4.Enter the network UNC path to the folder where you want the database backed-up to, or click Browse to manually find the correct folder.
When ready, click OK.
5.During the scheduled Reorg process, the database will be backed up to the specified location.
|
Note: The same level of security and encryption protection (i.e. for JITC) placed on the original database file is also applied to the backup file. |
Database Restoration from the UNC Backup
If an active node has failed and needs to have its database restored from backup, stop all of the listed services, then copy and paste the backup file to the active node’s folder.
|
Note: The restoration of files is only possible if the backed up Avaya Messaging files to be restored are of the same version as the system that they are being restored into. |
|
Warning: Before backing up any system files, ensure that the following services have been stopped: |
|
|
• SQL Anywhere - ASADB_UC |
• UC FaxService |
|
Note: If you are restoring the database files (originally in \UC\DB), you must navigate to \UC and delete the original database and transaction log files from the \DB folder. The database files are read-only files and cannot be overwritten by the restore process. These files must be removed before the restore procedure can begin. |
When the backup file has been copied, reboot the server and ensure that all of the services have been restarted.