The CSE Gateway is a server component that provides unified messaging and integration services between Avaya Messaging and other messaging systems. The UM CSE provides an easily managed and highly scalable system that supports a broad range of messaging platforms.
The CSE Gateway works directly with EEAM (unified messaging - UM - data and the business objects layer) to provide UM clients (phone devices, web Access, etc.) access to a single messaging data store that combines all email, faxes, voice mail and other types of information. The CSE Gateway allows UC users to access mailboxes that are located on a messaging systems commonly found in a company network, such as Exchange Servers.
The CSE Gateway is tightly integrated with the EEAM. It intercepts any message store-related operations for configured mailboxes, and transforms them into protocol commands that are supported by major messaging systems (acting as clients for that system).
Avaya Messaging provides the ability to extend protocol support by using plug-in modules for the CSE Gateway. If any operation that is regularly intercepted by the CSE Gateway fails due to a network failure, the CSE Gateway gives EEAM the opportunity to continue to operate through its own database so that data loss is prevented. Once a network connection is re-established, the CSE Gateway automatically retries any stored operations.
To fully use CSE Gateway, user information must be specified. The LDAP protocol allows for the creation of a link between the voice mailbox and a mailbox within the major messaging system.
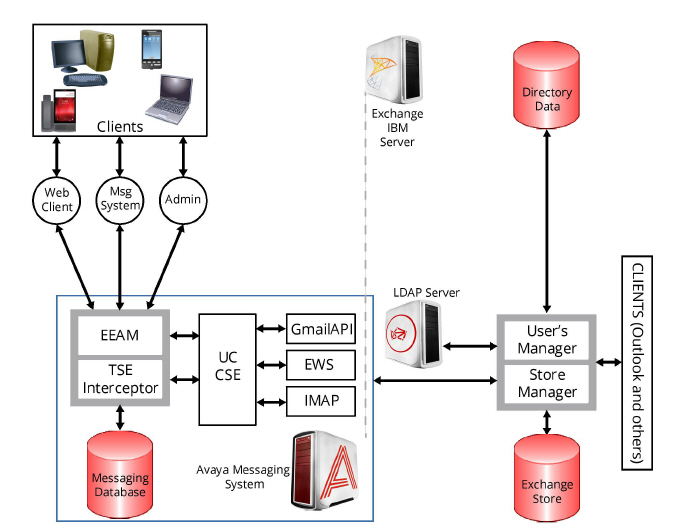
CSE Gateway architectural diagram:
To successfully utilize the CSE Gateway, the following components are required:
•UM components
•Major Messaging System components
•100 BaseT Ethernet or faster
•Secure Socket Layer certification for each machine involved in running IMAP transactions, allowing for encrypted authentication (provided SSL services are required)
Three major operation modes are used by the UM CSE Gateway:
1.Active Session Support
2.Background File Transfers for Inactive Sessions
3.Managing Mailbox Statistics
Active session support
Once an active client session is established by one of the UM clients, EEAM receives the corresponding request and forwards the command to the CSE Gateway. The command checks to see if a mailbox for this operation is configured to use a single store. The CSE Gateway holds the pool of active sessions. These sessions are maintained until the client requests can be processed. In the case of a session failure, the error will be reported to the EEAM with a corresponding status code and the session will continue to execute without the Gateway using the local UM database. Once the session is reestablished, EEAM will forward all outstanding requests to the CSE Gateway.
CSE Gateway uses data caching for storing message header information in order to return results back to the EEAM as quickly and efficiently as possible.
Background file transfers
Due to possible network failures, the single store used by the CSE Gateway may be inaccessible. At these times, the EEAM stores all of the data in the UM database. When the connection is re-established, the system will search for the data stored in the UM database and transfer it onto the single store. After this process is completed, the system verifies that database synchronization is correct.
Managing mailbox statistics
In order to support the fast retrieval of mailbox statistics, the UM CSE Gateway executes a number of threads that establish new temporary sessions to the single store. This is done on a regular basis for each configured mailbox, checking for the number of messages in each folder, and the number of unread/read messages by type (voice, fax, email). When the UM application retrieves this value from the EEAM, the UM CSE Gateway gives the last computed values stored in the cache.
For details on integrating CSE enabled mail servers with Avaya Messaging, please refer to the Feature Description Guide which is available at: http://support.avaya.com .
The following servers support Superuser implementation, which allows a single admin level account to oversee synchronization, eliminating the need for users to update their mail server passwords on Avaya Messaging.
•Microsoft Exchange 2013
•Microsoft Exchange 2010
•Microsoft Exchange 2007
•Google Apps
•IBM Domino
The following servers which support generic IMAP integration, which requires the entry of each user’s mail server password within Avaya Messaging mailbox.
•Most IMAP enabled Mail Servers
|
Note: If you wish to utilize Blackberry devices within your organization, please refer to Blackberry Enterprise Server integration section within Feature Description Guide. |
|
Note: A maximum of 4 CSE Servers can be attached to a system. |
Installing and configuring IMAP SSL connection
This section describes the steps to establish a secure IMAP connection between the UC system and a Microsoft Exchange Server, to protect IMAP traffic while synchronizing mailboxes. Configuration steps provided here should be considered only as the simplest way to make an SSL connection. Implementing secured networking as well as certificate services largely depends on an organization’s needs, and may impact or depend upon many factors not covered here. For full documentation of Microsoft Certificate Services, Private Key Infrastructure, Microsoft Exchange and other linked topics, please refer to Microsoft Windows and Microsoft Exchange product documentation.
The suggested method for establishing a secure connection between Avaya Messaging and Microsoft Exchange requires:
• Creating certification authority that will be used to issue a server certificate for the CSE server.
• Assigning a server certificate to the email server.
Creating certification authority
In order to create certification authority (if one is not yet available) it is necessary to pick a PC that will serve as the certificate server for a domain where Microsoft Exchange Server is installed, and install Certificate Services on it. Certificate services are a Windows component that comes with Windows Server.
1.Go to Control panel > Add or Remove Programs.
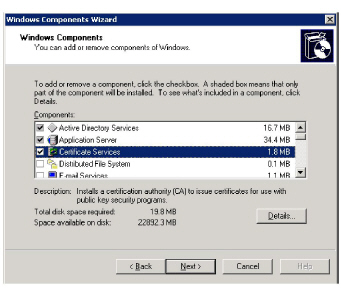
2.Click Add/Remove Windows Components.
3.Check Certificate Services and click Next.
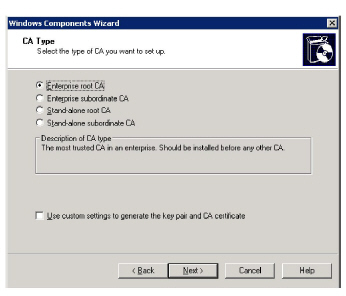
4.Select the Certification Authority type required.
For this example, we are considering the simplest case when Certificate Authority was not present. Select Enterprise root CA.
Click Next.
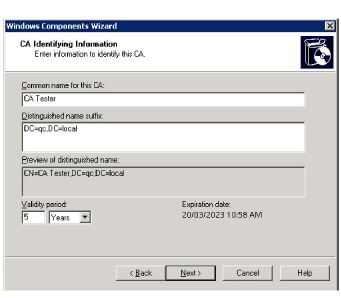
5.Enter the appropriate identity information.
Click Next.
6.Modify data storage location options if necessary, then click Next.
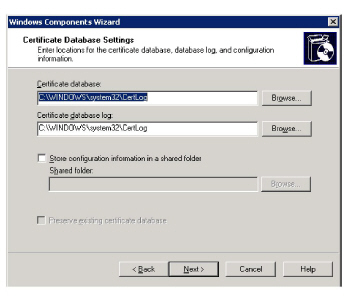
7.Windows will start installing Certificate services. After the process is finished Certification Authority can be used to issue a certificate for IMAP server.
Assigning certificate to IMAP server
1.On PC the where Microsoft Exchange Server is installed, start the Microsoft Exchange System Manager.
Open the Protocols container (see below).
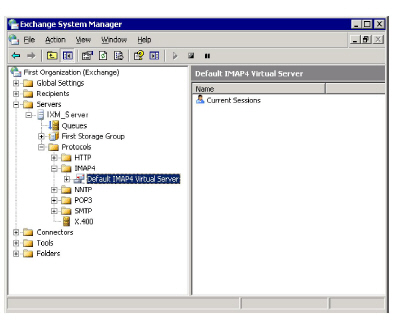
2.Right-click on the IMAP server instance and select Properties.

3.Open the Access tab.
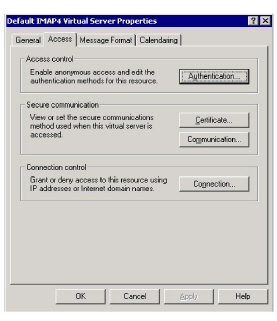
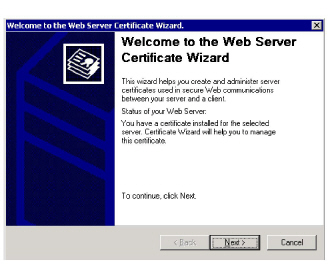
4.Click Certificate button. The Web Server Certificate Wizard will start.
5.Click Next.
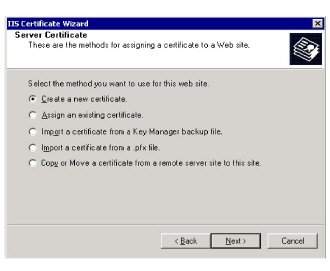
6.Click Create a new certificate.
Click Next.
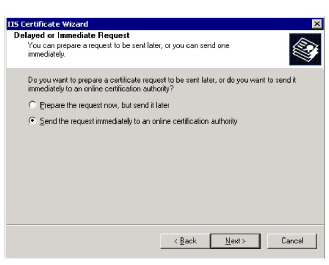
7.Pick Send the request immediately option.
Click Next.
8.Put the DNS name of Exchange server into Name box.
Click Next.

9.Select Organization and Organizational Unit. Click Next.
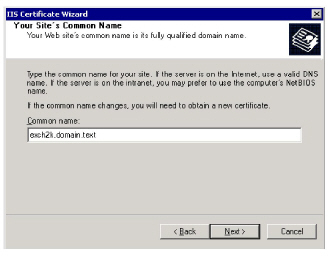
10.Put full DNS name of Exchange server into Common name box. Click Next.
11.Specify geographical location of Exchange server. Click Next.
12.Pick certification authority to request certificate from. Click Next.
13.Click Next to submit request.
14.Request will be sent to Certification authority, and if it is online, server certificate will be assigned immediately. Click Finish.
CSE and Exchange Transaction Logs
What are transaction logs?
Exchange utilizes a transactional database model. Transactional databases are generally regarded as robust and stable, as database events are either wholly committed or discarded. If data is only partially committed to a database, corruption may result. Transactional logging greatly reduces this likelihood.
Exchange transaction logs record every transaction taking place on your Exchange server (reads, deletes, logins, meeting notifications, etc). Literally thousands of transactions can occur every hour when user email traffic is at its highest. These transactions are stored in “transaction logs”. By default, they are located at:
C:\Program Files\Exchsrvr\MDBdata
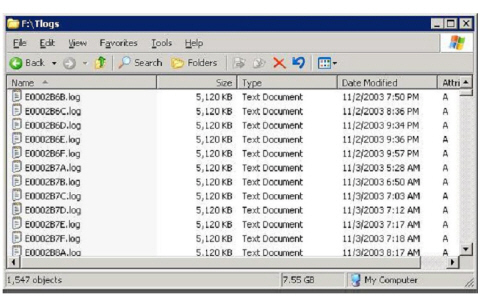
Transaction logs are 5120KB in size, and each log has a unique hexadecimal identifier. Below is an example list of Exchange transaction logs:
Log files such as these are extremely important to the health of your Exchange server.
Managing the transaction logs
It is extremely important that you monitor your transaction logs regularly as they are continually growing. If Exchange runs out of disk space and is unable to continue creating transaction logs, the Exchange server will shut down and your users will be unable to access their email. To prevent this situation from occurring, you should take the following actions:
1.Ensure there is sufficient disk space for Exchange transaction logs to grow. Sufficient space will differ from organization to organization. When in doubt, err on the side of caution and provide as much free space as possible.
It is possible and usually desirable to specify a path for your transaction logs. Consider placing them on a dedicated disk or RAID array. Not only will this ensure adequate size, but you will realize performance gains as well.
For more information, refer to Microsoft's documentation for transaction log placement.
2.Back up your Exchange Information stores regularly. Each time you back up your Exchange information stores, the transaction logs for said stores are committed to the Exchange database and the transaction log process “zeros out”, thereby eliminating the disk space utilized by the logs. This disk space is recovered when a backup is completed. If the Exchange information stores are never backed up, the transaction logs will inevitably grow to a size which outstrips available space.
It is extremely important that you back up the Exchange information stores properly. A file level backup is incorrect and will not result in the transaction logs being committed and flushed.
The CSE and your Exchange transaction logs
The CSE is the agent responsible for unifying your email and voicemail databases. It needs to interact with the Exchange server on a regular basis in order to achieve this end. Every time the CSE interacts with your Exchange server, many transactions take place. These transactions are logged in the Exchange transaction logs. Logically, you can expect an increased rate of growth for your Exchange transaction logs when you are using the CSE to unify your messages. You should account for this before you configure the CSE to point to your Exchange server.
Accounting for accelerated transaction log growth
In order to determine how much extra space you will require on the Exchange server for your transaction logs, you should enumerate at least a week’s worth of logs and determine the size they occupy. This is easily achieved by locating your transaction logs, selecting one created (for example) on Monday 12:00 AM, and then scrolling down until you reach (for example) Sunday 11:59PM. Shift-click to select all logs between these two points, and note the total disk space they occupy. Let’s say this results in 4GB total disk space. To be safe, double this (to 8GB) and ensure you have at least this much disk space available for your transaction logs.
Summary
1.The CSE will logically result in accelerated growth of Exchange transaction logs.
2.Sufficient space must be provided for this growth. 2x your current transaction log usage is a safe guideline.
3.Regular backups should be carried out to free up disk space and clear your transaction logs.
Turning off the transaction logs
It is possible to turn off the logging on IBM Notes. Follow the procedure below if you need to turn off the creation of transaction logs.
1.Open the Notes.ini file.
|
Note: If you are not sure of the location of this file, select Start > Search > For Files or Folders..., which opens the Search Results screen. In the Search for files or folders named field, enter ".ini" and click Search Now. When “Notes.ini” displays in the list of search results, double click it to open the file. |
2.Make sure the following lines exist in the .ini file:
•Log_Sessions 0
•Log_Tasks 0
3.Save the .ini file and close it.