Mailbox
Introduction
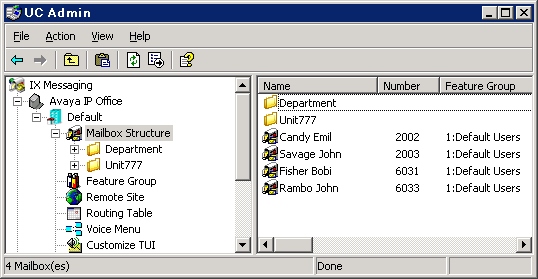
The Mailboxes represent individual accounts that will be associated with a single user in most cases. The Mailboxes may be customized by the users to configure their addresses, locations and other miscellaneous settings that will assist them with the UC user experience.
The capabilities of each Mailbox are directly related to the Company and Feature Group that it is associated with. The mailboxes may also be divided into different Organizational Units. Organizational Units can be viewed as a “folder” which organizes the Mailboxes on the system. For example, you can create an OU named “Sales” for all users that belong to the sales team. OU will also allow the end users to find someone easily through the Directory available under iLink Pro Desktop.
|
Note: The number of Mailboxes that you can create and the features available in the Mailboxes are also dependent on the server’s license.
|
Mailbox Buttons
|
Button
|
Description
|
|

|
Add a range of Mailboxes.
|
|

|
Add a new Mailbox.
|
|

|
Reset/Clear current Mailbox settings.
|
|

|
Delete current Mailbox.
|
|

|
Save current Mailbox.
|
|

|
Refresh current Mailbox.
|
|

|
Move to first Mailbox.
|
|

|
Move to previous Mailbox.
|
|

|
Move to next Mailbox.
|
|

|
Move to last Mailbox.
|
|

|
Copy current Mailbox settings to clipboard.
|
|

|
Paste copied Mailbox settings from clipboard to current Mailbox.
|
|

|
Save current Mailbox settings as a Mailbox template.
|
General Tab
The General tab of Mailbox allows you to configure the basic properties of a Mailbox including the number, name, password, etc.
Mailbox Number: The UC system automatically fills in the Mailbox number based on the other Mailboxes in the system upon Mailbox creation. If you wish to change it, simply enter the new Mailbox number in the field.
|
Note: If you want to change an existing user’s Mailbox number, enter the new number in the Mailbox Number field and click Save. As a precautionary step to ensure Mailbox data is not lost, a new Mailbox entry based on the new number is created. The old internal extension number within the address tab will remain the same and can be changed manually.
|
Last Name: Enter the last name of the user.
First Name: Enter the first name of the user.
|
Important: First and Last name must contain ONLY letters. No numbers or special characters are allowed. This is to ensure compatibility with the speech recognition features.
|
Gender: This will be used to select the TTS Voice (female/male) used when playing an email for the user, or generating a name greeting when name is recorded. The TTS Voice used for each gender is specified in the
Company Setup > Company Languages > Add/Edit tab.
Feature Group: From the dropdown menu, select the Feature Group that will be associated with the Mailbox.
Organizational Unit: Enter the full name of the Organizational Unit of the Mailbox.
Account Code: Enter the account number. This is used to pass account number information for toll charge billing back to an individual user.
Internal Extension: This field displays the current address of the Mailbox.
Voicemail Password
Password: Enter the user’s password. This password must be numeric.
Confirm Password: Confirm the user’s password.
Application User
User Name: Enter the user name for the IMAP account if the user is using the UC server as an email server. This is also the account used to login in to the Avaya iLink packages when using UC Credentials.
Password: Enter the user’s password for the account. This password must be alphanumeric (not all numbers).
Confirm Password: Confirm the user’s password for the account.
|
Note: When accessing the system using a telephone keypad, the Voicemail username and password are used. For all other access, such as through the Internet, use the Application User password.
|
|
Note: The IMAP password is for integrated messaging. If you are using IMAP, you must ensure that the IMAP settings are configured in VPIM Tools.
|
Advanced Tab
The Advanced tab of Mailbox allows you to configure the features that may be attached to the Mailbox such as Custom TUIs, Web Access, etc.
Personal Operator: From the dropdown menu, select a personal operator if you have a different person as your operator than the company default. If an extension does not have a mailbox associated with it, use Operator Phone Number below instead.
|
Note: This field is optional, but if you select an operator, you must also specify a Mailbox. This Mailbox is recognized as the operator for this individual. When the caller is in a particular Mailbox and hits 0, if this field is set, this user will be redirected to the Mailbox specified in this field instead of going to the company’s active operator.
|
Operator Phone Number: If your personal operator does not appear in the mailbox list above, enter their telephone number here. If an extension does not have a mailbox associated with it, enter the extension number here. Incoming calls to your extension will be routed to this number when the caller presses 0.
D.I.D Trunk: Enter the trunk number that the system will use to access the voicemail of this Mailbox. This field is normally used for Norstar Systems.
Customize TUI: Enable this checkbox to select a customized TUI from the accompanying dropdown menu. Clicking  allows you to create a TUI or modify one (if you selected a TUI from the drop-down) from the Customize TUI screen.
|
Note: The Browse button is enabled only if you select Customize TUI.
|
Voice Menu: Enable this checkbox to have the user’s calls answered with a customized Voice Menu offering callers a variety of choices. Select a Voice Menu to use for this Mailbox in the dropdown menu beside. Click on  button to browse the Voice Menus.
|
Note: A Voice Menu must be created before it can be applied to a Mailbox.
|
Collect Geo Location Data: Enables the collection of location data from a GPS on a remote device.
Domain Account Name: Enter the Windows domain and account name for this mailbox user (e.g. DOMAIN\USER_NAME). If this is configured alongside Auto Discovery, users will be able to log into their iLink Pro Desktop based on their domain credentials without having to configure or enter any information in iLink Pro Desktop. This single sign on feature is only available when the user is on the same network as the Avaya Messaging server.
Desktop Capabilities: From the dropdown menu, select the functionality that this user will have (Advanced or Basic).
|
Note: If you pick desktop capabilities not available under your company license (i.e. Advanced license choosing Collaboration), the selection will be denied by the program. Messaging, Collaboration, and Fax are included for legacy users only.
|
Date Format: From the dropdown menu, select the date format which will determine the way in which the date is expressed in Web Access.
PBX Node: From the dropdown menu, select the PBX node on which the Mailbox will reside. This option is only available if there are multiple PBX nodes defined on the system. Node numbers must be assigned sequentially starting with 1 (e.g. 1 2 3 4...).
Web Client User: Enable this checkbox to give the mailbox Web Access capability.
Distribution Lists: Click on this button to manage the Distribution Lists associated with this mailbox.
Folders: Click on this button to manage the message folders in this mailbox.
Directory Listing: Click on this button to manage the way in which the mailbox is found under the directories.
Workgroup: Click on this button to manage the workgroup associated with this mailbox.
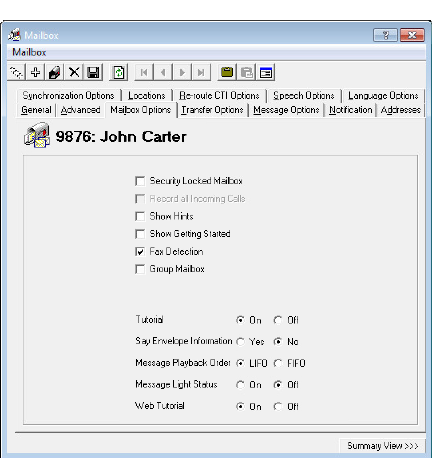
Mailbox Options Tab
The Mailbox Options tab of Mailbox allows you to configure additional features that may enhance the user's experience with the associated Mailbox.
Security Locked Mailbox: This checkbox becomes enabled when a mailbox becomes locked after failing to log in X number of times. The X is defined on the Company properties under Password/Security tab. Disable this checkbox to allow users to log into their mailbox.
Record all Inbound Calls: Enable this checkbox to have all inbound calls to the current Mailbox recorded.
Show Hints: Enable this checkbox to have Hints help documentation displayed by default throughout the Web Access windows. The Hints help documentation, shown in yellow strips at the top of each screen, will display in Web Access for the user until the user turns it off.
Show Getting Started: Enable this checkbox to have the Getting Started page displayed by default in Web Access for the user. The Getting Started page will display until the user turns it off.
Fax Detection: Enable this checkbox to allow incoming faxes to deliver their message to the user’s inbox if the call is unanswered. With this box unchecked, the phone set will ring but a fax call will be dropped if it is not answered.
Group Mailbox: Enable this checkbox to convert this mailbox into a group mailbox. Group Mailboxes are accessible to multiple users, and all activity is tracked. The administrator can generate a report with the details.
Go to the Group Mailboxes Tab tab and add up to 25 users to this mailbox.
|
Note: When this checkbox is enabled, the Group Mailboxes Tab tab is added to the panel.
If this checkbox is disabled, the Group Mailbox list will be deleted.
|
Tutorial: Select On from the radio buttons if you want the user to be prompted with a tutorial when accessing his/her Mailbox through telephone.
You can select a full or simple tutorial through UC Admin > Voice Server > Advanced > Simple Tutorial (here).
Say Envelope Information: Select the Yes radio button if you want the user to be able to hear the envelope information when listening to a message. The information to be relayed is defined in the TUI action.
Message Playback Order: Select one of the radio buttons. This allows the users to listen to their messages by either FIFO (plays the oldest message first, newest message last) or LIFO (plays the newest message first).
Message Light Status: Displays the current condition (On / Off) of the Message Waiting Indicator for this mailbox.
Web Tutorial: Select On to enable a tutorial for the user when opening the Web Access. This option is enabled by default and turned off once the user has completed the tutorial or turns it off themselves. When a mailbox is created or reset, an email is sent to the user prompting them to complete the tutorial or to disable the feature.
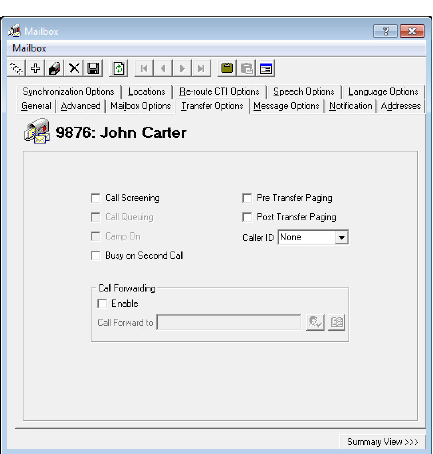
Transfer Options Tab
The Transfer Options tab of Mailbox allows you to configure the way in which incoming calls for the current Mailbox will be managed.
Call Screening: Enable this checkbox to instruct callers who wish to transfer to an extension to state their name at the tone.
|
Note: Call screening requires the call to be supervised and the user must be in his or her group.
|
Before the call is transferred, the recipient hears the caller's name and is prompted by the system to accept the call press <1>, to send to another extension press <2>, to accept and record conversation press <3>, to send to your Mailbox press <#>.
Call Queuing: Enable this checkbox to place incoming calls in a queue when an extension is busy. Callers are informed of their position in the hold queue and are given opportunities to either continue to hold or leave a voice message.
|
Warning: Call queuing is available only on telephone systems that provide a busy tone. Most telephone sets with multiple extension appearances do not produce a busy tone.
|
CampOn: Enable this checkbox to notify the caller when the recipient of the call is available, assuming that the dialed number was originally busy.
Busy on Second Call: With this option enabled, incoming calls will be immediately routed to voicemail if the user is already on the phone. If disabled, incoming calls will keep trying to reach the user at that extension until the line is free.
Pre Transfer Paging: Enable this checkbox to page users before the call is transferred.
When a caller requests an extension, the caller is put on hold and the UC system pages the user. The system then waits for a definable period of time (this timer is defined in the Advanced dialog with a default of 5 seconds) and then transfers the caller to the desired extension.
Post Transfer Paging: Enable this checkbox to page users after the call is transferred.
When a caller transfers to an extension that is busy or is not answered, the caller is forwarded to the user's Mailbox. In the user's personal greeting, the caller can be given the option to page the user over the telephone intercom system (for example, "Press 4 to have me paged"). Callers must be informed of the paging feature in the user's personal greeting. The system does not have a pre-recorded prompt.
Caller ID: From the dropdown menu, select the desired option to configure the Caller ID.
|
Note: This option is required for desktop screen pops using iLink Pro Desktop. The iLink Pro Desktop settings must also be configured to accept screen pops.
|
|
Note: If a blank Caller ID is sent to the iPD, there will be no pop-ups.
|
Call Forwarding - Enable: Enable this checkbox to forward incoming calls transferred from the automated attendant to another Mailbox.
Call Forward to: Enter the Mailbox that calls will be transferred to manually or use the directory to select the Mailbox.
|
Note: When assigning a Mailbox to the fax extension or Admin Mailbox, you can hit the Check Names or Address Book buttons to find the Mailbox you are looking for.
|
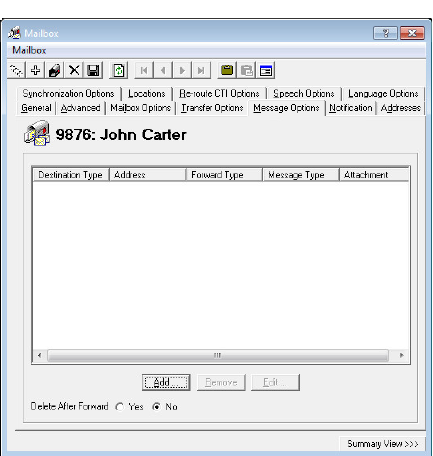
Message Options Tab
This tab allows you to control the user’s messaging options.
This field displays all the defined message options.
Add: This button allows you to add a new message option entry. Refer to here for more information.
Remove: This button allows you to remove the selected message option entry.
Edit: This button allows you to edit the selected message option entry.
Delete After Forward: Select Yes from the radio buttons to delete all incoming messages after they have been forwarded or relayed.
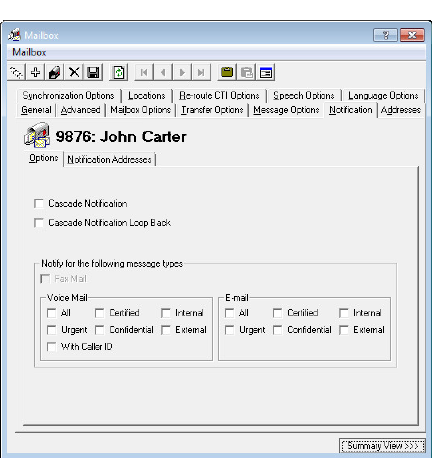
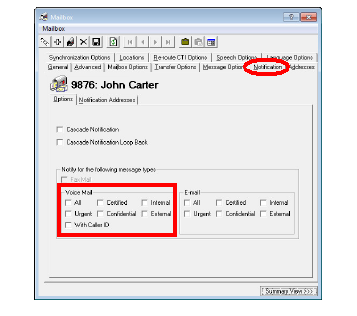
Notification - Options Tab
The Notification Options tab of Mailbox allows you to specify internal or external addresses that can be used to notify a user when they receive new messages.
Cascade Notification: Enable to have the system send notifications in consecutive order to a list or defined notification schedule.
Cascade Notification Loop Back: Enable checkbox to allow cascade notification loop back, which is like cascade notification except that it will not stop notifications after all retries are complete. It will instead start again from the beginning.
Fax Mail: Enable to send a notification when fax mail is sent.
Voice Mail
Select one or more options from the following choices to activate notification for voice mail messages.
All - Notifies user of all voice mail messages that are received
Urgent - Notifies user if an urgent voice message has been received
With Caller ID - Notifies user only if voice mail message is accompanied by Caller ID
Certified (Read Receipt) - Notifies user if a certified voice message has been received
Confidential - Notifies user if a confidential voice message has been received
Internal - Notifies user if a voice message has been received from an internal caller
External - Notifies user if a voice message has been received from an external caller
email
Select one or more options from the following choices to activate notification for email messages.
All - Notifies user of all email messages that are received
Urgent - Notifies user if an urgent email has been received
Certified (Read Receipt) - Notifies user if a certified email has been received
Confidential - Notifies user if a confidential email has been received
Internal - Notifies user if a email has been received from an internal caller
External - Notifies user if a email has been received from an external caller
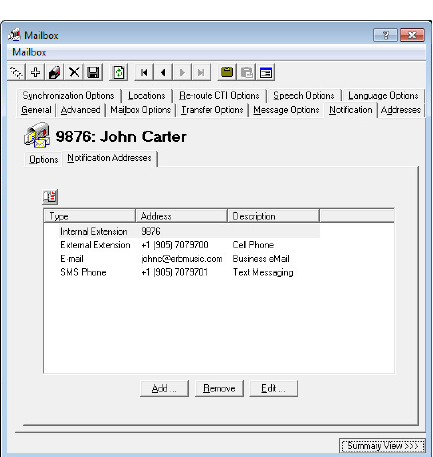
Notification - Notification Addresses Tab
You may define as many notification destination addresses as you want to ensure that you receive all the notifications that you have defined.
Schedule Notification:
Add: Click this button to add a new Notification Address.
Remove: Click this button to delete the selected Notification Address.
Edit: Click this button to edit the selected Notification Address.
Summary View: Click this button to view a simplified version of the Mailbox properties.
SMTP Notification
Each personal mailbox must be configured to process notifications.
1.Go to UC Admin and open the mailbox for the user.
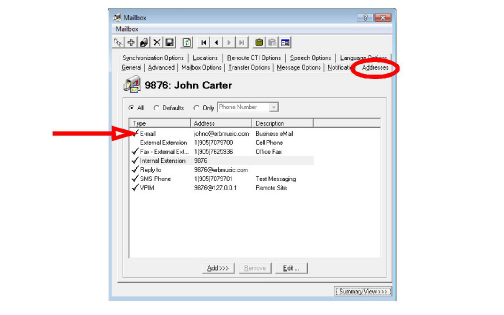
2.On the Addresses tab, ensure that at least one email address has been created. If there isn’t one, click Add and create an email address to use.
3.On the Notification tab, in the section for Voice Mail, enable all variations of voice messages that you want the customer to be notified about.
Click Save when ready. The user of this mailbox will now receive an email whenever a voice message has been recorded.
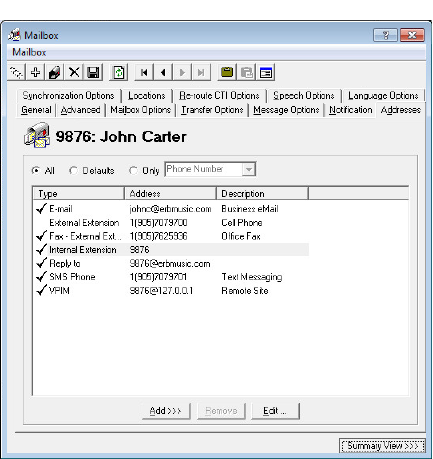
Addresses Tab
The Addresses tab of Mailbox allows you to add many types of addresses to be associated with the current Mailbox. These addresses may be utilized to further customize the way in which the user interacts with the UC system.
Select one of the following radio buttons to filter the displayed Addresses:
All: Display all added addresses
Defaults: Display all the default addresses
Only: After selecting this radio button choose a category from the dropdown menu to display the specific type of addresses
From the dropdown menu, choose the type of addresses you wish to view after selecting the Only radio button.
Add: Click this button to add an address. Refer to Add / Edit Addresses on page 150 for detailed information.
Remove: Click this button to remove the selected address.
Edit: Click this button to edit the selected address.
|
Note: An email address must be included here before SMTP notifications can be sent to the user. Which notifications are received are configured on the Notification - Options Tab.
|
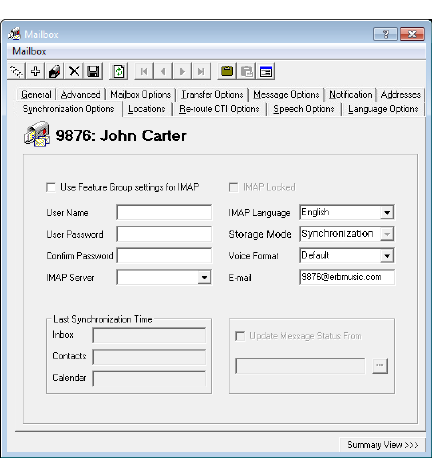
Synchronization Options Tab
The Synchronization Options tab of Mailbox allows you connect the current Mailbox with the IMAP CSE feature, allowing you to synchronize information between your UC server and the email server (e.g. Microsoft Exchange, IBM Domino).
Use Feature Group settings for IMAP: Enable this checkbox to use the IMAP settings of the Feature Group. This is used when you are using a superuser account to connect to the Exchange server for the IMAP CSE feature.
User Name: Enter the IMAP account user name which the UC server will use to synchronize the data. Follow the domainname/username/alias format for this field.
User Password: Enter the IMAP account password.
Confirm Password: Re-Enter the IMAP account password.
IMAP Server: From the dropdown menu, select the corresponding IMAP server.
IMAP Locked: This checkbox is enabled if the user’s Mailbox becomes locked. The lock occurs when the account fails authentication numerous times during the IMAP CSE synchronization activity. Disable this box to unlock the Mailbox.
IMAP Language: From the dropdown menu, select the primary language of the IMAP account.
Storage Mode: From the dropdown list, select IMAP to store messages in the IMAP store, or Database to store messages in the UC database.
|
Note: This field indicates whether or not the Mailbox is IMAP-synchronized. Setting storage to Database indicates no IMAP synchronization.
|
Voice Format: From the dropdown menu, select the voice compression format which is to be used when the user is sending a voice message outside of the UC server.
email: Enter the email address to synchronize for the current user.
Last Synchronization Time
Inbox: This field displays the last time that the inbox of the mailbox was synchronized through the IMAP CSE server with the email server. This field cannot be modified and is for reference only.
Contacts: This field displays the last time that the contact entries of the mailbox were synchronized through the IMAP CSE server settings with the email server. This field cannot be modified and is for reference only.
Calendar: This field displays the last time that the calendar entries of the mailbox were synchronized through the IMAP CSE server settings with the email server. This field cannot be modified and is for reference only.
Update Message Status From: Enable this checkbox to synchronize the legacy IBM Domino and the UC server at a defined time. After enabling the checkbox click on the ellipsis button  to manually select the date.
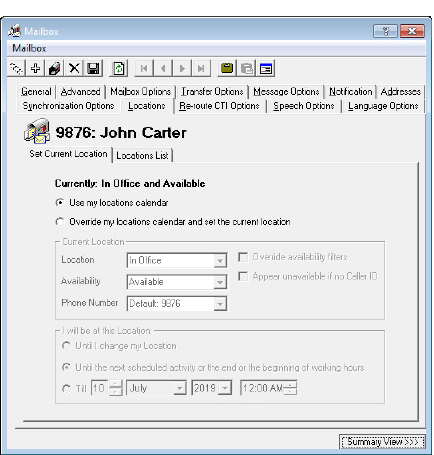
Locations - Set Current Locations Tab
The Locations tab of Mailbox allows you change the location status of the Mailbox and also modify the list of locations defined for the current Mailbox.
Use my locations calendar: Select this radio button to automatically set the location according to the calendar schedule.
Override my locations calendar and set the current location: Select this radio button to manually define a location for the current Mailbox. You must also define the following options.
Location: From the dropdown list, select the desired location for the Mailbox.
Availability: From the dropdown list, specify the availability of the Mailbox.
Phone Number: From the dropdown list, select the current phone number that will be associated with the Mailbox.
Override availability filters: Enable this checkbox to have the system override the availability filter settings associated with the selected location.
Appear unavailable if no Caller ID: Enable this checkbox to have the user appear unavailable if no caller ID is given on incoming calls.
Until I change my Location: Select this radio button to keep the defined location settings until they are manually changed.
Until the next...: Select this radio button to keep the defined location settings until the next scheduled activity on the calendar occurs.
Till: Select this radio button to keep the defined location settings until the designated time. The location will change to the calendar schedule when the defined time is reached.
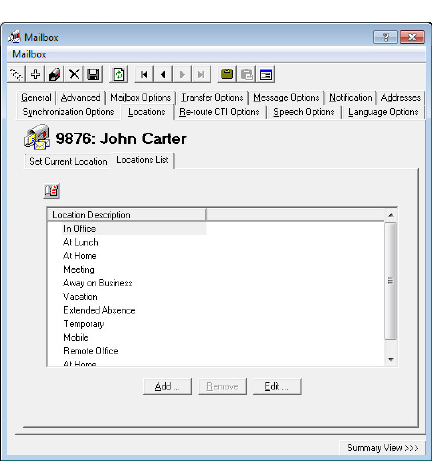
Locations - Locations List Tab
Add: Click on this button to add a new custom location.
Remove: Click on this button to delete the selected location. Only custom created locations can be removed.
Edit: Click on this button to modify the selected location.
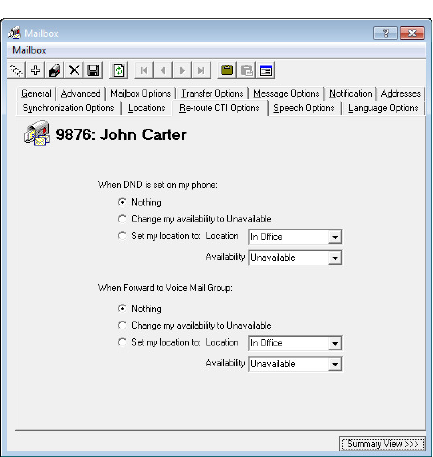
Re-route CTI Options Tab
The Re-route CTI Options tab of Mailbox allows you to automatically append availability and/or location settings depending on your telephone settings. This feature is dependent on the telephone system that is utilized with the Mailbox.
When DND is set on my phone
Nothing: Select this radio button to inform the caller that the phone is set to DND.
Change my availability to Unavailable: Select this radio button to inform the caller that the user is unavailable.
Set my location to: Select this radio button to manually define the location and availability that the callers will be informed of when the phone is set to DND.
Location: From the dropdown menu, select the Location that the DND status of the phone will be associated with.
Availability: From the dropdown menu, select the availability that will be associated with above location.
When Forward to Voice Mail Group
Nothing: Select this radio button to forward the caller according to the phone settings.
Change my availability to Unavailable: Select this radio button to inform the caller that the user is unavailable.
Set my location to: Select this radio button to manually define the location and availability that the callers will be informed of when forwarding is configured on the phone.
Location: From the dropdown menu, select the Location that the forwarded status of the phone will be associated with.
Availability: From the dropdown menu, select the availability that will be associated with above location.
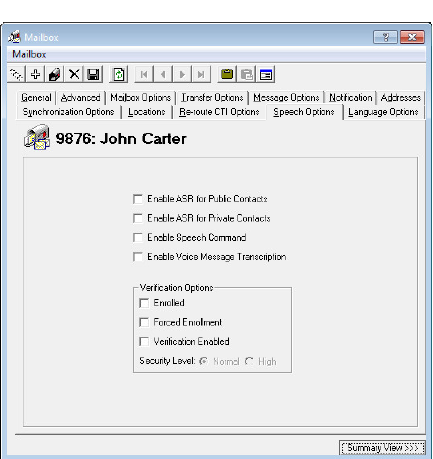
Speech Options Tab
The Speech Options tab of Mailbox allows you to configure the enrollment of the current mailbox in the voice verification features and configure the related security levels. You may also enable any transcription options here.
Enable ASR for Public Contacts: Enable this checkbox to allow the user of the current mailbox to access their public contacts through ASR along with the traditional DTMF method.
Enable ASR for Private Contacts: Enable this checkbox to allow the user of the current mailbox to access their private contacts through ASR along with the traditional DTMF method.
Enable Speech Command: Enable this checkbox to allow the user of the current mailbox to navigate the TUI through speech commands along with the traditional DTMF method.
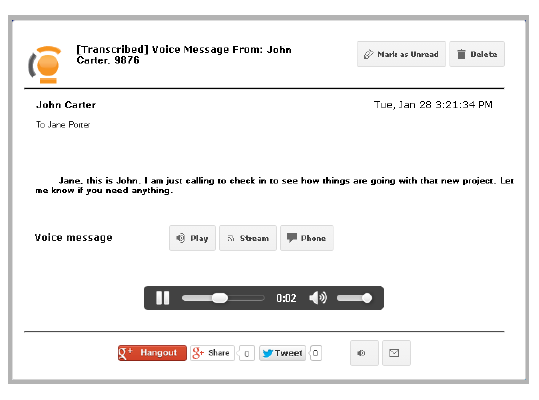
Enable Voice Message Transcription: Enable this checkbox to activate speech-to-text transcription for voice messages. Once enabled, voice messages left in this mailbox will be rendered into text, and sent to the associated email address. A transcription add-on to the Avaya Messaging license is required.
Voice Verification Options
Enrolled: This checkbox becomes enabled when the user successfully finishes the voice verification configuration during their tutorial or manually through the TUI.
Forced Enrollment: Enable this checkbox to force the user to configure the voice verification feature. The users will not be able to skip the tutorial when this option is enabled.
You can select a full or simple tutorial through UC Admin > Voice Server > Advanced > Simple Tutorial (here).
Voice Verification Enabled: Enable his checkbox to allow this user to use the Voice Verification feature.
Security Levels
Normal: Select this radio button to use Normal as the voice verification security setting. The security settings are configured under Company properties.
High: Select this radio button to use High as the voice verification security setting. The security settings are configured under Company properties.
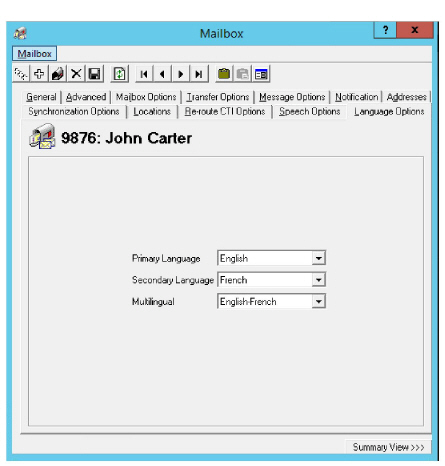
Language Options
While the languages for the Auto Attendant are controlled through system settings, you can use the Language Options tab to setup one or two languages for your mailbox prompts. Specify one language as the primary, and another as the secondary, then choose which order to play them.
Primary Language: Select the language to be used as the main language for your mailbox prompts.
Secondary Language: Select the language to be used as an alternate language for your mailbox prompts.
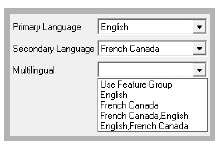
Multilingual: From the dropdown menu, choose the order the prompts will be played: Primary only, Secondary only, Primary then Secondary, or Secondary then Primary.
When an external caller reaches your mailbox, they will hear your mailbox prompts (e.g. “Please leave a message at the tone.”) in the order chosen under Multilingual.
When an internal caller reaches your mailbox, the voice server will scan their mailbox language preferences and play the prompts in the appropriate language.
|
Important: The language packs must be installed on the voice server before they will be available here. Additional language licenses can be purchased as part of your Avaya Messaging license.
|
|
Note: This option will not be available it has not been enabled in the Company > Advanced tab (found here).
|
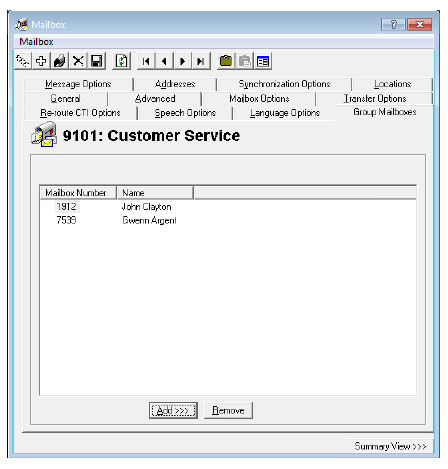
Group Mailboxes Tab
When a mailbox is configured as a Group Mailbox, this tab appears and requires the user to create a list of people that have access to the mailbox (Group Mailbox Access List). At least one contact must be added to the list, but up to 25 may be included.
Each person on the accesslist has access to this mailbox to review, create and delete messages. Each time the mailbox is accessed, or an action is taken, an entry is created in the database and a report can be generated with the details. See the Web Report (chapter 25) on here of this document for details.
|
Hint: Name a Group Mailbox after its function rather than for a specific person. For example, “Customer Service” or “Sales”.
|
Add / Remove Contacts
Add Contacts
•Click Add to join contacts to the Group Mailbox Access List.
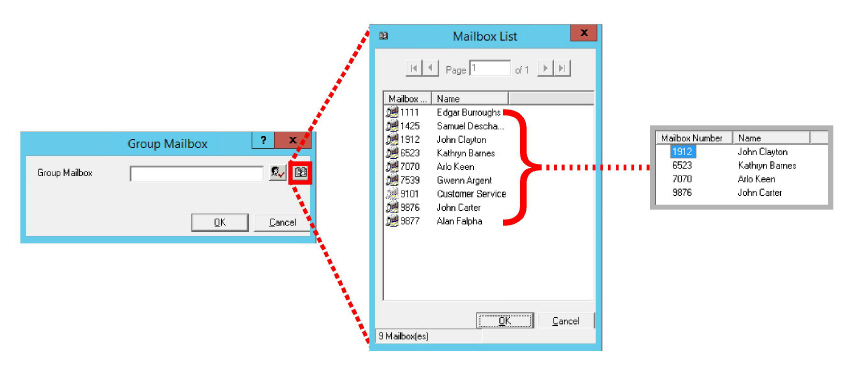
•Select the Directory icon  , pick a person to add, click OK, then click OK again at the Group Mailbox screen to append that person to the access list.
Repeat to add as many people to the list (one at a time) as required. Save the mailbox when finished.
|
Note: A mailbox (“Customer Service” in this example) cannot be added to its own access list. Each person can only be added to the list once. An error will pop-up the second time a user is to be added.
|
|
Note: A group mailbox cannot be included in the access list of another group mailbox.
|
|
Caution: Disabling the Group Mailbox option on the Mailbox Options tab will permanently delete the access list.
|
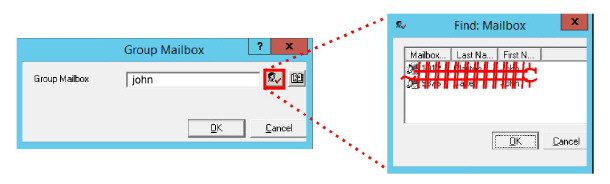
You can also type the person’s extension or first name or last name into the space provided on the Group Mailbox screen. Click the Verify button  and the system will return all matching contacts. Select the correct individual and click OK to add them to the access list.
If only a single match is found, then that person’s details will be displayed in the text entry field. Click OK to approve the selection.
Remove Contacts
To delete a person from the list, select the person’s extension, then click Remove.
Accessing the Group Mailbox
Any of the people on the Mailbox List can enter the group mailbox.
•From any phone, access the Auto Attendant and enter the extension number for the group mailbox.
•You will be asked to enter your mailbox number, then your password. This is the same number and password that you use to access your own voice mailbox.
•The system will log you into the group mailbox where you can manage the messages. You can listen to the messages, create new messages, and delete messages from the mailbox. All activities are recorded in the database.
Other Mailbox Related Options/Configurations
Add / Edit Addresses
UC server supports numerous types of addresses that may be assigned to a Mailbox for ubiquitous communication.
Adding an Address
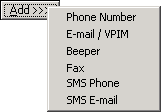
Click on the Add button then select the type of address that you wish to add.
|
Note: You can only have one default address for each type of address. For example, you have may a default Phone Number and a default Fax number together but you cannot have two default Fax numbers. The Default address takes automatic priority when you are trying to be reached by the UC server.
|
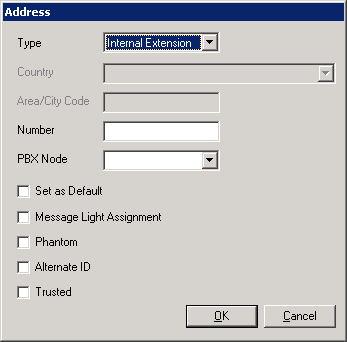
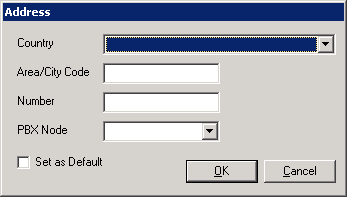
Phone Number - Internal
Number: Enter the internal extension number.
PBX Node: From the dropdown menu, select the PBX node that the extension resides in.
Set as Default: Enable this checkbox to make this address the default for the current Mailbox.
Message Light Assignment: Enable this checkbox to enable message lights on the phone system connected to this extension.
Phantom: Enable this checkbox to make the current extension a phantom extension. A phantom extension is not connected to an actual phone but can still be used to play greetings and accept messages.
Alternate ID: Enable this checkbox to make the current extension an alternate ID. The Mailbox user will be able to use this extension number to login and accept calls as if it were a Mailbox number.
|
Note: If this feature is enabled, under Company > Advanced, one user can have the same Alternate ID in multiple Organizational Units. When an incoming caller searches for the Alternate ID number, they will be prompted to select which version of the contact they want to be connected to.
For example: John Smith has a mailbox in 2 OU's: Toronto and London. Each has its own extension, but shares the same Alternate ID. A caller who searches for the Alternate ID will be prompted whether they want John Smith from Toronto or London.
|
Trusted: Enable this checkbox to assign this extension as a trusted number for voice verification features.
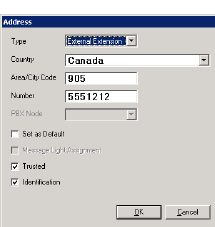
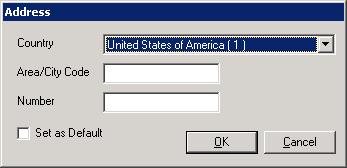
Phone Number - External
Country: From the dropdown menu, select the Country code for the telephone number.
Area/City Code: Enter the area code for the telephone number.
Number: Enter the telephone number.
Set as Default: Enable this checkbox to make this address the default for the current Mailbox.
Trusted: Enable this checkbox to assign this extension as a trusted number for voice verification features.
Identification: Enable this checkbox to use the defined external number as an Identification Number. The Identification Number can be used as an alternative method to log in to the Mailbox when Voice Verification is enabled on the system.
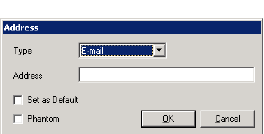
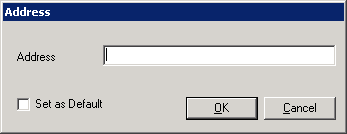
email
Address: Enter the full email address.
Set as Default: Enable this checkbox to make this address the default for the current Mailbox.
Phantom: Enable to designate this address as a Phantom email. When the system is resolving the address, a phantom email address will not be returned.
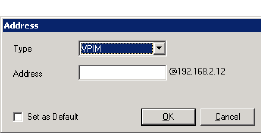
VPIM
Address: Enter the VPIM address (the name portion only).
Set as Default: Enable this checkbox to make this address default for the current Mailbox.
Beeper
Country: From the dropdown menu, select the Country code for the pager number.
Area/City Code: Enter the area code for the pager number.
Number: Enter the pager number.
PBX Node: From the dropdown menu, select the PBX node that the extension resides in.
Set as Default: Enable this checkbox to make this address default for the current Mailbox.
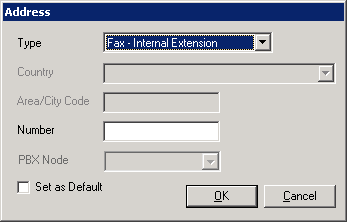
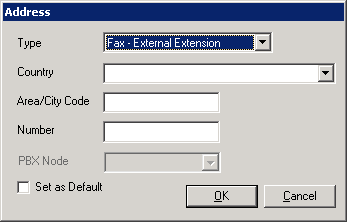
Fax - Internal / External
Country: From the dropdown menu, select the Country code for the fax number.
Area/City Code: Enter the area code for the fax number.
Number: Enter the internal extension number for fax.
PBX Node: For sites where there is more than one PBX installed, use this field to select which node the fax traffic should be routed through. Node numbers must be assigned sequentially starting with 1 (e.g. 1 2 3 4...).
Set as Default: Enable this checkbox to make this address the default for the current Mailbox.
SMS - Phone
Country: From the dropdown menu, select the Country code for the SMS capable phone number.
Area/City Code: Enter the area code for the SMS capable phone number.
Number: Enter the SMS capable phone number.
Set as Default: Enable this checkbox to make this address the default for the current Mailbox.
SMS - email
Address: Enter the full email address.
Set as Default: Enable to make this address the default for the current Mailbox.
Add / Edit Location
While most users will be able to add and modify their locations through the Web Access interface, you also have the option of manually configuring them through the admin interface.
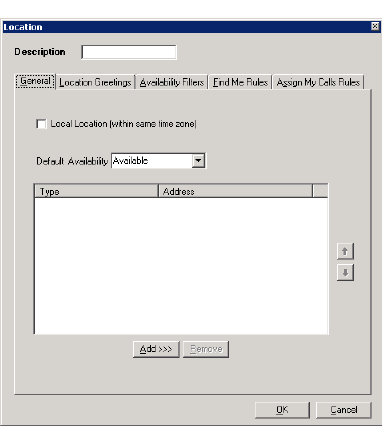
General
Description: Enter a title for the current location.
Local Location (within the same time zone): Enable this checkbox if the location you are creating is in the same time zone as your primary location.
Default Availability: From the dropdown menu, select the default availability for the location.
Add: Click on this button to add an address to the current location.
Remove: Click on this button to remove the selected address.
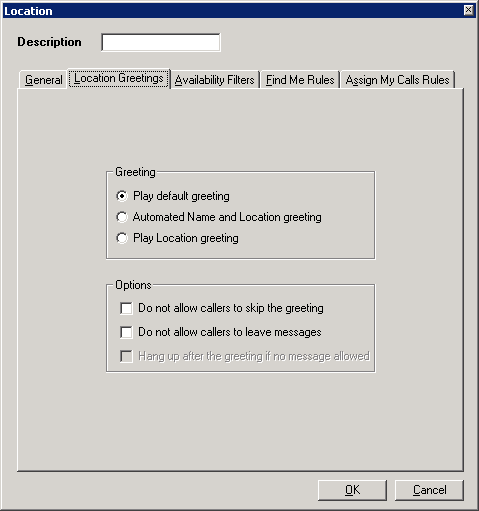
Location Greetings
Greeting
Play default greeting: Select this radio button to play the default greeting when the user is in the current location.
Automated Name and Location greeting: Select this radio button to play an automated name and location greeting when the user is at the current location.
Play Location greeting: Select this radio button to play the current location's greeting when the user is at that location.
Options
Do not allow callers to skip the greeting: Enable this checkbox to force the caller to listen to the entire greeting unless they disconnect.
Do not allow callers to leave messages: Enable this checkbox to prevent the caller from leaving a message in the Mailbox as long as the location is set to the current location.
Hang up after the greeting: Enable this checkbox to hang up on the caller right after playing the location greeting.
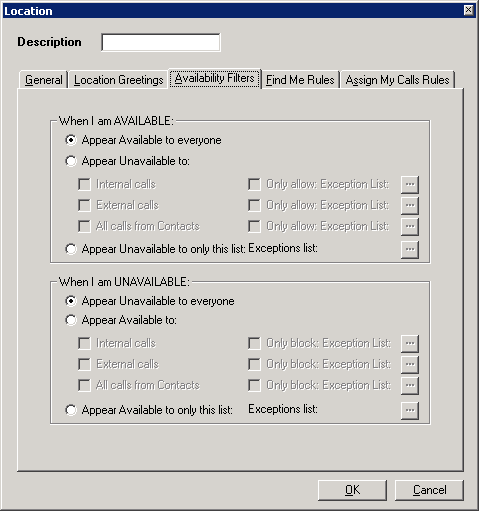
Availability Filters
When I am Available
Appear Available to everyone: Select this radio button to appear available to everyone when set to available at the current location.
Appear Unavailable to: Select this radio button to appear unavailable according to the settings defined below when set to available at the current location.
Select the Internal calls check-box if you want to appear unavailable for all internal calls. If there will be exceptions to this rule, select the accompanying Only allow: Exception List check-box and select your exceptions using the  button.
Select the External calls check-box if you want to appear unavailable for all external calls. If there will be exceptions to this rule, select the accompanying Only allow: Exception List check-box and select your exceptions using the  button.
Select the All calls from Contacts check-box if you want to appear unavailable for all calls from contacts. If there will be exceptions to this rule, select the accompanying Only allow: Exception List check-box and select your exceptions using the  button.
Appear Unavailable to only this list: Select this radio button to appear unavailable to a specific group of people even when you are available. The list may be defined by clicking on the ellipsis button  on the right.
When I am Unavailable
Appear Unavailable to everyone: Select this radio button to appear unavailable to everyone when set to unavailable at the current location.
Appear Available to: Select this radio button to appear available according to the settings defined below when set to unavailable at the current location.
Select the Internal calls check-box if you want to appear available for all internal calls. If there will be exceptions to this rule, select the accompanying Only block: Exception List check-box and select your exceptions using the  button.
Select the External calls check-box if you want to appear available for all external calls. If there will be exceptions to this rule, select the accompanying Only block: Exception List check-box and select your exceptions using the  button.
Select the All calls from Contacts check-box if you want to appear available for all calls from contacts. If there will be exceptions to this rule, select the accompanying Only block: Exception List check-box and select your exceptions using the  button.
Appear Available to only this list: Select this radio button to appear available to a specific group of people even when you are available. The list may be defined by clicking on the ellipsis button  on the right.
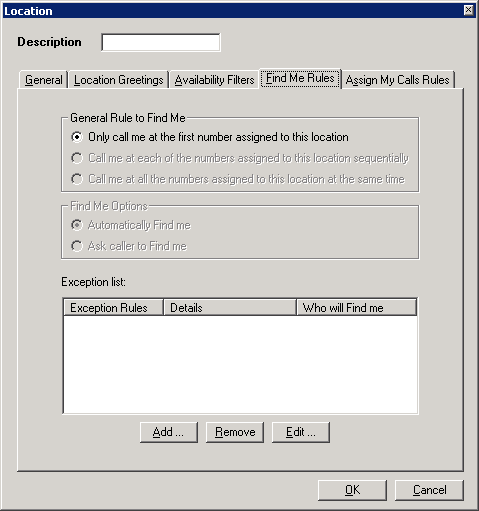
Find Me Rules
When an incoming call arrives at your extension, the Find Me Rules determine how the UC System will route the call if you are not currently at your desk.
General Rule to Find Me
Only call me at the first number...: Select this radio button to find the user only at the first number assigned to current location.
Call me at each of the numbers...sequentially: Select this radio button to find the user at each of the numbers assigned to current location in sequence.
Call me at all the numbers...at the same time: Select this radio button to find the user at all numbers assigned to current location simultaneously.
Find Me Options
Automatically Find me: Select this radio button to have the system automatically search for the user.
Ask caller to Find me: Select this radio button to have the system ask the caller if they want the system to search for the user.
Exception List
Add: Click on this button to add Mailbox/contacts to the exception list.
Remove: Click on this button to remove the selected exception list item.
Edit: Click on this button to edit the selected exception list item.
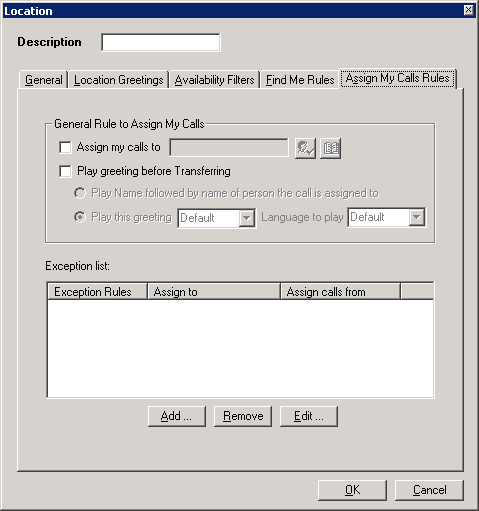
Assign My Calls Rules
General Rule to Assign My Calls
Assign my call: Enable this checkbox to have your calls assigned to another Mailbox in the same Company. In the text field to the right, enter or select the Mailbox from the directory.
Play greeting before Transferring: Enable this checkbox to have the greeting played before a call is transferred. You may specify the type of greeting to be played below.
Play Name followed by name of person the call is assigned to: Select this radio button to have the system explicitly state who the user is assigning the call to before transferring the call.
OR
Play this greeting: Select this radio button to select a specific greeting from the dropdown menu to play before transferring a call. If applicable, select the language of the greeting from the Language to play dropdown menu.
Exception List
Add: Click on this button to add Mailbox/contacts to the exception list.
Remove: Click on this button to remove the selected exception from the list.
Edit: Click on this button to edit the selected exception from the list.
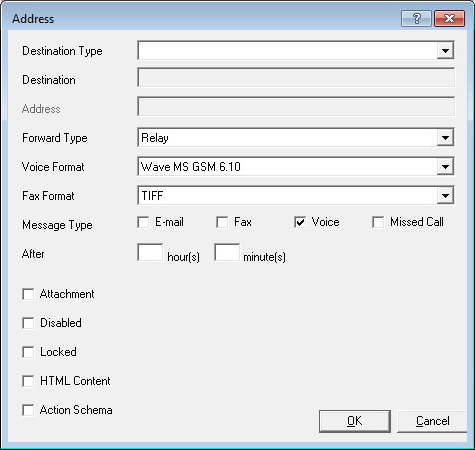
Add / Edit Message Options
The messages that arrive in the current Mailbox may be automatically forwarded or relayed to a destination of choice.
Destination Type: From the dropdown menu, select the address type of the destination.
|
Type
|
Destination
|
Address
|
|
AMIS
|
From the dropdown menu, select the desired Remote Site.
|
Enter the address within the chosen Remote Site that you wish to forward/relay to.
|
|
Distribution List:
|
From the dropdown menu, select the distribution list (both public and private from the Mailbox that is being configured will be available).
|
|
|
email:
|
Enter the desired email address.
|
|
|
Mailbox:
|
Enter the Mailbox number then click on verify or select a Mailbox from the directory.
|
|
|
Print to Fax:
|
Enter the fax number or use the ellipsis button  to open a dialog box. to open a dialog box.
|
|
|
Print to Server Default Printer
|
|
|
|
SMS email
|
Enter the desired email address.
|
|
|
SMS Phone
|
Enter the phone number or use the ellipsis button  to open a dialog box. to open a dialog box.
|
|
|
VPIM
|
From the dropdown menu, select the desired Remote Site.
|
Enter the address within the chosen Remote Site that you wish to forward/relay to.
|
|
Storage Path
|
Enter the network path to the storage location.
|
Must be UNC Compatible path
|
|
Google Docs
|
Enter Google Docs Collection location.
|
Requires an existing collection
|
Destination: Refer to the above chart.
Address: Refer to the above chart.
Forward Type: From the dropdown menu, select Forward or Relay.
Forward: Select this option to have messages forwarded automatically. A copy of the message will be sent to the destination with 'FW:' in the subject header. The sender of the message will be the current Mailbox.
Relay: Select this option to have messages relayed automatically. A copy of the message will be sent to the destination. The sender of the message will be the originating Mailbox.
Voice Format: From the dropdown menu, select the format of voice messages. The WaveUlaw8 format is recommended as the default.
Fax Format: From the dropdown menu, select TIFF or PDF. Fax messages that are automatically forwarded to email addresses will be converted into the selected format.
Message Type: Enable the checkboxes for the type of messages you want forwarded/relayed to the destination address.
After: Enter a value on either or both of the hour(s) and minute(s) fields to delay the forward/relay by that amount of time.
Attachment: Enable this checkbox to allow any attachments to be included in the forwarded/relayed message.
Disabled: Enable this checkbox to not automatically forward or relay received messages for the chosen address. This setting can be toggled by the Mailbox user at any time.
Locked: Enable this checkbox to not automatically forward or relay received messages for the chosen address. This setting can be toggled by the administrator and is active until changed.
HTML Content: Enable this checkbox to have files attached to messages accessible only through a hyper link (HTTP).
|
Note: Multiple Destinations require separate address entries to be made for each.
|
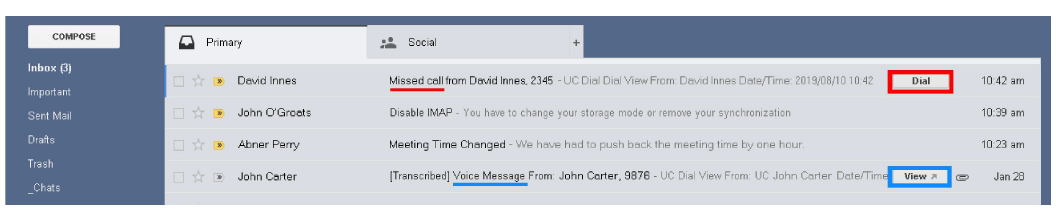
Action Schema: Enable this option to have tags appear in the subject line of emails that contain voice messages, or those that denote missed calls. This feature only applies to email clients that support DKIM verification.
Dial: When an incoming call is received but not answered, and the caller does not leave a voice message, the Dial button will appear in the subject line of the email header. Click the button to place a call to the contact.
View: When a caller leaves a message in the mailbox, the View button will appear in the subject line of the message header. Click the call to open the playback control window to listen to the message through any audio capable device.
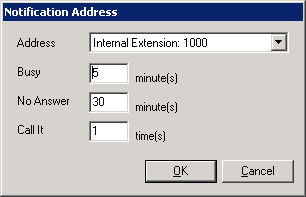
Add / Edit Notification Addresses
After specifying notification addresses, they can be modified to suit your changing business needs.
Address: From the dropdown menu, select an address that will be used for notification. The addresses available on this list are the addresses listed under the current Mailbox's Address tab.
Busy: Enter the amount of time (in minutes) that the system will wait before retrying notification when the destination address is busy.
No Answer: Enter the amount of time (in minutes) that the system will wait before retrying notification when the destination address does not answer.
Call It: Enter the number of times the system will attempt to notify the Mailbox user. If the system is successful, it will not retry.
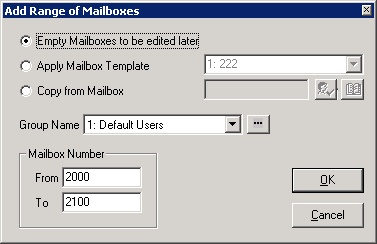
Adding a Range of Mailboxes
Instead of creating Mailboxes one at a time, you can create a range of Mailboxes under a particular Feature Group. Once you have created the Mailboxes, you can go back and specify the options for each Mailbox.
Empty Mailboxes to be edited later: Select this radio button to add a range of empty Mailboxes that can be edited later.
Apply Mailbox Template: Select this radio button to create a range of Mailboxes using the selected Mailbox template. Mailbox templates need to be already defined on the system.
Copy from Mailbox: Select this radio button to use an existing Mailbox as the model for creating a range of new Mailboxes.
Group Name: From the dropdown menu, select the Feature Group you want the Mailboxes to be associated with.
From: Enter the first number in the Mailbox range.
To: Enter the last number in the Mailbox range.
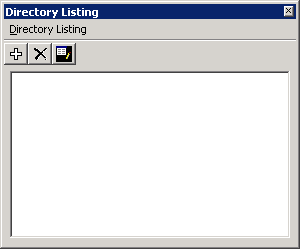
Directory Listing
The UC server allows the Mailbox user to create nicknames and store them in the company directory. A caller can then spell the user’s name or speak the name to the speech enabled automated attendant.
The Mailbox must be in a Feature Group that has the company directory feature enabled. The Mailbox will then be accessible via ASR (Automatic Speech Recognition). In the Mailbox, a user can define multiple names that are used for directory purposes (e.g. first name, last name, maiden name).
When a Mailbox is created and the first name, last name and username are specified, the information is automatically input to the Directory List screen. While in this window, you can add and move these names, as necessary.
|
Note: The basic ASR license supports 250 names. Please check your ASR license for the number of names your system will support and upgrade the license if necessary.
|
|
Note: The Mailbox must be in a Feature Group that has the Company Directory feature enabled.
|
|
Important: First and Last name must contain ONLY letters. No numbers or special characters are allowed. This is to ensure compatibility with the speech recognition features.
|
Company Buttons
|
Button
|
Description
|
|

|
Add a new Directory Listing entry.
|
|

|
Delete selected Directory Listing entry.
|
|

|
Edit selected Directory Listing entry.
|
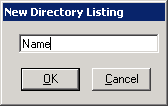
Directory Listing Configuration
|
Note: The basic ASR license supports 250 names. Please check your ASR license for the number of names your system will support and upgrade the license if necessary.
|
To add a new directory listing, click the Add icon, then enter the details for the new directory item.
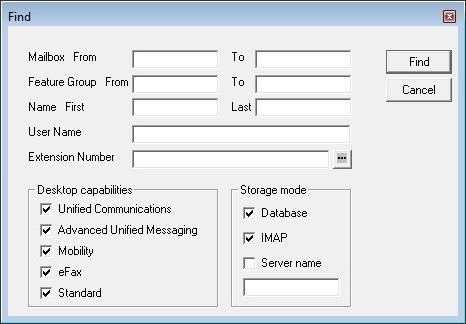
Finding a Mailbox
In a system that has a large number of users, it may be difficult to scroll through the entire directory to find a specific Mailbox. The find Mailbox function can be used to easily locate the desired Mailbox(es) by using search filters.
Mailbox, From and To: Enter the range of Mailboxes you wish to search. Enter the starting Mailbox number in the From field and the ending Mailbox number in the To field.
Feature Group, From and To: Enter the range of Feature Groups you wish to search. Enter the starting Feature Group number in the From field and the ending Feature Group number in the To field. All Mailboxes that are associated with the specified range of Feature Groups will be shown as results.
Name, First and Last: Enter the first name in the First field and/or enter the last name in the Last field to search for a Mailbox by the user's name.
User Name: For contacts with a user name defined, enter it here to begin a search.
Extension Number: Type in or select  and an extension number to search for.
Desktop Capabilities
|
Note: If you have no Desktop Capabilities selected, the search results will be as if you have all Desktop Capabilities selected.
|
Enable one or more checkboxes to filter the search results according to the Desktop Capability of the Mailbox.
Unified Communications: Enable this checkbox to include Mailboxes with Unified Communications capabilities in the search result.
Advanced Unified Messaging: Enable this checkbox to include Mailboxes with Advanced Unified Messaging capabilities in the search result.
Mobility: Enable this checkbox to include Mailboxes with Mobility (CTI) capabilities in the search result.
eFax: Enable this checkbox to include Mailboxes with eFax capabilities in the search result.
Standard: Enable this checkbox to include Mailboxes with Standard capabilities in the search result.
Storage Mode
|
Note: If you have no Storage Mode selected, the search results will be as if you had all Storage Modes selected.
|
Enable one or more checkboxes to filter the search results according to the Storage Mode of the Mailbox.
Database: Enable this checkbox to include Mailboxes with Database storage mode in the search result.
IMAP: Enable this checkbox to include Mailboxes with IMAP storage mode in the search result.
Server Name: Enable this checkbox to include Mailboxes with a specific server storage mode in the search result. You must also define the server name in the text field below when you enable this checkbox.
Folders
You can create custom folders in the user’s Mailbox for message storage and organization. The folders created will automatically be created in another message server (e.g. both on UC server and the email server) when the user is configured as a unified messaging user.
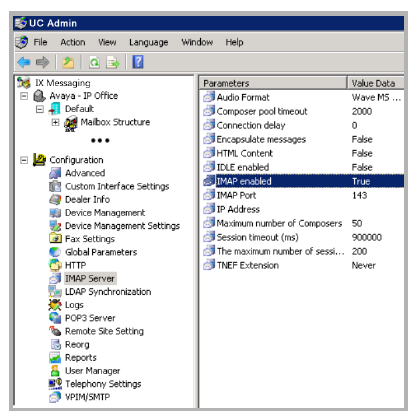
IMAP4 Configuration
IMAP 4 and POP3 are no longer supported in Avaya Messaging 11.0.
Location Schedule
Although most users will be managing their location and calendar through the Web Access or Avaya iLink Pro, there is also the option of adding and modifying them manually through the admin interface. Due to the nature of locations, all location related schedules are saved under the location calendar.
Location Schedule Buttons
|
Button
|
Description
|
|

|
Create new Location Calendar.
|
|

|
Delete current Location Calendar.
|
|

|
Save current Location Calendar.
|
|

|
View a list of all Location Calendars.
|
|

|
Create a new Schedule.
|
|

|
Delete the current Schedule.
|
|

|
Move to first Schedule item.
|
|

|
Move to previous Schedule item.
|
|

|
Move to next Schedule item.
|
|

|
Move to last Schedule item.
|
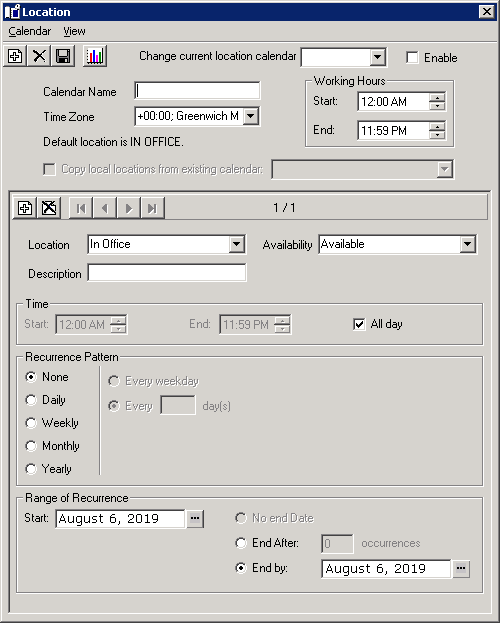
Location Schedule Configuration
Change current location calendar: From the dropdown menu, select the calendar that you wish to modify.
Enable: Enable this checkbox to activate the current schedule.
Calendar Name: Enter a descriptive name for the calendar.
Time Zone: Select the time zone to which the location belongs.
Default Location is: This field displays the default location for the current calendar. If there are no specific locations defined, this will be used as a default.
Copy local locations from existing calendar: Enable this checkbox to copy the location settings from another calendar. You must select the other calendar from the dropdown menu after you enable this checkbox.
Working Hours, Start and End: Define the working hours of the calendar.
Location: From the dropdown menu, select the location that will be active during the period specified below.
Availability: From the dropdown menu, select the availability of current location.
Description: Enter a short description for your reference.
Time
Start and End: Enter the time in which the sub menu will be active. Enabling the All day checkbox will make the sub menu active for 24hrs.
Recurrence Pattern:
None: Select this radio button to have the sub menu occur only for the period of time once with no recurrence.
Daily: Select this radio button to indicate that the sub menu will be active on a day-by-day basis. Afterwards, you will have (2) options:
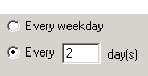
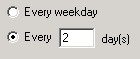
Every weekday: Select this radio button if you want the sub menu to be active every weekday (Monday - Friday).
Every X day(s): Select this radio button to specify an interval of activity for the sub menu (every second day by entering 2 in the field, for example).
|
Hint: If you wish to define the settings as Every weekday, you can instead choose the Weekly settings where you can specify which days of the week you wish to be notified.
|
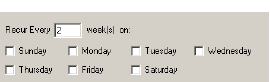
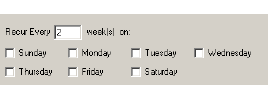
Weekly: Select this radio button to indicate that the sub menu will be active on a weekly basis. Then, in the Recur Every X week(s) on field, enter an interval of activity for the sub menu (i.e. enter 3 for every third week). Finally, check the boxes of the days of the week you want the sub menu to be in effect. If you wanted a sub menu to be active every second Monday, Wednesday and Thursday, you would enter 2 in the field and select the Monday, Wednesday and Thursday checkboxes.
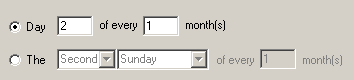
Monthly: Select this radio button if you want the sub menu to be active on a monthly basis.
You have two (2) options:
Select the Day radio button and indicate which day of the month you want the sub menu to be active.
Select the The radio button and indicate which day of a month you want the sub menu to be active. For example, if you want the sub menu to be active on the second Monday of every second month, you would select the The radio button, select Second and Monday, and enter 2.
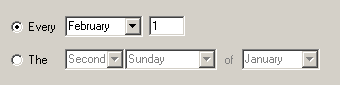
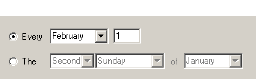
Yearly: Select this radio button if you want the sub menu to be active on a specific day of the year. You have two (2) options:
Select the Every radio button and indicate the day of the year on which you want the sub menu to be active.
Select the The radio button and indicate a specific day of a specific month of the year on which you want the sub menu to be active. For example, if you want the sub menu to be active on the second Thursday of every March, you would select the radio button and select Second, Thursday and March from the dropdown menu.
Range of Recurrence
Start: Select the date when the first occurrence of the sub menu is to occur.
|
Note: The sub menu must have a recurrence pattern defined.
|
No end Date: Select this radio button if you want the sub menu to occur indefinitely
End After: Select this radio button if you want to disable the sub menu after it occurs the defined number of times.
End by: Select this radio button if you want to disable the sub menu by the defined date.
Notification Schedule
You can create a notification schedule to specify a calendar setting for each notification address. For example, you can schedule an email to be the active notification address for a period of time.
Notification Schedule Buttons
|
Button
|
Description
|
|

|
Create new Notification Schedule.
|
|

|
Delete Notification Schedule.
|
|

|
Save Notification Schedule.
|
|

|
View a list of all Notification Schedules.
|
|

|
Create a new Schedule.
|
|

|
Delete the current Schedule.
|
|

|
Move to first Schedule.
|
|

|
Move to previous Schedule.
|
|

|
Move to next Schedule.
|
|

|
Move to last Schedule.
|
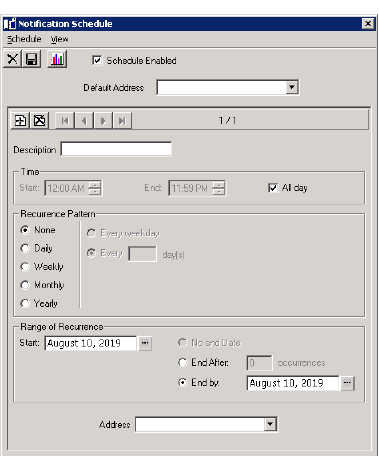
Notification Schedule Configuration
Schedule Enabled: Enable this checkbox to activate the notification schedule.
Default Address: From the dropdown menu, select the address that will be used by the schedules by default unless they have a specific address defined.
Description: Enter a brief title/description of the sub menu for reference.
Time
Start and End: Enter the time during which the sub menu will be active. Enabling the All day checkbox will make the sub menu active for 24hrs.
Recurrence Pattern:
None: Select this radio button to have the sub menu occur only once with no recurrence.
Daily: Select this radio button to indicate that the sub menu will be active on a day-by-day basis. Afterwards, you will have (2) options:
Every weekday: Select this radio button if you want the sub menu to be active every weekday.
Every X day(s): Select this radio button to specify an interval of activity for the sub menu (every second day by entering 2 in the field, for example).
|
Hint: If you wish to define the settings as Every weekday, you can instead choose the Weekly settings where you can specify which days of the week you wish to be notified.
|
Weekly: Select this radio button to indicate that the sub menu will be active on a weekly basis. Then, in the Recur Every X week(s) on field, enter an interval of activity for the sub menu (i.e. enter 3 for every third week). Finally, check the boxes of the days of the week you want the sub menu to be in effect. If you wanted a sub menu to be active every second Monday, Wednesday and Thursday, you would enter 2 in the field and select the Monday, Wednesday and Thursday checkboxes.
Monthly: Select this radio button if you want the sub menu to be active on a monthly basis.
You have two (2) options:
Select the Day radio button and indicate which day of the month you want the sub menu to be active.
Select the The radio button and indicate which day of a month you want the sub menu to be active. For example, if you want the sub menu to be active on the second Monday of every second month, you would select the The radio button, select Second and Monday, and enter 2.
Yearly: Select this radio button if you want the sub menu to be active on a specific day of the year. You have two (2) options:
Select the Every radio button and indicate the day of the year on which you want the sub menu to be active.
Select the The radio button and indicate a specific day of a specific month of the year on which you want the sub menu to be active. For example, if you want the sub menu to be active on the second Thursday of every March, you would select the radio button and select Second, Thursday and March from the dropdown menu.
Range of Recurrence
Start: Select the date on which the first occurrence of the sub menu is to occur.
|
Note: The sub menu must have a recurrence pattern defined.
|
No end Date: Select this radio button if you want the sub menu to occur indefinitely.
End After: Select this radio button if you want to disable the sub menu after it occurs the defined number of times.
End by: Select this radio button if you want to disable the sub menu by the defined date.
Address
From the dropdown menu, select the address that will be active during the defined period.
Organizational Unit
The purpose of an Organizational Unit is to organize the Mailboxes. In a system with large number of Mailboxes, it may be difficult to sort and keep track of all the Mailboxes in one folder. By having Mailboxes allocated to an Organizational Unit you can easily group different types of Mailboxes.
|
Note: Organizational Units are not related to the settings of the Mailbox. However, you can designate a PBX node for the Organizational Unit. If you do so, the Mailboxes associated with the OU will use this PBX node as default, assuming that you do not have a PBX node manually assigned to the Mailbox itself.
|
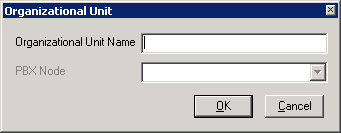
Adding/Editing a Organizational Unit
Organizational Unit Name: Enter a unique name for the OU.
PBX Node: From the dropdown menu, select the PBX node that this OU will be associated with.
Workgroup
A workgroup can be conveniently accessed through iLink Pro Desktop. It allows users to send messages to individual members or workgroups via Chat.
Workgroup Buttons
|
Button
|
Description
|
|

|
Add a new workgroup.
|
|

|
Delete current workgroup.
|
|

|
Save current workgroup.
|
|

|
Move to first workgroup.
|
|

|
Move to previous workgroup.
|
|

|
Move to next workgroup.
|
|

|
Move to last workgroup.
|
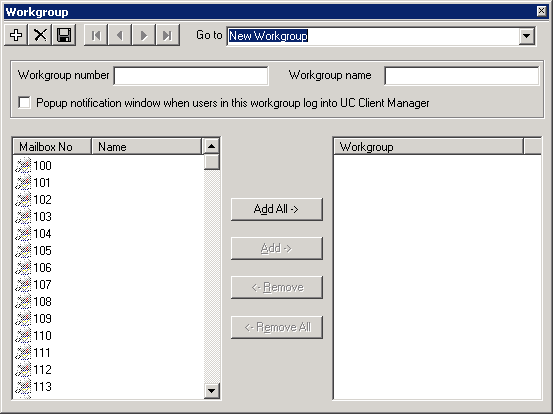
Workgroup Configuration
Go to: From the dropdown menu, select the workgroup that you wish to modify.
Workgroup Number: Enter a number for the workgroup you are creating.
Workgroup Name: Enter a name for the workgroup you are creating.
Popup notification...: Enable this checkbox to inform members when other members of the current workgroup log into iLink Pro Desktop.
Adding Users to Workgroup
Add: Select the desired Mailbox from the left pane then click on the Add button to add them to the workgroup in the right pane.
Add All: Click on the Add All button to add all Mailboxes from the same company to the workgroup.
Removing Users from Workgroup
Remove: Select the desired Mailbox in the right pane then click on the Remove button to remove them from the workgroup.
Remove All: Click on the Remove All button to delete all Mailbox from the workgroup.