Virtualized Environment: Microsoft Hyper-V
Many organizations are turning to virtual environments for their server needs due to their cost and efficiency. Instead of a room full of servers, a single virtual server on a hosted or in-house environment can perform the functions of many individual computers. Avaya Messaging can be installed in a virtual environment enabling you to reuse the equipment you already have. Instead of buying a new computer to host the voice server, upgrades to existing hardware may be sufficient through virtualization.
Avaya Messaging supports both VMWare and Microsoft’s Hyper-V for the virtualized environment. In this chapter, we will create and configure a Hyper-V virtual environment to host the voice server.
|
Software |
Version |
|
Hyper-V |
Windows Server 2012 or 2012 R2 Hyper-V Server 2012* |
|
OS for Avaya Messaging |
Windows Server 2012 or 2012 R2 Windows Server 2016 |
* - Hyper-V Server 2012 is not a full version of Windows Server 2012. It is a stand-alone product that contains only the resources necessary to support and manage virtual environments, and is available free from Microsoft. However, a full version of Windows Server 2012 is still required to create the virtual environments on each Hyper-V Server only machine. See here for more details on using Hyper-V Server 2012.
Virtual Environment Limitations
You cannot directly upgrade an existing Avaya Messaging server to a virtual environment. However, you can move an existing server onto a virtual machine by migrating the database using the utilities provided on the Avaya Messaging installation package. You can transfer both 7.x and 8.x systems to an 9.0 virtual environment. Avaya Messaging must be installed on a new virtual machine with a clean operating system.
Avaya Messaging installed on a virtual environment requires the same hardware resources as non-virtual machine installations.
|
Warning: Moving an existing Avaya Messaging environment to a virtual image is not supported. However, after installing Avaya Messaging onto the virtual machine, the data files can be migrated to the new location. |
|
Note: The fax capability of Avaya Messaging within a virtual environment is limited to 8 ports. |
|
Warning: Do Not create checkpoints while the servers are in operation as this can lead to serious corruption in the database. System performance may also be heavily compromised. To create a checkpoint, shutdown the server first, then create the checkpoint while the system is down. |
Before installing Avaya Messaging onto a virtual server, the computer must be configured for the environment, and the operating system must be installed. The virtual environments have the same hardware requirements as a standalone machine.
The physical computer (Host) that will have Microsoft Hyper-V installed must be running Windows Server 2012 or 2012 R2. Microsoft Hyper-V Server 2012 can be installed on the Host, but one full version of Windows Server 2012 is still required to create the virtual environments on each of these machines.
The environment created (Guest) on the host must have its own licensed copy of Windows installed, configured and fully patched. The version of Windows required must be one supported by Avaya Messaging.
|
Note: These steps are performed on Windows Server 2012, not Hyper-V Server 2012. See here for details on using Hyper-V Server. |
Once the Host has had Windows Server 2012 installed and patched, follow the directions below to add the Hyper-V role.
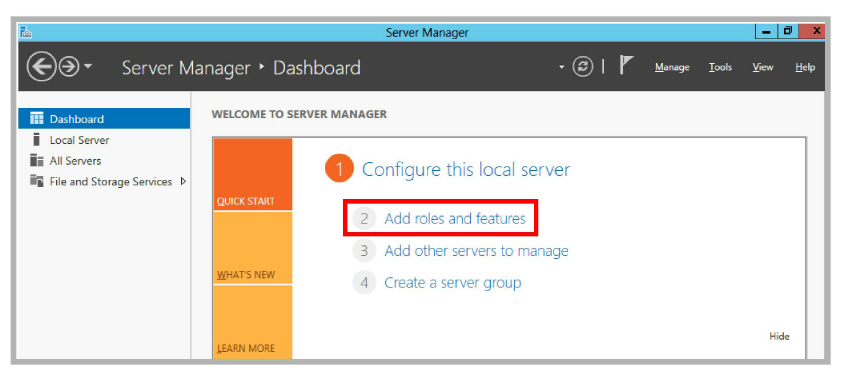
1.On the Host computer, open the Server Manager utility and add a new role.
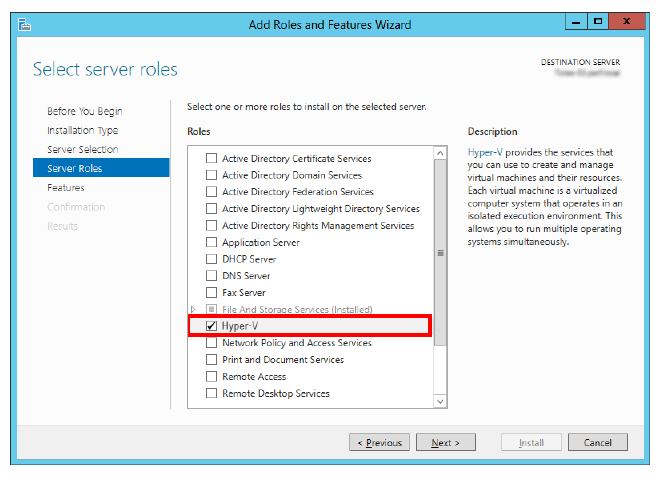
2.Proceed through the screens. At the Select server roles pane, enable Hyper-V from the available options.
Click Next.
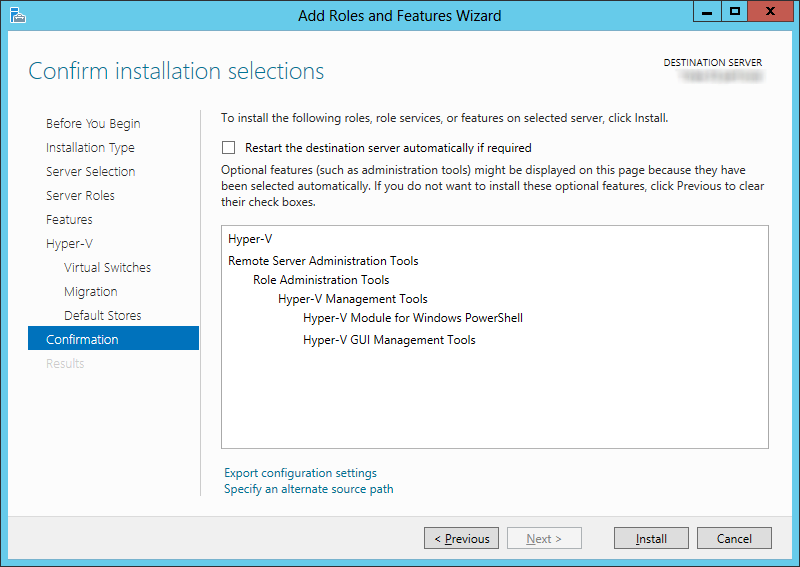
3.At the prompt, confirm the selection by clicking Add Features.

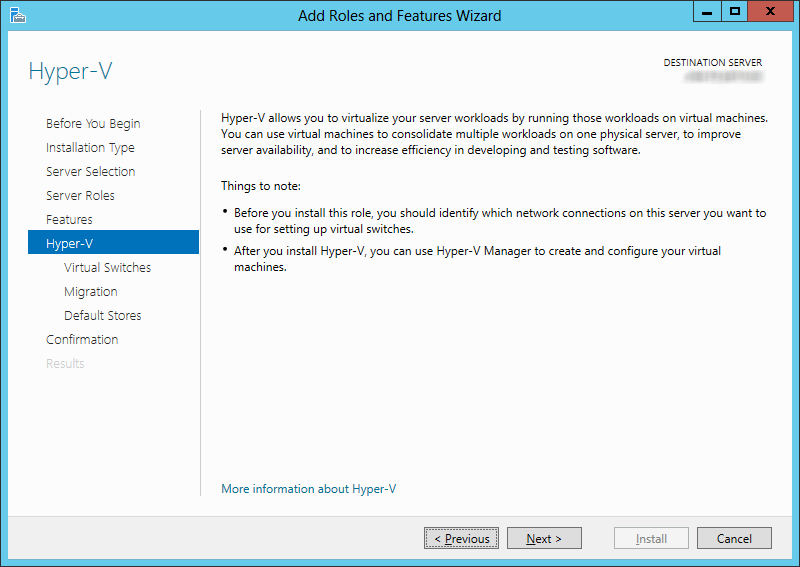
4.Continue until you reach the Hyper-V setup screen. Click Next.
5.Disable all of the virtual switches on the Host, then click Next.

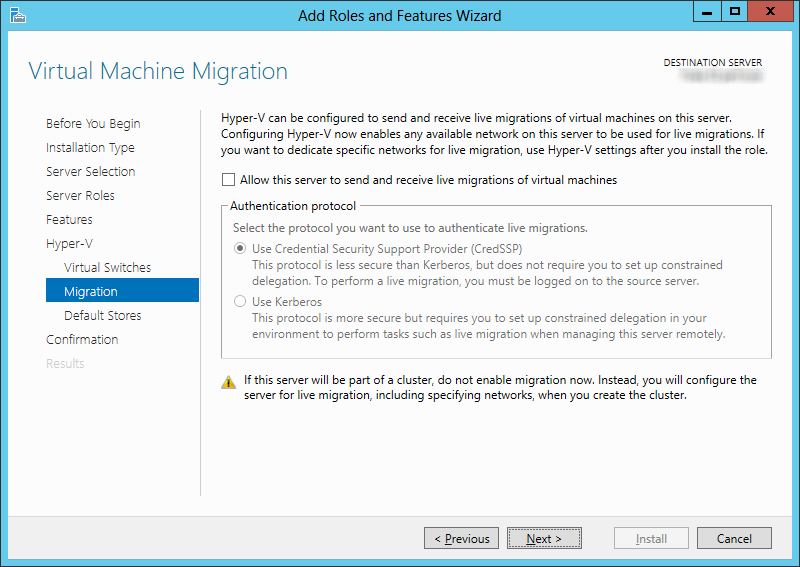
6.At the Virtual Machine Migration screen, leave the values at their defaults, and click Next.
7.For Default Stores, specify the hard drive and file location on the Host where the virtual hard disk and configuration files will be kept.
Click Next.

8.The Host has all of the information it needs. Click Install to add the Hyper-V role to the server.
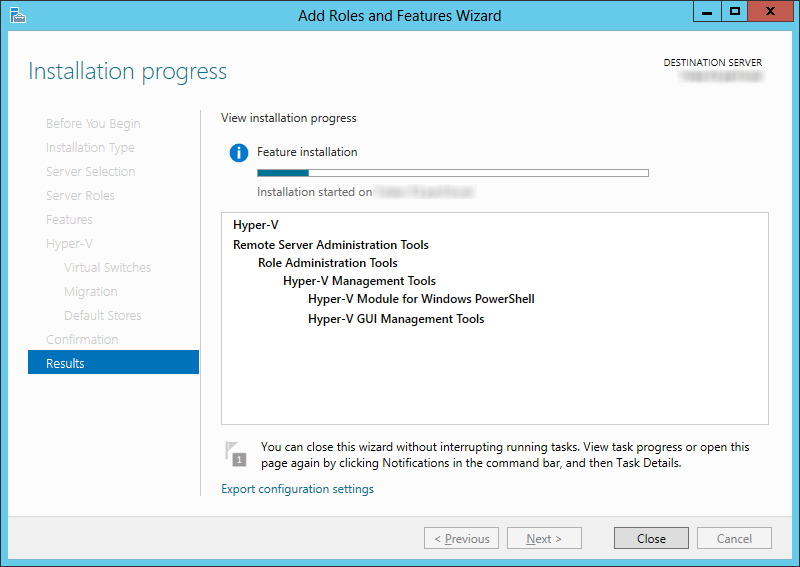
9.Support for Hyper-V virtual environments will be installed on the computer.
When finished, click Close, then restart the server.
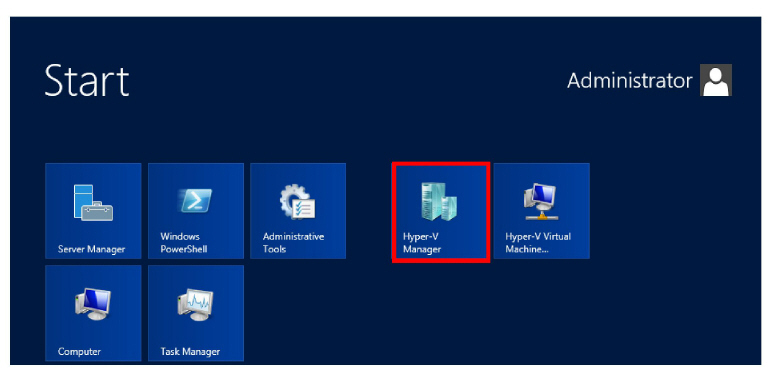
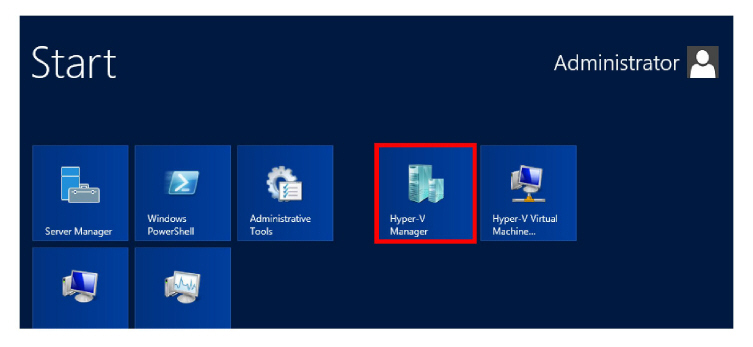
10.After the restart, open the Start window and select Hyper-V Manager.
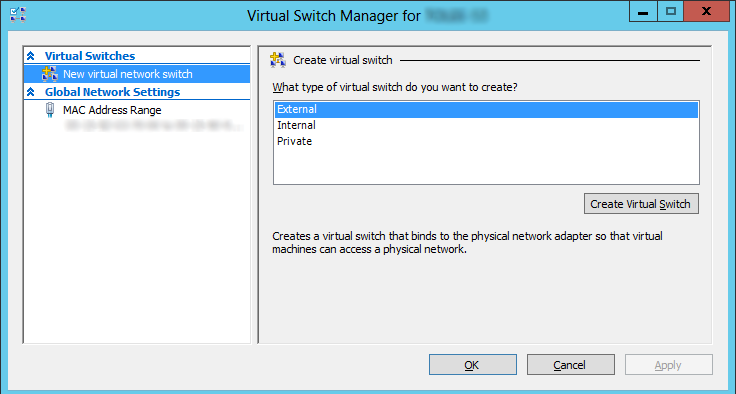
11.Right-click the Host, then click Virtual Switch Manager... from the pop-up menu.
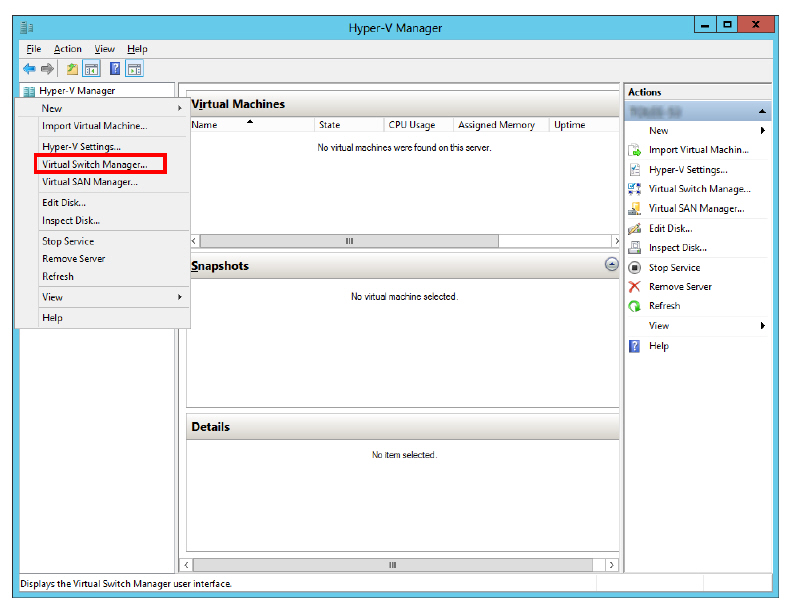
12.Select External for the type of virtual switch to create. Click Create Virtual Switch.
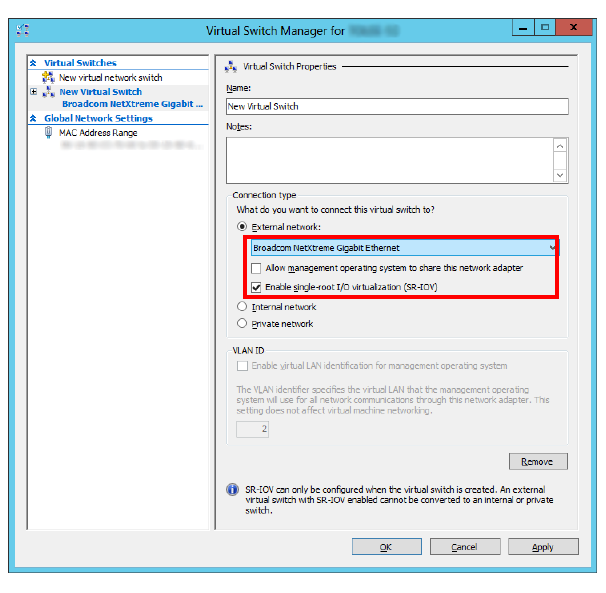
13.Enter a name for the switch.
Select a virtual switch from the list of those available on the dropdown menu. One switch is typically used exclusively for managing the virtual environment. Choose any other switch than the one used for management functions.
Ensure that Allow management operating system to share this network adapter is disabled.
Ensure that Enable single-root I/O virtualization (SR-IOV) is enabled.
Click Apply, then OK.
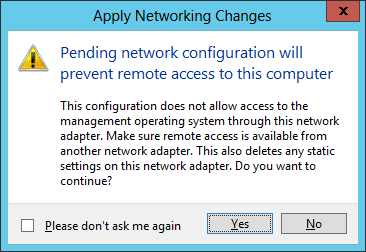
14.Click Yes to confirm the changes.
The Host has been configured and is ready to create new virtual environments.
Creating the Guest Environment on the Host
With the Hyper-V role installed, the individual environments for each Guest can be created and configured.
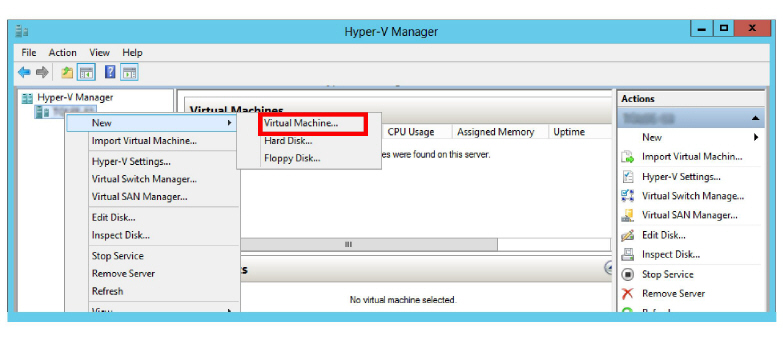
1.On the Host server, open the Start window and select Hyper-V Manager.
2.On the Manager screen, right-click the Host computer and select New > Virtual Machine....
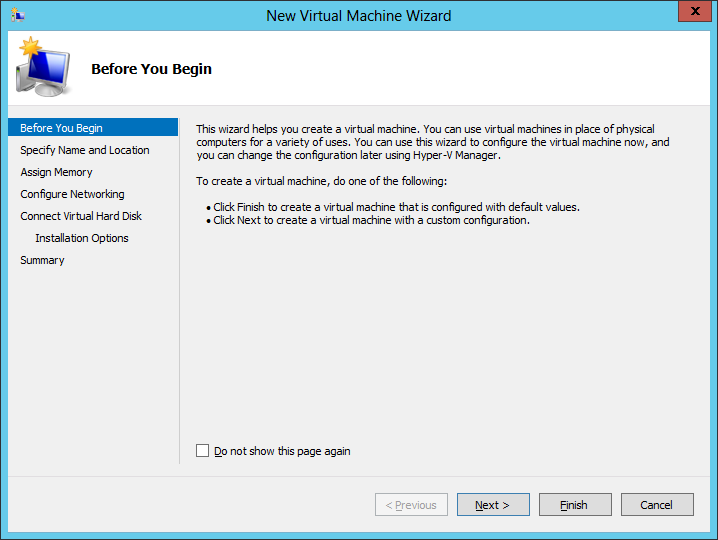
3.The New Virtual Machine Wizard will guide you through the process to create a new virtual environment on the selected server.
Click Next to continue.
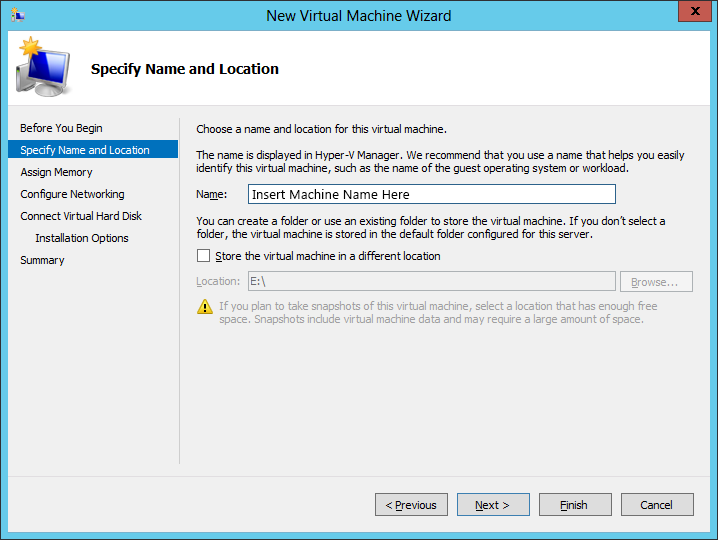
4.Give the Guest a name. You can also choose to store the data for the environment in a different location.
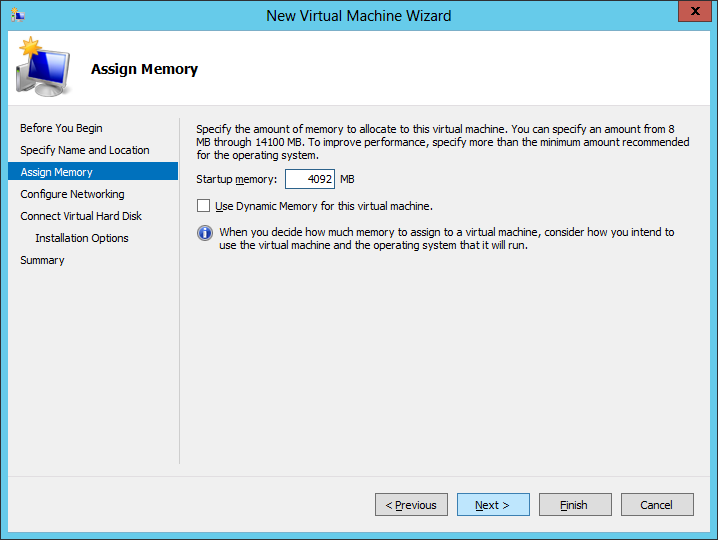
5.Specify the amount of memory the Guest will have. This must be at least as much as required by the version of Avaya Messaging to be installed. It is recommended that a minimum of 4GB be configured.
|
Note: The Host must have sufficient RAM installed to dedicate the desired amount of memory to the Guest environment, and still have enough remaining for its own needs. |
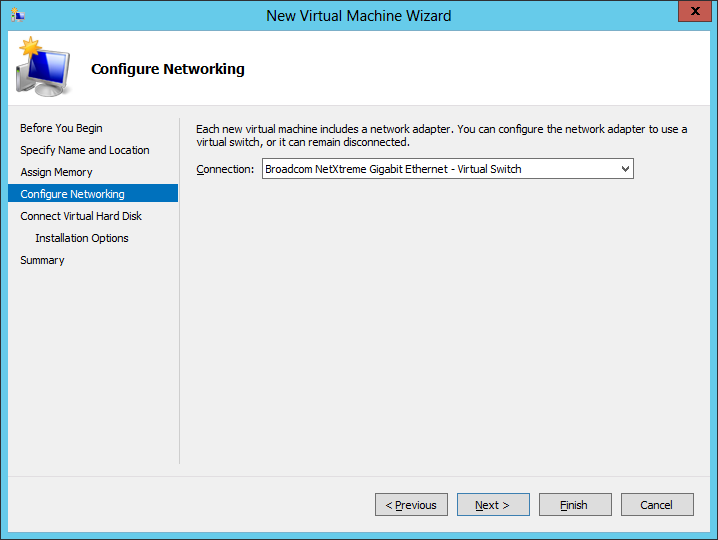
6.To connect this environment to other systems, a virtual switch is required. Choose a switch for the environment to use from the dropdown menu. Avaya Messaging requires this connection to provide access to the network and to the Internet.
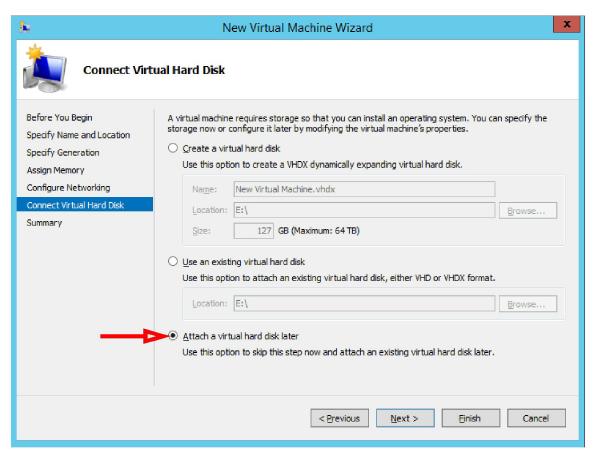
7.Select Attach a virtual hard disk later. Click Next.
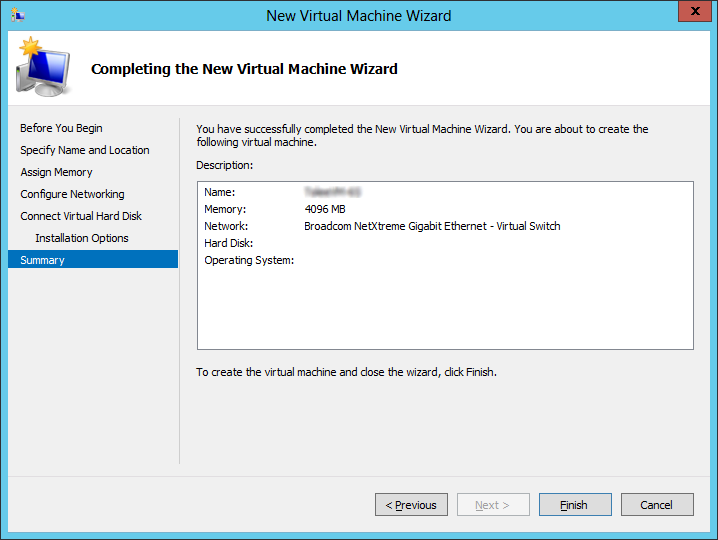
8.The Host has all of the necessary information to build the virtual machine.
Review the settings and click Finish to create the new Guest environment.
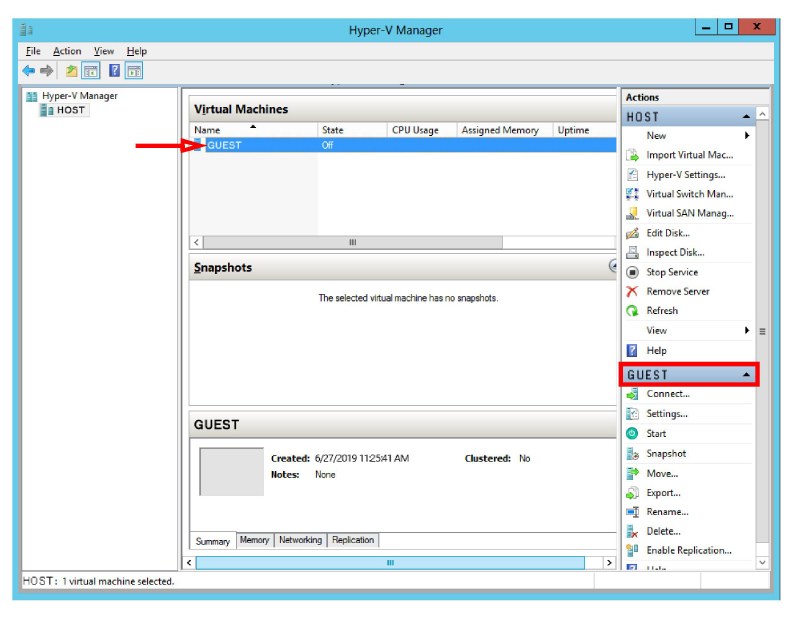
9.When the virtual machine has been created, you are returned to the Hyper-V Manager screen. The new Guest environment is displayed.
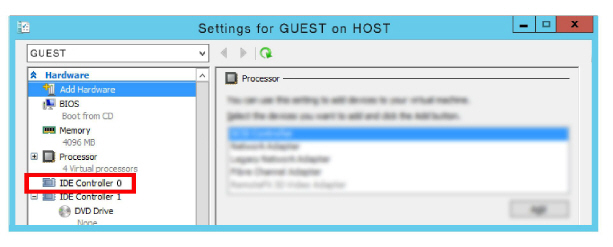
10.Open Settings for the Guest machine, and verify or set the number of processors needed to properly support Avaya Messaging.

11.Open the settings for IDE Controller 0.
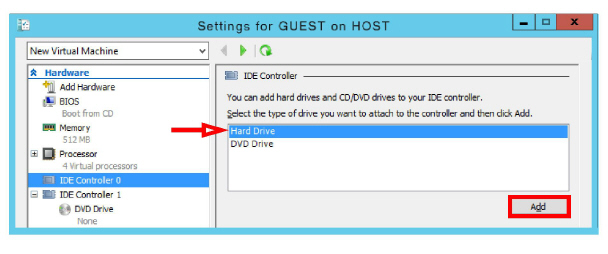
12.Select Hard Drive, then click Add.
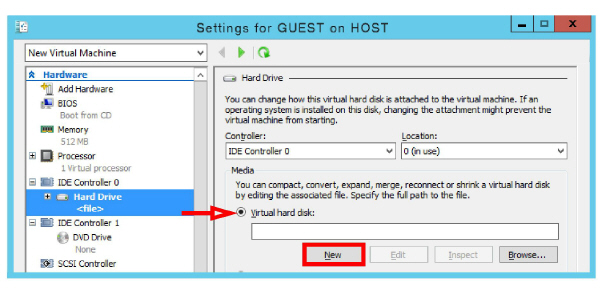
13.Enable Virtual hard disk. Click New.
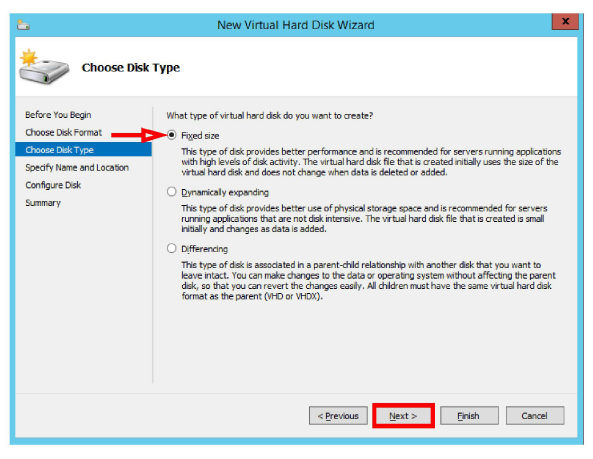
14.In the New Virtual Hard Disk Wizard, click Next until you reach Choose Disk Type.
Enable Fixed size, and click Next.
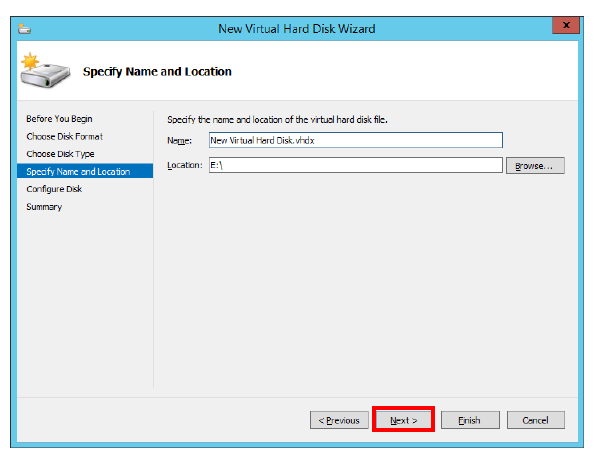
15.Specify the name for the drive, and a path to its location on the disk. Click Next.
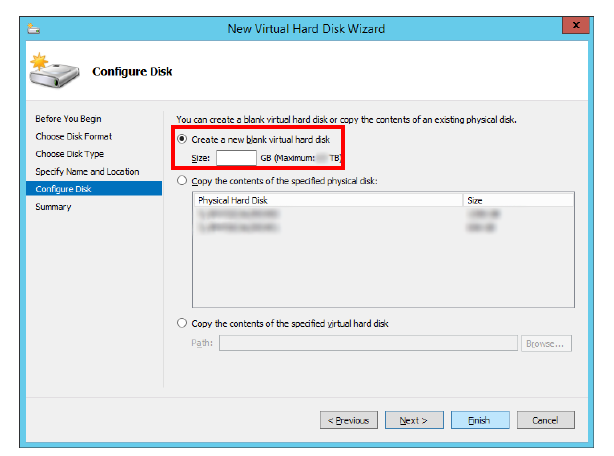
16.Enable Create a new blank virtual hard disk.
Enter the size for the drive in the space provided.
|
Note: The size for the drive is calculated in the same way as it is for any other voice server. Be sure to reserve enough space to handle all of the traffic that will be passing through the system. |
17.Click Finish to complete the installation.
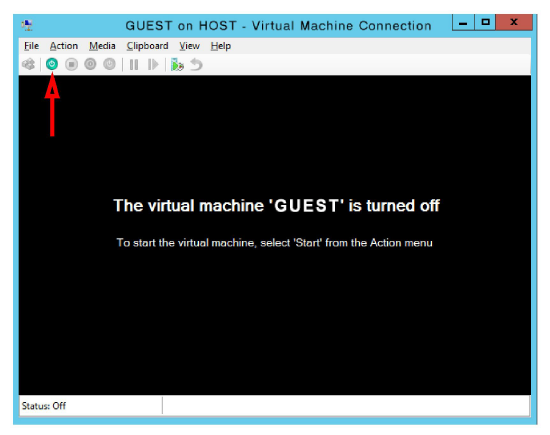
18.The virtual environment is now ready to use. The device is currently Turned Off.
Turn it on ![]() to proceed with the installation of the operating system and the Avaya Messaging software.
to proceed with the installation of the operating system and the Avaya Messaging software.
|
Note: The virtual machine has no operating system and no applications installed. Once the machine is on, it must be treated as a new computer. Install and configure an appropriate version of Windows and Avaya Messaging. |
Microsoft Hyper-V Server 2012 is a stripped down version of Windows Server 2012 intended only for use as a Hyper-V server. It has no desktop or other GUI components. It includes only the pieces of Windows required to host and manage a virtual machine environment. It is freely available from Microsoft, and can be installed on any currently empty computer.
Hyper-V Server cannot set up an environment on its own. A fully licensed version of Windows Server 2012 is still required to create and manage the environment, but only a single license of Windows is required to administer many Hyper-V servers.
1.On a computer with a full version of Windows, use an Internet browser to download the Hyper-V Server installation ISO file from the Microsoft web site. Burn this file onto a CD/DVD.
2.Place the disk into the drive of the computer that will become a Hyper-V server. The computer’s hard drive must be empty. Boot the computer from the disk. The installation of the Hyper-V Server will begin automatically.
3.When finished, reboot the computer.
4.When the computer restarts, use the management interface to configure the network settings for that computer.
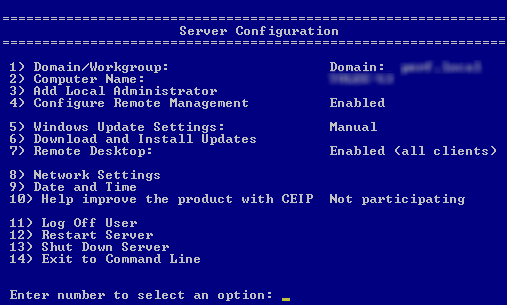
Define the following items according to your site’s networking requirements:
|
wDomain/Workgroup |
wComputer Name |
|
wWindows Update Settings |
wDownload and Install Updates |
|
wNetwork Settings |
wDate and Time |
All of the other items are optional.
5.From a computer that has Windows Server 2012 with the Hyper-V Role installed, open Hyper-V Manager.

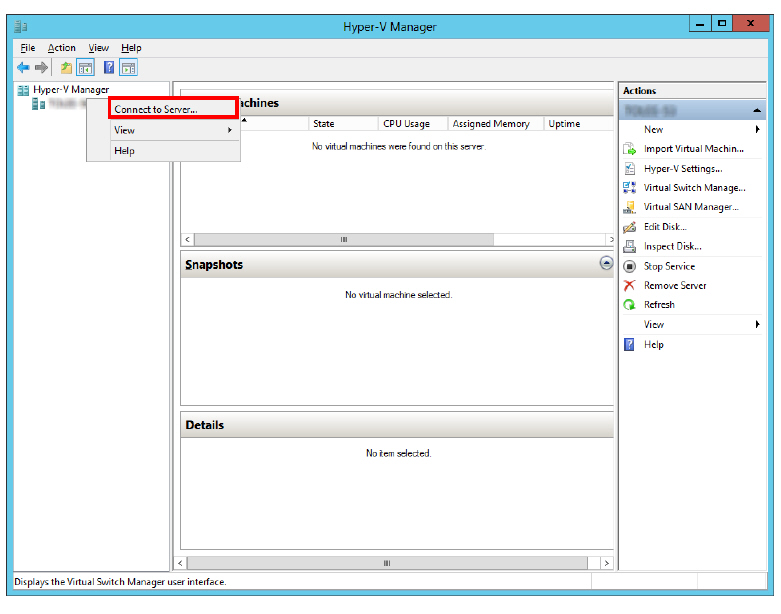
6.Right-click Hyper-V Manager in the left-hand pane and select Connect to Server... from the dropdown menu.
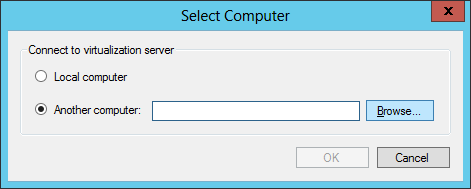
7.When prompted, select Another computer. In the space provided, enter the IP Address or the name of the Hyper-V Server machine. Click OK.
8.The server will appear on the list on the Hyper-V Manager main page. Follow the instructions for creating a virtual environment as outlined beginning on here.
|
Note: The Hyper-V server management interface is only used to configure the domain and perform other network setup procedures on that computer. All of the virtual environments are managed using the Windows Server 2012 machine. |