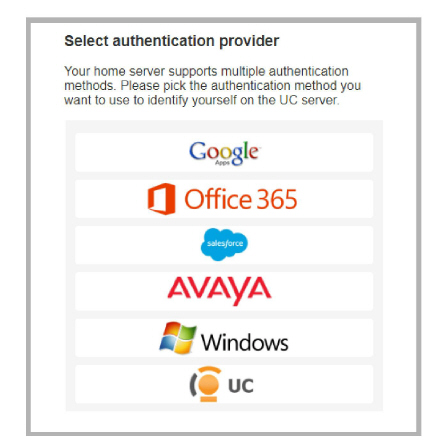
Logging in to Avaya Messaging applications (Web Admin, Web Access, Web Reports and Avaya Messaging Admin) is handled using a 3rd party authentication provider, such as Salesforce, Google, Office 365 or Windows. This Single Sign-On process let’s clients use their credentials from the other applications to access Avaya Messaging. This is known as Legacy SSO.
Clients open an application, are passed through Avaya Messaging and then onto the provider. The client’s credentials are authenticated by the provider and access is granted.
The preferred method for authentication is Hybrid SSO as it offers a higher level of security for your connections by adding a certificate validation layer. The Voice Server, or the Consolidated Server in a High Availability environment, is authenticated on the Avaya licensing server through a certificate enabled handshake. The client then uses whichever login credentials they have available to complete the connection from their current location.
Clients open an application and are passed through to Avaya Messaging. If the connection to the accounts.avayacloud.com server has been validated by the certificate, the login request is sent to the provider for authentication. If either the connection is not valid, or if the client’s credentials are incorrect, then access is denied.
|
Important: The Hybrid SSO login procedure requires an active Internet connection. Only Legacy SSO can be used if Internet access is disabled / locked-down (i.e. at high security, isolated sites). |
A the end of the installation routine, you are asked to select the SSO method to employ.
To use the Legacy SSO login method:
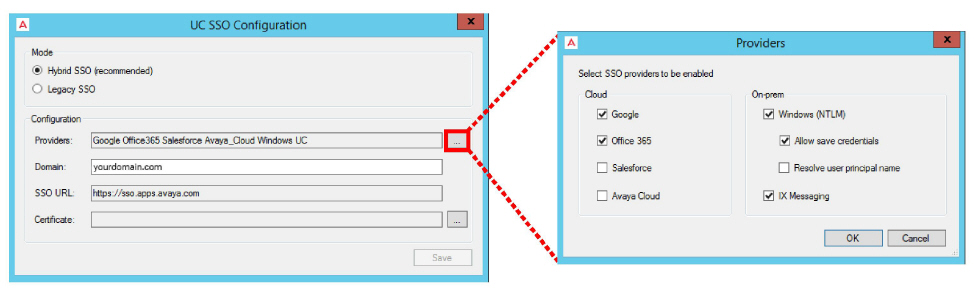
•On the SSO Configuration screen, enable Legacy SSO.
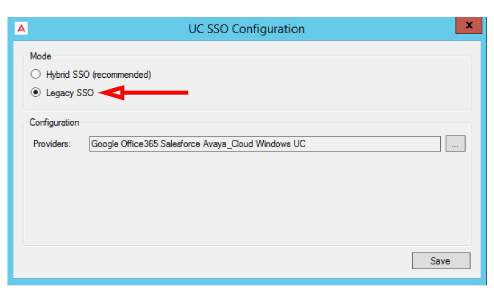
•From the Providers dropdown menu, enable the authentication providers that you want your clients to use to access Web Admin, Web Access, Web Reports and Avaya Messaging Admin. Items that are disabled will not appear during login.
Filling out these fields is optional and only required if you make use of OAuth2 when connecting to these providers.
•Client Id: Enter the OAuth2 client ID for the provider you have chosen.
•Client Secret: Enter the OAuth2 client secret value for the provider you have chosen.
•Redirect URL: Enter the URL for your company given by the provider you have chosen.
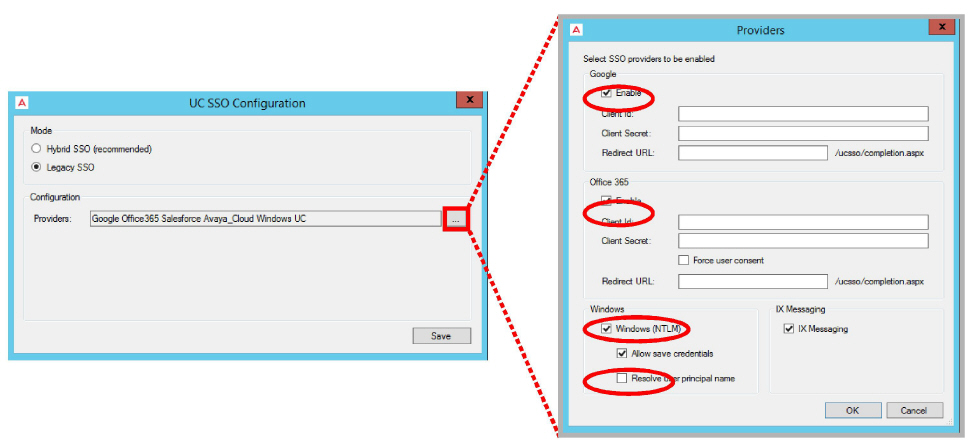
Resolve user principal name: When logging in to Windows, you must provide both the domain or computer name and a username (e.g. salesdomain\brian or mycomputer\bob). When Resolve user principal name is enabled, enter these details in the form userName@domain (e.g. [email protected]). This format must be used throughout the program wherever SSO login details are required to access other applications.
•Enable all that apply, then click OK.
•Click Save when finished.
|
Important: The Hybrid SSO login procedure requires an active Internet connection. Only Legacy SSO can be used if Internet access is disabled / locked-down (i.e. at high security or isolated sites). |
To use the Hybrid SSO authentication method:
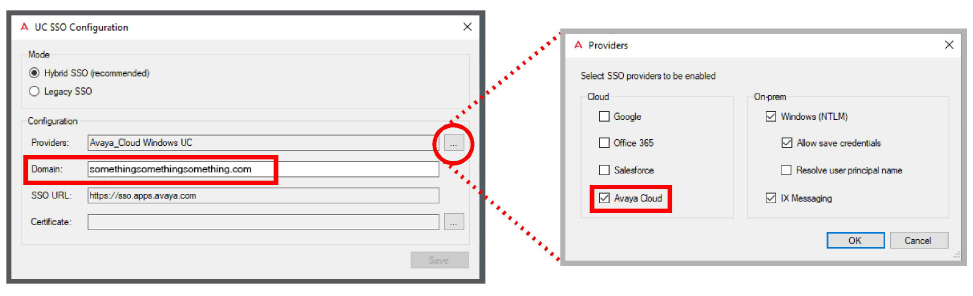
•On the SSO Configuration screen, enable Hybrid SSO.
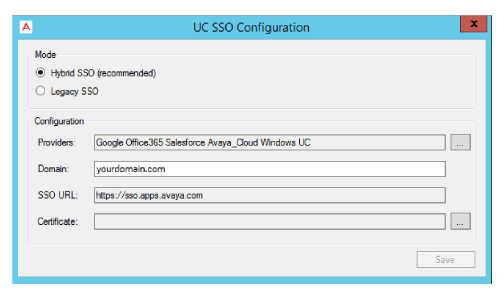
•From the Providers dropdown menu, enable the authentication credentials that you want your clients to use to access Web Admin, Web Access, Web Reports and Avaya Messaging Admin. Items that are disabled will not appear during login.
Enable all that apply, then click OK.
Resolve user principal name: When logging in to Windows, you must provide both the domain or computer name and a username (e.g. salesdomain\jcarter or posSystem\rosier). When Resolve user principal name is enabled, enter these details in the form userName@domain (e.g. [email protected]). This format must be used throughout the program wherever login details are required to access other applications.
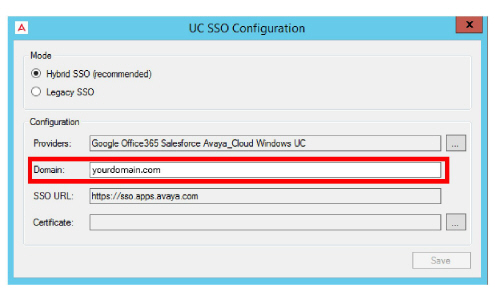
•Enter the domain name where your Voice / Consolidated server is located in the space provided.
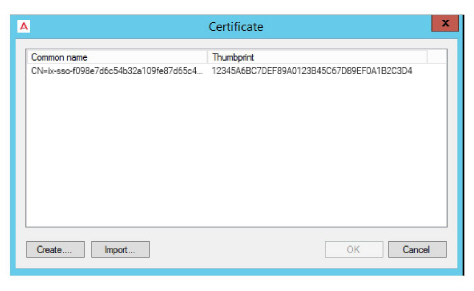
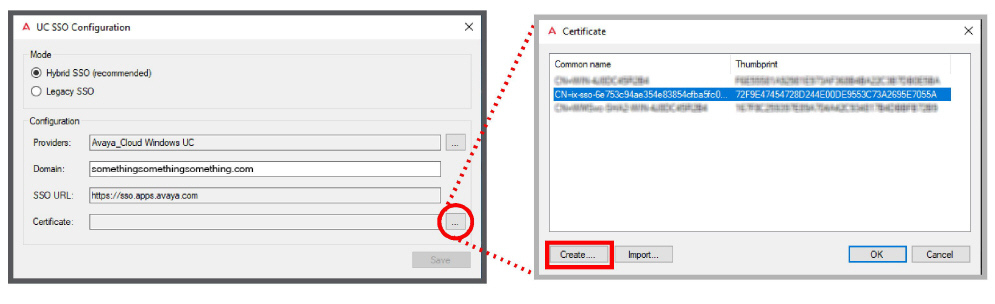
•A certificate is required when using Hybrid SSO. Click the button to the right side of the Certificate field.
Choose Create to have Avaya Messaging build a certificate for you. Or if you have a certificate in PFX format that you would rather use, click Import and select that file instead.
Select the certificate to use, then click OK.
•Once back at the SSO Providers screen, click Save.
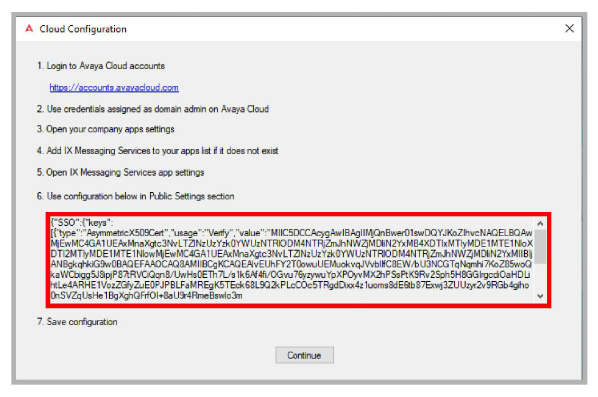
•Follow the instructions on this window to complete the installation.

1.Click the link, or enter the URL into the address bar of a web browser to open the Avaya Cloud Accounts site.
2.Login using credentials for an account with administrator rights to the domain.
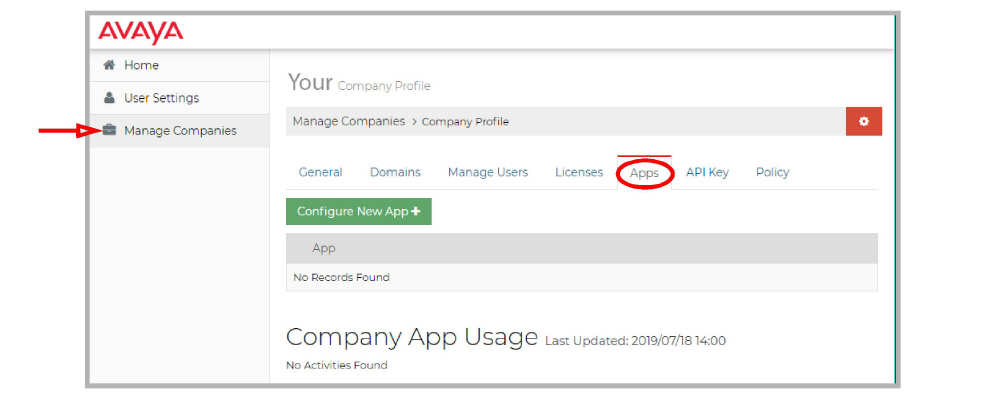
3.Go to Manage Companies, select a company (if more than one), and open the Apps tab.
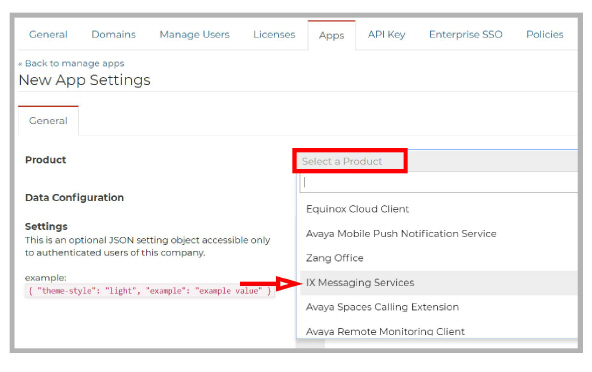
4.Click Configure New App+. On the Product dropdown menu, select IX Messaging Services.
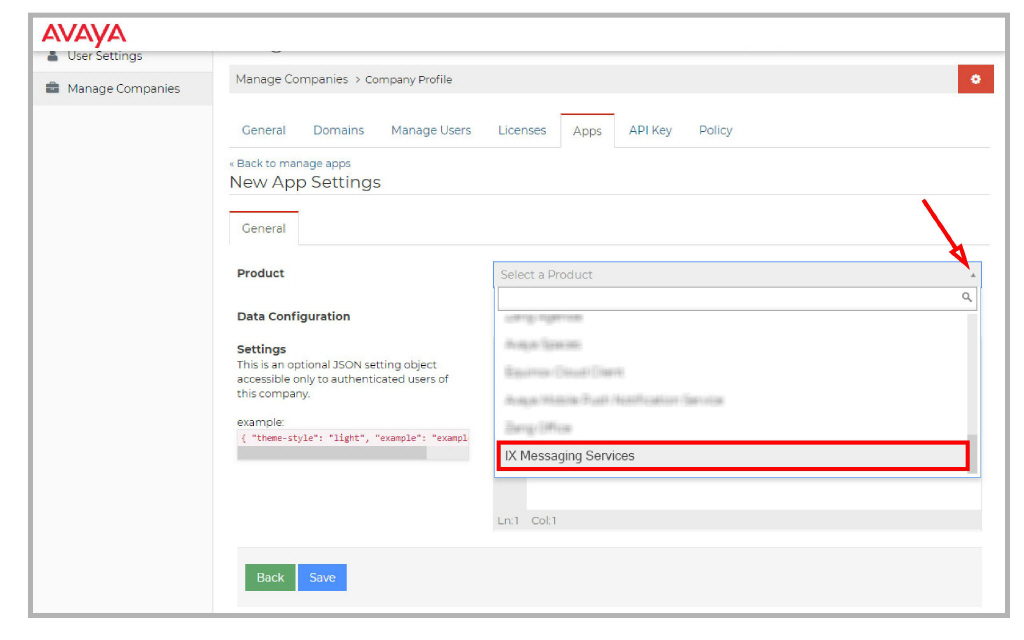
5.You should land on the IX Messaging Services Application Settings page.
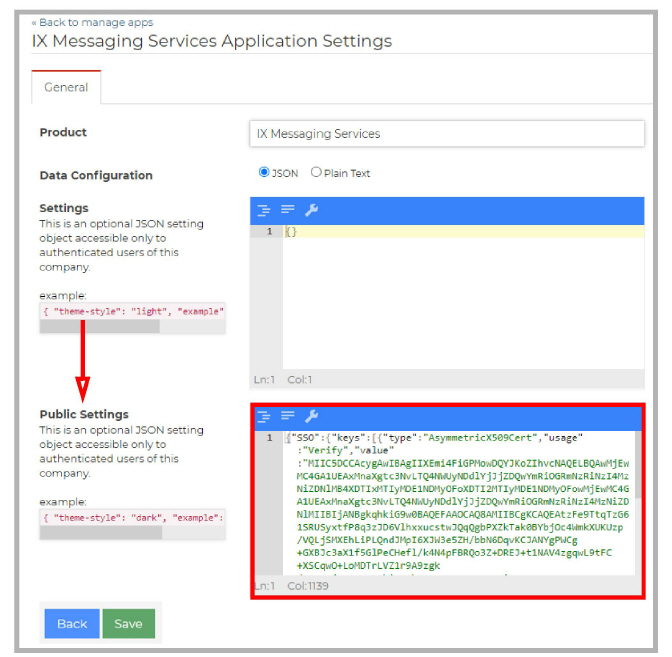
6.Ensure that the option for JSON is enabled then scroll down to Public Settings. Copy the string from the Cloud Configuration panel and paste it into the space provided.
|
Caution: Be careful to copy the entire string from the Cloud Configuration panel. It may extend below the bottom of the pane. |
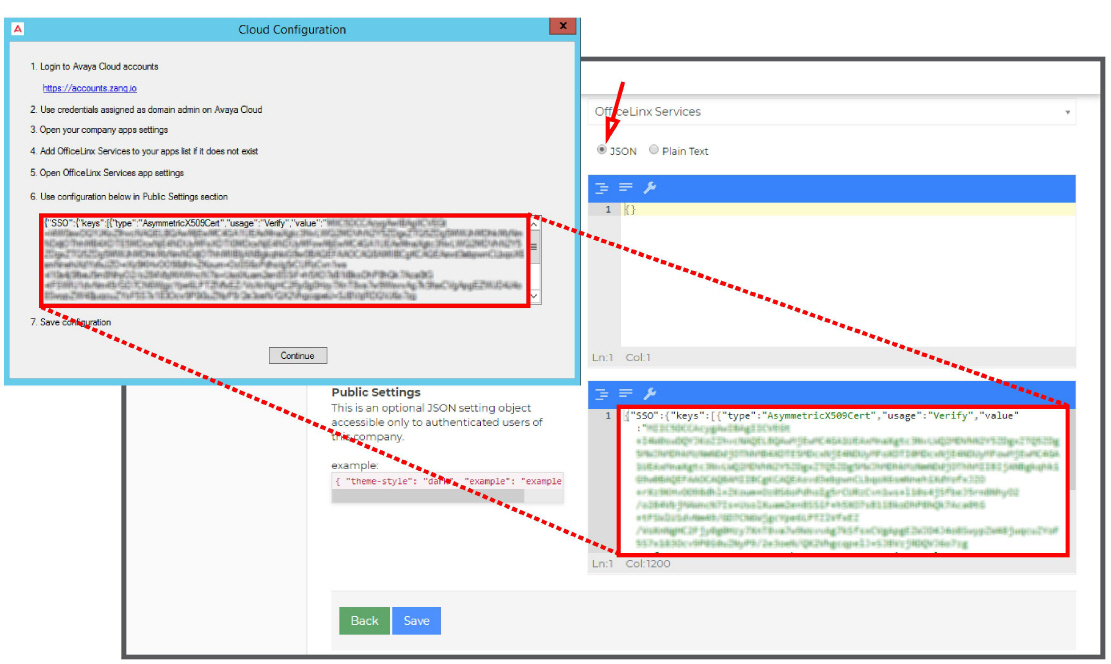
7.Click Save when ready. Returning to the Cloud Configuration panel, click Continue to complete the Hybrid SSO configuration.
As long as the strings on both the Voice / Consolidated server and the Avaya Cloud server match, users will be able to access the applications using their available credentials.
If these strings are not the same, then users will not be able to login using any credentials.
|
Important: The Hybrid SAML SSO login procedure requires an active Internet connection. Only Legacy SSO can be used if Internet access is disabled / locked-down (i.e. at high security or isolated sites). |
|
Warning: Hybrid SAML SSO has not been validated for JITC compliance. |
To use the Hybrid SAML SSO authentication method:
Configure Hybrid SSO on Avaya Messaging
1.On the installation drive, run the UC\SSO\UCSConfig.exe utility.
For an HA system, run the utility on the Primary Consolidated server.
2.Enable Hybrid SSO, select Avaya Cloud as the SSO provider, and enter a domain.
3.Beside the Certificate field, click the ellipsis ... . Click the Create … button to make a new certificate.
Click OK.
4.Click Save.
5.Copy the configuration string and save it in a safe place. It will be used when configuring the accounts.avayacloud.com portal (step 3 below).
Configure Hybrid SSO on Avaya Cloud
1.Login into accounts.avayacloud.com.
2.Open Manage Companies and select a company. Go to Apps > IX Messaging Services.
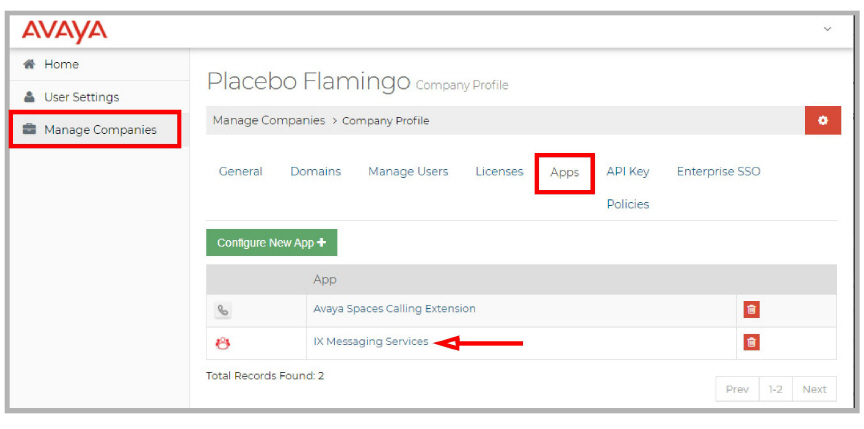
If IX Messaging Services is missing, click Configure New App.
From the Select a Product dropdown menu, choose IX Messaging Services and click Save.
3.Paste the configuration string from step 5 above into the Public Settings text field, then click Save.
Custom SAML application for Enterprise SSO
This example uses Google Workspaces as the Identity Provider.
Refer to the documentation for your Identity Provider for site specific details.
1.Login into the Google Admin Console (admin.google.com).
Go to Apps > Web and mobile apps.
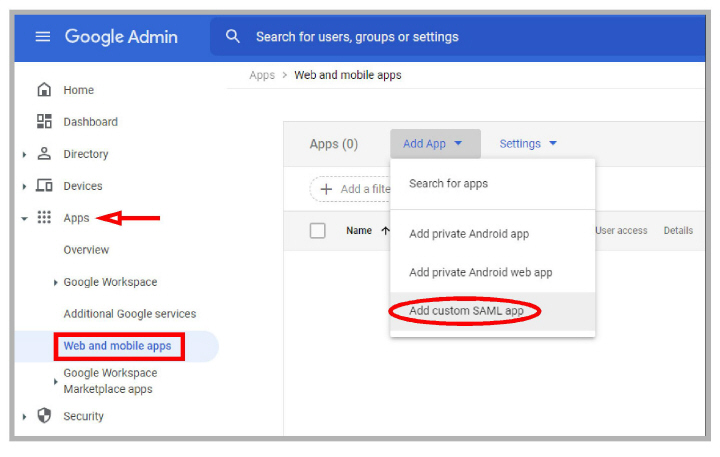
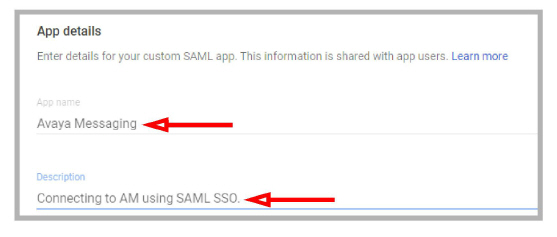
1.Open Add App and select Add custom SAML app. Provide an App name and a description.
When ready, click Continue.
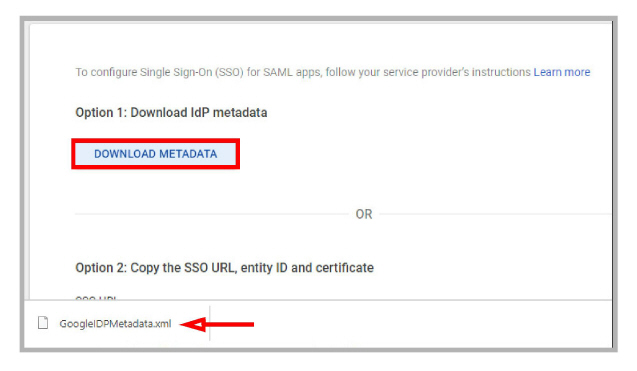
2.Click the Download Metadata button to save the xml file to your drive.
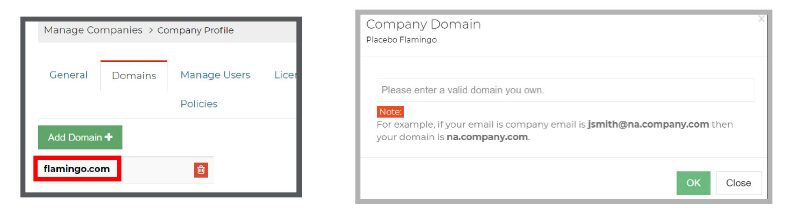
3.Return to accounts.avayacloud.com and go to Manage Companies > Company Profile > Domains.
If no domain has been configured, click Add Domain to configure a new domain for this company.
After the domain has been added, a prompt will appear asking you to verify the domain. This can only be accomplished by the System Administrator.
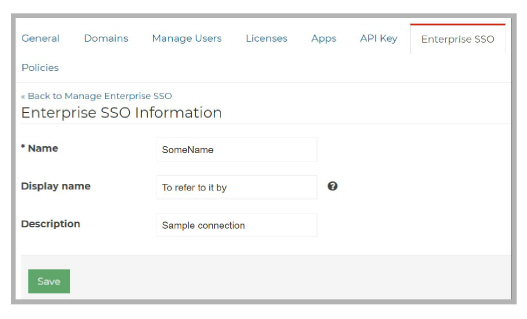
4.Under Manage Companies > Company Profile > Enterprise SSO choose Add an Enterprise SSO.
Enter a Name, Display name and a Description for this connection, then click Save.
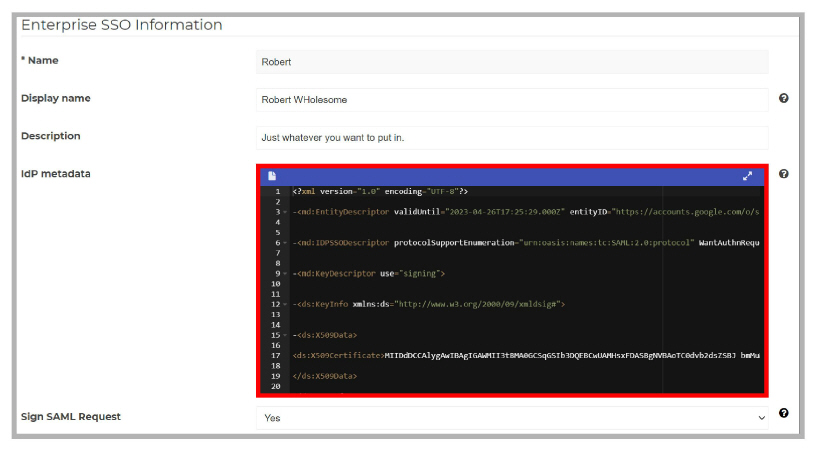
5.The IdP metadata field appears. Copy and paste the contents of the Google Workspace IdP metadata xml file saved ealier (step 2) into the space provided, then click Save.
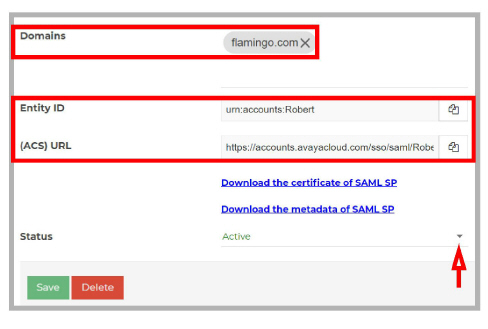
6.Open the Domains tab and select the domain from Manage Companies > Company Profile > Domains.
Set Status to Active and copy the details from the Entity ID and ACS URL fields.
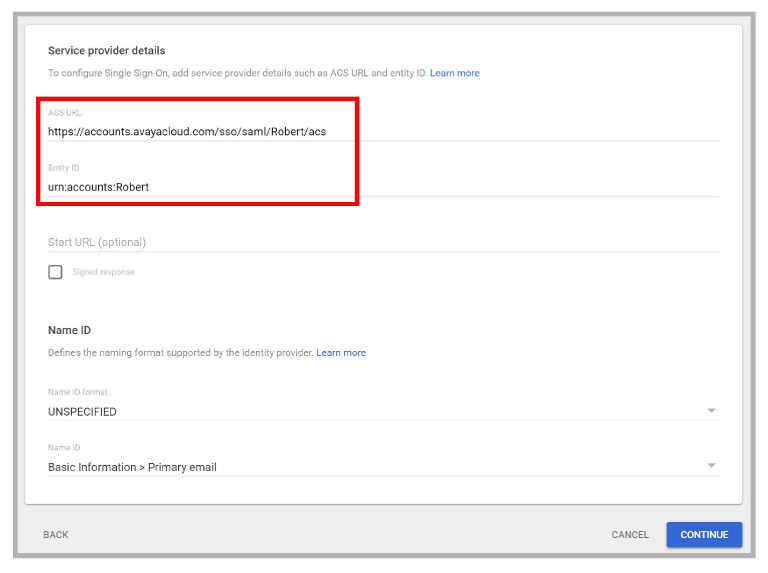
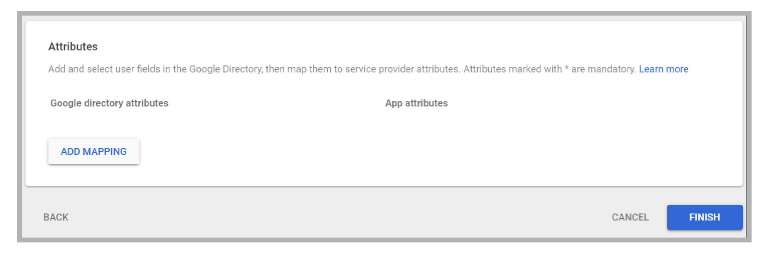
7.Return to the Google Admin Console and click Continue to open the Service provider details form.
Paste the ACS URL and the Entity ID values into the corresponding fields.
Click Continue.
8.Click Finish to complete the IdP setup.
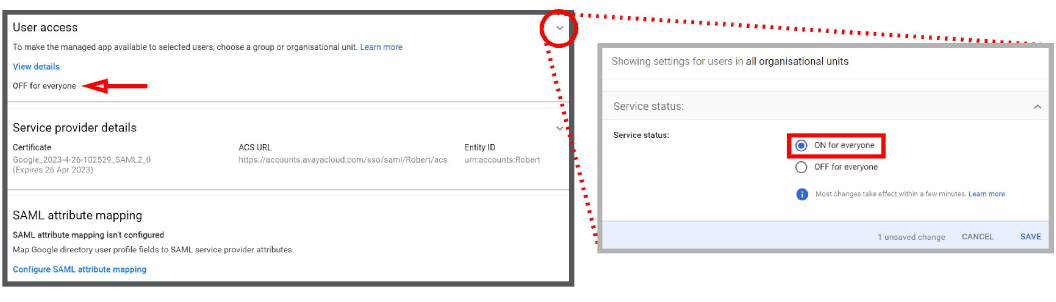
9.User access is OFF by default. Click the User access arrow and enable On for everyone, then click Save.
10.Return to the Enterprise SSO tab of accounts.avayacloud.com.
Click the Test button to verify that the configuration is working.
In this example, if everything is configured correctly, the Google sign-in page will appear.
When integrating with a customer’s identity provider, the customer’s enterprise SSO login page will appear instead.
Test the setup with a user’s credentials.
If the configuration and the credentials are correct, there will be a SAML response referencing the email address entered.
Verification: Avaya Messaging Web Access SSO login
Make sure that:
•The Avaya Messaging Web page is accessible.
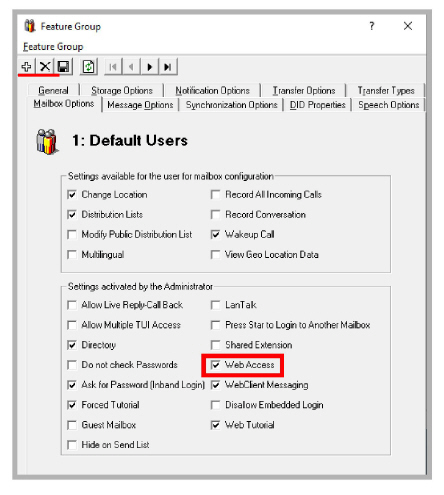
•Web Access is enabled under Feature Group > Mailbox Options.
•Web Client User is enabled, and the Domain Account Name is entered under Mailbox > Advanced.
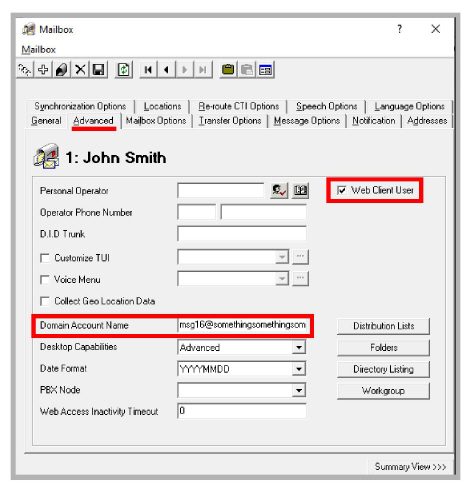
The user should be added to both Avaya Messaging server and accounts.avayacloud.com.
For this example, the mailbox user is associated with Google Workspaces account msg16.
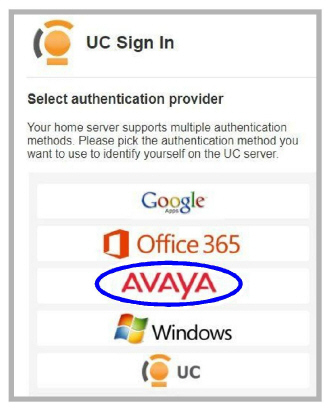
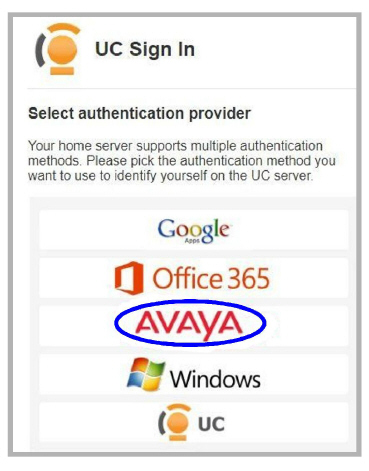
1.Open Avaya Messaging Web Access. At the login screen, choose Avaya as the authentication provider.
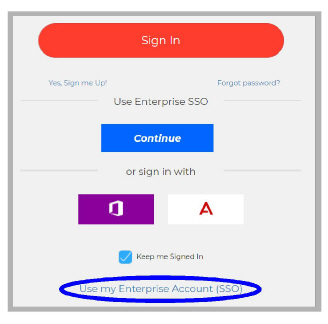
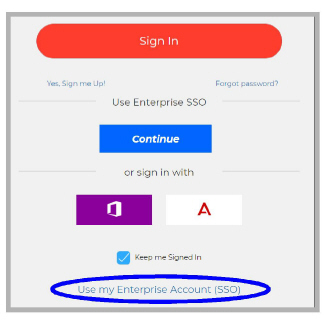
2.Click Use my Enterprise Account (SSO).
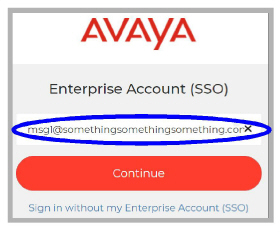
3.Enter the Domain account name for the email address. In this example, it is msg16.
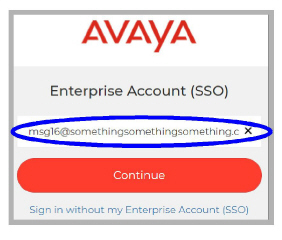
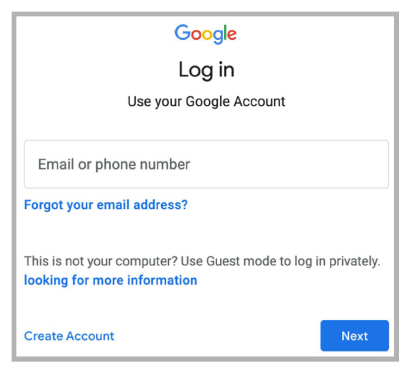
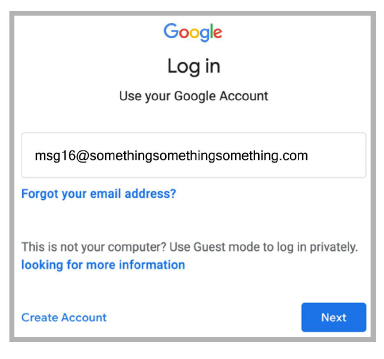
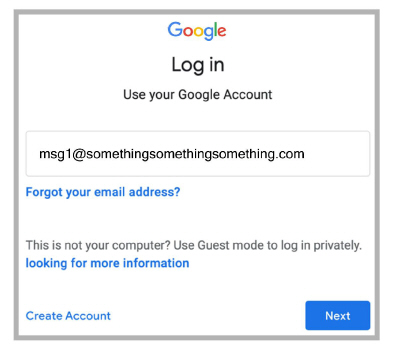
4.You will be redirected to the Google sign-in page. Click Next.
5.Accounts.avayacloud.com confirms a successful Enterprise SSO login.
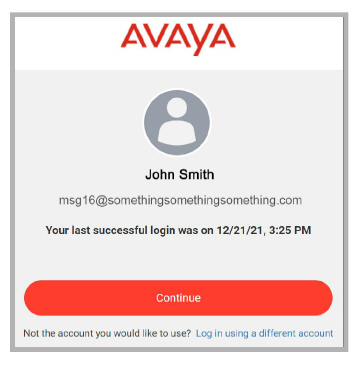
The browser will open the Web Access program.
Verification: Avaya Messaging Web Admin SSO login
Verify that the Domain Account has been defined.
1.Open the MMC admin console and go to Configuration > User Manager.
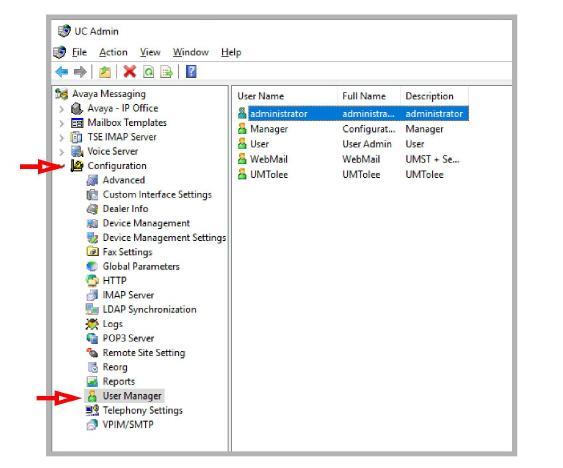
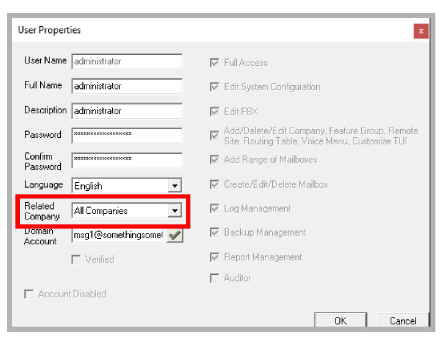
2.Double-click administrator, then enter the Domain Account name in the space provided.
In this example, Google user msg1 was chosen as the messaging system administrator. Click OK.
3.Open Avaya Messaging Web Admin. At the login screen, choose Avaya as the authentication provider.
4.Click Use my Enterprise Account (SSO).
5.Enter the Domain account name for the email address. In this example, it is msg1.
6.You will be redirected to the Google sign-in page. Click Next.
7.Accounts.avayacloud.com confirms a successful Enterprise SSO login.
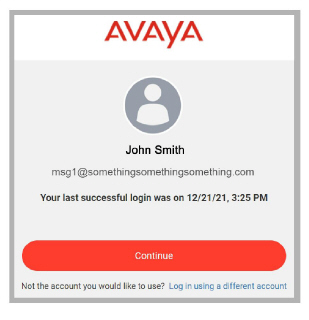
The browser will open the Web Admin program.
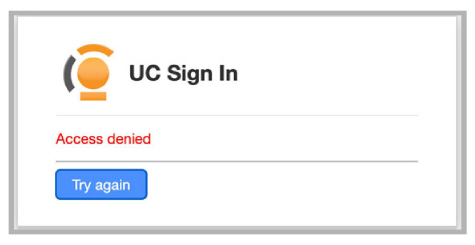
For an SSO login other than msg1, access to Web Admin will be denied.
Verification: Avaya Messaging Web Report SSO login
After completing the setup for Web Admin, the administrator can also login to Web Reports.
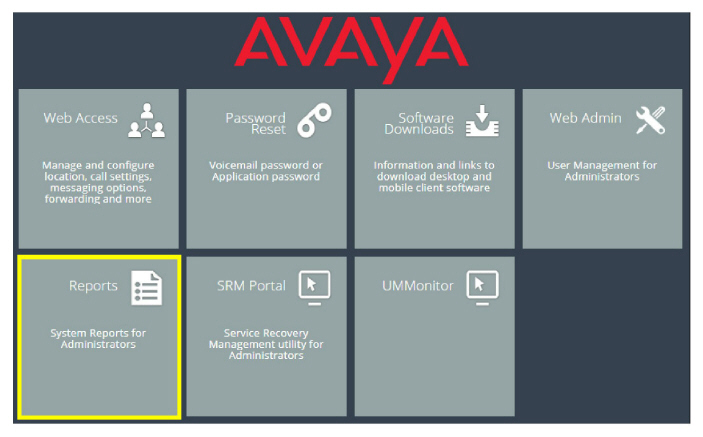
1.Open the Avaya Messaging Web portal and click Reports.
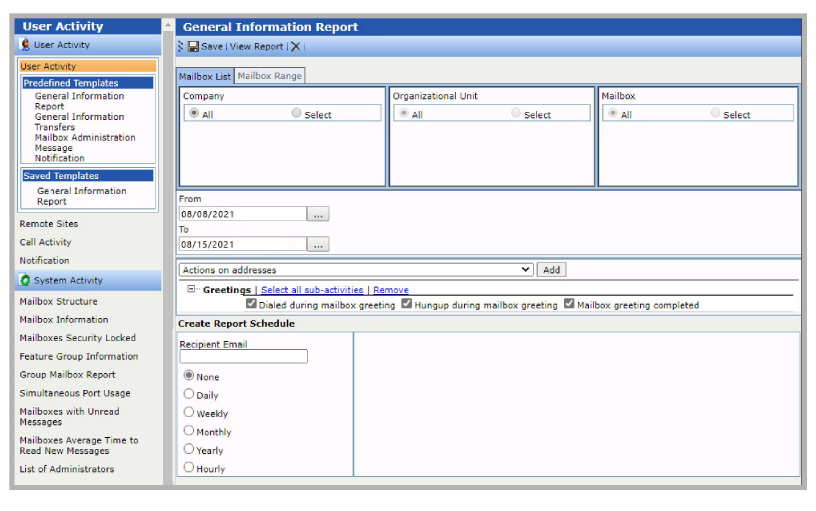
2.The administrator account automatically logs into the Web Reports utility if the user has already signed into the associated Google profile. If not, the SSO login screen will appear.
Avaya: SAML configuration
https://accounts.avayacloud.com/helps/en/saml_sp/#saml-configuration
Avaya: SAML configuration troubleshooting
https://accounts.avayacloud.com/helps/en/saml_sp/#troubleshoot