Messaging to Office 365 Integration with EWS
Depending upon your site’s requirements and software, you have the option to integrate Avaya Messaging with several email systems. None of these are required. Where appropriate, refer to the chapter that best suites your requirements.
|
Chapter |
Integration |
Why you want it |
|---|---|---|
|
|
Creates a secure connection through OAuth2 to your Gmail and Google Apps accounts. |
|
|
Exchange using EWS |
The simplest connection between your Exchange server and IXM. |
|
|
Exchange without EWS |
A connection between Exchange and IXM for legacy systems. |
|
|
Exchange 2010 |
A connection between Exchange 2010 and IXM. |
|
|
Office 365 using Graph |
Setup the latest high security integration procedures for maximum data integrity. |
|
|
Office 365 using EWS |
Quick connection between your O365 server and IXM. |
This configuration note describes the implementation of unified messaging between Office 365 and Avaya’s Messaging.
|
Warning: The instructions found in this guide cannot be guaranteed to work for all installations since each site is unique. Some problems may arise even if you follow these instructions precisely. Therefore, use this document as a reference for your own configuration, making the changes appropriate to your site's specific requirements. |
|
Note: This document describes the standard configuration for the integration of Avaya Messaging with Microsoft Office 365. For a high security connection, such as for sites requiring JITC compliance, please contact your vendor to purchase Professional Services support. |
The following preliminary steps must be completed before the integration can begin:
•The Office 365 domain has been setup and deployed (requires Midsize Business and Enterprise plan minimum, E1 or E3).
•Messaging Server installed and running (refer to Avaya’s documentation web site), either in a single server configuration, or in a High Availability environment (1 Consolidated server, 1 Primary server, 1+ Secondary servers).
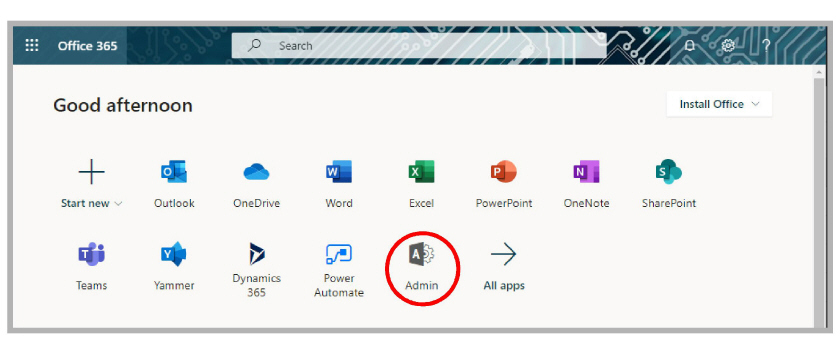
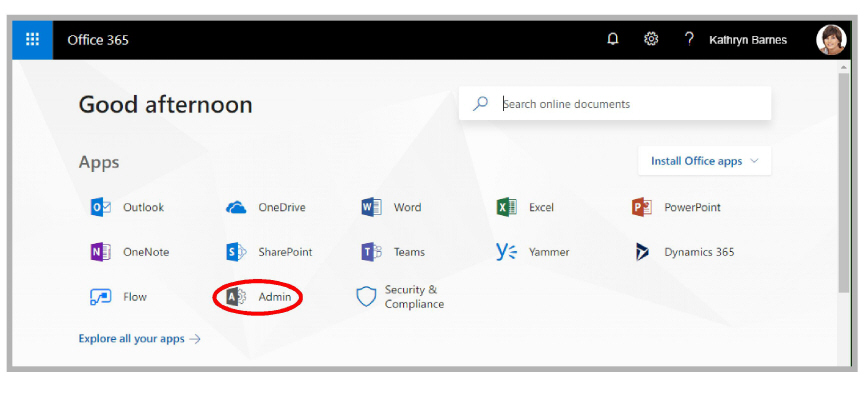
1.Log into the Office 365 Administration interface through a web browser at https://login.microsoftonline.com/ or similar as setup by your administrator.
Click Admin.
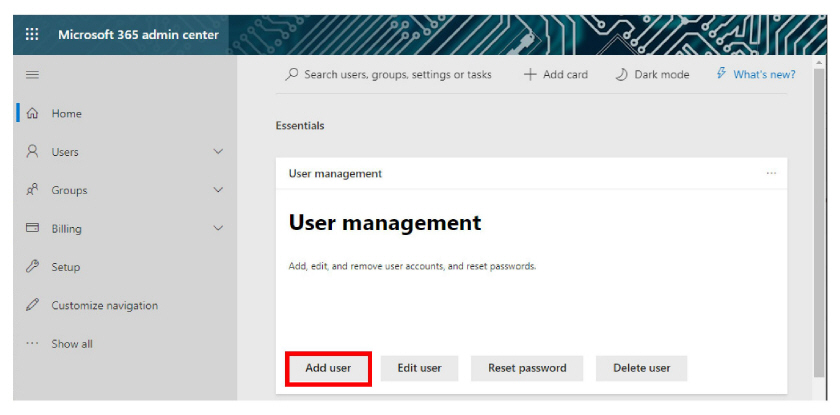
2.Under User Management, select Add User.
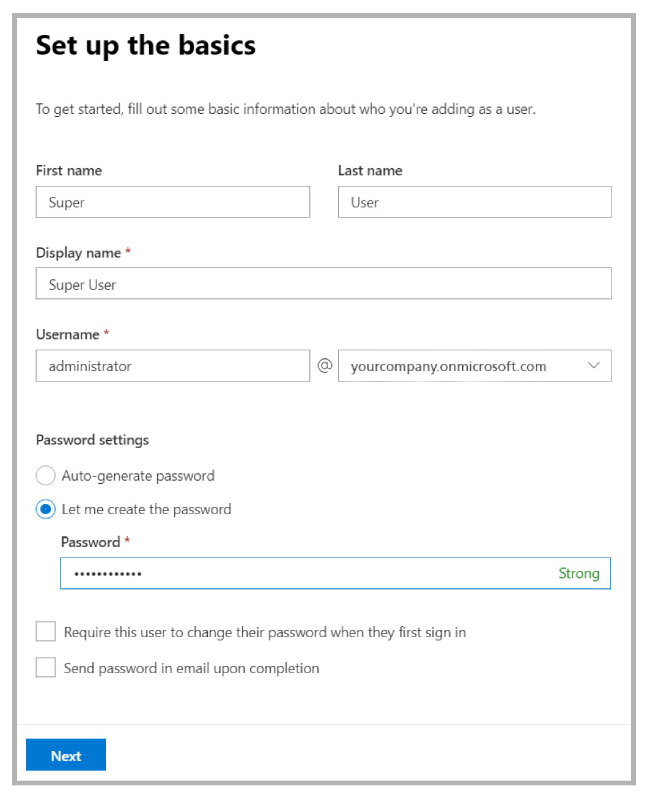
3.Enter a first and last name, display name, the username and password for the superuser (service) account.
Click Next.
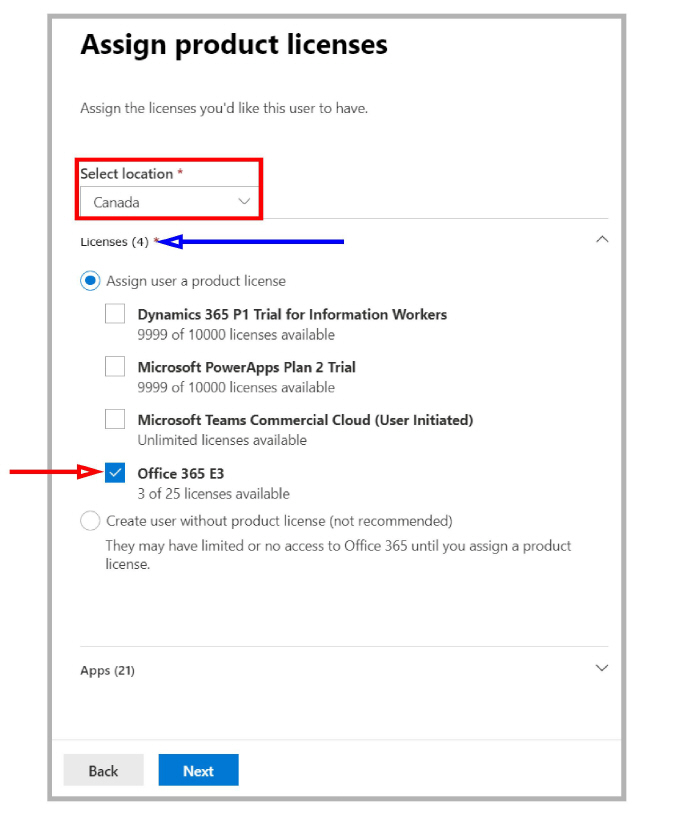
4.Set the user’s geographic location on the dropdown list. Under Assign a Product License, select Office 365 E3.
When ready, click Next.
|
Note: A license must be available on your system for you add this user. If all licenses are already in use, delete one, or purchase additional licenses for this user. |
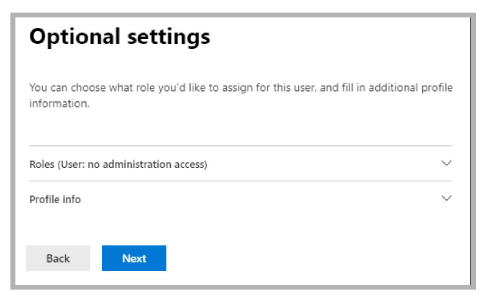
5.Make no changes here, and click Next.
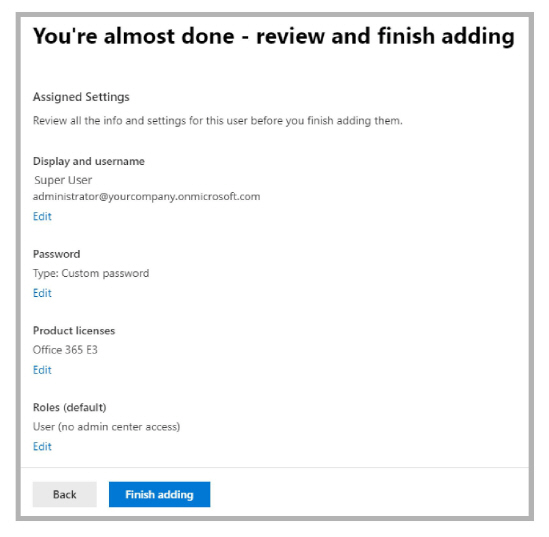
6.Review the user settings. If everything is correct, click Finish adding.
If some elements need to change, click the Edit link beneath the incorrect item.
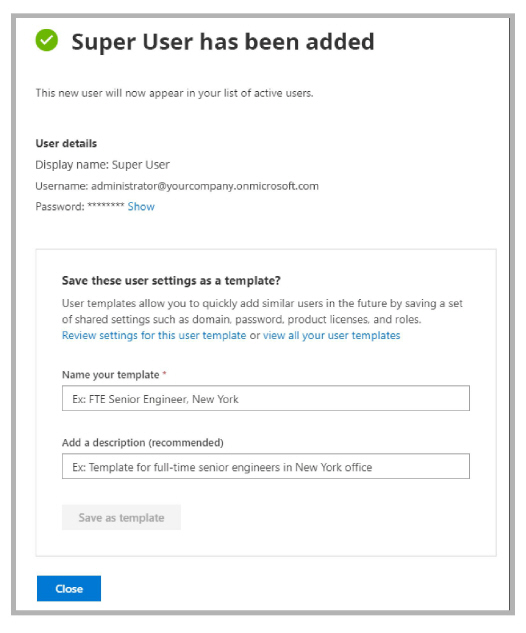
7.The user has been created. Click Close.
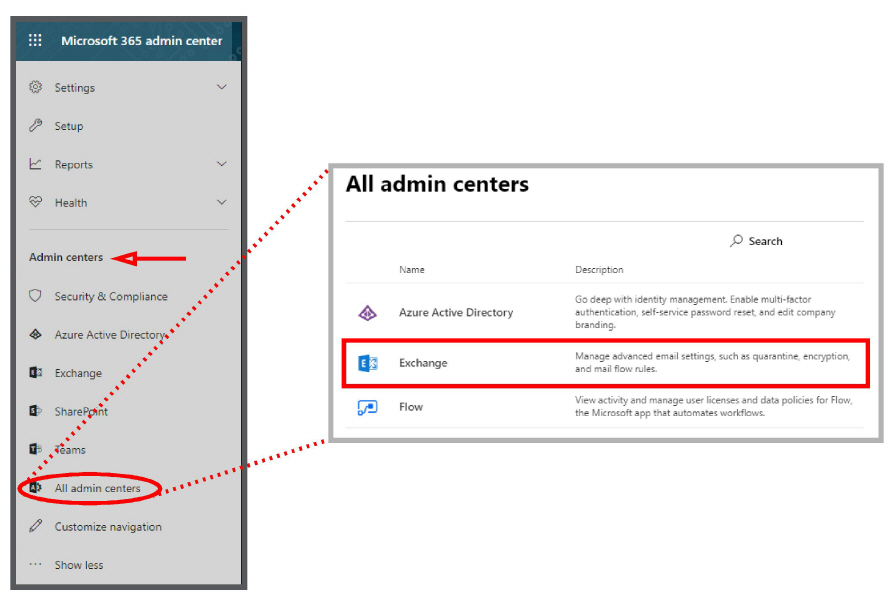
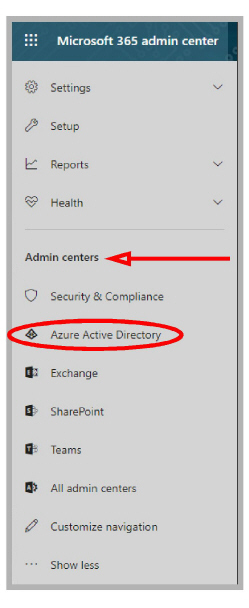
8.In the left-hand panel (Show All), under Admin centers, select All Admin Centers.
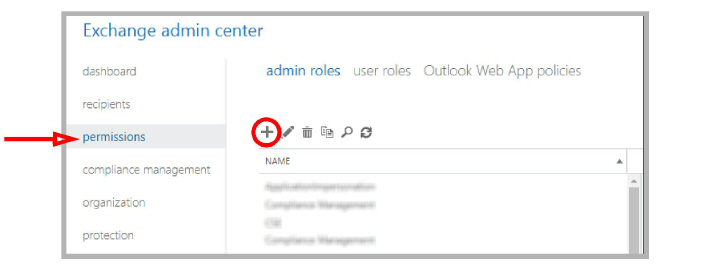
From the list of applications, click Exchange.
9.Select Permissions in the left-hand pane. Click New ![]() .
.
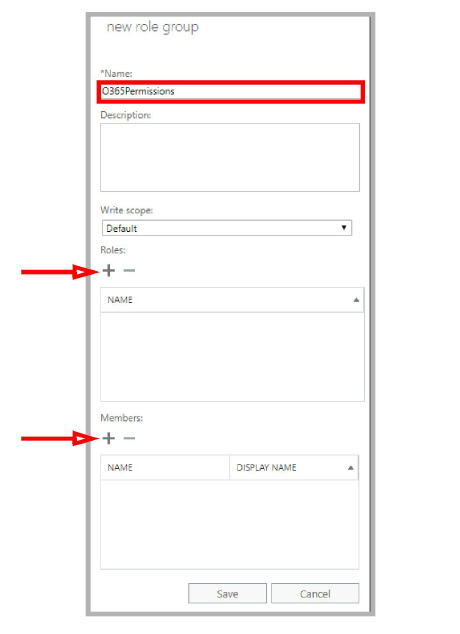
10.Give the Role a name (a Description is optional). Beside Roles, click Add ![]() .
.
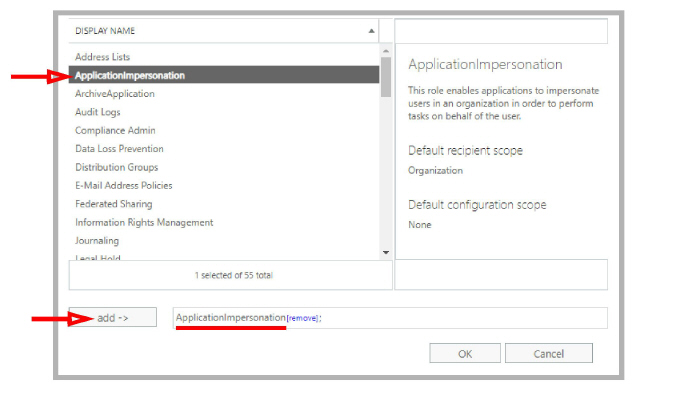
11.Select ApplicationImpersonation and click add ->. Click OK.
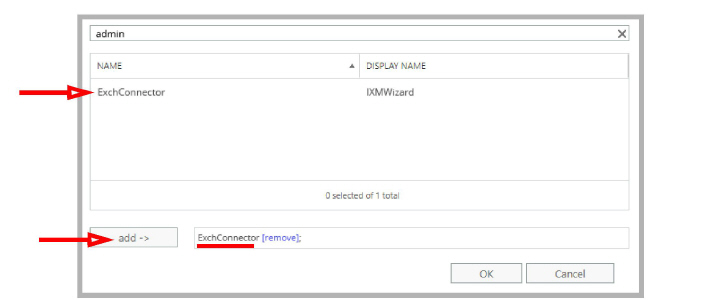
12.Below Members, click Add ![]() . Locate the account you just created, select it and click add ->. Click OK.
. Locate the account you just created, select it and click add ->. Click OK.
13.Returning to the new role group pane, click Save.
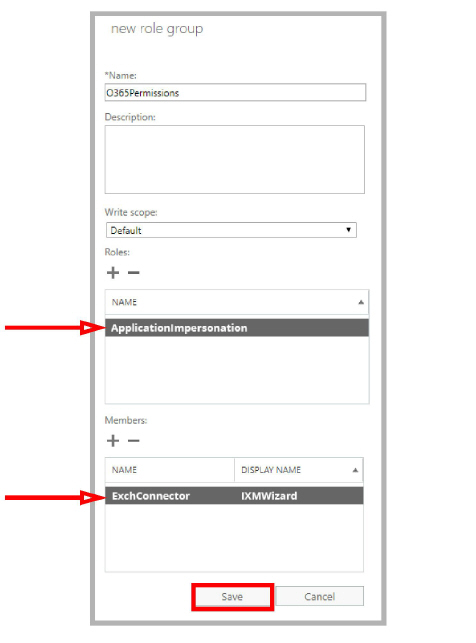
14.Confirm that the new role appears in the list.
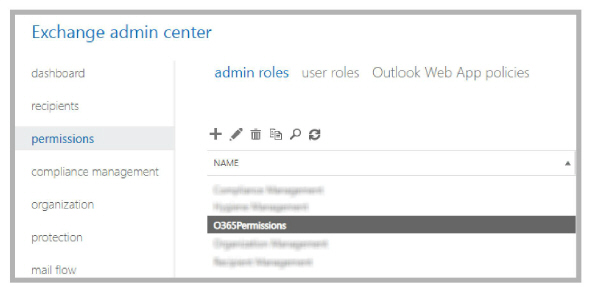
The new account has been created.
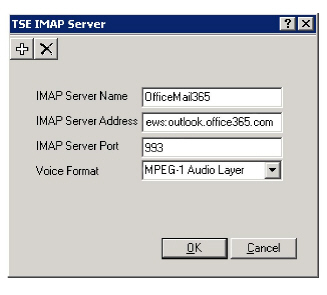
1.In Messaging Admin, add a new TSE IMAP server, and include the Office 365 server information.
IMAP Server Name: Enter a name for this connection (e.g. OfficeMail365).
IMAP Server Address: Type in ews:outlook.office365.com.
IMAP Server Port: Set to 993 to enable SSL connectivity.
Voice Format: Select MPEG-1 Audio Layer 3 (MP3) for client playback.
Click OK when ready.
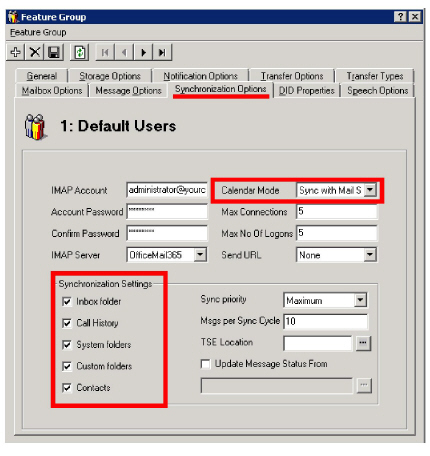
2.Once the TSE IMAP Server entry has been created, go to Feature Group > Synchronization Options and modify the Office 365 user mailboxes as follows:
IMAP Account: Enter the user/service account created in step 3 above. Include the complete [email protected] (e.g. [email protected]).
Account / Confirm Password: Enter the super user/service account password from step 3.
IMAP Server: Type in the name of the IMAP TSE Server created in the previous step (e.g. OfficeMail365).
Calendar Mode: If calendar synchronization is required, select Sync with Mail Server Calendar from the dropdown menu. Otherwise, select None.
Synchronization Settings: Set these options to specify which information will be synchronized between servers.
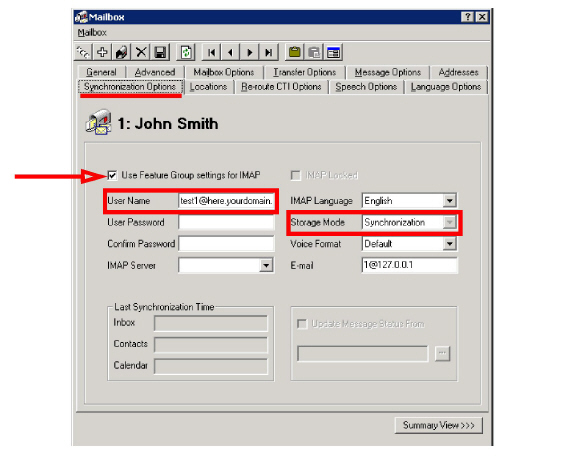
3.Ensure that individual mailboxes are configured under Mailbox > Synchronization Options with their User Name
(e.g. [email protected]), and that Use Feature Group settings for IMAP is enabled Set Storage Mode to Synchronization.
Connecting Through EWS Using OAuth 2.0
As an option, Messaging can be connected to Office 365 using Exchange Web Services. This can add an additional layer of security to your communication traffic flows. This section is not required.
|
Warning: This section contains advanced concepts and programming steps that could adversely affect operations if handled incorrectly. Read through these instruction thoroughly before proceeding. If you are not confident to follow these instructions adequately, do not continue. |
|
Note: You must have corporate Office 365 and EWS accounts for this configuration. |
|
Important: These instructions require a certificate for securing the connections. It is Strongly advised that you purchase a certificate from an Certification Authority (CA) instead of using self-signed certificates. Both a Public Key and a Private Key certificate file are required. |
1.Open a web browser and go to the Office 365 site at https://www.office.com.
Click Sign in and login using your Office 365 administrator account credentials.

2.Click Admin.
3.In the left-hand panel, open Admin centers (Show all) and select Azure Active Directory. The Azure dashboard will appear.
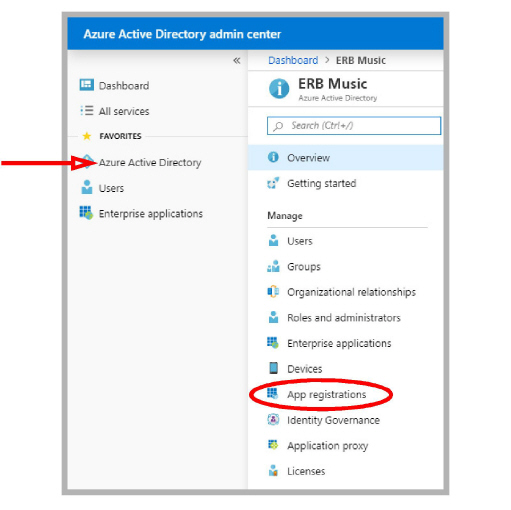
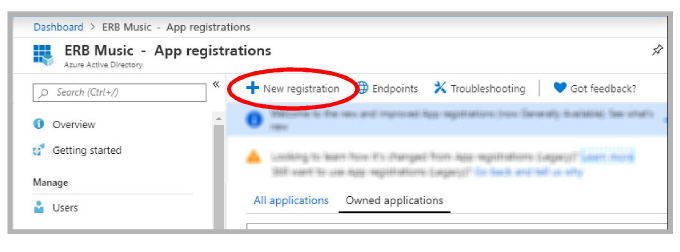
4.Click Azure Active Directory > App registrations.
5.Click New registration.
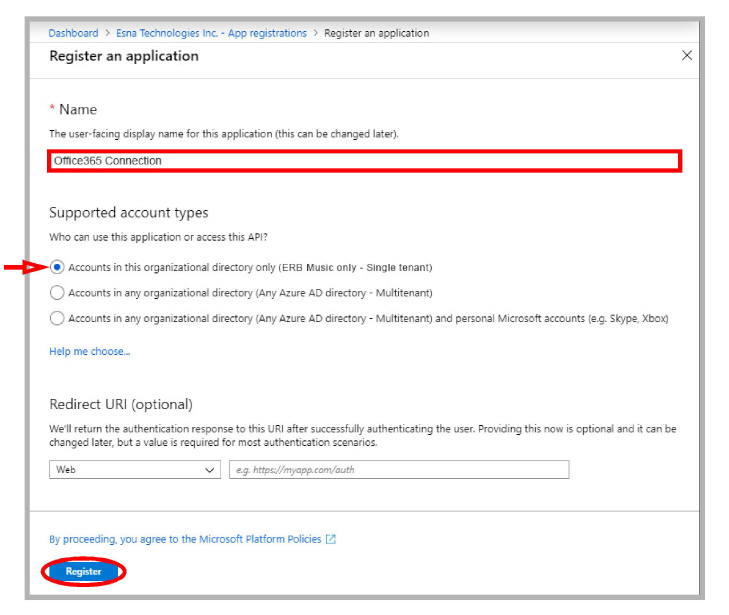
6.Provide a name for the registration. Enable Accounts in this organizational directory only. No redirect URI is required. Click Register.
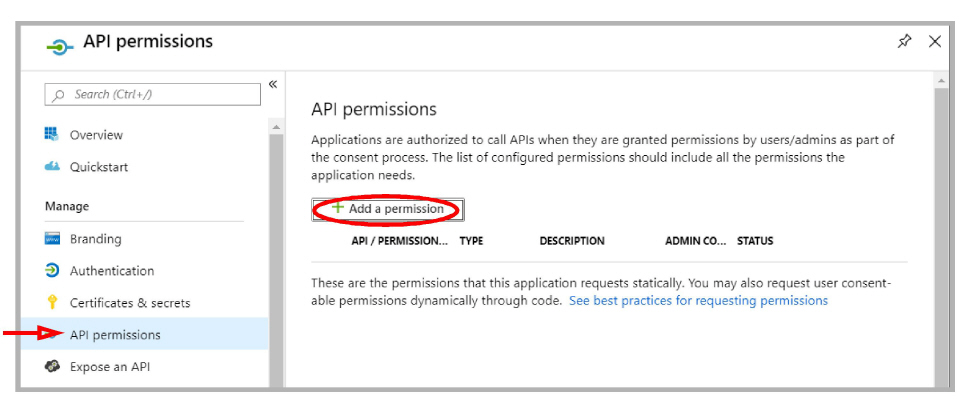
7.To configure the permissions for the application, click API permissions > Add a permission.
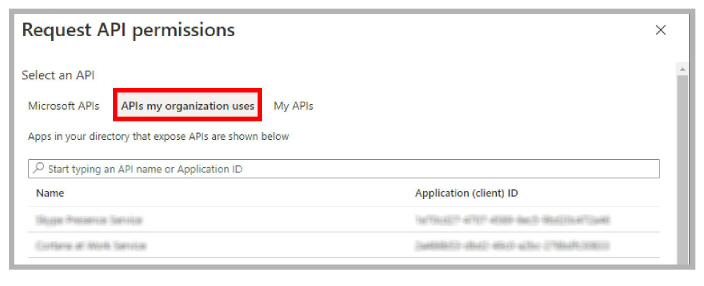
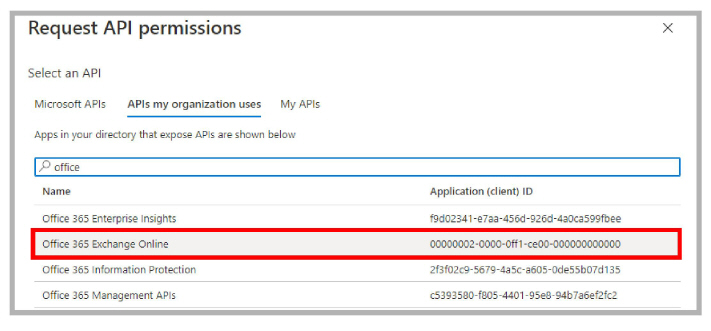
8.Under Select an API, go to the APIs my organization uses tab.
9.Find and select Office 365 Exchange Online.
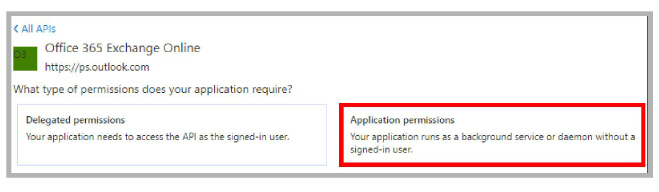
10.Click Application permissions.
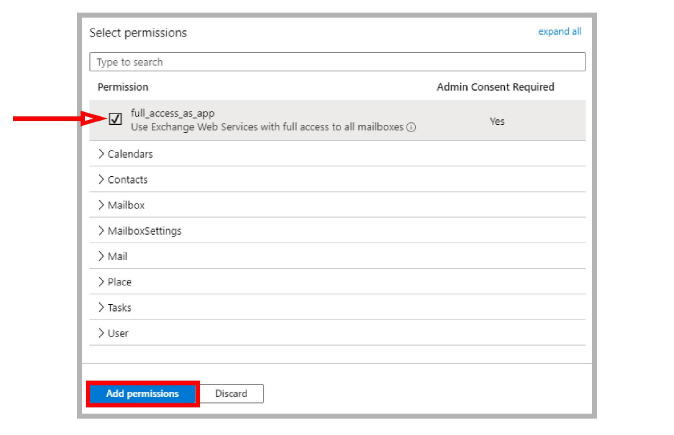
11.Enable full_access_as_app. Click Add permissions.
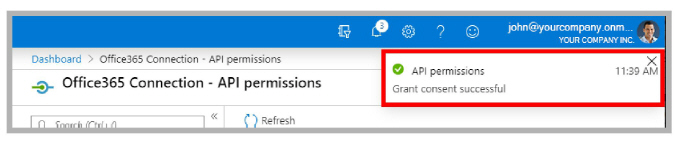
12.Wait 2-5 minutes for the updates to propagate through the system, then click Grant admin consent for... .

13.If the configuration was a success, a pop-up will appear in the upper right corner of the window.
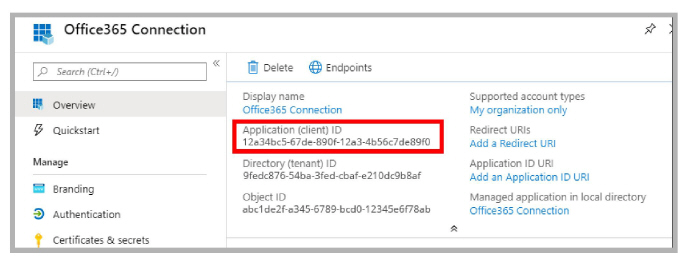
14.From the Office 365 dashboard, open Azure Active Directory > App registrations. Click the application just created.

15.Copy the Application (client) ID.
16.You will have received 2 certificate files from the Certifying Authority: one is a Public Key, the other is a Private key.
Rename the Private key. Change the extension to .p12. Replace the name of the file with the Application (client) ID value recorded in step 15.
For example: 0a987b654cd32.pfx ----> 12a34bc5-67de-890f-12a3-4b56c7de89f0.p12
Copy this file into both the UC/UCCSE and the UC/IMAPTSE folders on the IX Messaging voice server. For a site using High Availability, copy the file to the same folders on the Consolidated Server, and on all Remote CSE servers.
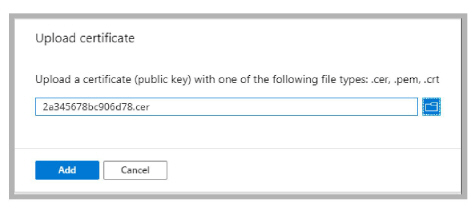
Rename the Public key. Change the extension to .cer .
For example: 2a345678bc906d78.pfx ----> 2a345678bc906d78.cer
17.Click Certificates & secrets in the left-hand pane. Select Upload certificate.
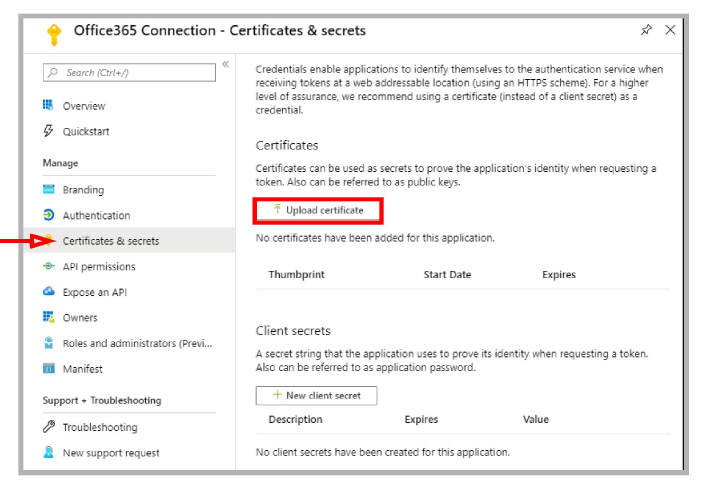
18.Click Browse ![]() and select the Public certificate file on your drive. It is the one with the .cer extension. Click Add.
and select the Public certificate file on your drive. It is the one with the .cer extension. Click Add.
19.Open UC Admin on the Voice Server. Go to the Feature Group > Synchronization Options tab.
Under IMAP Settings, configure:
IMAP Account: Enter your corporate Office 365 domain, a forward slash, then the Application (client) ID.
(e.g. yourcompanydomain.com/12a34bc5-67de-890f-12a3-4b56c7de89f0).
Account / Confirm Password: Type in the password used to secure the .p12 certificate file.
IMAP Server: Enter the name of your IMAP server.
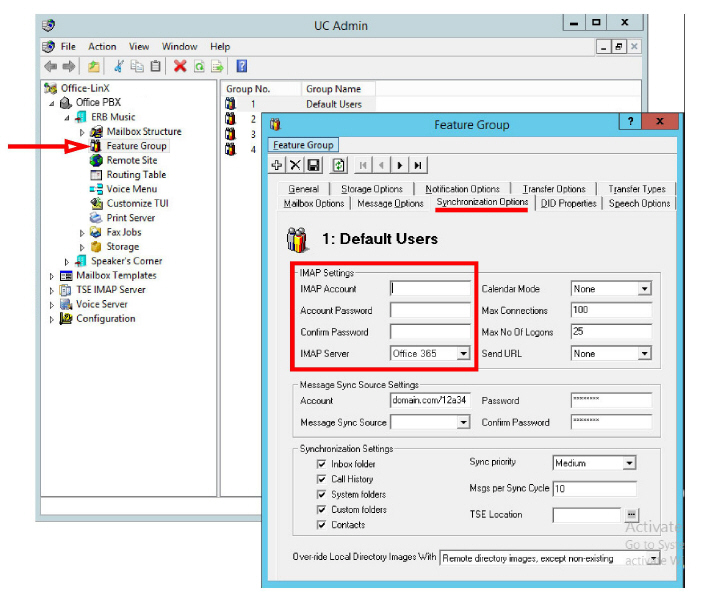
When ready, click Save.
20.In UC Admin, open Mailbox Structure. Open a person’s mailbox that will use this configuration. Go to the Synchronization Options tab.
Enable Use Feature Group settings for IMAP.
Type in the User Name for this account.
For Storage Mode, select Synchronization.
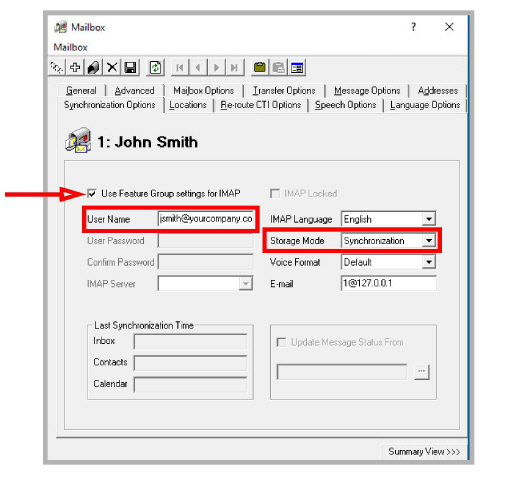
When ready, click Save.
The configuration is complete.
Once the installation has been completed, verify that the system is configured to use EWS instead of IMAP.
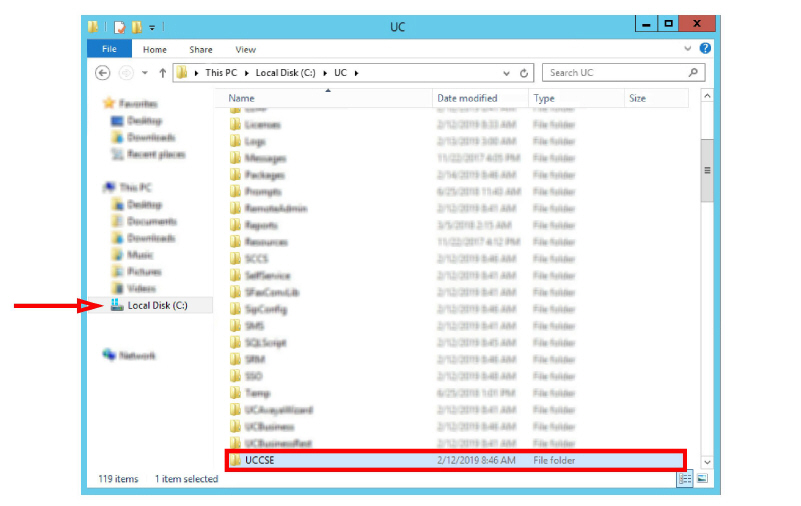
1.On a Single Server Installation, open the UC/UCCSE folder on the program installation drive.
For HA installations, this file is found on the Consolidated server in the same folder.
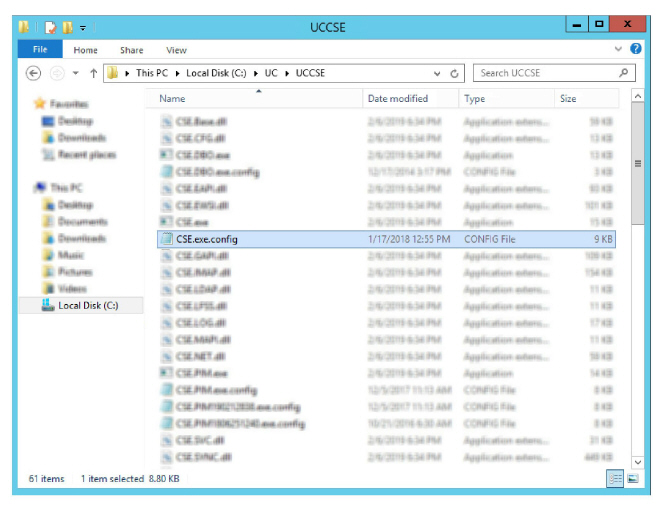
2.Within the folder, open the CSE.exe.config file in a text editor such as NotePad.

3.Scroll down to find the following lines:
<setting name=”UseEWSIMAP” serializeAs=“String”>
<value>False</value>
</setting>
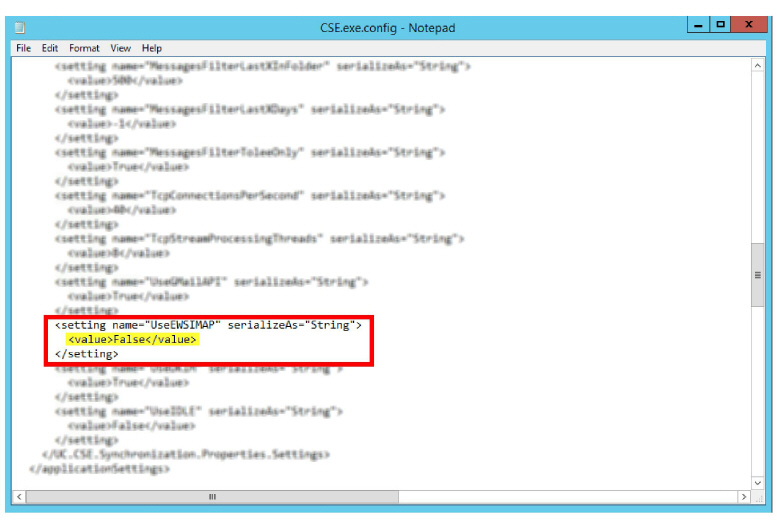
Verify that the Value is set to False. If the value is not False, retype the text and save the file to change it to the correct value.