The Messaging Remote Printer feature allows system administrators to remove printing functions from the voice server and move them to another computer. This reduces the demand on the voice server CPU allowing for greater speed and efficiency in processing voice data.
Remote Printer also permits the use of existing licenses for software that is not installed on the voice server. For example, MSOffice and Adobe Acrobat must be installed on the voice server if faxes are to be sent in any of their supported formats (doc, docx, pdf). Using Remote Printer to redirect this traffic to a machine that already has the necessary software installed removes the need for additional licenses to be consumed by the voice server.
Remote Printer is included on the DVD with the standard release of Messaging. It is installed by default as part of Messaging Admin. The Remote Printer program must be installed on the host, and the settings on the voice server must be changed to point to the host machine.
Remote Printer Host Installation and Setup
|
Note: Messaging must be installed and properly configured on the voice server before proceeding with the Remote Printer host installation. Refer to the Server Installation Guide and Server Configuration Guide for more information. |
The following instructions must be performed on the computer that is to act as the remote printer host.
1.Run the UCPrint.msi program. This can be found on the Messaging DVD at:
D:\UC\UCPrint (change “D:\” to the correct location of your DVD drive).
Double-click this file to start the installation. The process takes a few seconds, and runs silently in the background.
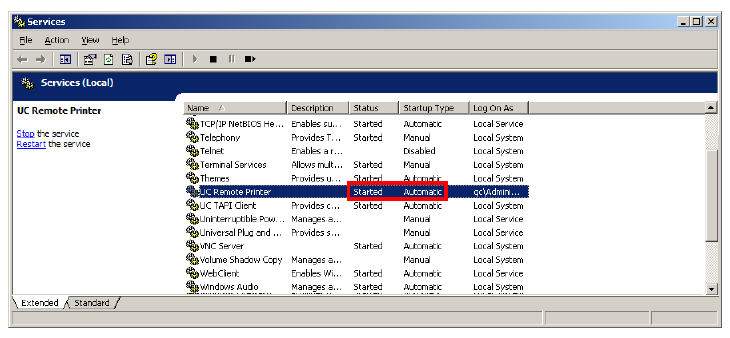
2.After a few moments, go to Start>Administrative Tools>Services and verify that the UC Remote Printer service is installed and running. This service should be configured to start automatically.
|
Note: The Log On As account should be the same as that used during the installation of MS Office or Adobe Acrobat Reader. |
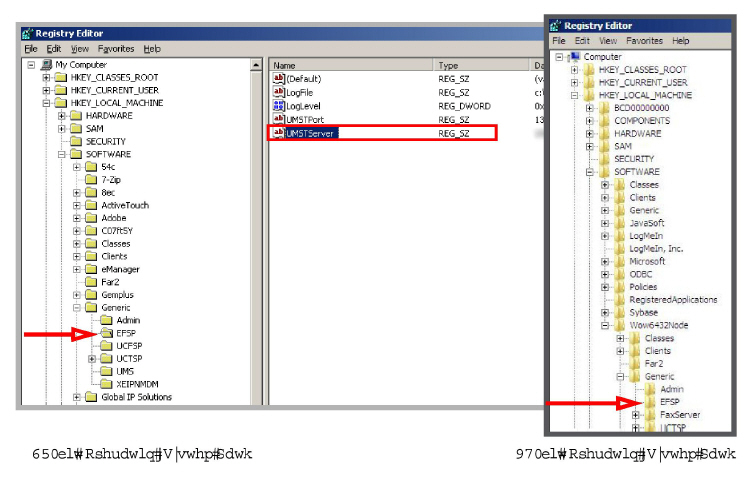
3.Go to Start>Run and type regedit in the text entry box. Click OK.
4.On the left pane, navigate to either:
HKEY_LOCAL_MACHINE>SOFTWARE>Generic>EFSP (for 32-bit operating systems), or
HKEY_LOCAL_MACHINE>SOFTWARE>Wow6432Node>Generic>EFSP (for 64-bit operating systems).
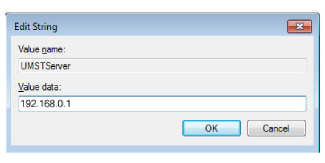
5.In the right pane, double-click UMSTServer and enter the IP Address of the Messaging server for the value data. Click OK and close the regedit screen.
The client side configuration is complete. Proceed with the setup of the Messaging voice server.
Messaging Voice Server Remote Printer Setup
The following instructions are performed on the Messaging voice server.
|
Note: These instructions assume that Messaging has already been installed and configured on the voice server. For details on the installation and setup of Messaging, please refer to the Server Installation Guide and the Server Configuration Guide for details. |
1.Go to Start>Administrative Tools>IIS Manager. Verify that FTP is installed and running. This should already be setup as part of the Messaging installation.
2.Open Messaging Admin and click
Print Server.
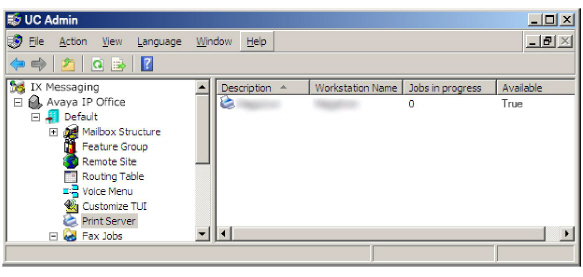
3.Right-click on Print Server and choose Add.
4.Fill in the required fields.
Description: Enter a descriptive name for the remote print server.
Workstation Name: Enter the PC name or the IP Address of the remote printer host computer.
Available: Enable this checkbox.
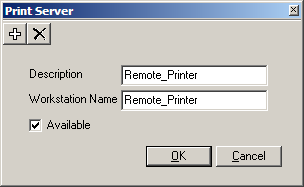
Click OK when finished.
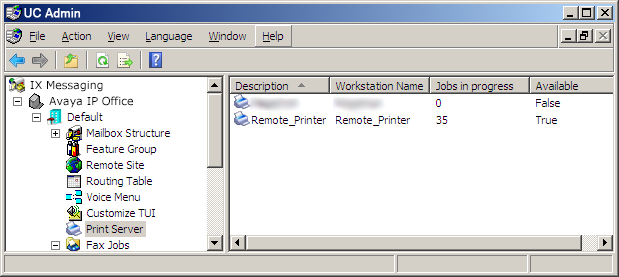
5.In the right pane, double-click the local print server and disable the Available checkbox.
Click OK when finished.
6.Go to Start>Adnministrative Tools>Services and disable the UC Remote Printer service.
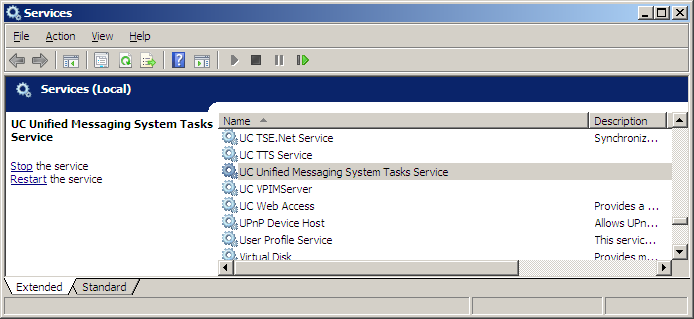
7.Go to Start>Administrative Tools>Services. Stop then start the following services:
UC Unified Messaging System Tasks Service and UC VPIMServer.
8.On the computer acting as the remote printer host, stop then start the UC Remote Printer Service.
The setup of the Remote Printer feature is now complete.