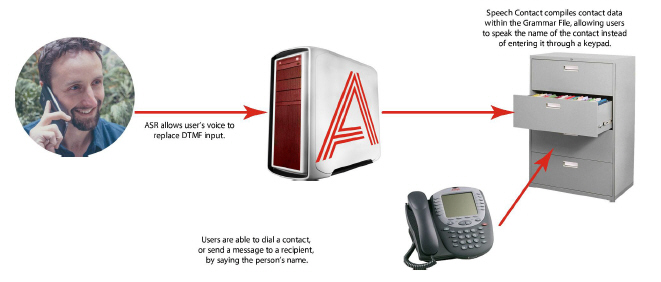
For many business users, their list of contacts can easily grow to such a length that finding any one person can be difficult. To make this easier, the contact list can be speech enabled to allow finding a person through voice alone.
In order for a user to use this feature, configuration changes must be made on both the server and the client applications. Please follow this guide exactly as explained to enable the speech contact function on your system.
Having easy access to contacts is essential for people on the go. Spending a few minutes just to select someone to call or to send a message to is not very efficient. Speech Contacts makes it easy for users to locate a contact by enabling voice searches. Once the user sets a contact to be speech enabled, they will be able to find that person within the TUI.
|
Requirements |
Details |
|---|---|
|
License |
ASR |
|
Software |
Officelinx version 8.1 - 10.7 Messaging version 10.8 or higher |
For the following steps, launch the Messaging Admin program.![]()
1.Go to Company properties, and open the Speech Options tab.
Specify the following:
Voice Recognition: Enable to activate the ASR engine in the automated attendant.
Confirm Names in Voice Recognition: Allows the confirmation of the name spoken by the caller.
Allow Barge-In in Voice Recognition: The caller can interrupt the system (e.g. say "Yes" or "No") during voice recognition.
Allow Barge-In in Name Confirmation: This allows the caller to interrupt the system (e.g say "Yes" or "No") as it performs name confirmation.
Allow Say Operator: The caller can say “Operator” to be transferred to the operator if one has been setup on the system.
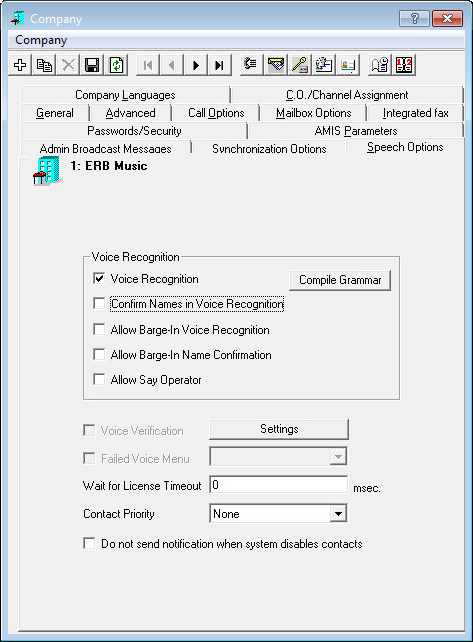
2.From the Contact Priority dropdown list, select which of your contacts (Public, Private or None) are more important when doing speech recognition of contacts.
For example, if in a mailbox you choose to speech enable both Public and Private contacts (Mailbox > Mailbox Options screen) and the number of users (company mailboxes + private contacts + public contacts) exceeds the number of allowable users on the license, you must disable either the Enable ASR for Public Contacts or Enable ASR for Private Contacts according to the selection you have made in this dropdown list.
For example, selecting Private in this dropdown list, and disabling Enable ASR for Private Contacts on the
Mailbox > Mailbox Options screen will give priority to Public contacts.
3.Save any changes.
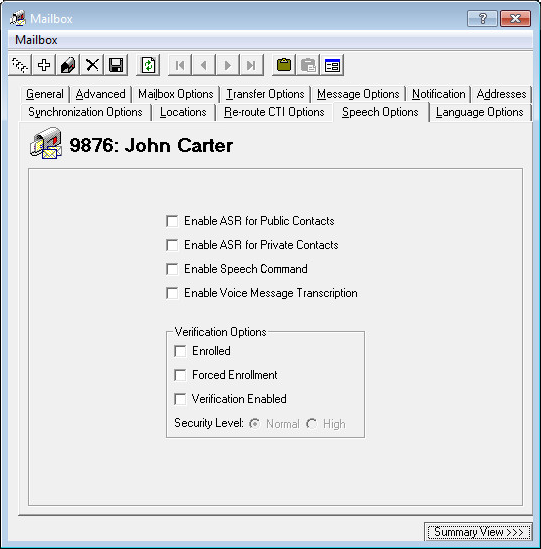
4.Open the Mailbox of the person who will use this feature.
Go to the Speech Options tab and specify the following:
Enable ASR for Public Contacts: Enable to implement ASR capabilities for public contacts.
Enable ASR for Private Contacts: Enable to implement ASR capabilities for private contacts.
5.Move onto the Advanced tab. Ensure that Messaging & Collab is selected under Desktop Capabilities.
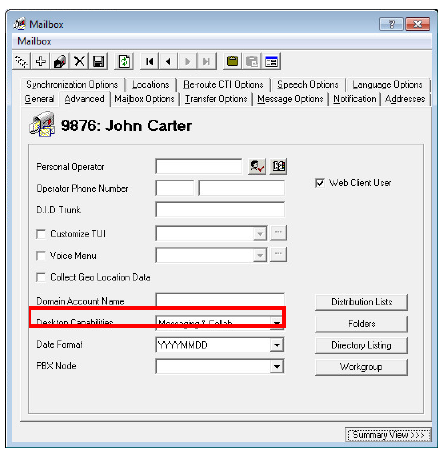
6.Save the Mailbox settings.
Enabling Speech Contacts allows you to quickly and easily get in touch with your contacts through the TUI (Telephone User Interface). Instead of having to enter multiple keys to find a contact, you say the name instead.
Only speech enabled contacts may be accessed through speech. You must ensure that the contacts are enabled for speech before using the feature.
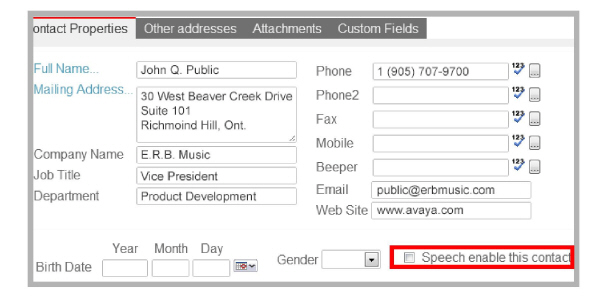
You can enable speech for your contacts individually from each contact’s properties.
If you have a long list of contacts, it is quicker to use the batch function.
1.Click on the Contacts icon, then click on the Speech Enable Contacts button.

2.Select the Enable Speech radio button.
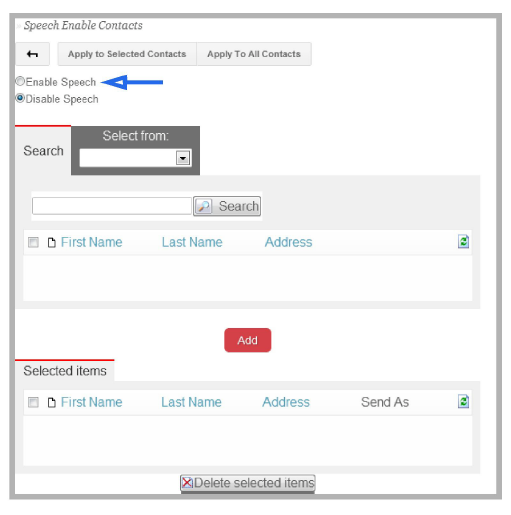
If you wish to enable speech for all of your contacts, click on the
Apply To All Contacts button.
If you wish to enable speech for only certain contacts:
1.Populate the uppermost listbox with contacts. Choose from the Select from: dropdown list, or in the Search field, enter the contact name that you want to add and click the Search button.
2.Add contacts from the upper listbox to the bottom by enabling the checkbox beside the contact, then clicking the Add button.
3.When all desired contacts have been added, click on the
Apply to Selected Contacts button to apply the changes.
|
Note: If you wish to disable the speech contact feature for large number of contacts, repeat the above process but choose Disable Speech radio button instead. |
When you open a contact that has speech enabled, you will see that Speech enable this contact is checked. You may freely modify individual entries by enabling or disabling this checkbox.