Data Migration
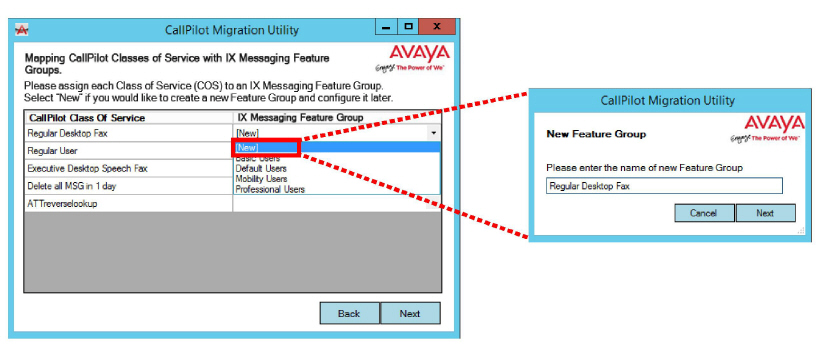
Now that the data files have been copied, the Class of Service (COS) for each user must be mapped to the corresponding Feature Group within Avaya IX Messaging.
1. For each CallPilot Class of Service listed, use the dropdown menu on the right-hand side and select the appropriate Feature Group from Avaya IX Messaging.
You can also select New to create a Feature Group in IX Messaging. New groups will need to be configured later in IX Messaging.
Tip: Give new feature groups the same name as their class of service. This will help to identify each group so that appropriate rights can be assigned.
Note: If you leave a COS blank and click Next, you will be prompted to set the value for that COS to Default.
Once the classes of service have been aligned with feature groups, the migration process will continue.
|
CallPilot |
IX Messaging |
Notes |
|---|---|---|
|
First Name |
First Name |
|
|
Last Name |
Last Name |
|
|
Mailbox Number |
Mailbox number and Internal extension |
|
|
Extension DNs |
Internal and External extensions |
Extension DN 1 to External extension Extension DN 2, Extension DN 3, Extension DN 4, Extension DN 5, Extension DN 6, Extension DN 7, Extension DN 8 to Internal or External extensions If extension length is longer than the PBX Extension Max Length, it will be migrated to IXM as an External Extension If extension length is equal to or shorter than the PBX Extension Max Length, it will be migrated to IXM as an Internal Extension |
|
Location Name |
PBX |
|
|
Mailbox Class |
Feature Group |
|
|
MWI DNs |
Message Light Assignment |
Message Light Assignment on IXM enables if MWI DN and the mailbox number are the same and the MWI DN is enabled on the CallPilot® system. Message Light Assignment on IXM disables if MWI DN and the mailbox number are the same but the MWI DN is disabled on the CallPilot® system. Message Light Assignment on IXM disables if MWI DN and the mailbox number are the different on the CallPilot® system. |
|
PDLs |
PDLs |
PDL number on the IXM system is CallPilot® PDL number + 10. |
|
Greetings |
Greetings |
Temporary Absence Greeting-Extended Absence External Personal Greeting-Don't migrate Internal Personal Greeting-Don't migrate Personal Verification-Name Recording Temporary Absence Greeting Expiry-Don't migrate |
|
Multiple Remote Notification Targets |
Internal Extension or External Extension and Email |
For the first phone number: If extension length is longer than PBX Extension Max Length, it will be migrated to IXM as External extension. If extension length is equal or shorter than PBX Extension Max Length, it will be migrated to IXM as Internal extension.
For all the email addresses to E-mail: An urgent flags for the target phone and email are not migrated. |
|
Attributes Unique to IX Messaging |
|
|---|---|
|
User Name |
"First name" +"Last name" + "(Mailbox number)" |
|
Password |
User default password on IXM system |
The data files will be copied into Avaya IX Messaging.
1. Enable the desired features and click Next.
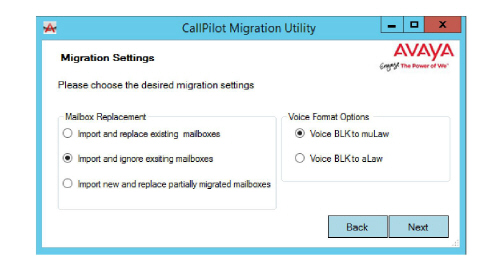
Mailbox Replacement: Tell the program how to handle duplicate entries. Select one of the following.
Import and replace... - Copy user data and overwrite duplicate entries.
Import and ignore... - Copy user data but do not overwrite duplicate entries.
Import new and replace partially... - Copy user data and overwrite previously only partially imported entries.
Voice Format Options: Select the audio coding format to use (muLaw, aLaw).
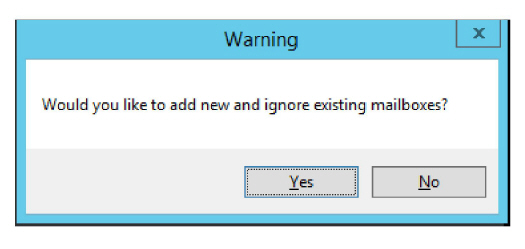
2. Click Yes at the prompts to confirm the chosen settings.
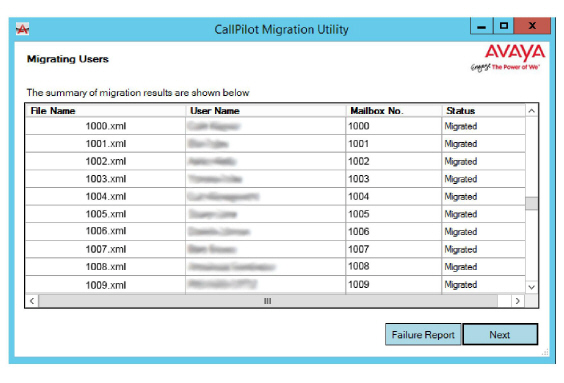
3. The selected sites will be imported into Avaya IX Messaging, with each user assigned to the Feature Group that corresponds to their CallPilot Class of Service.
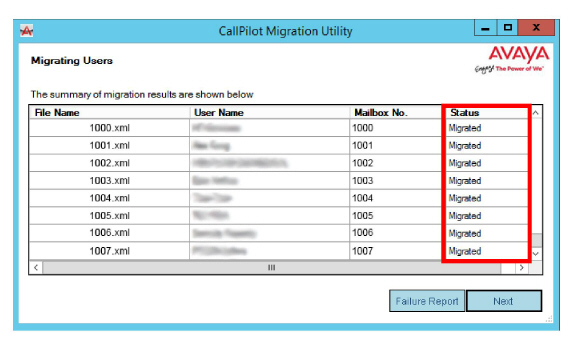
Any issues with the migration will be displayed in the Status column. Click Failure Report to see the details for each problem entry. Status will be one of the following:
Migrated: Data processed successfully.
Ignored: Duplicate entry detected. No action taken.
Failed: An error with the data occurred and the record was not imported.
Partial: An error with the data occurred and only some of the record was imported. This usually occurs when there are Distribution Lists associated with a user.
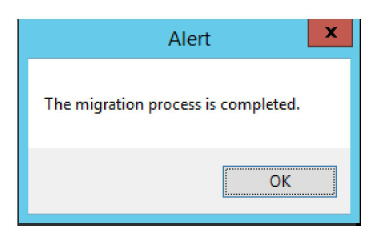
4. When finished, click OK.
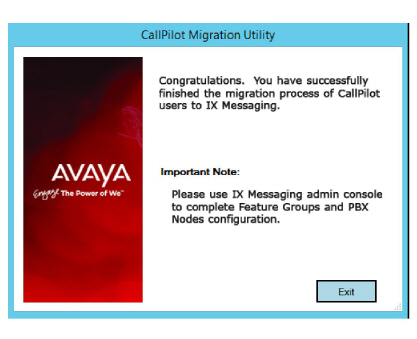
5. Click Next.
6. The migration is complete. Click Exit.
Important: The default password assigned to each IX Messaging mailbox is 13579. Users will be asked to change this password immediately during their first login attempt. The password parameters (i.e. minimum and maximum length, allowed/required characters) are configured through the IX Messaging Admin program. To check the current default password, open IX Messaging Admin and go to
Company > Passwords/Security > Default Voicemail Password.
Once the import is complete, open IX Messaging and check that it produced the expected results.
1. Under Mailbox Structure, verify that all of the CallPilot mailboxes are present and have been added to the correct Feature Group.

2. Test each mailbox to ensure that it can both send and received telephone calls.
3. Test voicemail.
4. Ensure that each mailbox user can login to their account. The default password is 13579 for all accounts.
Note: Personal greetings are not migrated to the IX Messaging server and must be re-recorded by the user.