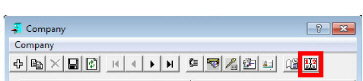
Company
Introduction
Messaging allows you to create a single or multiple companies on a single server with multiple configurations for better management and segregation. Company settings will set the ground rules for security, message management, ASR features, etc. All Feature Groups and Mailboxes under a Company will share the rules and settings established for that Company. The Company settings are also responsible for the greetings and business hour schedules for that group.
|
Note: The number of companies that you can create is determined by the terms of your license. By default, you must have at least one company in order for the system to function properly.
|
Company Buttons
|
Button
|
Description
|
|

|
Add a new company.
|
|

|
Copy the configuration of one company to another company. If only a single company exists, clicking this button creates a new company.
|
|

|
Delete current company.
|
|

|
Save company settings.
|
|

|
Refresh company settings.
|
|

|
Move to first company.
|
|

|
Move to previous company.
|
|

|
Move to next company.
|
|

|
Move to last company.
|
|

|
Key mapping configuration.
|
|

|
Configure message menu that is employed by outside callers wishing to leave a message in a Mailbox.
|
|

|
Configure functionality available while a recording is in progress.
|
|

|
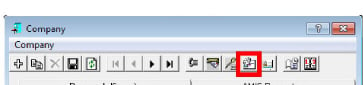
Configure company distribution lists.
|
|

|
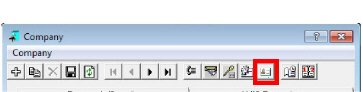
Configure company contacts.
|
|

|
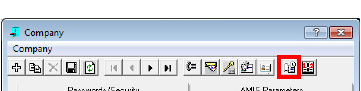
Configure company business hours.
|
|

|
Configure company holidays.
|
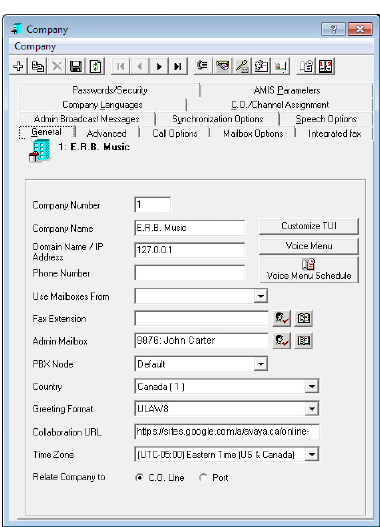
General Tab
The General tab of Company allows you to specify general information about the company, including name, phone number, and company Mailbox.
Company Number: This field is entered automatically when you save the company.
Company Name: Enter the name of the company. The company name is used to associate users with a particular company when there are two or more companies sharing the same server. If this system is configured for only one company, this field will not affect any functionality of the system.
Domain Name/IP Address: Enter the domain name or the company IP address of the server.
|
Warning: This domain name or IP address should not be the same as your mail server, especially when using IMAP synchronization or BES. For example, if you are using company.com as your mail server domain (e.g. [email protected]), the domain you enter here should be something in the range of voiceserver.company.com and never company.com.
|
Phone Number: Enter the company’s phone number. This information must be specified if you want to create a VPIM address.
Use Mailboxes From: From the dropdown menu, select another company if the current company is to share the Mailboxes with another company.
Fax Extension: Enter a Mailbox that is associated with a fax extension. This Mailbox will receive all faxes directed to this company.
Admin Mailbox: Enter the Administrator’s Mailbox. The Admin Mailbox specified must have a VPIM address defined which is used for sending delivery notifications.
PBX Node: From the dropdown menu, select the PBX node that the current company will utilize. This option is only available if you have multiple PBXs defined in the PBX settings. You must choose a node whenever the option is available to you so that the system can properly manage the calls. Node numbers must be assigned sequentially starting with 1 (e.g. 1 2 3 4...).
Country: From the dropdown menu, select the country in which the system is located.
Greeting Format: From the dropdown menu, select the format that you wish to use to record the greetings.
Collaboration URL: Enter the URL of the collaboration service that your company is using. Collaboration services are enabled in the Web Access.
Time Zone: Select the time difference in hours between your primary office location and Greenwich Mean Time (GMT).
Relate Company to: Select the C.O. Line radio button if C.O. lines are employed to identify the company. Otherwise, select the Port radio button. This field is used for clear identification of how incoming calls are managed in a multiple company environment.
|
Note: Avaya Messaging supports Multi-Tenanting where more than one company is setup on a single voice server. Each company is isolated from the others, so incoming calls on specific numbers or lines can be automatically routed to the correct auto attendant, Telephone User Interface and other resources. Additional licensing is required to configure more than one company.
|
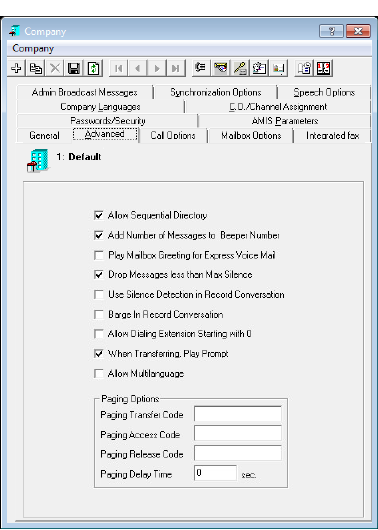
Advanced Tab
The Advanced tab of Company allows you to specify a variety of options, such as rules followed during calls and paging options within the company.
Allow Sequential Directory: Enable this checkbox to indicate whether or not to allow callers to access the sequential directory when they press * while accessing the directory.
Add Number of Messages to Beeper Number: Enable this checkbox to indicate whether or not to indicate the number of new messages in the Mailbox when outcalling to a beeper. This is shown with an asterisk (*), followed by the number (for example, 201 *3 indicates 3 new messages in Mailbox 201).
Play Mailbox Greeting for Express Voice Mail: Enable this checkbox to indicate whether to play the Mailbox greeting when callers are sent to Express Voice Mail, or merely the name prompt.
Drop Messages Less than Max Silence: Enable this checkbox to disable the delivery of messages that are less than the specified Maximum Silence. Max silence is defined in the PBX properties under Disconnect.
Use Silence Detection in Record Conversation: Enable this checkbox to end a recording of conversation when silence is detected. Max silence is defined in the PBX properties under Disconnect.
Barge in Record Conversation: Enable this checkbox to allow the barge in during recording of conversations.
Allow Dialing Extension Starting with 0: Enable this checkbox to allow the creation of extensions that lead with digit 0 (e.g. 033).
When Transferring, Play Prompt: Enable this checkbox to play the “Thank You. Please Hold” prompt when transferring calls from the automated attendant.
Allow Multilanguage: In order for clients to use multilingual prompts on their mailboxes, this option must be enabled.
Paging Transfer Code: Enter the sequence of actions or digits that the system is to dial to make a transfer.
Paging Access Code: Enter the PBX port number for paging.
Paging Release Code: Enter the sequence of actions or digits that the system is to dial to get the caller back after intercom paging.
Paging Delay Time: Enter the length of time (in seconds) that the system is to wait after paging before transferring to the extension.
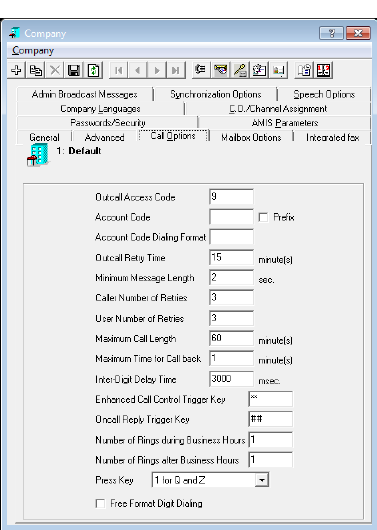
Call Options Tab
The Call Options tab of Company allows you to define the specific logic related phone calls. These settings will also determine the ground rules for users who are calling or receiving calls through the server.
Outcall Access Code: Enter the code required for the system to access an outside line. The code must be followed by a comma.
Account Code: Enter the appropriate long distance code. Enable the Prefix checkbox if you require the Account Code to be dialed before the long distance number.
Account Code Dialing Format: Enter the format required to successfully employ the Account Code. For example, if you require the account code to be entered both before and after the dialed number or even within the dial string, you will define it through here.
Outcall Retry Time: Enter the period of time (in minutes) that the system is to wait before attempting to make another outside call. The default is 2.
Minimum Message Length: Enter the minimum length (in seconds) a recorded message should be before the system recognizes it to be valid. If a recorded message is shorter than this value, the system will reject it.
The default is 2.
Caller Number of Retries: Enter the number of allowable invalid attempts an outside caller is allowed before being disconnecting from the call.
The default is 3.
User Number of Retries: Enter the number of allowable invalid attempts an internal user is allowed before being disconnecting from the call.
The default is 3.
Maximum Call Length: Enter the maximum time (in minutes) that an incoming call can last. A value of 0 indicates unlimited time. The default is 30 minutes.
|
Note: Call needs to be supervised by the server (i.e. Trombone) for maximum call length to be enforced. Calls connected via blind transfer do not have a time limit.
|
Maximum Time for Call back: Enter the maximum time (in minutes) that a call-back call can last.
Inter-Digit Delay Time: Enter the maximum time (in msec) that the system should wait between inband digit strings before reading. The default is 3000 msec.
Enhanced Call Control Trigger Key: Enter the sequence of keys that the user may press to access the Enhanced Call Control feature. The user must have this feature enabled in the feature group for these keys to have an effect.
Oncall Reply Trigger Key: Enter the sequence of keys that the user may press to return the user to their mailbox while utilizing the "Call Back to Sender" feature from their TUI. When the trigger keys are pressed, the sender who was called will be disconnected and the user will be returned to their mailbox.
Number of Rings During Business Hours: Enter the number of rings before the auto attendant answers during business hours. A value of 1 intercepts calls quickly.
Number of Rings after Business Hours: Enter the number of rings before the auto attendant answers after business hours. A value of 1 intercepts calls quickly.
Press Key: From the dropdown menu, select either 1 for Q and Z or 7 for Q and 9 for Z to specify the numbers to use when entering these letters.
Free Format Digit Dialing: Enable this checkbox to allow free format dialing. Free format dialing allows callers to dial any system extension even if a Mailbox is not associated with that extension.
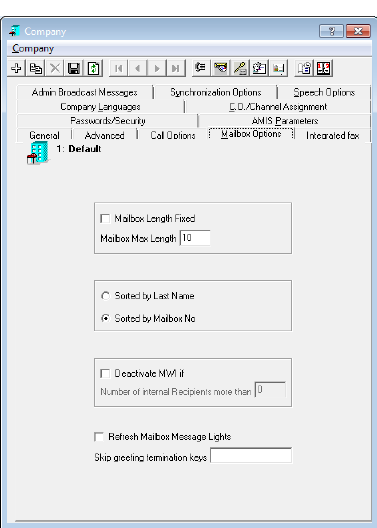
Mailbox Options Tab
The Mailbox Options tab of Company allows you to specify the options for all Mailboxes associated with the current company, including the Mailbox length (number of digits representing the Mailbox), the length of the directory list, and the method used to sort the Mailboxes.
Mailbox Length Fixed: Enable this checkbox to indicate whether or not the Mailboxes associated with this company will be fixed in length. Otherwise, the Mailbox number may be variable in length.
Mailbox Max Length: Enter the maximum number of digits that Mailboxes can be.
Sorted by Last Name: Select this radio button to have system playback the company sequential directory according to last name.
Sorted by Mailbox No: Select this radio button to have system playback the company sequential directory according to Mailbox number.
Deactivate MWI if: Enable this checkbox to deactivate message waiting indicators under a set condition below. Selecting this checkbox will enable the Number of internal Recipients more than field.
Number of internal Recipients more than: Enter the maximum number of active recipients that will deactivate the MWI. Deactivate MWI if must be enabled to modify this value.
Refresh Mailbox Message Lights: Enable this checkbox to automatically audit Mailbox status and reset Mailbox message lights in cases of power failures and computer reboots. This option is turned off by default and is only used when the PBX does not have the capability to store message light status in memory.
Skip greeting termination keys: Enter the DTMF key(s) that can be used for skipping the greeting.
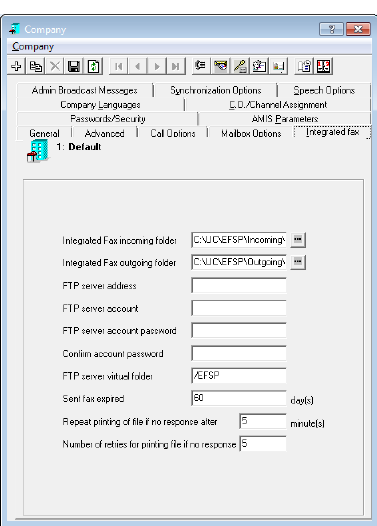
Integrated Fax Tab
The Integrated Fax tab of Company allows you to specify fax options for all Mailboxes associated with the company.
Integrated Fax incoming folder: Enter the path of the incoming fax folder for the current company.
Integrated Fax outgoing folder: Enter the path of the outgoing fax folder for the current company.
FTP server address: Enter the current company’s FTP server address.
FTP server account: Enter the account name required to access the above FTP server.
FTP server account password: Enter the password associated with the above FTP account.
Confirm account password: Re-enter the FTP server account password.
FTP server virtual folder: Enter the path of the folder on the FTP server where the files will be passed to and from the UC server.
Send fax expired: Enter the number of days that must pass before a fax expires.
Repeat printing of file if no response after: Enter the length of time (in minutes) the system will wait for a response after a print before attempting to print again.
Number of retries for printing file if no response: Enter the number of times the system will attempt a re-print if there is no response.
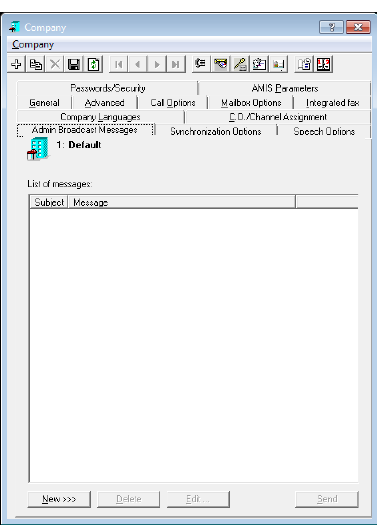
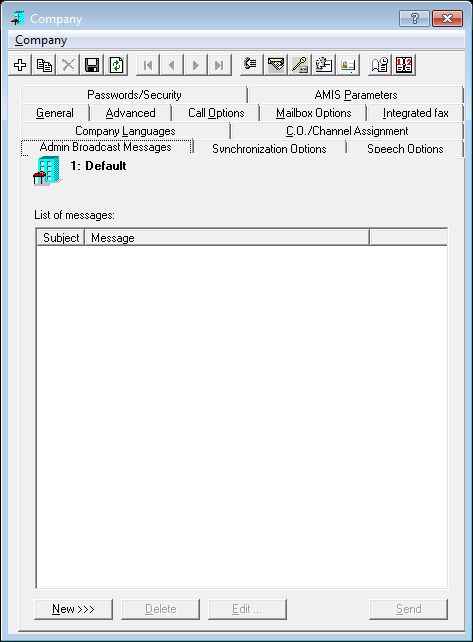
Admin Broadcast Messages Tab
The Admin Broadcast Messages tab of Company allows you to send text messages to all users in the current company. Please refer to Broadcast Messaging on page 96 for details on the procedure.
List of messages: This field displays all of the broadcast messages that has been saved.
New: Click this button to create a new broadcast message.
Delete: Click this button to delete the selected broadcast message.
Edit: Click this button to edit the selected broadcast message.
Send: Click this button to send the selected broadcast message.
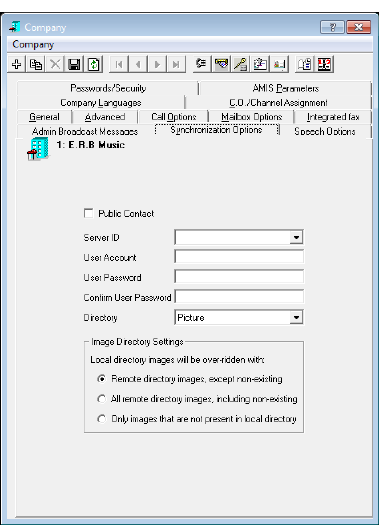
Synchronization Options Tab
Users can upload photographs to Google as part of their profile. The Synchronization Options tab allows the UC System to update these profile pictures when changes are made to the original online source files.
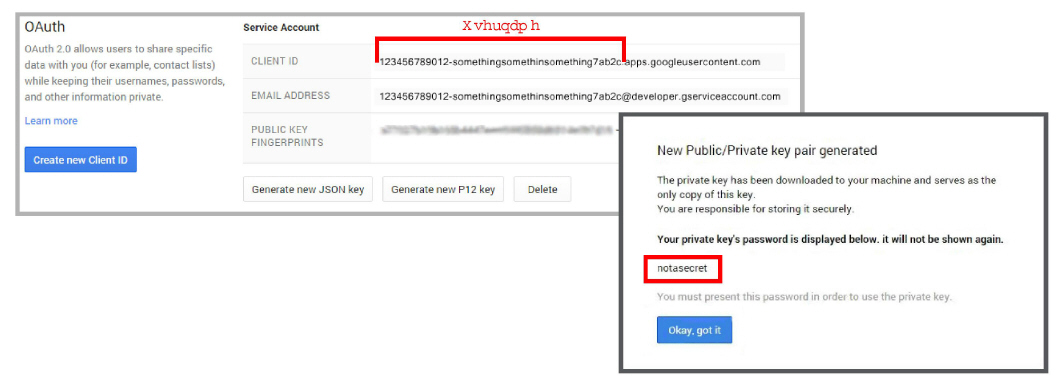
This tab provides company wide access for the system and requires an OAuth2 Service Account and Private key password to have been created on Google first.
Public Contact: Enable to include all corporate Public contacts. Disable to include only corporate contacts in the synchronization.
Server ID: Select the server where the profile picture is stored (e.g. Gmail).
User Account: Enter the user name taken from the Client ID of the OAuth2 Service Account. Do not include the domain portion of the Client ID.
User Password: Enter the OAuth2 private key password (notasecret).
Confirm User Password: Re-enter the private key password to confirm.
Directory: Select None to disable profile picture synchronization. Choose Pictures to synchronize with the online source directory.
|
Note: If OAuth2 is not being used, enter the admin explicit password for the login credentials.
User Account - Enter the administrator account and domain name (e.g. [email protected]).
User Password - Enter the administrator password.
|
Image Directory Settings
Messaging includes contact pictures if they have loaded a picture onto their Google profile. The Image Directory Settings control how the UC server deals with updated picture files.
Remote directory images, except non-existing: Picture files that are already in the storage directory that have changed since the last update will be downloaded.
All remote directory images, including non-existing: All picture files for contacts will be downloaded to the image directory.
Only images that are not present in local directory: Picture files that are not already in the image directory will be downloaded.
Web Application Settings
For Messaging to access and synchronize the image, the web application must be setup to allow others to view the image.
For example, in Gmail, go to User Settings > My picture, and enable the Visible to everyone radio button.
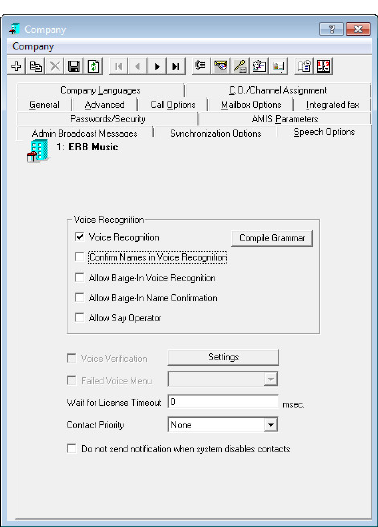
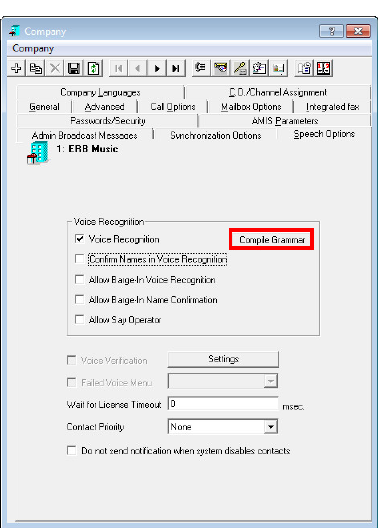
Speech Options Tab
The Speech Options tab of Company allows you to customize the voice recognition options for the Company.
Voice Recognition: Enable this checkbox to activate the ASR (automatic speech recognition) engine within the company.
Confirm Names in Voice Recognition: Enable this checkbox to play the confirmation prompt when the caller says the name of the desired party.
Allow Barge-In in Voice Recognition: Enable this checkbox to allow the voice recognition function to be active during prompts. For example, the caller can say the name of the desired party during the prompt as opposed to waiting for the prompt to finish if this option is enabled.
Allow Barge-In in Confirm Names: Enable this checkbox to allow confirmation during the confirmation prompt. For example, the caller can say "Yes" to be transferred right away without listening to the entire confirmation message.
Allow Say Operator: Enable this checkbox to allow a caller to be transferred to the operator by saying “Operator”.
Compile Grammar: Click this button to have the system recompile the grammar files located on the system.
Voice Verification: Enable this checkbox to allow voice verification as a login method. This feature may be used in conjunction with the traditional DTMF key input or as a stand alone option. Click on the Settings button for detailed configuration options.
Failed Voice Menu: Select the menu that the user will be sent to after voice verification has failed. This option is only available if voice verification is enabled.
Wait for License Timeout: Enter the time (in msec) that voice verification will wait before proceeding with a failed action. The voice verification feature requires a license to function and in some cases, the license cannot be verified due to the high volume of traffic on the voice verification ports. Setting a reasonable time within this field will allow the users to wait in the queue rather than failing right away.
Contact Priority: From the dropdown list, select which of your contacts (Public, Private or None) is less important when performing speech recognition on contacts. This information will be used to streamline the way in which the server processes the contact database.
Do not send notification when system disables contacts: Enable this checkbox to disable message notification when contacts are disabled from the system.
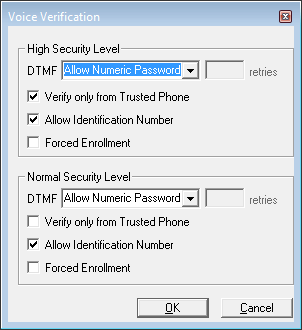
Voice Verification Security Settings
DTMF:
Allow Numeric Password: Select this option to permit the user to enter their password through the telephone keypad instead of using a voiceprint.
Allow Numeric Password after...retries: Select this option to permit the user to enter their password through the telephone keypad after the specified number of failed attempts using their voiceprint.
Verify only from Trusted Phone: Enable this checkbox to allow voice verification only from trusted phones. Trusted phones are defined under the Mailbox > Address tab for each individual address setting.
Allow Identification Number: Enable this checkbox to allow the users to log into their Mailbox by saying their Identification Number (usually from an external number).
Force Enrollment: Enable this checkbox to force Mailbox users to enroll for voice verification at the company level instead of individually.
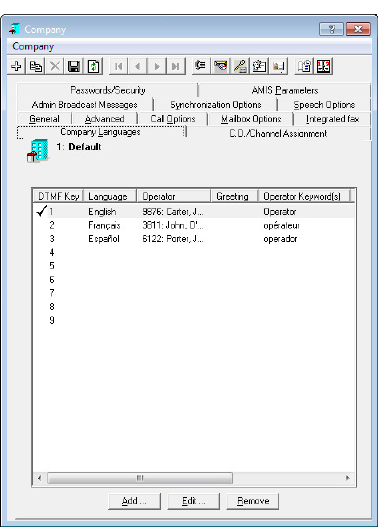
Company Languages Tab
The Company Languages tab of Company allows you to configure the languages for the UC system according to the modules that you have installed. The UC has the ability to play system prompts, holiday, business hours and company greetings in selected languages. Please refer to Add / Edit Language Properties on page 60 for details.
Add: Click this button to add a language to selected DTMF key.
Edit: Click this button to edit the language associated with the selected DTMF key.
Remove: Click this button to remove the language associated with the selected DTMF key.
|
Note: Each company can have its own default language.
|
|
Note: Language availability is controlled by licensing.
|
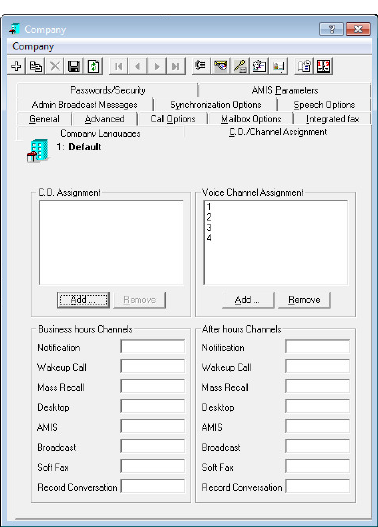
C.O./Channel Assignment Tab
The C.O./Channel Assignment tab of Company allows you to manually define C.O. Lines and Voice Channels to a company. This allows you to efficiently manage your resources, especially under a multi-tenant (multi-company) environment.
Assigning C.O. lines to companies will allow you to control which company picks up calls on a particular C.O. line. For example, if C.O. Line 1 is assigned to Company 1 and C.O. Line 2 is assigned to Company 2, all calls received by C.O. Line 1 will be answered by Company 1 while calls received by C.O. Line 2 will be answered by Company 2. Dividing the companies through C.O. line definition will also allow all the companies to share the port resources.
If your PBX does not support C.O. Line identification, you may divide the companies through ports (Voice Channels). In this case, the ports will be confined to the company they are assigned to.
You may also assign specific channels that are to be used for certain functions in this tab to better manage your resources. You will be able to define channels for 2 scenarios at each company: one for during business hours and one for after hours.
|
Note: When there is only one company, there is no need to dedicate C.O. lines.
|
|
Note: Voice Channels will be defined automatically in the default company upon initial installation/configuration.
|
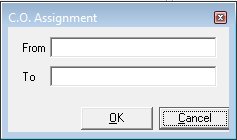
C.O. Assignment
Add: Click this button to add a C.O. assignment.
Remove: Click this button to remove the selected C.O. assignment.
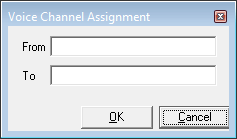
Voice Channel Assignment
Add: Click this button to add a voice channel assignment.
Remove: Click this button to remove the selected voice channel assignment.
Business hours Channels
The settings defined here will be used during the business hours of the current company.
Notification: Enter the channels to be used for outcall notification (e.g. phone, beeper).
|
Note: A range of channels can be addressed with a dash (e.g. 1-4) while many individual channels are divided by commas (e.g. 1,3).
|
Wakeup Call: Enter the channels to be used for the wakeup call function.
Mass Recall: Enter the channels to be used for Mass Recall.
|
Note: This field can have dedicated channels. For light port activity usage, they can be the same as the notification ports.
|
Desktop: Enter the channels to be used for message playback (from Outlook and Client).
|
Note: It is recommended that you allocate separate ports for Desktop and Notification to eliminate the chance of collisions between the two events.
|
AMIS: Enter the channels to be used for AMIS.
Broadcast: Enter the channels to be used for Broadcast.
Record Conversation: Enter the channels to be used for various recording features.
After hours Channels
The settings defined here will be used outside of the business hours of the current company.
Notification: Enter the channels to be used for outcall notification (e.g. phone, beeper).
|
Note: A range of channels can be addressed with a dash (e.g. 1-4) while many individual channels are divided by commas (e.g. 1,3).
|
Wakeup Call: Enter the channels to be used for the wakeup call function.
Mass Recall: Enter the channels to be used for Mass Recall.
|
Note: This field can have dedicated channels. For light port activity usage, they can be the same as the notification ports.
|
Desktop: Enter the channels to be used for message playback (from Outlook and Client).
|
Note: It is recommended that you allocate separate ports for Desktop and Notification to eliminate the chance of collisions between the two events.
|
AMIS: Enter the channels to be used for AMIS.
Broadcast: Enter the channels to be used for Broadcast.
Record Conversation: Enter the channels to be used for various recording features.
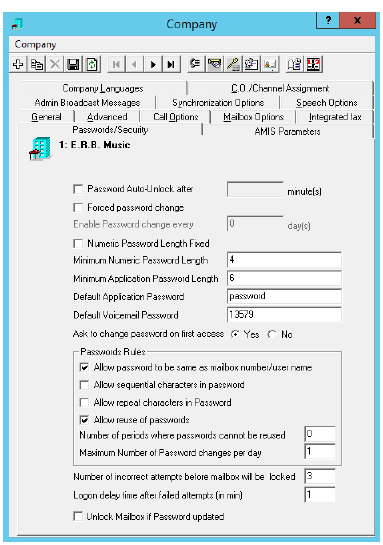
Passwords/Security Tab
The Passwords/Security tab of Company gives you control over the level of password security for the company.
Password Auto-Unlock after: Enable this checkbox to automatically unlock a locked Mailbox (e.g. after too many login attempts, etc.) after the set amount of time passes. The field to enter the amount of time becomes active once the checkbox is enabled.
Forced password change: Enable this checkbox to force each Mailbox user (in the current company) to change their password after a period defined in the text box below. The field to enter the period becomes active once the checkbox is enabled.
Enable Password change every X day(s): Enter the number of days after which a Mailbox user must change their password. For example, if you enter 30 in this field, users will be forced to change their password every 30 days. This field becomes active when Forced password change is enabled.
|
Note: You must enter a value greater than 0 day(s) on this field when utilizing this feature. This is also true when you are utilizing force password change upon reset feature.
|
Numeric Password length Fixed: Enable this checkbox to establish a fixed length for voicemail or numeric passwords.
Password Length/Minimum Numeric Password length: When Numeric Password length Fixed is enabled, enter the length for fixed numeric passwords. For example, if you want all mailbox passwords to be seven characters long, enter 7 in this field. When Numeric Password length Fixed is not enabled, enter the minimum allowed length for numeric passwords. Longer passwords can be used if desired.
Minimum Application Password length: Enter the minimum allowed length for application (alphanumeric) passwords. Longer passwords can be used if desired.
Default Application Password: Enter the default password for all application logins accounts created under the current company.
Default User Password: Enter the default password for all new mailbox accounts created under the current company.
Ask to change password on first access: Select the Yes radio button to force the users to change their password when they first log in to their mailbox. Select No to allow the users to use the default password continuously.
Allow password to be same as mailbox number / user name: Enable this checkbox to allow a user’s mailbox number / user name and the password to be the same (i.e. the password for Mailbox 1234 can be set as 1234).
Allow sequential characters in password: Enable this checkbox if you want to allow users to use sequential characters in their password (e.g. ABC or 123).
Allow repeat characters in Password: Enable this checkbox to allow repeated characters in the password (e.g. AAA or 555).
Allow reuse of passwords: Enable this checkbox to allow a previous password to be reused. The number of times a password can be reused is defined in the field below.
Number of periods where passwords cannot be reused: Enter the period in which the old password becomes reusable. (i.e. if you enter 2 in this field, a user can use a specific password again after 2 cycles of enforced password changes while entering '0' allows the users to reuse the same password continuously).
Maximum Number of Password changes per day: To increase system security, set this value to limit the number of times a user password can be changed in one day. Administrator accounts are not affected. Acceptable values are 1-24.
Number of incorrect attempts after Mailbox is locked: Enter the number of failed user login attempts allowed before a Mailbox is locked.
Login delay time after failed attempts (in min): After reaching the set number of failed login attempts, this user will not be allowed another attempt until the specified number of minutes have elapsed.
Unlock Mailbox if Password updated: Once enabled, whenever a mailbox password is updated, its locked status will be reset allowing it to be opened normally. If disabled, a locked mailbox will remain locked after a password update.
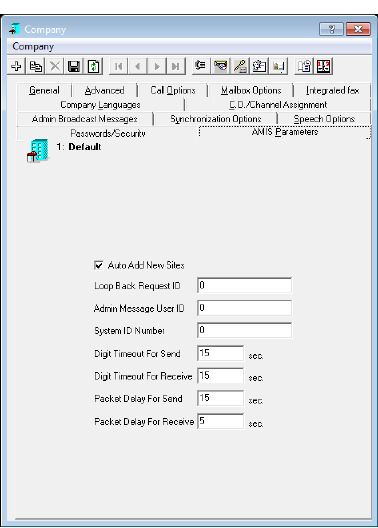
AMIS Parameters Tab
The AMIS Parameters tab of Company allows you to specify the AMIS (Audio Messaging Interchange Specification) settings. AMIS is a standard that enables voice messaging systems produced by different vendors to be networked together.
Auto Add New Sites: Enable this checkbox to automatically add sites that are not registered to the network database. The Description field of the auto-added sites will show the date the site was auto-added.
Loop Back Request ID: Enter the AMIS loop back test number for this site. For LOCAL sites, this defines the loop back test for incoming calls from other sites.
Admin Message User ID: Enter the user ID that will receive messages that cannot be delivered or returned.
|
Note: The default value for this field is blank. If the field is left blank, undeliverable and returned messages will be deleted. This field is used for local sites only.
|
System ID Number: Enter an unique string that identifies this company to all other sites as an AMIS site. It will also identify the callback telephone number.
Digital Timeout For Send: Enter the number of seconds to wait for all digits before timeout. The default is 15.
Digit Timeout For Receive: Enter the number of seconds to wait for all digits before timing out. The default is 15.
Packet Delay For Send: Enter the number of seconds the system should wait before sending a time out message. The default is 3.
Packet Delay For Receive: Enter the number of seconds the system should wait before sending a time out message. The default is 3.
Other Company Related Options/Configuration
Add C.O./Voice Channel Assignment
Line Answering parameters define how the telephone system and the auto attendant system ports are utilized. When more than one company shares the same telephone system, it is possible to set-up the system with "Floating Ports." This means both companies can share the same Inbound Ports.
However, the C.O. Lines used by each company must be identified so that the system knows which company should pick up the call. For example, if you have two companies using a four port system and each company has two incoming C.O. Lines, C.O. Lines 1 and 2 for company A, and C.O. Lines 3 and 4 for company B, both companies will use Inbound Ports 1 to 4, or as many as you have installed.
|
Note: When there is only one company, there is no need to dedicate any C.O. lines. These assignments do not have to be independent of one another if you setup multi-tenanting with C.O. Line assignment. Under voice channel allocation you must configure channels that have been allocated to this particular company. If the UC server is set up for only one company, follow the outline for a single company. For multiple companies, follow the outline for Multi-Tenanting.
|
Adding a C.O. Assignment Entry
From: Enter the first number of C.O. lines that the current company will use to receive incoming calls.
To: Enter the last number of C.O. lines that the current company will use to receive incoming calls.
|
Note: If you want to add a single entry, simply enter the same number in the From and To field (e.g. From: 1, To: 1).
|
|
Note: If your telephone system does not have C.O. Line identification, you may simulate C.O. Line identification. Set up the C.O. Lines to ring into real extensions that are programmed to forward all calls to Server Pilot. On the “Inband Parameters” screen, enter the inband that you would normally receive from a forwarded extension into the Parameter 190 - "Inband Outside C.O. Call". On the company screen, enter the extension number of this forwarded extension in the C.O. Lines field.
For example, Extension 123 is to be used to identify a call for company A. The code sent by the telephone system to the server is 99E. In parameter 190, enter 99E. On the company screen, in the C.O. Lines field enter From: 123 and To: 123.
Companies must be listed sequentially according to C.O. Line Number whenever multi-tenanting based on C.O. Line Number is used.
|
Adding a Voice Channel Assignment Entry
From: Enter the first voice channel that will be used by the current company.
To: Enter the last voice channel that will be used by the current company.
|
Note: In majority of cases, the channels will be assigned automatically upon UC server installation.
|
|
Note: If you want to add a single entry, simply enter the same number in the From and To field (e.g. From: 1, To: 1).
|
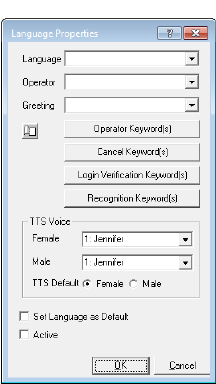
Add / Edit Language Properties
Language: From the dropdown menu, select a language.
Operator: From the dropdown menu, select the mailbox number of the company operator (receptionist) for this language. This allows callers to transfer to this extension when they press zero (0) to speak to an operator in the preferred language.
Greeting: From the dropdown menu, select a company greeting to be associated with this language.
Operator Schedule 
Refer to Operator Schedule on page 88 for more information.
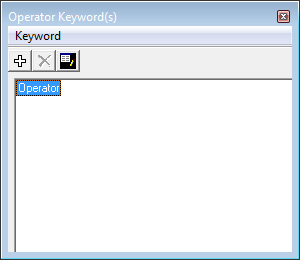
Operator Keyword(s)
Operator Keywords will be recognized by the ASR system which will then transfer the call to the default operator when the keyword is spoken by the caller.
Cancel Keyword(s)
Cancel Keywords will be recognized by the ASR system to cancel input when the keyword is spoken by the callers.
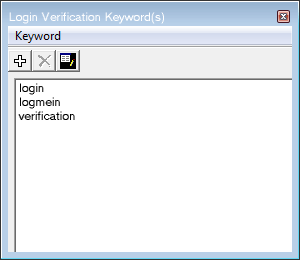
Login Verification Keyword(s)
Login Verification Keywords will be recognized by the ASR system to send the caller to the corresponding mailbox to login. The caller will have to say additional information (e.g. their name, ID number) if the system does not recognize the user right away. The caller must be a voice verification user to use this feature.
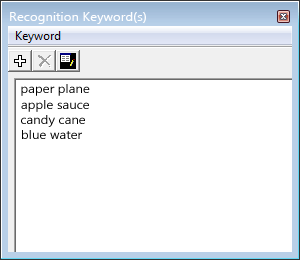
Recognition Keyword(s)
Recognition keywords are used by the ASR engine to match the voice print of the user during voice verification. It is best to choose words that are easy to pronounce that also have a good mixture of vowels and consonants.
TTS Voice
Female: From the dropdown menu, select the female voice that will be used for the current language.
Male: From the dropdown menu, select the male voice that will be used for the current language.
TTS Default: Select Female radio button to make the default TTS voice female or Male radio button to make the default TTS voice male.
Set Language as Default: Enable this checkbox to make the current language the default for the Company.
Active: Enable this checkbox to activate the current language. If not activated, the language will be unavailable in the system when multiple languages are present.
Business Hours 
The Business Hours dialog box allows you to designate your company's office hours. These business hours are used in conjunction with Greeting Times to play the appropriate greeting.
Buttons
|
Button
|
Description
|
|

|
Delete the entire Business Hours schedule.
|
|

|
Save Business Hours schedule.
|
|

|
View a report of all Business Hours schedules.
|
|

|
Create a new Business Hours schedule entry.
|
|

|
Delete the current Business Hours schedule entry.
|
|

|
Move to first Business Hours schedule entry.
|
|

|
Move to previous Business Hours schedule entry.
|
|

|
Move to next Business Hours schedule entry.
|
|

|
Move to last Business Hours schedule entry.
|
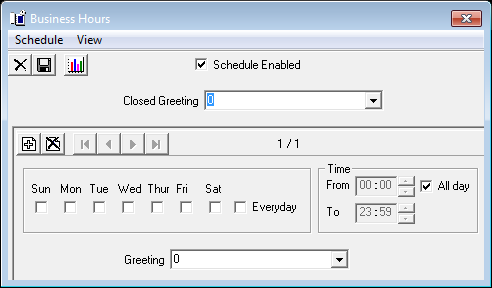
Business Hours Configuration
Schedule Enabled: Enable this checkbox to activate the current schedule.
Closed Greeting: From the dropdown menu, select the phrase that you want to play when a call is received outside of business hours.
Days: Select the checkboxes of the days of the week on which you want the greeting to run.
Time From: Scroll to the time (hours and minutes in 24-hour format) that the greeting is to start, or manually enter the time in the field.
Time To: Scroll to the time (hours and minutes in 24-hour format) that the greeting is to end, or manually enter the time in the field.
|
Note: Select the All Day checkbox if you want the greeting to play by default, regardless of the time. If no time is entered in the Time From/Time To fields, the system will select All Day for its default value.
|
|
Note: A value of From 13:00 to no value indicates 1:00 PM to midnight. The minimum value is 0:00 and the maximum value is 23:59.
|
|
Note: The From field can not be greater than the To field.
|
Greeting: From the dropdown menu, select the greeting that is to play during the specified business hour.
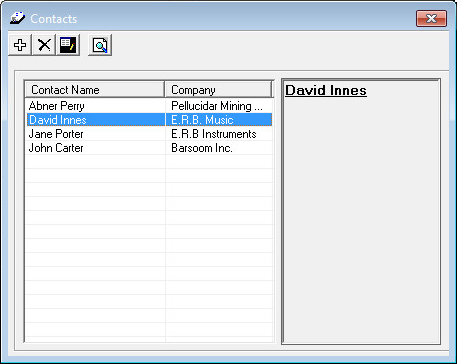
Company Contacts 
The Admin console allows you to create company contacts.
Company Contacts Buttons
|
Button
|
Description
|
|

|
Add new Company Contact.
|
|

|
Delete selected Company Contact.
|
|

|
Edit selected Company Contact.
|
|

|
Search for a Company Contact.
|
Adding / Editing a Contact
General
Speech Enable: Enable this checkbox to allow this contact to be dialed using voice recognition.
User Name: Enter the contact’s name as you want it to appear in the list.
Gender: From the dropdown menu, select the gender for the contact.
Personal Info
Title: From the dropdown menu, select a salutation for the contact (e.g. Mr.)
First Name: Enter the contact’s first name.
Middle Name: Enter the contact’s middle name.
Last Name: Enter the contact’s last name.
Suffix: From the dropdown menu, select a suffix for the contact’s (e.g. Jr.).
Birthday: Enter or click on the ellipsis button  to select it from a calendar.
Business Info
Company: Enter the name of the contact’s company.
Job Title: Enter the contact’s official job title.
Office: Enter the location name of the office where the contact works.
Department: Enter the name of the company department in which the contact works.
Business Address
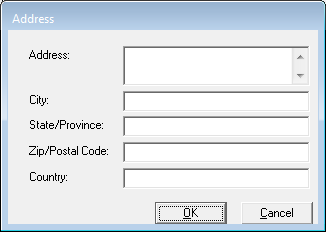
Address: Enter the contact's address directly or through the dialog box by pressing the Address button.
Phone: Enter the contact’s primary telephone number.
Phone 2: Enter the contact's secondary telephone number.
Fax: Enter the contact’s fax number.
Mobile: Enter the contact’s mobile phone number.
Beeper: Enter the contact’s beeper number.
email: Enter the contact’s email address.
Web Site: Enter the contact’s business or personal web site.
Description: Enter a short description for your reference.
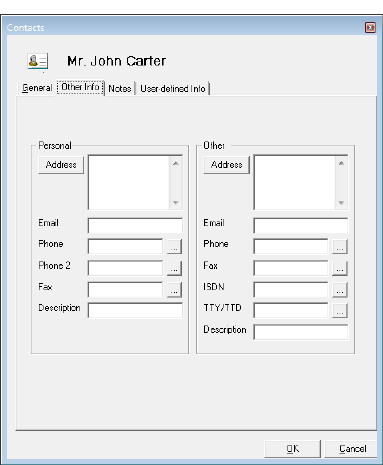
Other Info
Use the Other Info tab to enter additional personal information for the contact.
Click the Address button to include more detailed address details.
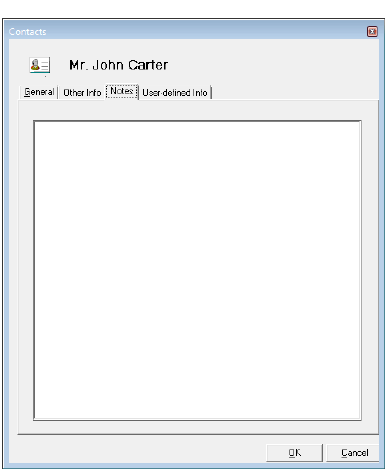
Notes
Use the Notes tab to enter any notes/comments about the contact.
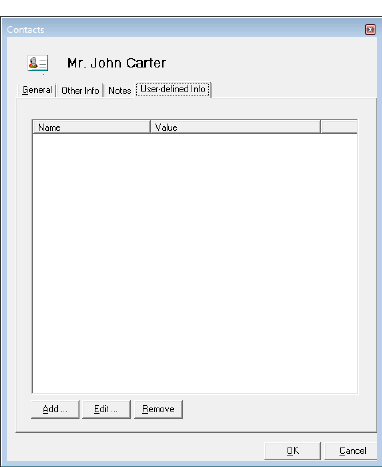
User-defined Info
Use the User-defined Info tab to create your own entries for this contact.
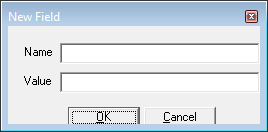
For example, enter a contact's nickname in the space provided here. In such a case, you would click on the Add button. The New Field dialog box appears.
If that contact's nickname was 'Growler', you would enter ‘Nickname’ in the Name field and 'Growler' in the Value field, then click OK.
Compile Grammar
Each time you create a Mailbox, you enter the first and last name of the user. Using speech recognition technology, the system allows a caller to speak a user's name and be directly transferred to the appropriate Mailbox. Creating and compiling the grammar file allows you to maximize the ASR/Voice Verification functionality.
When Mailboxes are added or names are modified, grammar compilation is necessary and will automatically be scheduled 5 minutes after the last change is made. To compile grammar manually, go to the
Company > Speech Options tab and click on the Compile Grammar button.
Compiling Grammar also does the following:
•Allows people to say the name of contacts.
•Allows people to say the name of the party that they wish to message.
•Compiles the Voice Verification keyword list.
•Compiles the list of people who have Voice Verification enabled.
Distribution List 
The UC system allows you to create a distribution list consisting of one or more message recipients. This enables you to send a voicemail, email, or fax to more than one user simultaneously.
When creating the distribution list you can add internal users, users on a site that is networked via AMIS to the server, users on a site that is networked via VPIM to the server, and external email users. This allows you to send messages to any user with one of these profiles.
Each Mailbox has the ability to hold all the distribution lists that you need, each consisting of an unlimited number of Mailboxes.
|
Note: When you are viewing a personal distribution list that consists of both Private & Public contacts, you will only see the Public contacts on the list from the Admin. However, the list still holds the Private contacts and can be accessed by the user who created the contact. This ensures the privacy of individual users and their personal contacts.
|
Distribution List Buttons
|
Button
|
Description
|
|

|
Create a new Distribution List.
|
|

|
Delete current Distribution List.
|
|

|
Save current Distribution List.
|
|

|
Move to first Distribution List.
|
|

|
Move to previous Distribution List.
|
|

|
Move to next Distribution List.
|
|

|
Move to last Distribution List.
|
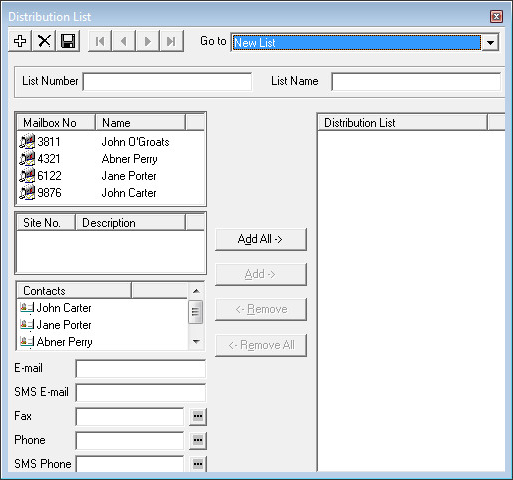
Distribution List Configuration
List Number: Enter the Distribution List number.
List Name: Enter a name for the Distribution List.
|
Note: The list name can consist of any combination of alphanumeric characters. If you require the voice mail system to read your distribution lists to you, it will read the characters that you have entered in this field through the telephone handset using the Text-to-Speech (TTS) feature.
|
|
Note: Both the list number and list name must be unique within a company.
|
After Selecting the Item(s) on the Left Pane:
Add: Click on this button to add the selected entries to the Distribution List.
|
Note: Due to the nature of Remote Site entries you must add them individually. Please refer to the below section to learn more about adding entries to the Distribution List from Remote Sites.
|
Add All: Click on this button to add all Mailbox entries to the Distribution List.
After Selecting the Item(s) on the Right Pane:
Remove: Click on this button to remove the selected entries from the Distribution List.
Remove All: Click on this button to remove all entries from the Distribution List.
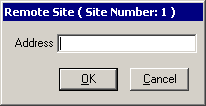
Adding an Remote Site Entry
After Selecting a Remote Site Number from the Left Pane:
Enter the address of the user/Mailbox/extension that you wish to reach.
|
Note: An AMIS address must be numeric. A VPIM address can be alphanumeric.
|
Adding a Manual Entry (Email/Fax/SMS/Phone)
You may add Email, SMS Email, Fax and SMS Phone entries manually to the distribution list.
email: Enter the full email address then click on the Add button.
SMS email: Enter the full SMS email address then click on the Add button.
FAX: Enter the FAX number then click on the Add button. Alternatively, click on the ellipsis button  to open a dialogue to define country code, area code and phone number separately.
Phone: Enter the Phone number then click on the Add button. Alternatively, click on the ellipsis button  to open a dialogue to define country code, area code and phone number separately.
SMS Phone: Enter the SMS Phone number then click on the Add button. Alternatively, click on the ellipsis button  to open a dialogue to define country code, area code and phone number separately.
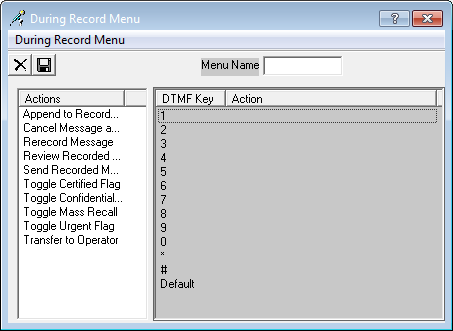
During Record Menu 
The During Record Menu allows you to configure a message menu that will be used by outside callers during a message recording session.
During Record Menu Buttons
|
Button
|
Description
|
|

|
Delete current During Record Menu.
|
|

|
Save current During Record Menu.
|
During Record Menu Configuration
Menu Name: Enter a name for the sub menu.
Actions: Drag and drop an action in this panel to the DTMF key of choice. By assigning actions to specific keys, outside callers will be presented with the actions you have defined.
Click Save when finished.
|
Action
|
Function
|
|
Append to Recorded Message
|
Adds the message to a previously recorded message.
|
|
Cancel Message and Exit
|
Cancels the message and exits.
|
|
Rerecord Message
|
Allows a caller to rerecord a message.
|
|
Review Recorded Message
|
Plays back the recorded message for review.
|
|
Send Recorded Message
|
 Sends the message to the destination. When you attach this function to a DTMF key the following window will appear. Sends the message to the destination. When you attach this function to a DTMF key the following window will appear.
Urgent: Enable this checkbox to mark the message as urgent.
Certified: Enable this checkbox to notify the caller when the message is received.
Confidential: Enable this checkbox to restrict the receiver from forwarding the message.
Do not play prompt: Enable this checkbox to disable the prompt, if desired. The default value is to enable the prompt.
|
|
Toggle Certified Flag
|
Flags message as certified.
|
|
Toggle Confidential Flag
|
Flags the message as confidential.
|
|
Toggle Mass Recall
|
Enables mass recall.
|
|
Toggle Urgent Flag
|
Flags the message as urgent.
|
|
Transfer to Operator
|
Sends the caller to the company operator.
|
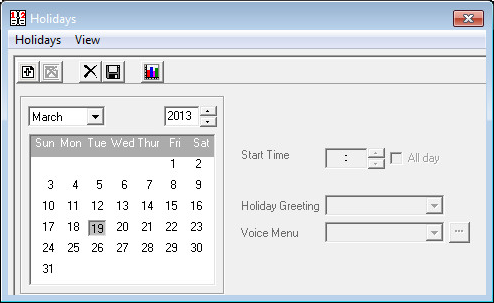
Holidays 
The Holidays parameter allows you to specify holidays so that an appropriate greeting can be played on that day. You can enter as many holiday dates as you require.
Holidays Buttons
|
Button
|
Description
|
|

|
Create a new Holiday entry.
|
|

|
Delete the current Holiday entry.
|
|

|
Delete all Holiday entries.
|
|

|
Save Holiday entries.
|
|

|
View a report of all Holidays.
|
Configuring Holidays
|
Note: When the Company starts with a Voice Menu, the Holidays phrase will only take effect if the Phrase field says “Company Active Greeting” in the Voice Menu. This tells the system to use the Phrase defined on the Greetings tab of the Holiday screen, and to check if the current day is a Holiday.
|
|
Note: You can also double click on the date instead of manually adding a Holiday entry on the selected date by clicking on the button.
|
Month: From the dropdown menu, select the month that the holiday appears in.
Year: Select or enter the year in which the holiday appears in.
Start Time: Select or enter the start time of the holiday. The callers will hear the selected greeting and be sent to the define Voice Menu starting at the define time on the selected holiday. The holiday will expire at 23:59 PM of that day.
All day: Enable this checkbox to honor the holiday for the entire day. The callers will hear the selected greeting and be sent to the define Voice Menu starting at 12:00 AM of the holiday. The holiday will expire at 23:59 PM of that day.
Holiday Greeting: From the dropdown menu, select the prompt that corresponds to the selected holiday.
Voice Menu: From the dropdown menu, select the Voice Menu that the system will use during the Holiday hours.
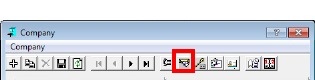
Key Mapping 
The Key Mapping dialog allows you to specify single digit key access, enabling callers to perform actions using a telephone keypad. For example, you can setup your system to allow a caller to press <1> for the Sales Department, <2> for Technical Support, and so on.
Before customizing key mapping, you must be aware of the default keys:
|
*
|
Directory (access to company directory)
|
|
#
|
Login (user's access to the system)
|
|
0
|
Operator
|
Key Mapping Buttons
|
Button
|
Description
|
|

|
Delete current Key Mapping.
|
|

|
Save current Key Mapping.
|
|

|
Open Start Menu Schedule. Use this schedule to define when the custom Key Mapping is going to be used.
|
|

|
Create a new Sub Menu.
|
|

|
Delete the current Sub Menu.
|
|

|
Move to first Sub Menu.
|
|

|
Move to previous Sub Menu.
|
|

|
Move to next Sub Menu.
|
|

|
Move to last Sub Menu.
|
|

|
Search for a Sub Menu.
|
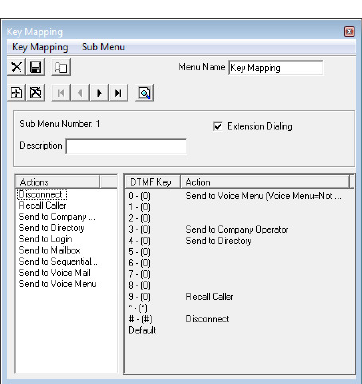
Key Mapping Configuration 
Creating a key mapping sub menu allows the user to create a series of different key mapping definitions based on different times and days of the week. For example, if a caller presses 1 in the morning, they are transferred to Sales. If they press 1 when the company is closed, however, the system transfers the call to the west coast office where operations are still open to handle the call.
Menu Name: Enter a name for current key mapping. This is for administrator use only and has no affect on performance.
Sub Menu Number: This number is automatically assigned when you create a sub menu.
Extension Dialing: Enable this checkbox to allow callers to transfer to a Mailbox user by pressing the DTMF keys (i.e. if you set 2 to be a disconnect, the user can enter 2022 to be transferred to Mailbox 2022 instead of being disconnected).
Description: Enter a description for current key mapping sub menu. This is for administrator use only and has no affect on performance.
Actions: This field displays a list of predefined actions you can configure in the automated attendant. The following actions are available for key mapping:
|
Action
|
Function
|
|
Disconnect
|
Hangs up the call
|
|
Recall Caller
|
Recalls the caller out of the Voice Menu of a defined Mailbox.
Note: The DTMF Key assigned to this action cannot be the same as the first number of the user’s Mailbox number. For example, if a user has the Mailbox number 255, the Recall Caller action cannot be assigned to DTMF key 2.
|
|
Send to Company Operator
|
Sends the caller to the company operator.
|
|
Send to Directory
|
Sends the caller to the company directory.
|
|
Send to Login
|
Allows the caller to log into the system as a user.
|
|
Send to Mailbox
|
Transfers the caller to a defined Mailbox.
|
|
Send to Sequential Directory
|
Lists the company directory by name in alphabetical order.
|
|
Send to Voice Mail
|
Sends the caller to the Mailbox that was entered.
Note: This action works in the same way as if you had pressed # E# (for example, 7#E#).
|
|
Send to Voice Menu
|
This transfers the call into a custom Voice Menu for further processing.
|
There are two methods available to add an action to a DTMF key:
•Highlight an action, right click and select Set Action To. Select a DTMF key to match to the action. For example, if Disconnect is to be set to DTMF key 1, right click on Disconnect, click on Set Action to, and then select 1. Disconnect should be assigned to DTMF key 1.
•Click and drag the desired action to the DTMF Key in the right pane.
Key Mapping Schedule 
Key Mapping Schedule Buttons
|
Button
|
Description
|
|

|
Delete Key Mapping Schedule.
|
|

|
Save Key Mapping Schedule.
|
|

|
View a list of all Key Mapping Schedules.
|
|

|
Create a new Schedule.
|
|

|
Delete the current Schedule.
|
|

|
Move to first Schedule.
|
|

|
Move to previous Schedule.
|
|

|
Move to next Schedule.
|
|

|
Move to last Schedule.
|
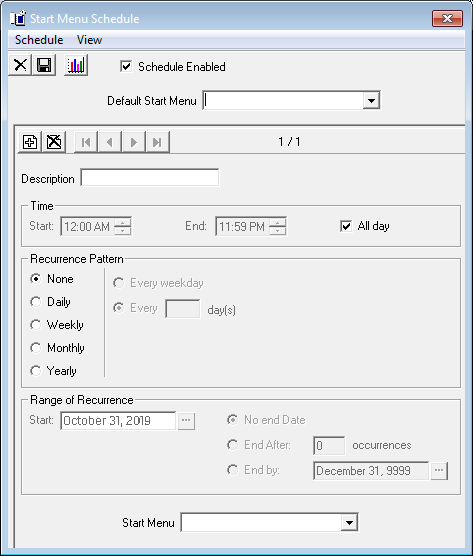
Key Mapping Schedule Configuration
Schedule Enabled: Enable this checkbox to active the key mapping schedule.
Default Start Menu: From the dropdown menu, select the start menu that should be active when there is no start menu defined individually in the sub menus.
Description: Enter a brief title/description of the sub menu for your reference.
Time
Start and End: Enter the times between which the sub menu will be active. Enabling the All day checkbox will make the sub menu active for 24hrs.
Recurrence Pattern:
None: Select this radio button to have the sub menu occur only once for the period of time with no recurrence.
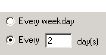
Daily: Select this radio button to indicate that the sub menu will be active on a day-by-day basis. You have (2) options:
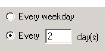
Every weekday: Select this radio button if you want the sub menu to be active every weekday.
Every X day(s): Select this radio button to specify an interval of activity for the sub menu (every second day by entering 2 in the field, for example).
|
Note: If you wish to define the settings as Every weekday, select Weekly settings and define the weekdays manually. The UC Admin algorithm favors the weekly setting and will enhance your user experience.
|
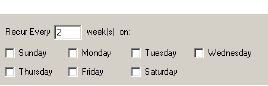
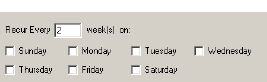
Weekly: Select this radio button to indicate that the sub menu will be active on a weekly basis. Then, in the Recur Every X week(s) on field, enter an interval of activity for the sub menu (every third week by entering 3 in the field, for example). Finally, check the boxes of the days of the week you want the sub menu to be in effect. For example, if you wanted a sub menu to be active every second Monday, Wednesday and Thursday, you would enter 2 in the field and select the Monday, Wednesday and Thursday checkboxes.
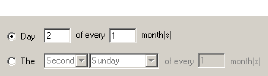
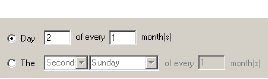
Monthly: Select this radio button if you want the sub menu to recur on a monthly basis.
You have two (2) options:
Select the Day radio button and indicate which day of the month to use the sub menu.
Select the The radio button and indicate which day of a month you want the sub menu to be used. For example, if you want the sub menu to be active on the second Monday of every second month, you would select the The radio button, select Second and Monday, and enter 2.
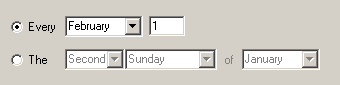
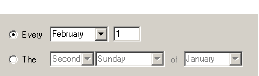
Yearly: Select this radio button if you want the sub menu to be active on a specific day of the year. You have two (2) options:
Select the Every radio button and indicate the day of the year on which you want the sub menu to be active.
Select the The radio button and indicate a specific day of a specific month of the year on which you want the sub menu to be active. For example, if you want the sub menu to be active on the second Thursday of every March, you would select the radio button and select Second, Thursday and March from the dropdown menu.
Range of Recurrence
Start: Select the date on which the first occurrence of the sub menu is to take effect.
|
Note: The sub menu must have a recurrence pattern defined.
|
No end Date: Select this radio button if you want the sub menu to occur indefinitely
End After: Select this radio button if you want to disable the sub menu after the specified number of times.
End by: Select this radio button if you want to disable the sub menu by the specified date.
Start Menu
From the dropdown menu, select the start menu that will run during the scheduled sub menu.
|
Note: If not defined, this will default to the sub menu defined in Default Start Menu field.
|
Operator Schedule 
Following the creation of operators and their languages, you can specify when each operator is to receive calls based on their spoken languages through the Operator Schedule feature.
Operator Schedule Buttons
|
Button
|
Description
|
|

|
Delete Operator Schedule.
|
|

|
Save Operator Schedule.
|
|

|
View a list of all Operator Schedules.
|
|

|
Create a new Schedule.
|
|

|
Delete the current Schedule.
|
|

|
Move to first Schedule.
|
|

|
Move to previous Schedule.
|
|

|
Move to next Schedule.
|
|

|
Move to last Schedule.
|
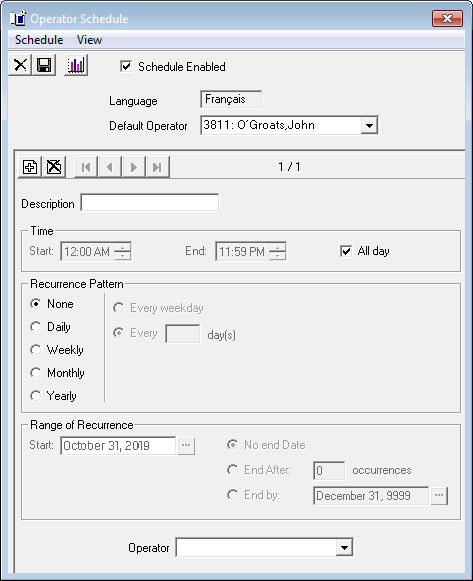
Operator Schedule Configuration
Schedule Enabled: Enable this checkbox to activate the current operator schedule.
Language: From the dropdown menu, select a language for the operator.
Default Operator: From the dropdown menu, select the default operator that will be used by the schedules unless a specific operator has been defined.
Description: Enter a description or name.
Time
Start and End: Enter the times between which the sub menu will be active. Enabling the All day checkbox will make the sub menu active for 24hrs.
Recurrence Pattern:
None: Select this radio button to have the sub menu occur only once for the period of time with no recurrence.
Daily: Select this radio button to indicate that the sub menu will be active on a day-by-day basis. Afterwards, you will have (2) options:
Every weekday: Select this radio button if you want the sub menu to be active every weekday.
Every X day(s): Select this radio button to specify an interval of activity for the sub menu (every second day by entering 2 in the field, for example).
|
Note: If you wish to define the settings as Every weekday, please opt for the Weekly settings and define the weekdays manually. The UC Admin algorithm favors the weekly setting and will enhance your user experience.
|
Weekly: Select this radio button to indicate that the sub menu will recur on a weekly basis. Then, in the Recur Every X week(s) on field, enter an interval of activity for the sub menu (i.e. 3 for every third week). Finally, check the boxes of the days of the week you want the sub menu to be in effect. For example, if you wanted a sub menu to be active every second Monday, Wednesday and Thursday, you would enter 2 in the field and select the Monday, Wednesday and Thursday checkboxes.
Monthly: Select this radio button if you want the sub menu to recur on a monthly basis.
You have two (2) options:
Select the Day radio button and indicate which day of the month you want the sub menu to be used.
Select the The radio button and indicate which day of a month you want the sub menu to be used. For example, if you want the sub menu to be used on the second Monday of every second month, you would select the The radio button, select Second and Monday, and enter 2.
Yearly: Select this radio button if you want the sub menu to be recur on a specific day of the year. You have two (2) options:
Select the Every radio button and indicate the day of the year on which you want the sub menu to be used.
Select the The radio button and indicate a specific day of a specific month of the year on which you want the sub menu to be used. For example, if you want the sub menu to be used on the second Thursday of every March, you would select the radio button and select Second, Thursday and March from the dropdown menu.
Range of Recurrence
Start: Select the date on which the first occurrence of the sub menu is to take effect.
|
Note: The sub menu must have a recurrence pattern defined.
|
No end Date: Select this radio button if you want the sub menu to occur indefinitely
End After: Select this radio button if you want to disable the sub menu after the specified number of times.
End by: Select this radio button if you want to disable the sub menu by the specified date.
Operator
From the dropdown menu, select the operator that will be active during the defined period.
Send Message Menu 
The Send Message Menu allows you to configure a message menu that will be used by outside callers who decide to leave messages in Mailboxes on your company system.
Send Message Menu Buttons
|
Button
|
Description
|
|

|
Save current Send Message Menu.
|
|

|
Create a new Send Message Menu.
|
|

|
Delete the current Sub Menu.
|
|

|
Move to first Sub Menu.
|
|

|
Move to previous Sub Menu.
|
|

|
Move to next Sub Menu.
|
|

|
Move to last Sub Menu.
|
|

|
Search for a Sub Menu.
|
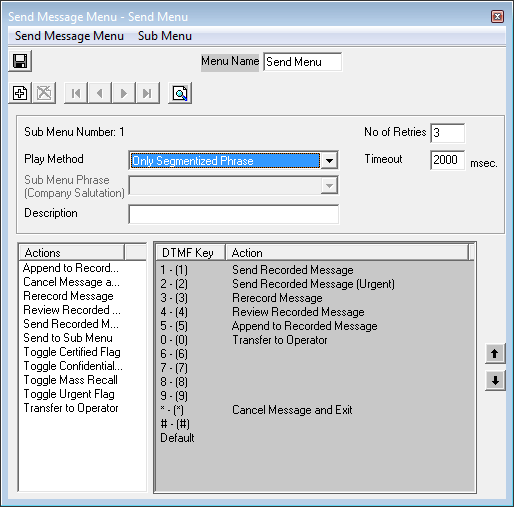
Send Message Menu Configuration
Menu Name: Enter a name for the current Send Message Menu.
No. of Retries: Enter the maximum number of retries a caller is allowed within the sub menu.
Play Method: From the dropdown menu, select the play method to use.
Sub Menu Phrase: From the dropdown menu, select the phrase to use for the sub menu.
|
Note: If you are using a language other than English, you must define your sub menu phrases so that they correspond to the language that you are using. By default, the system installs the English language ranges. If you are using a French system, you must select the .VOX file in the French range that corresponds to the default English .VOX file. For example, SAL9501.VOX is installed by default. To define the French equivalent, you must select SA9551.VOX (the last digit must match), and so on, for each Sub Menu Phrase.
|
|
Note: For more information on sub menu phrases in the Send Message Menu, refer to chapter 4 on page 93 of this guide.
|
Description: Enter an accurate title/description for the sub menu.
Timeout: Enter the amount of time (in milliseconds) the caller has for input before the system processes it.
|
Note: At the end of the defined timeout, if there is no input, the system will say “I'm sorry, I did not understand that.” If there was an input, system will check and process it if it matches any action.
|
Actions: Drag and drop an action in this panel to the DTMF key of choice. By assigning actions to specific keys, outside callers will be presented with the actions you have defined.
|
Action
|
Function
|
|
Append to Recorded Message
|
Adds the message to a previously recorded message.
|
|
Cancel Message and Exit
|
Cancels the message and exits.
|
|
Re-record Message
|
Allows a caller to re-record a message.
|
|
Review Recorded Message
|
Replays the recorded message for review.
|
|
Send Recorded Message
|
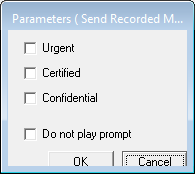 Sends the message to the destination. When you attach this function to a DTMF key the following window will appear. Sends the message to the destination. When you attach this function to a DTMF key the following window will appear.
Urgent checkbox to mark the message as urgent.
Certified checkbox to notify the caller when the message is received.
Confidential checkbox to restrict the receiver from forwarding the message.
Do not play prompt checkbox to disable the prompt, if desired. The default value is to enable the prompt.
|
|
Toggle Certified Flag
|
Flags message as certified.
|
|
Toggle Confidential Flag
|
Flags the message as confidential.
|
|
Toggle Mass Recall
|
Enables mass recall.
|
|
Toggle Urgent Flag
|
Flags the message as urgent.
|
|
Transfer to Operator
|
Sends the caller to the company operator.
|
Broadcast Messaging
You can send Admin Broadcast Messages to all users in the current company. The message will be sent as a text message to the VPIM address defined in the mailbox.
New: Click on this button to add a new admin broadcast message entry.
Delete: Click on this button to delete the selected entry.
Edit: Click on this button to edit the selected entry.
Send: Click on this button to send the selected message.
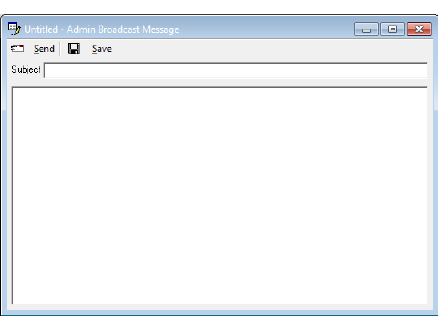
Add / Edit a Admin Broadcast Message
Send: Click on this button to send the message you are currently creating/editing.
Save: Click on this button to save the current message.
Subject: Enter the subject of the message.
Body: Enter the content of the message.
Confirmation
Since Admin Broadcast Message is a mass messaging tool, you may be asked to confirm your action. Click Yes to send your message or No to cancel the message. Once a message has been sent, it cannot be recalled.
When the message has been sent, you will see the following prompt. Click OK to continue.