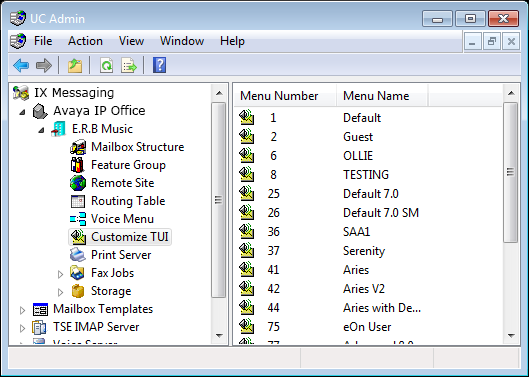
A customized Telephone User Interface allows mailbox users to maintain and personalize their mailbox profiles.
|
Note: You can only assign 1 TUI to a Mailbox but the same TUI may be assigned to multiple Mailboxes. |
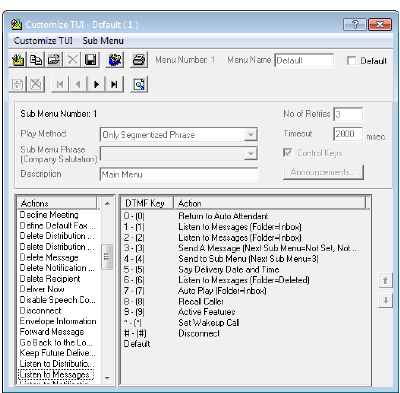
Menu Number: This field is automatically generated when you create a new Custom TUI.
Menu Name: Enter the name of the TUI. This is for reference only and has no impact on functionality.
Default: Enable this checkbox to assign the current TUI to all mailboxes that do not have TUIs defined in their profiles.
No. of Retries: Enter the number of retries a mailbox user has before the system disconnects them.
Play Method: From the dropdown menu, select a setting for the prompt. There are several options available:
|
Salutation |
Function |
|---|---|
|
Nothing |
No prompt will be played on this sub menu. |
|
Only Sub Menu Phrase |
Only the defined Sub Menu Phrase will be played when the user accesses this sub menu. |
|
Only Segmented Phrase |
Only the Segmented Phrase of each action will be played when the user accesses this sub menu. |
|
Both Sub Menu and Segmented Phrase |
Both the defined Sub Menu Phrase and the Segmented Phrase of each action will be played when the user accesses this sub menu. |
Description: Enter text describing the action of this sub menu in the TUI template.
Timeout: Enter the amount of time (in msec) that the system will wait before it processes the mailbox user's input. If the mailbox user did not enter anything, the system will perform the default action.
Control Keys: Enable this checkbox to turn on the control key function while listening to a message.
|
Note: Control Keys must be enabled in all sub menus before this function will work. |
|
Note: Control keys can only be accessed through DTMF input. It is not compatible with speech commands. |
Announcements...: Click on this button to select which announcements to play when the mailbox user logs in.
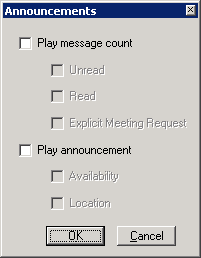
Play message count: Enable this checkbox to play back the number of message in the mailbox user's inbox. Enabling this option also plays back messages to the user when their inbox is nearly full as per Feature Group > Storage options.
•Unread: Enable this checkbox to play back the number of unread message in the mailbox user's inbox.
•Read: Enable this checkbox to play back the number of read message in the mailbox user's inbox.
•Explicit Meeting Requests: Enable this checkbox to play back the number of meeting requests in the mailbox user's inbox.
Play announcement: Enable this checkbox to play back the mailbox user's current availability and location.
•Availability: Enable this checkbox to play back the availability of the mailbox user.
•Location: Enable this checkbox to play back the location of the mailbox user.
|
Note: For all Actions that require a mailbox, the target mailbox must have a Mainstream license. |
Common Fields
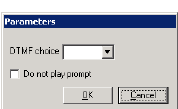
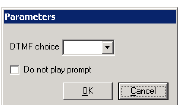
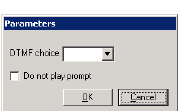
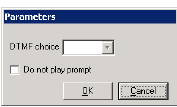
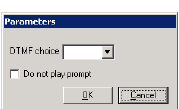
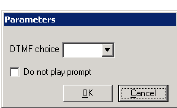
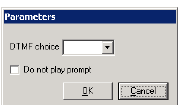
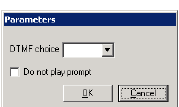
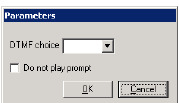
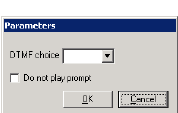
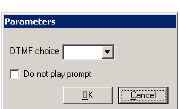
DTMF Choice: From the dropdown menu, select the DTMF key that the action will be associated with under the current sub menu. Only 1 DTMF key may be assigned to an action. You must create duplicate actions if you need the action to be valid for more than one DTMF key in a single sub menu.
Do not play prompt: Enable this checkbox to ignore the announcement of current action when the system announces all the action in the current sub menu to the users. The action will still be valid and can be used, the users will simply not hear anything when navigating through the menu.
Accept Meeting
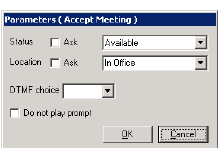
This action will allow the users to accept the current meeting request message they are listening to.
Accept Meeting Tentatively
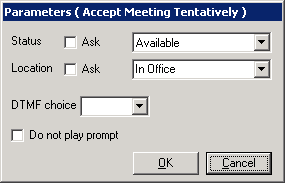
This action will allow the users to tentatively accept the current meeting request message they are listening to.
Active Features

This action will inform the user of their Transfer Options status.
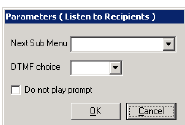
Add Distribution List
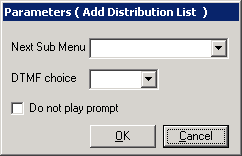
This action will allow the users to create a Distribution List by entering the number then recording a name for it.
Next Sub Menu: Select the sub menu that the user will be sent to after creating a Distribution List. This sub menu should contain the actions to manage the list (e.g. Add Distribution List Member).
Add Distribution List Member

This action will allow the users to add a mailbox to an existing Distribution List. This action must be on a sub menu which comes after Adding/Modifying a Distribution List action.
Add Notification Schedule

This action will allow the users to add a Notification Schedule entry via telephone. They will be able to define the full phone number along with the exact schedule.
Add Recipient
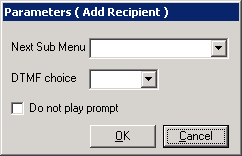
This action will allow the users to add more recipients to a message. This action must be on a sub menu which comes after an action that records, forwards or sends a message.
Next Sub Menu: From the dropdown menu, select the Sub Menu that the users will be sent to after adding a recipient. This Sub Menu should be a Sub Menu which has the Send Recorded Message action.
Append to Recorded Message

This action will allow the users to add a message to an existing recorded message. This action must be on a sub menu which comes after an action that records, forwards or sends a message.
Auto Forward Message

This action will allow the users to set automatic forwarding of all their messages to a destination of their choice.
Auto Play
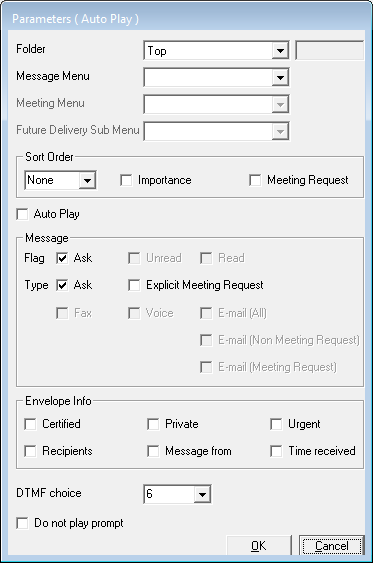
This action will allow the users to consecutively listen to all the messages in the specified folder. The type of messages, and the specific information that will be played for the users may be either asked for or forced by the action settings.
Folder: From the dropdown menu, select the message folder that the action will browse for messages.
Message Menu: From the dropdown menu, select the Sub Menu that has message management actions.
Meeting Menu: From the dropdown menu, select the Sub Menu that has management actions for meetings.
Future Delivery Sub Menu: From the dropdown menu, select the Sub Menu that has management actions for messages flagged for Future Delivery.
Sort Order
From the dropdown menu, select None, Read or Unread to prioritize messages according to selected option. Select None if you do not wish to separate Read from Unread.
Importance: Enable this checkbox to sort the messages according to their flags (e.g. certified, private, etc.).
Meeting Request: Enable this checkbox to sort the meeting request messages separately.
Auto Play: Enable this checkbox to automatically start playing the messages in the defined order without user confirmation.
Message
Flag: Enable the Ask checkbox to ask the users to select which messages will be played (between Unread and Read). Enable the Unread checkbox to only have unread messages available for playback. Enable the Read checkbox to only have the read messages available for playback.
Type: Enable the Ask checkbox to ask the users to select which type of messages will be played (all types of messages will be available to them). Enable the Fax checkbox to give users the fax message playback option. Enable the Voice checkbox to give the users the voice message playback option. Enable the email (All) checkbox to give users the email message playback option. Enable the email (Non-Meeting Request) checkbox to give users the non-meeting request email message playback option. Enable the email (Meeting Request) checkbox to give users the meeting request email message playback option.
Envelope Info
Certified: Enable this checkbox to inform the user that the message is certified before playback if it was flagged by the sender.
Private: Enable this checkbox to inform the user that the message is private before playback if it was flagged by the sender.
Urgent: Enable this checkbox to inform the user that the message is urgent before playback if it was flagged by the sender.
Recipients: Enable this checkbox to inform the user of all the recipients of the message before playback.
Message From: Enable this checkbox to inform the user who the sender of the message is before playback.
Time Received: Enable this checkbox to inform the user when the message was received before playback.
Browse Folder

This action will allow the users to browse specific message folders. The type of messages and the specific information that will be played for the users may be either asked for or forced by the action settings.
Folder: From the dropdown menu, select the message folder that the action will browse for messages.
Message Menu: From the dropdown menu, select the Sub Menu that contains the message management actions.
Meeting Menu: From the dropdown menu, select the Sub Menu that contains the management actions for meeting.
Future Delivery Sub Menu: From the dropdown menu, select the Sub Menu that contains the management actions for messages flagged for Future Delivery.
Sort Order
From the dropdown menu, select None, Read or Unread to prioritize messages according to the selected option. Select None if you do not wish to separate Read from Unread.
Importance: Enable this checkbox to sort the messages according to their flags (e.g. certified, private, etc.).
Meeting Request: Enable this checkbox to sort the meeting request messages separately.
Auto Play: Enable this checkbox to automatically start playing the messages in the defined order without user confirmation.
Message
Flag: Enable the Ask checkbox to ask the users to select which messages will be played (between Unread and Read). Enable the Unread checkbox to have only unread messages available for playback. Enable the Read checkbox to have only read messages available for playback.
Type: Enable the Ask checkbox to ask the users to select which type of messages will be played (all types of messages will be available to them). Enable the Fax checkbox to give users the fax message playback option. Enable the Voice checkbox to give users the voice message playback option. Enable the email (All) checkbox to give users the email message playback option. Enable the email (Non-Meeting Request) checkbox to give users the non-meeting request email message playback option. Enable the email (Meeting Request) checkbox to give users the meeting request email message playback option.
Envelope Info
Certified: Enable this checkbox to inform the user that the message is certified before playback if it was flagged by the sender.
Private: Enable this checkbox to inform the user that the message is private before playback if it was flagged by the sender.
Urgent: Enable this checkbox to inform the user that the message is urgent before playback if it was flagged by the sender.
Recipients: Enable this checkbox to inform the user of all the recipients of the message before playback.
Message From: Enable this checkbox to inform the user who the sender of the message is before playback.
Time Received: Enable this checkbox to inform the user when the message was received before playback.
Call Back to Sender

This action will allow the users to directly call the sender of the message. They can choose to call the sender directly, assuming that the sender's address can be resolved by the system, or manually enter the phone number to call. This action must be on a sub menu which comes after an action that plays a message.
Cancel Message and Exit
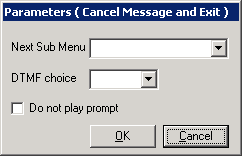
Next Sub Menu: From the dropdown menu, select the Sub Menu that the users will be sent to after canceling a message. This Sub Menu should be a Sub Menu which comes after reviewing a message.
Change Availability
This action will allow the users to change their availability. If they are currently available, they will now be unavailable and vice versa.
Change Future Delivery Date/Time
This action will allow the users to change the date on Future Delivery messages. This action must be on a sub menu which comes after reviewing a message.
Change Location
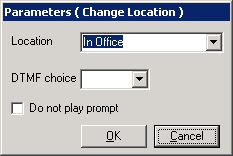
This action will allow the users to change their location to the one defined in the action.
Location: From the dropdown menu, select the location that users will be able to change to. This location has to be one of the default locations. You cannot select a custom location through this method.
Change Voice Verification Security Level

This action will allow the users to change the Voice Verification security level between none, normal and high.
Choose TTS Language
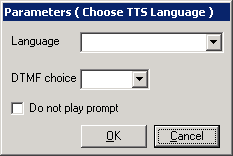
This action will allow the users to choose the TTS language defined in the action.
Language: From the dropdown menu, select the TTS language that the users will be able to choose.
Clear Mass Recall

This action will stop sending a Mass Recall broadcast, and clear the queue of all pending outgoing messages.
Clear Numeric Password

This action will allow the users to reset their password to the default (13579).
Decline Meeting

This action will allow the users to decline the current meeting request message that they are listening to.
Define Default Fax Address

This action will allow the users to manually define a destination for all incoming faxes. This will be added as a fax entry under the Address tab of the mailbox.
Delete Distribution List
This action will allow the users to delete a selected Distribution List.
Delete Distribution List Member

This action will allow the users to remove a mailbox from the current Distribution List. This action must be on a sub menu which comes after Adding/Modifying a Distribution List action.
Delete Message

This action will allow the users to delete the current message. This action must be on a sub menu which comes after an action that plays a message.
Delete Notification Schedule
This action will allow the users to either delete a selected Notification Schedule entry or all schedules.
Delete Recipient
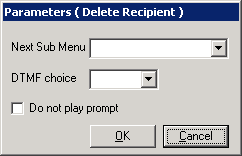
This action will allow the users to remove recipient from a message. This action must be on a sub menu which comes after an action that records, forwards or sends a message.
Next Sub Menu: From the dropdown menu, select the Sub Menu that the users will be sent to after deleting a recipient. This Sub Menu should be a Sub Menu which has the Send Recorded Message action.
Deliver Now

This action will allow the users to immediately send the current message in the outbox folder. This action must be on a sub menu which comes after reviewing a message.
Disable Speech Command
This action will allow the users to disable the Speech Command feature for the duration of current login session.
Disconnect

This action will disconnect the user from the system.
Envelope Information
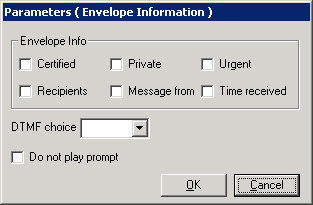
This action will allow the users to play the envelope information of a message. The type of envelope information played may be defined within the action. This action must be on a sub menu which comes after an action that plays a message.
Certified: Enable this checkbox to inform the user that the message is certified if it was flagged by the sender.
Private: Enable this checkbox to inform the user that the message is private if it was flagged by the sender.
Urgent: Enable this checkbox to inform the user that the message is urgent if it was flagged by the sender.
Recipients: Enable this checkbox to inform the user of all the recipients of the message.
Message From: Enable this checkbox to inform the user who the sender of the message is.
Time Received: Enable this checkbox to inform the user when the message was received.
Forward Message
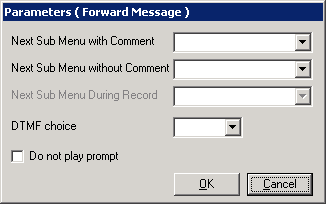
This action will allow the users to forward the current message. The users may forward the message as is or record a comment on the forward during the action. This action must be on a sub menu which comes after an action that plays a message.
Next Sub Menu with Comment: From the dropdown menu, select the Sub Menu which contains actions related to recording (e.g. Review Recorded Message).
Next Sub Menu without Comment: From the dropdown menu, select the Sub Menu which contains actions related to sending a message.
Next Sub Menu During Record: From the dropdown menu, select the Sub Menu that the users will have access to while making a recording.
Go Back to the Locations Calendar

This action will allow the users to change their location to what is currently defined in their Locations Calendar.
Keep Future Delivery Date/Time

This action will allow the users to keep the current date on Future Delivery messages. This action must be on a sub menu which comes after reviewing a message. The purpose of this action is to give the users an option when they are on a TUI Sub Menu dedicated to Future Delivery management.
Listen to Distribution List

This action will allow the users to listen to the list of all available Distribution Lists.
Listen to Messages
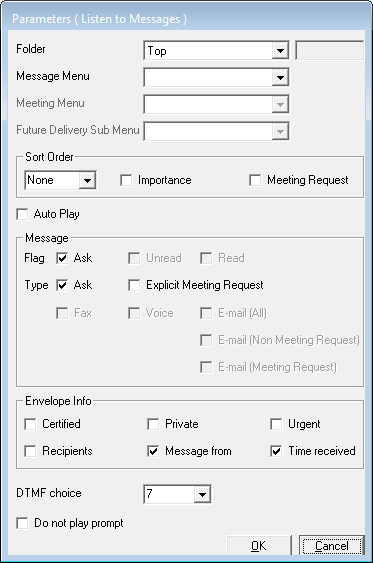
This action will allow the users to listen to the messages in the specified folder. The type of messages, and the specific information that will be played for the users may be either asked or forced by the action settings.
Folder: From the dropdown menu, select the message folder that the action will browse for messages.
Message Menu: From the dropdown menu, select the Sub Menu that has message management actions.
Meeting Menu: From the dropdown menu, select the Sub Menu that has management actions for meeting.
Future Delivery Sub Menu: From the dropdown menu, select the Sub Menu that has management actions for messages flagged for Future Delivery.
Sort Order
dropdown Menu: From the dropdown menu, select None, Read or Unread to prioritize messages according to selected option. Select None if you do not wish to separate Read from Unread.
Importance: Enable this checkbox to sort the messages according to their flags (e.g. certified, private, etc.).
Meeting Request: Enable this checkbox to sort the meeting request messages separately.
Auto Play: Enable this checkbox to automatically start playing the messages in the defined order without user confirmation.
Message
Flag: Enable the Ask checkbox to ask the users to select which messages will be played (between Unread and Read). Enable the Unread checkbox to only have unread messages available for playback. Enable the Read checkbox to only have the read messages available for playback.
Type: Enable the Ask checkbox to ask the users to select which type of messages will be played (all types of messages will be available to them). Enable the Fax checkbox to give the users fax message playback option. Enable the Voice checkbox to give the users voice message playback option. Enable the email (All) checkbox to give the users email message playback option. Enable the email (Non-Meeting Request) checkbox to give the users non-meeting request email message playback option. Enable the email (Meeting Request) checkbox to give the users meeting request email message playback option.
Envelope Info
Certified: Enable this checkbox to inform the user that the message is certified before playback if it was flagged by the sender.
Private: Enable this checkbox to inform the user that the message is private before playback if it was flagged by the sender.
Urgent: Enable this checkbox to inform the user that the message is urgent before playback if it was flagged by the sender.
Recipients: Enable this checkbox to inform the user of all the recipients of the message before playback.
Message From: Enable this checkbox to inform the user who the sender of the message is before playback.
Time Received: Enable this checkbox to inform the user when the message was received before playback.
Listen to Notification Schedule

This action will allow the users to listen to all their Notification Schedules.
Listen to Numeric Password

This action will allow the users to listen to their current mailbox password.
Listen to Recipients
This action will allow the users to listen to all the recipient on a message. This action must be on a sub menu which comes after an action that records, forwards or sends a message.
Next Sub Menu: From the dropdown menu, select the Sub Menu that the users will be sent to after listening to the recipient. This Sub Menu should be a Sub Menu which has the Send Recorded Message action.
Make Caller ID Active Address

This action will allow the users to add their current Caller ID to their mailbox and use it as a default under the location that they are in. If the number already exists in the addresses, it will become the default.
Mark Message Unread/Read

This action will allow the users to mark the message as Unread or Read. This action must be on a sub menu which comes after an action that plays a message.
Edit Distribution List
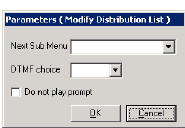
This action will list the entries of the Distribution List selected by the user then forward them to the sub menu where they can manage the Distribution List.
Next Sub Menu: Select the sub menu that the user will be sent to modify the Distribution List. This sub menu should contain the actions to manage the list (e.g. Add Distribution List Member).
Edit Notification Schedule

This action will allow the users to modify a selected Notification Schedule entry.
Move Message to Another Folder
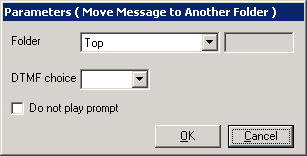
This action will allow the users to move the message to the folder defined in the action. This action must be on a sub menu which comes after an action that plays a message.
Folder: From the dropdown menu, select the folder that the message will be moved to. If you choose custom, enter the name of the folder manually on the field provided on the right.
Place Call
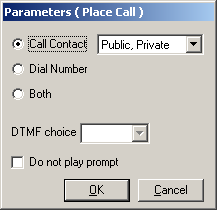
This action will allow the users to call a contact or a number they specify. The availability of call options will depend on the configuration of the action.
Call Contact: Select this radio button, then from the dropdown menu, select Private, Public or both to give the user access to those contacts.
Dial Number: Select this radio button to allow users to dial a custom number.
Both: Select this radio button to allow users to dial both contacts or custom numbers.
Print Fax
This action will allow the users to print the fax message that they have just reviewed. This action must be on a sub menu which comes after an action that plays a message.
Recall Caller

This action will allow the users to connect to a caller that is currently leaving a message on the mailbox of the user.
Record Busy Greeting
This action will allow users to record a greeting that can be played when their status is set to busy.
Record Customized Greeting

This action will allow the users to record a greeting that may be utilized in few different situations. The users will have to assign a number to each Customized Greeting when they are recording a new one.
Record Internal Busy Greeting

This action will allow the users to record a greeting that can be played to internal callers when their status is set to busy.
Record Internal Personal Greeting

This action will allow the users to record a greeting for personal purpose that will only be available to internal callers. This will usually be the greeting that will be played when the user does not pick up their phone.
Record Internal Unavailable Greeting

This action will allow the users to record a greeting that can be played to internal callers when their status is set to unavailable.
Record Location Greeting
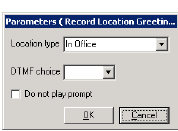
This action will allow the users to record a greeting for specified location.
Location: From the dropdown menu, select the location that users will be recording the greetings for. This location has to be one of the default locations. You cannot select a custom location through this method.
Record Message in Current Mailbox
This action will allow the users to record a voice message which will be left in the mailbox they are currently logged into.
Record Name Greeting
This action will allow the users to record a Name Greeting which will be played to identify the owner of the mailbox in a directory or during a transfer.
Record Personal Greeting

This action will allow the users to record a greeting for personal purposes. This will usually be the greeting that will be played when the user does not pick up their phone.
Record Unavailable Greeting
This action will allow the users to record a greeting that can be played when their status is set to unavailable.
Reply to All Recipients
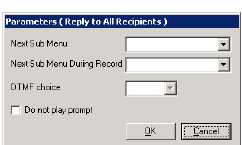
This action will allow the users to record a reply that will be sent to the sender as well as anyone else that has received the same message. This action must be on a sub menu which comes after an action that plays a message. This action is the equivalent of Reply to All function from email clients.
Send Message Sub Menu: From the dropdown menu, select the Sub Menu that the users will be sent to review, send or cancel their message. The actions to manage the recorded message (e.g. Review Recorded Message) should be in this Sub Menu.
Next Sub Menu During Record: From the dropdown menu, select the Sub Menu that the users will have access to while making a recording. The actions on this Sub Menu cannot use the same DTMF keys that the defined Send Message Sub Menu is already utilizing. Having a same DTMF key entry will cause a conflict.
Reply to Sender Only
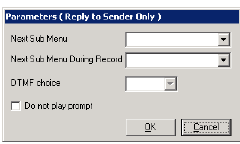
This action will allow the users to record a reply that will be sent to the sender of the message. This action must be on a sub menu which comes after an action that plays a message.
Send Message Sub Menu: From the dropdown menu, select the Sub Menu that the users will be sent to review, send or cancel their message. The actions to manage the recorded message (e.g. Review Recorded Message) should be in this Sub Menu.
Next Sub Menu During Record: From the dropdown menu, select the Sub Menu that the users will have access to while making a recording. The actions on this Sub Menu cannot use the same DTMF keys that the defined Send Message Sub Menu is already utilizing. Having a same DTMF key entry will cause a conflict.
Rerecord List Name

This action will allow the users to rerecord the current Distribution List's name. This action must be on a sub menu which comes after Adding/Modifying a Distribution List action.
Rerecord Message

This action will allow the users to rerecord a message to replace the one they have recorded. This action must be on a sub menu which comes after an action that records, forwards or sends a message.
Return to Auto Attendant

This action will return the users to the auto attendant.
Review Availability and Location
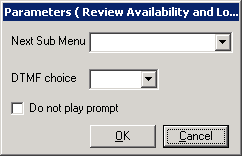
This action will allow the users to listen to their current availability and location.
Next Sub Menu: Select the sub menu that the user will be sent to after reviewing their status. This sub menu should contain the actions to manage the locations (e.g. Change Location).
Review Contacts
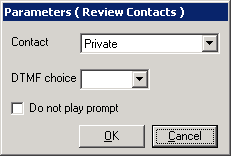
This action will allow the users to review the contacts from the database specified in the action. The contact's default numbers will be played by the system.
Contact: From the dropdown menu, select Private, Public or both to give the user access to those contacts.
Review Distribution List Members

This action will play all the existing entries on the current Distribution List for the user. This action must be on a sub menu which comes after Adding/Modifying a Distribution List action.
Review List Name

This action will play the current Distribution List's name for the user. This action must be on a sub menu which comes after Adding/Modifying a Distribution List action.
Review Message

This action will allow the users to review the current message. Afterwards, they will be returned to the primary Sub Menu that has the actions for messages. This action must be on a sub menu which comes after an action that plays a message.
Review Recorded Message

This action will allow the users to review the message that has been recorded. This action must be on a sub menu which comes after an action that records, forwards or sends a message.
Rewind Message

This action will allow the users to rewind the current message (if under control key, you will be able to define the amount of time you can rewind per key entry). Single entry will rewind the message for the defined time (5 seconds by default) while double entry will rewind the message to the beginning. Afterwards, they will remain in the same Sub Menu where the Rewind Message action is in. This action must be on a sub menu which comes after an action that plays a message.
Save Recorded Message in Draft and Exit
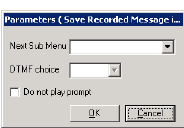
This action will allow the users to save the recorded message in the Draft folder and exit. This action must be on a sub menu which comes after an action that records message. This message may be accessed by going to the Draft folder at any time.
Say Delivery Date and Time

This action will allow the users to listen to the Future Delivery time of the messages. This action must be on a sub menu which comes after reviewing a message.
Send A Message
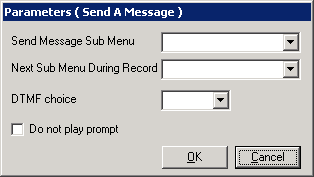
This action will allow the users to send a voice message to mailbox(es) in the system. They will be prompted to record a message when they select this option.
Send Message Sub Menu: From the dropdown menu, select the Sub Menu that the users will be sent to review, send or cancel their message. The actions to manage the recorded message (e.g. Review Recorded Message) should be in this Sub Menu.
Next Sub Menu During Record: From the dropdown menu, select the Sub Menu that the users will have access to while making a recording. The actions on this Sub Menu cannot use the same DTMF keys that the defined Send Message Sub Menu is already utilizing. Having a same DTMF key entry will cause a conflict.
Send Recorded Message
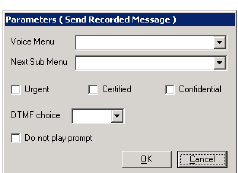
This action will allow the users to send the message that has been recorded. This action must be on a sub menu which comes after an action that records a message.
Voice Menu: From the dropdown menu, select the Voice Menu that the message recipients will be sent to after hearing the message.
Next Sub Menu: From the dropdown menu, select the Sub Menu that the users will be sent to after sending a message.
Urgent: Enable this checkbox to automatically flag all messages sent through this action as Urgent.
Certified: Enable this checkbox to automatically flag all messages sent through this action as Certified.
Confidential: Enable this checkbox to automatically flag all messages sent through this action as Confidential.
Send Recorded Message In Future
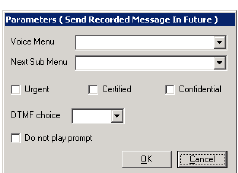
This action will allow the users to send the message that has been recorded at a specific future date that they choose. This action must be on a sub menu which comes after an action that records a message.
Voice Menu: From the dropdown menu, select the Voice Menu that the message recipients will be sent to after hearing the message.
Next Sub Menu: From the dropdown menu, select the Sub Menu that the users will be sent to after sending a message.
Urgent: Enable this checkbox to automatically flag all messages sent through this action as Urgent.
Certified: Enable this checkbox to automatically flag all messages sent through this action as Certified.
Confidential: Enable this checkbox to automatically flag all messages sent through this action as Confidential.
Send to Sub Menu
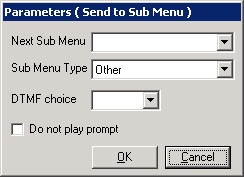
This action will send the user to the Sub Menu defined in the action.
Send to Tutorial

This action will send the user to the Tutorial session.
Set Numeric Password

This action will allow the users to change their mailbox numeric password.
Set Wakeup Call

This action will allow the users to add a wakeup call entry to the system. They will be able to manually define the time and the number to be called.
Skip to Next Message without changing Read Status
This action will allow the users to skip to the next message without changing Read Status of the current message. This action must be on a sub menu which comes after an action that plays a message.
Skip to Previous Message

This action will allow the users to skip to the previous message. This action must be on a sub menu which comes after an action that plays a message.
Skip to Previous Message without Changing Read Status
This action will allow the users to skip to the previous message without changing Read Status of the current message. This action must be on a sub menu which comes after an action that plays a message.

Skip/Save
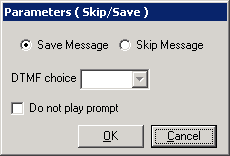
This action will allow the users to either skip or save the current message. This action must be on a sub menu which comes after an action that plays a message.
Save Message: Select this radio button to make this action save the current message.
Skip Message: Select this radio button to make this action skip the current message.
Toggle Certified Flag
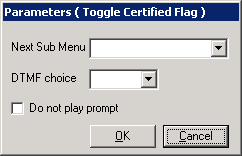
This action will allow the users to manually flag their message as Certified. This action must be on a sub menu which comes after an action that records, forwards or sends a message.
Next Sub Menu: From the dropdown menu, select the Sub Menu that the users will be sent to after flagging the message. This Sub Menu should be a Sub Menu which has the Send Recorded Message action.
Toggle Confidential Flag
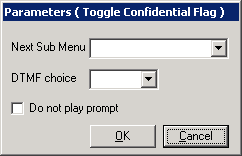
This action will allow the users to manually flag their message as Confidential. This action must be on a sub menu which comes after an action that records, forwards or sends a message.
Next Sub Menu: From the dropdown menu, select the Sub Menu that the users will be sent to after flagging the message. This Sub Menu should be a Sub Menu which has the Send Recorded Message action.
Toggle Mass Recall

This action will allow the users to activate mass recall. If the mass recall is already activated, this action will stop the mass recall.
Toggle Urgent Flag
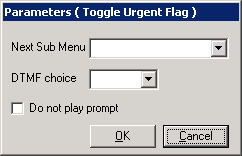
This action will allow the users to manually flag their message as Urgent. This action must be on a sub menu which comes after an action that records, forwards or sends a message.
Next Sub Menu: From the dropdown menu, select the Sub Menu that the users will be sent to after flagging the message. This Sub Menu should be a Sub Menu which has the Send Recorded Message action.
Transfer to Mailbox
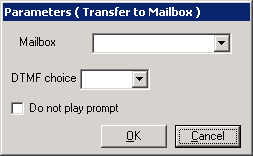
This action will allow the users to be transferred to the mailbox defined in the action.
Mailbox: From the dropdown menu, select the mailbox that the user will be transferred to.
Transfer to Operator

This action will allow the users to be transferred to the Operator.
Turn Call Forwarding On/Off

This action will allow the users to activate/deactivate Call Forwarding. If the feature was on, it will be turned off and vice versa.
Turn Call Queuing On/Off

This action will allow the users to activate/deactivate Call Queuing. If the feature was on, it will be turned off and vice versa.
Turn Call Screening On/Off
This action will allow the users to activate/deactivate Call Screening. If the feature was on, it will be turned off and vice versa.
Turn Notification Schedule On/Off
This action will allow the users to activate/deactivate their Notification Schedule. If the feature was on, it will be turned off and vice versa.
Turn Post Paging On/Off

This action will allow the users to activate/deactivate Post Paging. If the feature was on, it will be turned off and vice versa.
Turn Pre-Paging On/Off

This action will allow the users to activate/deactivate Pre Paging. If the feature was on, it will be turned off and vice versa.
Voice Print Training

This action will allow the users to train the voice print system so that the Voice Verification feature will be able to recognize the user more fluently. The user may also remove and reenroll the voice prints through this action as well.
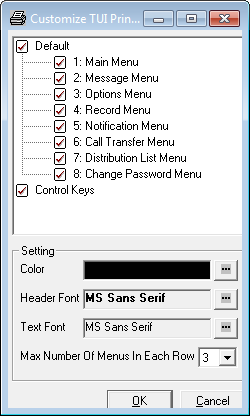
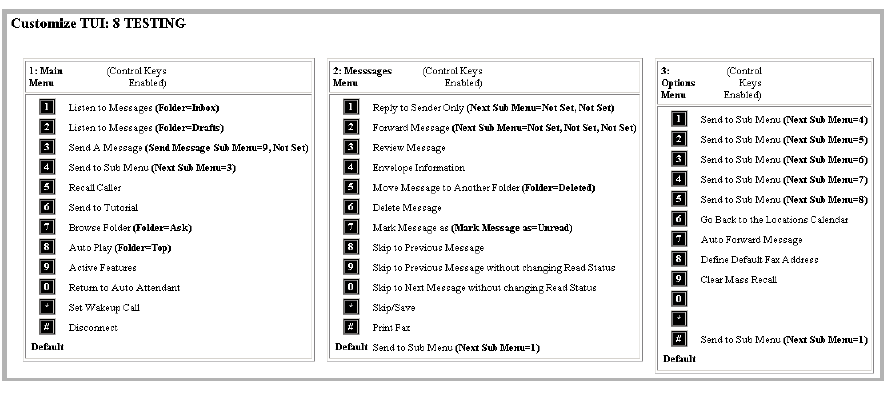
A fully customized TUI can be complex. To make things easier to understand, particularly for the users, you can export the TUI structure as an HTML file and print it. When you click on the Customize TUI Print-out button, you will see this window which maps out your current TUIs entire structure.
|
Hint: Disable the checkbox beside each TUI component to remove it from the print-out. |
Color: Select the color of the text that will be used to generate the print-out.
Header Font: Select the style of font that will be used for headers (e.g. sub menu name) in the print-out.
Text Font: Select the style of font that will be used for the descriptive/action text.
Max Number of Menus in Each Row: Select the number of menu items that a single row will hold. For example, setting this to 3 will print 3 sub menus in a single row.
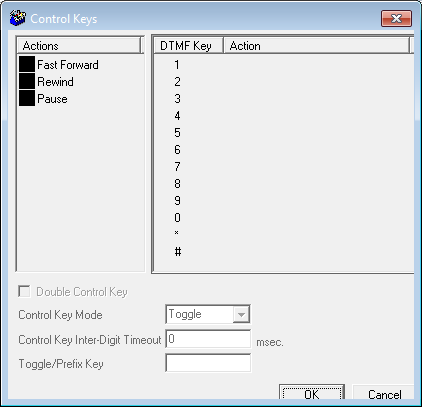
The Control Keys feature allows mailbox users to have control over the message playback.
Fast Forward: Fast forward a message during playback. You may define the fast forward duration (in msec) when you add the action to the DTMF key.
Rewind: Rewind message during playback. You may define the rewind duration (in msec) when you add the action to the DTMF key.
Pause: Pause the message during playback. You may define the pause duration (in msec) when you add the action to the DTMF key.
Double Control Key: Enable this checkbox to allow Double Control Key which offers further customizing of control keys via options below.
Control Key Mode: From the dropdown menu, select the Control Key Mode from below to employ.
•Double Keys: During message play back, press the assigned key twice to perform the desired action. For example, if Rewind was assigned to DTMF key 1, press [1][1] to Rewind the message.
•Toggle: During message play back, press the Toggle/Prefix Key and then the assigned key to perform the desired action. For example, if '*' was the Toggle/Prefix Key, the mailbox user would press [*][1] to Rewind the message.
|
Note: This method is recommended if you wish to use a DTMF key that is already in use for control keys. The Toggle/Prefix key will ensure that the two functions do not overlap even if they share the same DTMF key. |
Control Key Inter-Digit Timeout: Enter the duration (in msec) that the UC server will wait before defaulting to end of message after the Toggle/Prefix Key is pressed.
Toggle/Prefix Key: Enter the DTMF key that will be used as the Toggle or Prefix key.
|
Note: If control keys have not been assigned, and a caller presses a key while the message is playing, the system will respond as if it has reached the end of the message and assume that the associated action key (e.g. Save Message) has been pressed. As a general rule, do not overlap the DTMF key used for action keys and control keys. If the keys do overlap, use the Toggle/Prefix key to prevent potential issues. |
Legacy Functions
The availability of these functions are limited to certain legacy PBX systems.
Softer: Reduce the volume level.
Normal Volume: Set the volume level to normal.
Louder: Increase the volume level.
Slower: Reduce the message playback speed.
Normal Speed: Set the message playback speed to normal.
Faster: Increase the message playback speed.