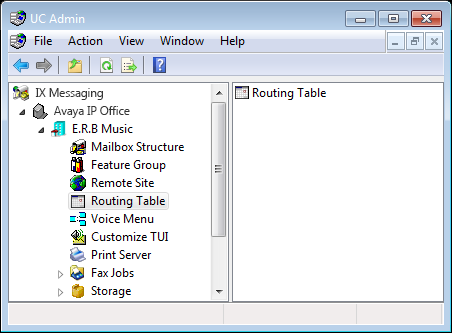
The Routing Table allows you to customize the way calls are handled depending on the information available. The information used for routing purposes is divided into three parts:
Caller ID: UC systems can be configured such that when a caller with a specific Caller ID dials into the system, the call will be routed to a specific Mailbox user. Specific phone numbers or area codes can be routed to a Mailbox user.
DNIS (Dialed Number Identification Service): The calls can be routed according to the dialed number of the destination. While this is usually configured at the switch level, you also have the option of managing it through the UC server.
PIN verification: You can enforce a PIN entry on the default Voice Menu and route the calls according to the PIN received. This feature is usually adapted by support centers.
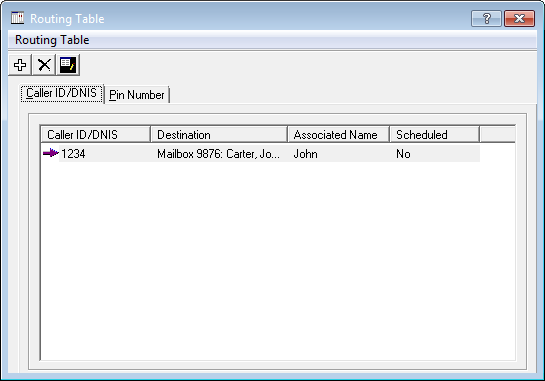
The Caller ID/DNIS tab allows you to create a routing destination that is based on Caller ID and the DNIS (Dialed Number Identification Service). Routing destinations will be based on call information such as Caller ID, Voice Menu or Mailboxes and Account Codes.
Routing Table Buttons
|
Button |
Description |
|---|---|
|
|
Add a new Routing Table. |
|
|
Delete current Routing Table. |
|
|
Edit selected Routing Table. |
|
|
Open scheduling menu (during adding/editing of Routing Table). |
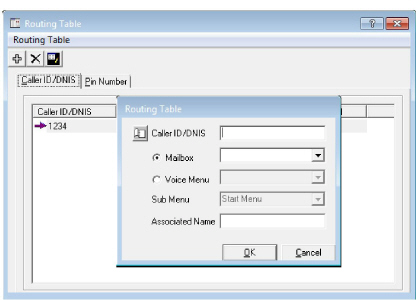
Adding/Editing a Caller ID/DNIS Entry
Caller ID/DNIS: Enter the number that will be routed to the Mailbox. You can enter either a Caller ID or a DNIS number.
|
Note: The Automated Attendant will detect the Caller ID or the DNIS number only if it is configured properly in the PBX configuration. |
You can enter the full number or area code with wild cards “?”. You can combine the wild cards with any configuration of numbers as well. For example, 416? will redirect all numbers that lead with 416.
Select one of the following radio buttons:
•Mailbox: Select this radio button to have callers that match the Caller ID/DNIS transfer to the selected Mailbox user upon dialing into the system.
•Voice Menu: Select this radio button to have callers that match the Caller ID/DNIS brought to the selected Voice Menu upon dialing into the system.
Sub Menu: From the dropdown menu, select the sub menu to use. Callers that match the Caller ID/DNIS will be brought to selected sub menu of the chosen Voice Menu. This option is available only when the Voice Menu radio button is selected.
Associated Name: Enter the description of the types of calls being redirected to a Mailbox.
|
Note: After setting Caller ID/DNIS destinations, you must enable the Caller ID feature. In the Admin tree, select Configuration > Device Management > Caller ID Settings and enable the Caller ID settings. |
Pin numbers are used to create a custom dialog and action set based on numerical inputs from the caller. Pin number verification and routing may be used in a support center, dealer, or partner log in scenarios.
Routing Table Buttons
|
Button |
Description |
|---|---|
|
|
Add a new Routing Table. |
|
|
Delete current Routing Table. |
|
|
Edit selected Routing Table. |
|
|
Open scheduling menu (during adding/editing of Routing Table). |
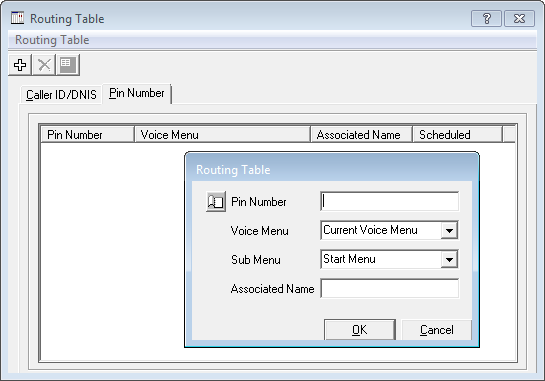
Adding/Editing a PIN Number Entry
Pin Number: Enter the PIN Number to be verified for call processing. The number can be up to 25 digits in length.
Voice Menu: From the dropdown menu, select the Voice Menu to direct callers to when they enter the correct Pin Number.
Sub Menu: From the dropdown menu, select the sub menu of the chosen Voice Menu to direct callers to when they enter the correct Pin Number.
Associated Name: Enter the name that will appear for screen pop-ups if using the “Pin Number as Caller ID” function.
|
Note: After specifying PIN numbers, make sure that you enable the Ask Pin Number feature in the Voice Menu. In the UC Admin tree, expand the company that this PIN number is associated with and double-click Voice Menu. The Voice Menus appear in the right pane of the UC Admin console. |
A schedule can be assigned to a PIN Number so that it is only valid during scheduled hours. The callers will not be forwarded to their destination even if the PIN Number is correct when they are calling outside of scheduled times.
PIN Number Schedule Buttons
|
Button |
Description |
|---|---|
|
|
Delete PIN Number Schedule. |
|
|
Save PIN Number Schedule. |
|
|
View a list of all PIN Number Schedules. |
|
|
Create a new Schedule. |
|
|
Delete the current Schedule. |
|
|
Move to first Schedule. |
|
|
Move to previous Schedule. |
|
|
Move to next Schedule. |
|
|
Move to last Schedule. |
Configuring PIN Number Schedule

Schedule Enabled: Enable this checkbox to activate the Pin Number routing schedule.
Default Voice Menu: From the dropdown menu, select the default Voice Menu that will be active under the schedule. This will be the default Voice Menu that will be used by all schedules that are created unless defined otherwise.
Sub Menu: From the dropdown menu, select the sub menu from the above Voice Menu that will be used as the initial sub menu.
Description: Enter a brief title/description of the sub menu for reference.
Time Start and End: Select when the sub menu will become active and when it will cease to be active. Enabling the All day checkbox will make the sub menu active for 24hrs.
Recurrence Pattern:
None: Select this radio button to have the sub menu occur only for the period of time once with no recurrence.
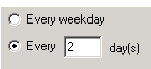
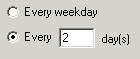
Daily: Select this radio button to indicate that the sub menu will be active on a day-by-day basis. Afterwards, you will have (2) options:
Every weekday: Select this radio button if you want the sub menu to be active every weekday.
Every X day(s): Select this radio button to specify an interval of activity for the sub menu (every second day by entering 2 in the field, for example).
|
Hint: If you wish to define the settings as Every weekday, you can instead choose the Weekly settings where you can specify which days of the week you wish to be notified. |
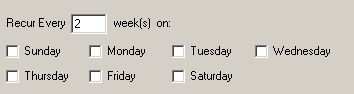
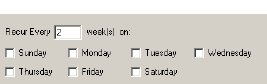
Weekly: Select this radio button to indicate that the sub menu will be active on a weekly basis. Then, in the Recur Every X week(s) on field, enter an interval of activity for the sub menu (i.e. enter 3 for every third week). Finally, check the boxes of the days of the week you want the sub menu to be in effect. If you wanted a sub menu to be active every second Monday, Wednesday and Thursday, you would enter 2 in the field and select the Monday, Wednesday and Thursday checkboxes.
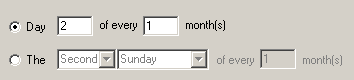
Monthly: Select this radio button if you want the sub menu to be active on a monthly basis.
You have two (2) options:
Select the Day radio button and indicate which day of the month you want the sub menu to be active.
Select the The radio button and indicate which day of a month you want the sub menu to be active. For example, if you want the sub menu to be active on the second Monday of every second month, you would select the The radio button, select Second and Monday, and enter 2.

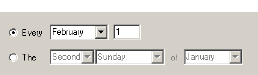
Yearly: Select this radio button if you want the sub menu to be active on a specific day of the year. You have two (2) options:
Select the Every radio button and indicate the day of the year on which you want the sub menu to be active.
Select the The radio button and indicate a specific day of a specific month of the year on which you want the sub menu to be active. For example, if you want the sub menu to be active on the second Thursday of every March, you would select the radio button and select Second, Thursday and March from the dropdown menu.
Range of Recurrence
Start: Select the date when the first occurrence of the sub menu is to occur.
|
Note: The sub menu must have a recurrence pattern defined. |
No end Date: Select this radio button if you want the sub menu to occur indefinitely
End After: Select this radio button if you want to disable the sub menu after it occurs the defined number of times.
End by: Select this radio button if you want to disable the sub menu by the defined date.
From the Start Menu dropdown list, select the sub menu that will run at the times specified.
A schedule can be assigned to a routing destination to determine when a call is to be transferred to an extension. When Caller ID recognizes a particular number, the system will examine the appropriate schedule. If the current day and time fall within that specified in the schedule, the call is routed directly to the Mailbox.
PIN Number Schedule Buttons
|
Button |
Description |
|---|---|
|
|
Delete Caller ID / DNIS Schedule. |
|
|
Save Caller ID / DNIS Schedule. |
|
|
View a list of all Caller ID / DNIS Schedules. |
|
|
Create a new Schedule. |
|
|
Delete the current Schedule. |
|
|
Move to first Schedule. |
|
|
Move to previous Schedule. |
|
|
Move to next Schedule. |
|
|
Move to last Schedule. |
Configuring Caller ID/DNIS Schedule
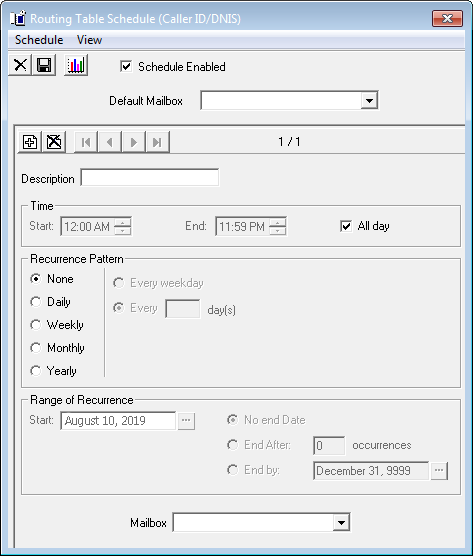
Schedule Enabled: Enable this checkbox to activate the Caller ID/DNIS routing schedule.
Default Mailbox: From the dropdown menu, select the default Mailbox.
Default Voice Menu: From the dropdown menu, select the default Voice Menu that will be active under the schedule. This will be the default Voice Menu that will be used by all schedules that are created unless specified otherwise.
Sub Menu: From the dropdown menu, select the sub menu from the above Voice Menu that will be used as the initial sub menu.
Description: Enter a brief title/description of the sub menu for reference.
Time Start and End: Select when the sub menu will become active and when it will cease to be active. Enabling the All day checkbox will make the sub menu active for 24hrs.
Recurrence Pattern:
None: Select this radio button to have the sub menu occur only for the period of time once with no recurrence.
Daily: Select this radio button to indicate that the sub menu will be active on a day-by-day basis. Afterwards, you will have (2) options:
Every weekday: Select this radio button if you want the sub menu to be active every weekday.
Every X day(s): Select this radio button to specify an interval of activity for the sub menu (every second day by entering 2 in the field, for example).
|
Hint: If you wish to define the settings as Every weekday, you can instead choose the Weekly settings where you can specify which days of the week you wish to be notified. |
Weekly: Select this radio button to indicate that the sub menu will be active on a weekly basis. Then, in the Recur Every X week(s) on field, enter an interval of activity for the sub menu (i.e. enter 3 for every third week). Finally, check the boxes of the days of the week you want the sub menu to be in effect. If you wanted a sub menu to be active every second Monday, Wednesday and Thursday, you would enter 2 in the field and select the Monday, Wednesday and Thursday checkboxes.
Monthly: Select this radio button if you want the sub menu to be active on a monthly basis.
You have two (2) options:
Select the Day radio button and indicate which day of the month you want the sub menu to be active.
Select the The radio button and indicate which day of a month you want the sub menu to be active. For example, if you want the sub menu to be active on the second Monday of every second month, you would select the The radio button, select Second and Monday, and enter 2.
Yearly: Select this radio button if you want the sub menu to be active on a specific day of the year. You have two (2) options:
Select the Every radio button and indicate the day of the year on which you want the sub menu to be active.
Select the The radio button and indicate a specific day of a specific month of the year on which you want the sub menu to be active. For example, if you want the sub menu to be active on the second Thursday of every March, you would select the radio button and select Second, Thursday and March from the dropdown menu.

Range of Recurrence
Start: Select the date in which the first occurrence of the sub menu is to take effect.
|
Note: The sub menu must have a recurrence pattern defined. |
No end Date: Select this radio button if you want the sub menu to occur indefinitely
End After: Select this radio button if you want to disable the sub menu after it occurs the defined number of times.
End by: Select this radio button if you want to disable the sub menu by the defined date.
From the Start Menu dropdown list, select the sub menu that will run at the times specified.


