Server Backup Using Carbonite Availability
|
Warning: Carbonite Availability CANNOT be used in a high-security (JITC) installation. |
An Avaya IX Messaging High Availability installation provides the means to maintain operations through failures in the Primary and Secondary servers. The Consolidated server, however, cannot be protected in the same way. Carbonite Availability is a third party application that provides data protection and failover support, providing immediate recovery from any Consolidated server outages.
|
Important: Carbonite Availability can be used ONLY with the HA Consolidated server. It cannot be applied to the Primary or Secondary servers, Remote CSE or Admin, Single Server machines, etc. |
There are two options for installing Carbonite Availability.
•All servers are on a single network (LAN).
•You have a distributed network (WAN).
Carbonite Availability requires another computer to mirror each voice server onto. This server must at least meet the minimum requirements needed to run the live server it is backing up. A third computer is required to run the client software that controls the behavior of the servers, but this computer can be any machine on the same network.
The Carbonite Availability backup system can be applied to an existing installation, or to a new installation.
The Carbonite Availability software is downloaded from the link provided by your vendor.
Carbonite Availability requires additional licensing, available through your Avaya representative, or directly from Carbonite.com. This license must be renewed annually.
Before proceeding, the Messaging servers must be configured and operating properly. The Backup server must have the same operating system as the live server, fully installed and patched.
Failover using Carbonite Availability - LAN
The basic configuration for Carbonite Availability has both servers existing within the same network environment, where IP addresses and other routing details can be managed.
Both the Consolidated server and the backup machines (a server pair) must be using the same operating system with identical hardware.
|
Requirements |
Details |
|---|---|
|
Carbonite Availability |
v. 8.2 |
|
Operating System |
Windows Server 2012 or 2012 R2 |
|
Windows Server 2016 |
|
|
Network Cards |
2 NICs are required in both the Consolidated and Backup servers |
Terminology
Carbonite Availability uses the terms Source and Target to describe the two servers in each pairing. The computer that manages the process is known as the client.
Source: This is the live system server. All traffic and processing is handled by the Source. This is the computer that is being backed up (the Consolidated server).
Target: This is the backup server. The Target is a real-time mirror of the Source, but does not itself handle live traffic.
Client: This can be any other computer that has network access to the Source and Target servers. It can be installed on either the Source or Target servers, or one or more other computers on the network. The Client regularly polls the Source. If it gets no response for a set period of time, it will assume that the Source is broken, and a failover condition is set.
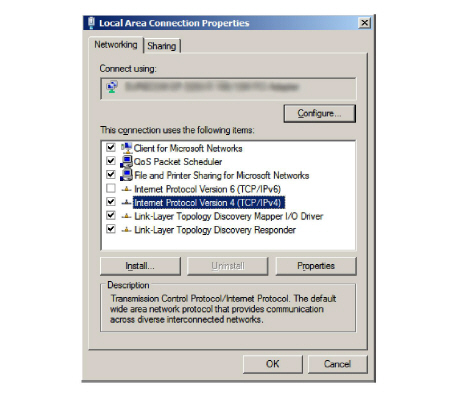
Both servers (source and target) in each pair must have 2 NICs installed. On each machine, designate one to be the primary and the other as the secondary NIC. Perform the following procedure on both the Source and Target servers.
1.Configure the Primary card on each machine as you normally would for any node on the network.
2.To configure the Secondary NIC, open its the properties page.
3.Enter the IP Address that the secondary NIC is to use.
Leave the DNS server details empty.
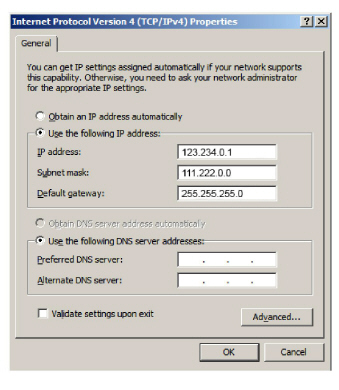
4.Click Advanced and open the DNS tab.
Disable the option to Register this connection’s addresses in DNS.
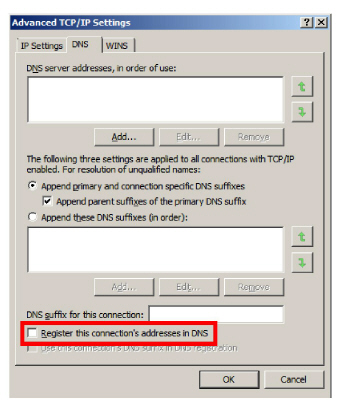
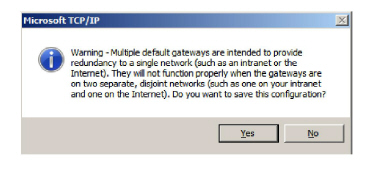
5.Click OK to save the configuration. If prompted, click Yes to continue passed the warning.
Installing Carbonite Availability on the Servers
The Carbonite Availability software is downloaded from the link provided by your vendor.
Save the file to a local drive and perform the following procedure on each server pair (Source and Target).
1.Double-click the program to start the installation.
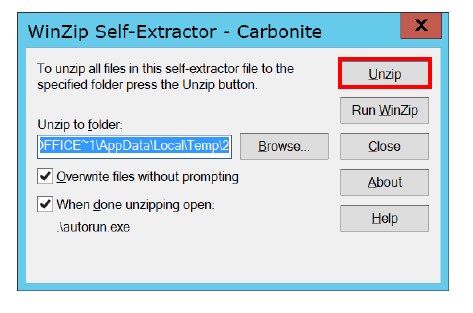
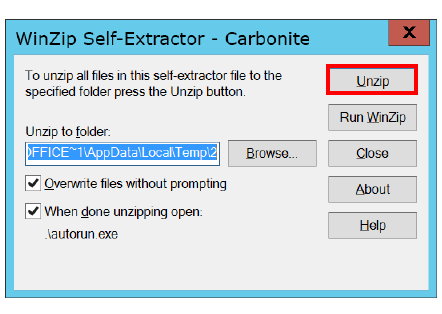
2.Specify the location on your hard drive where the compressed files should be extracted to.
Click Unzip.
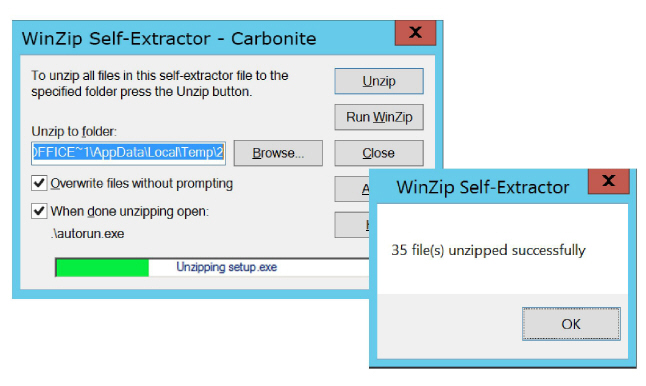
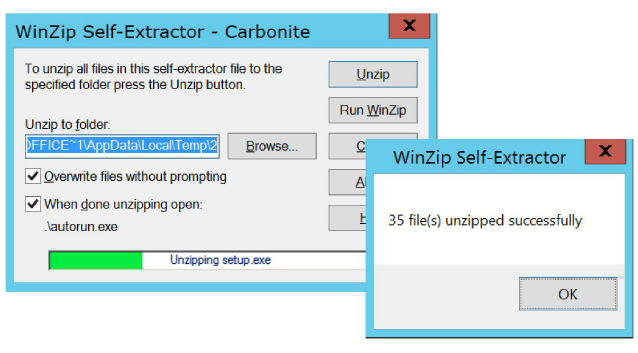
3.The files will be unpacked onto your drive. When finished, click OK to continue.
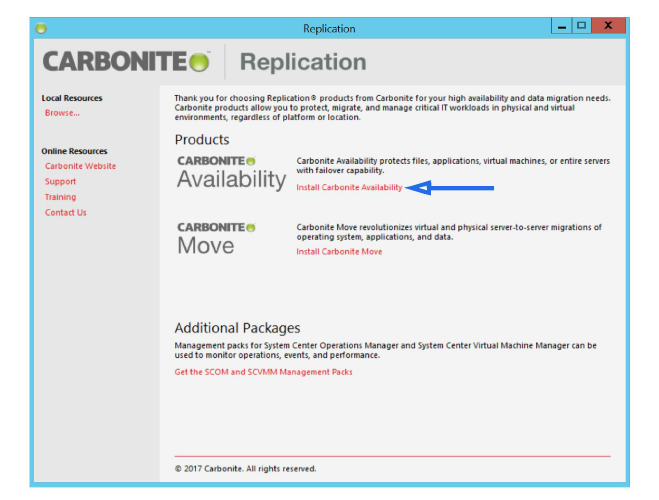
4.From the main screen, select Install Carbonite Availability.

5.Any required applications that are not installed on your system will be added now. Click Install to continue.

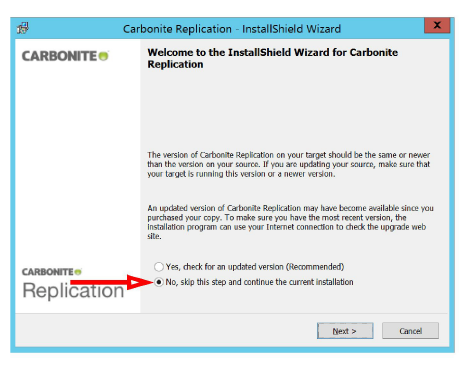
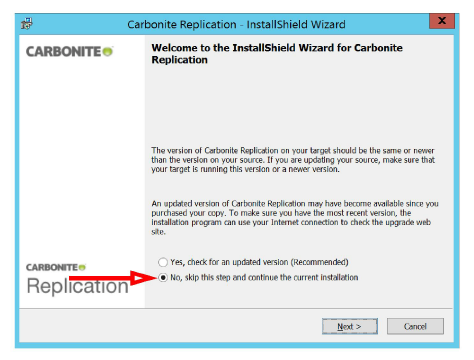
6.When prompted to check for the latest installation, select No and click Next to continue.
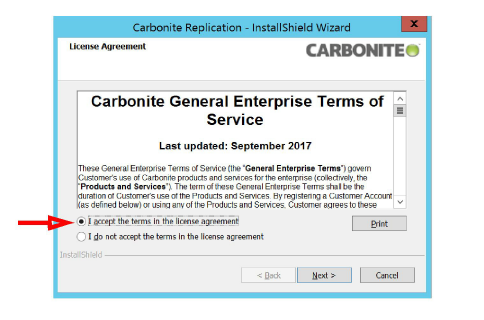
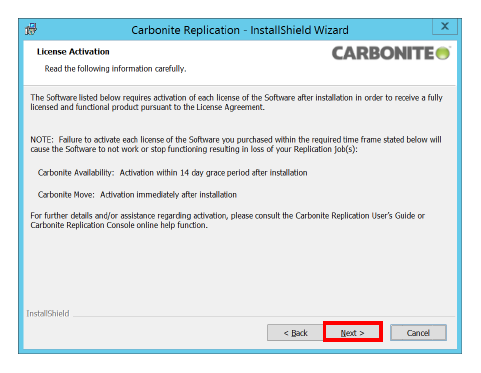
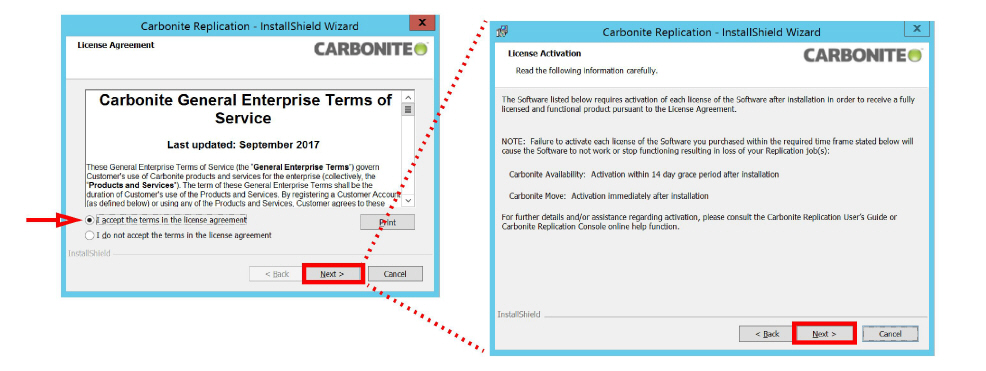
7.Accept the terms of the license agreement and click Next to continue.
8.Click Next to activate the license.
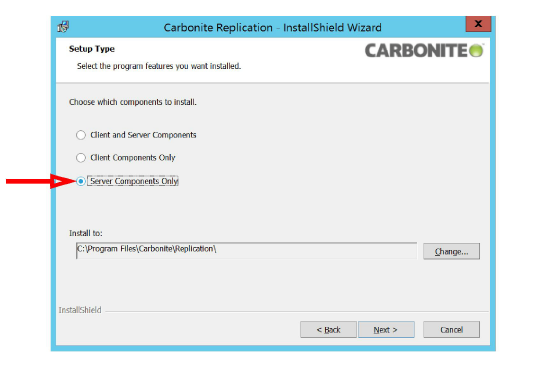
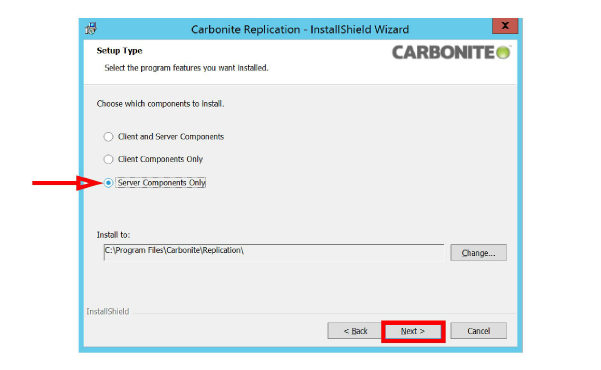
9.Enable Server Components Only, then click Next.
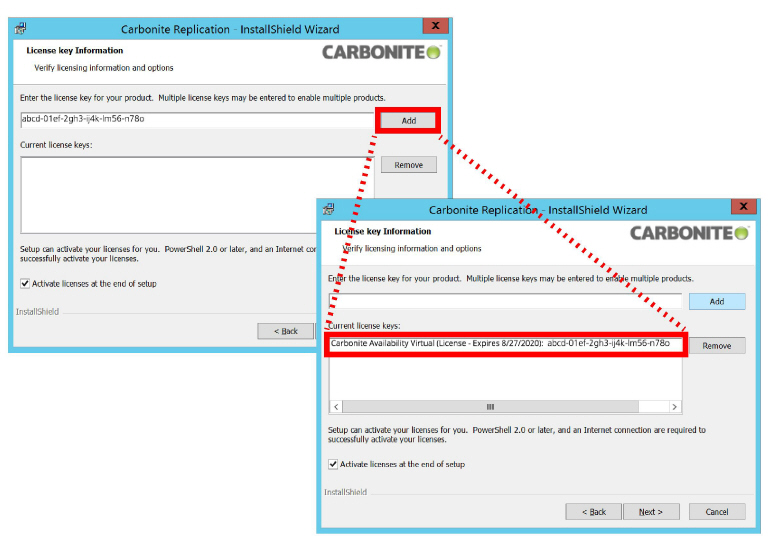
10.Enter the license key that came with the program into the space provided. Click Add to install the license onto the computer. Click Next to continue.
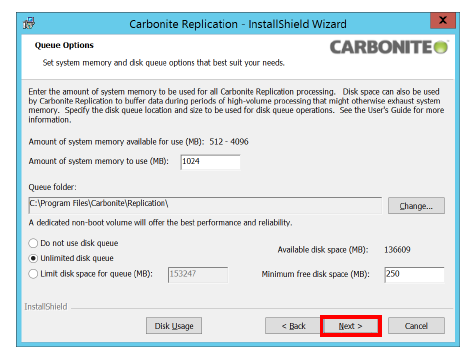
11.Leave all settings at their defaults. Click Next to continue.

12.Click Next at the Security Groups screen.
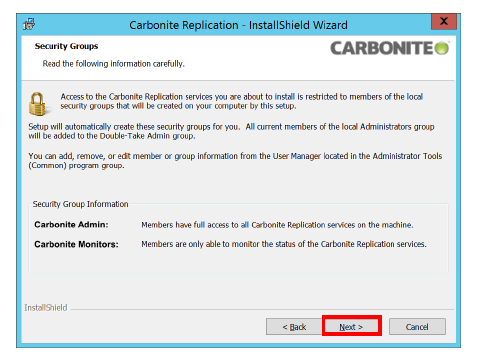
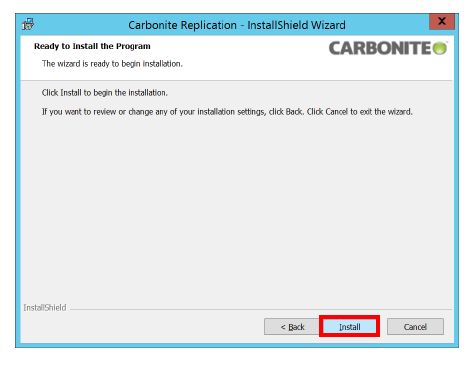
13.Click Install to begin adding the program to the server.
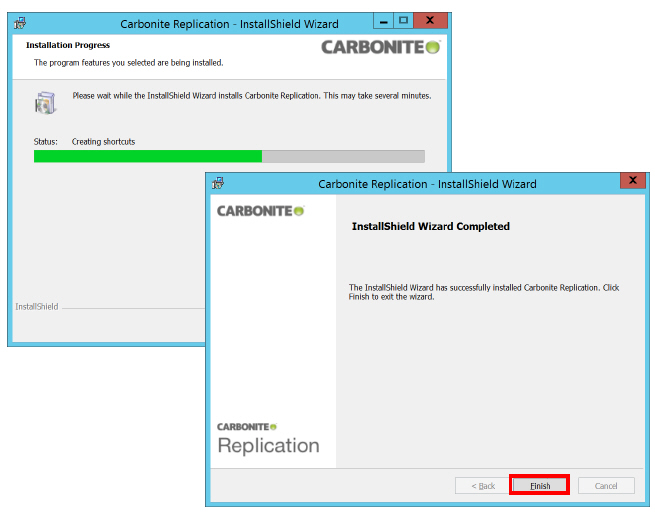
14.The program will be installed. Click Finish when prompted.
Installing Carbonite Availability on the Client
A computer is required to act as the client/manager for the servers. This machine can be any that has network access to the Source and Target servers. It can be installed on either the Source or Target servers, or one or more other computers on the network. The client can be installed on any computer with the same operating system requirements as Carbonite Availability. It can also be installed (32-bit and 64-bit) on Windows XP SP 2+, Windows Vista, Windows 7, Windows 8 or Windows 10. The client can also be installed onto a virtual machine connected to the network.
|
Note: The client software does NOT require a license to operate. |
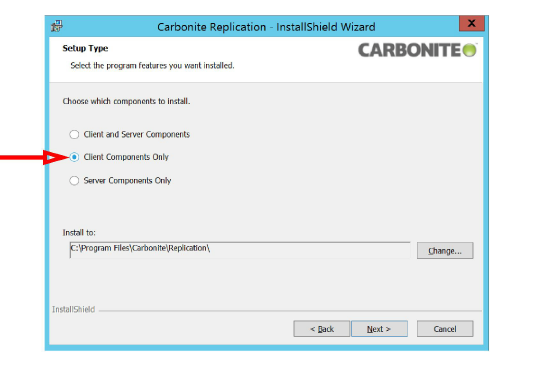
1.Install the software on the client computer as shown above, but when step 9 is reached, choose Client Components Only instead and continue.
2.Complete the installation.

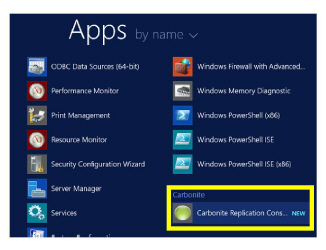
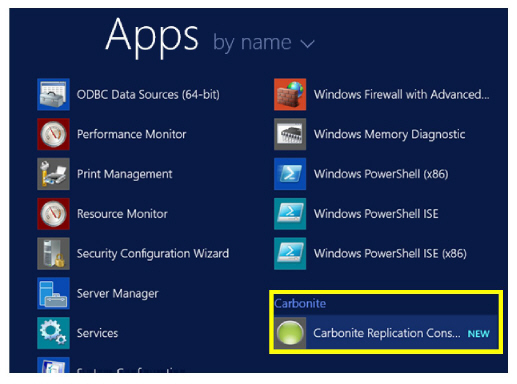
3.The Carbonite Replication console will be installed onto the client machine. Use this application to configure the disaster recovery and failover details for the 2 servers.
Setting up the details of the failover is done from the client computer using the Carbonite Replication Console.
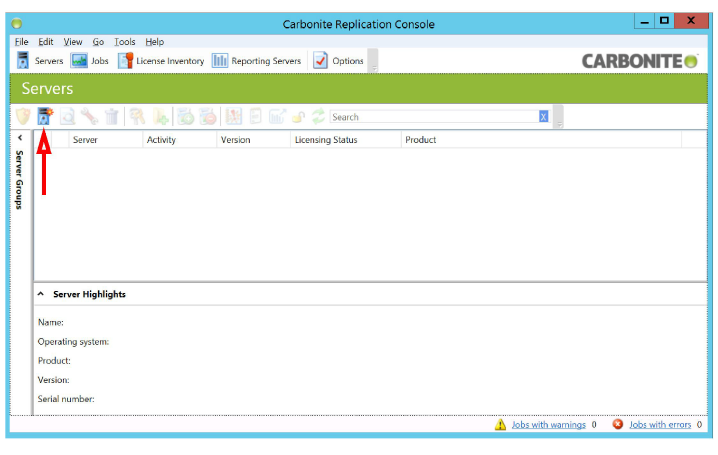
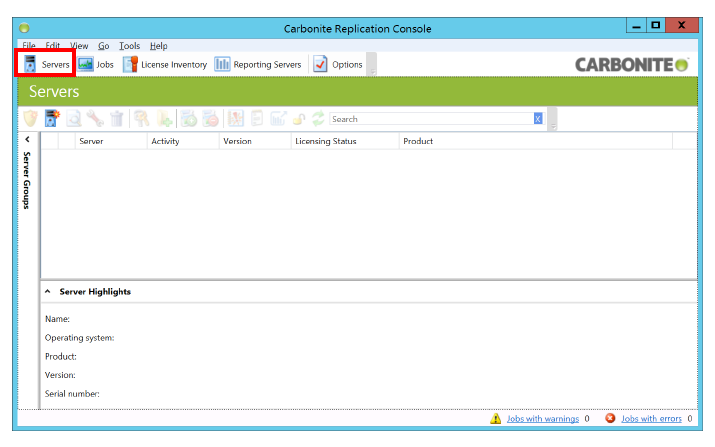
1.Double-click the console icon on the Client computer to start the console.
2.From the main screen, click the Add servers icon.
3.On the Manual Entry tab, enter the required details for the Primary NIC on one of the Source servers. Click Add when ready.
Repeat for the Primary NIC on the other server.
Click OK when finished to add both servers to the console.
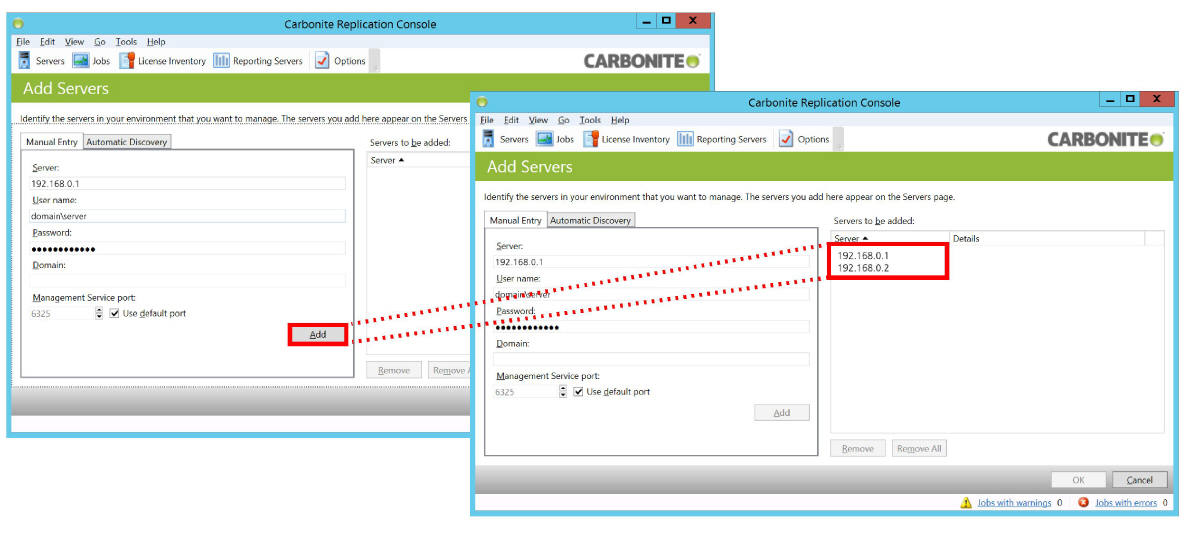
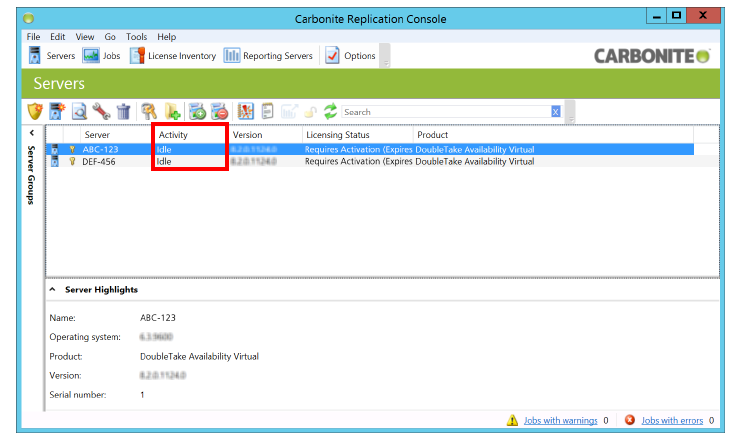
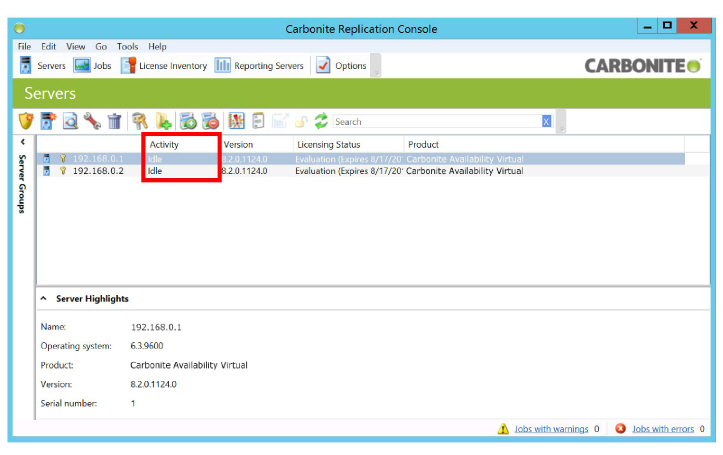
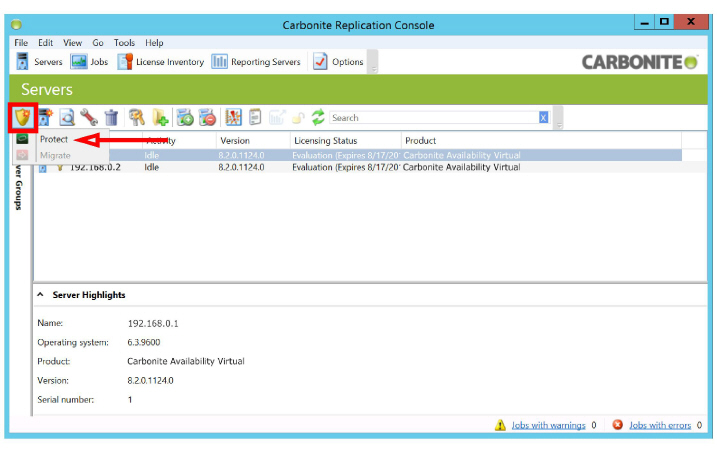
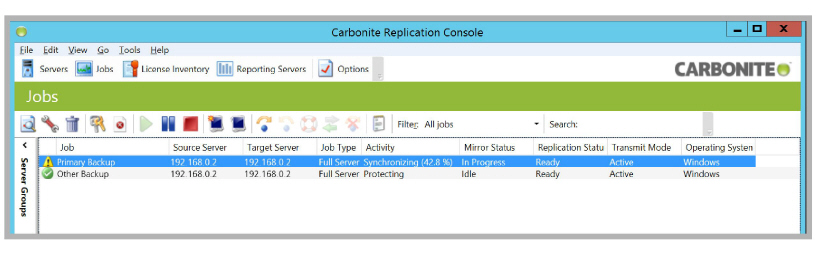
4.The Secondary NICs for both servers appear on the main screen of the console.
Under the Activity column, anything other than Idle means that an error has occurred. In this case, delete the server and repeat step 1 to 3.
5.Select the Source server. Click the Create New Job icon ![]() and choose Protect from the dropdown menu.
and choose Protect from the dropdown menu.
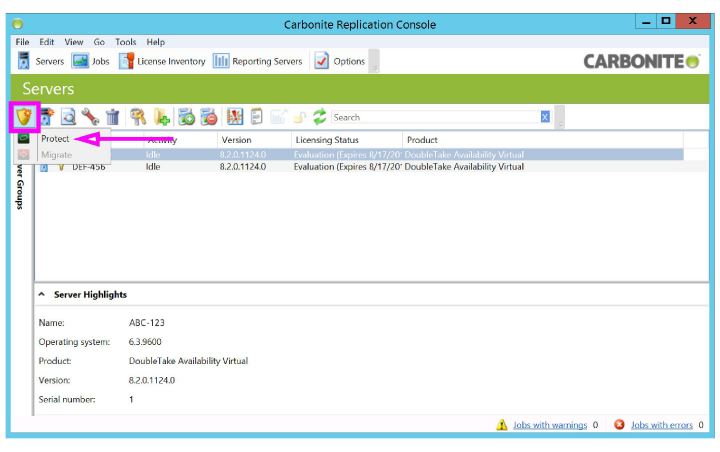
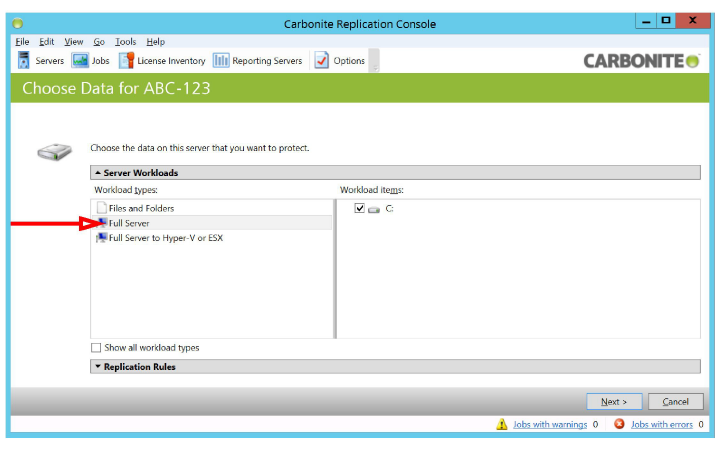
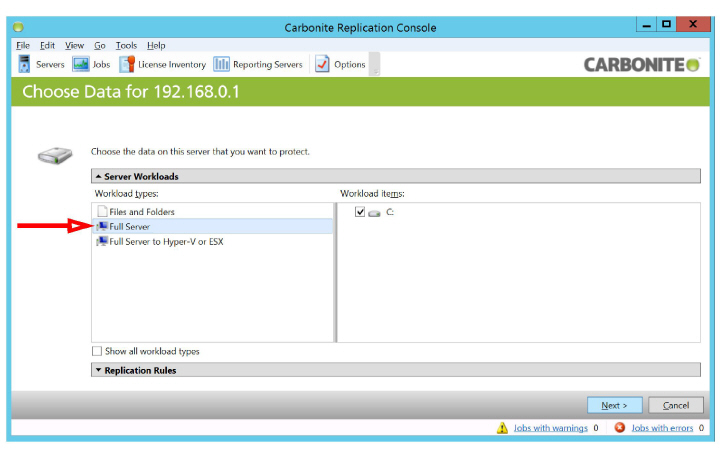
6.Choose Full Server and click Next.
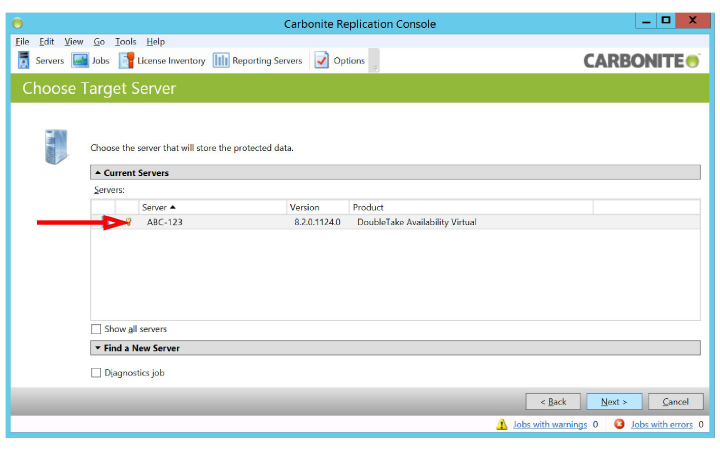
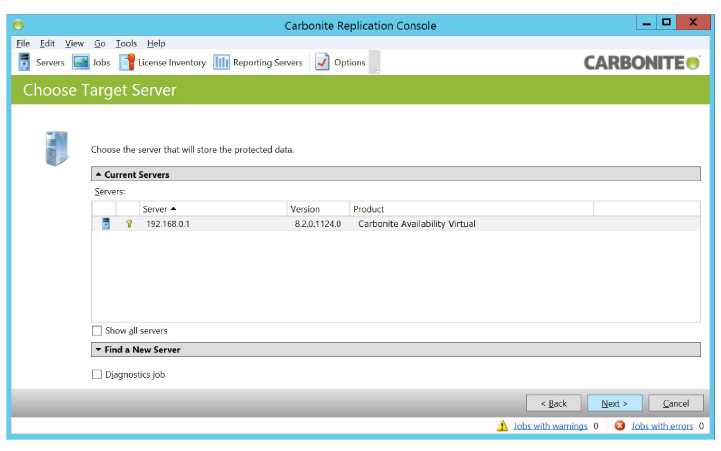
7.Choose the Target machine to mirror the Source files onto, and click Next.
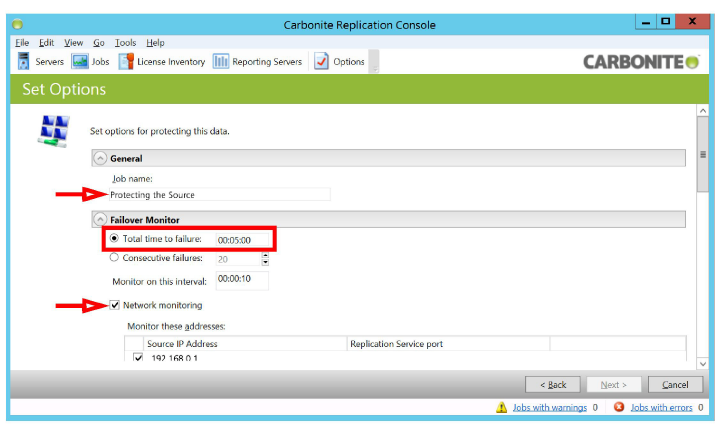
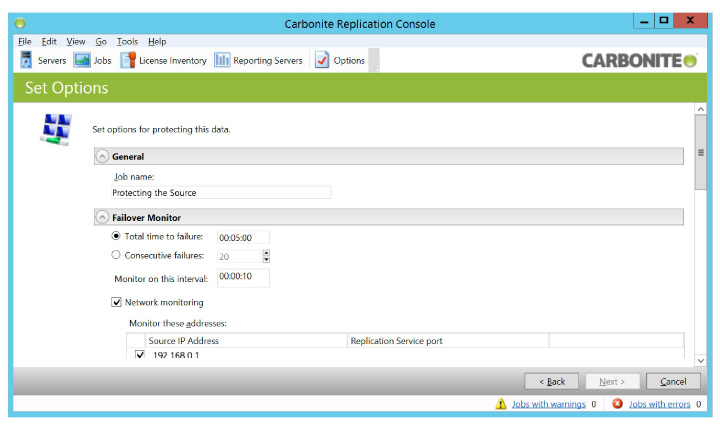
8.Configure the settings for the failover monitor. Scroll down to reveal additional options.
General
•Job name can be anything. Make it user friendly to make the job easier to manage.
•Enable Total time to failure and enter the maximum time that the Source can be unresponsive before initiating the failover. Entering a value that is too small may trigger failovers during a scheduled reboot of the Source. The Target server monitors this connection as it continuously mirrors data, and will trigger the failover after the specified period without a response.
•Enable Network monitoring and select the IP Addresses for both NICs on the Source server.
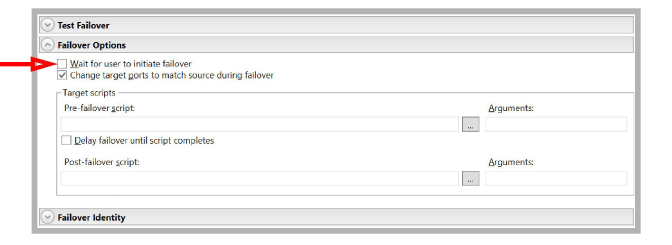
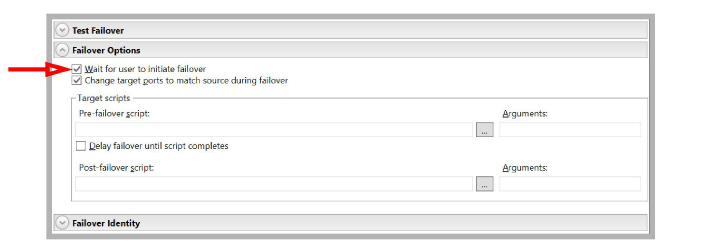
Failover Options
•Disable Wait for user to initiate failover to make the process automatic.
Failover Identity
•Enable Apply source network configuration to the target. This allows the Target server to take over as the Source without having to reconfigure the remaining servers on the network.
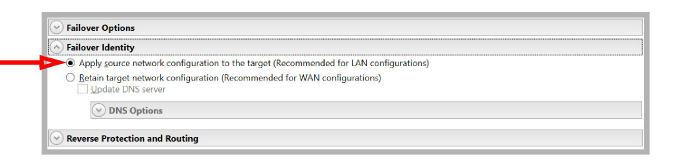
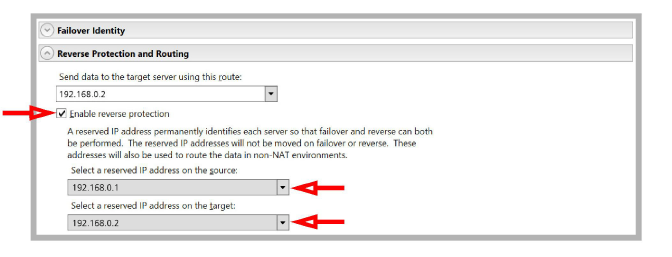
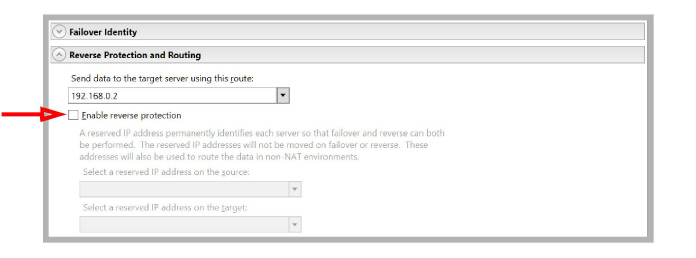
Reverse Protection and Routing
•Turn on Enable reverse protection. This allows the Source and Target servers to reverse roles permanently when the original Source is brought back online after recovering from a failure.
•Use the dropdown menu beside Select a reserved IP Address on the source to pick the address for the Secondary NIC on the Source.
•Use the dropdown menu beside Select a reserved IP Address on the target to pick the address for the Secondary NIC on the Target.
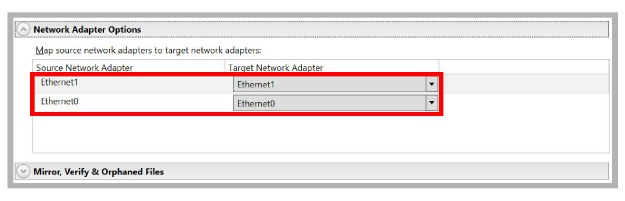
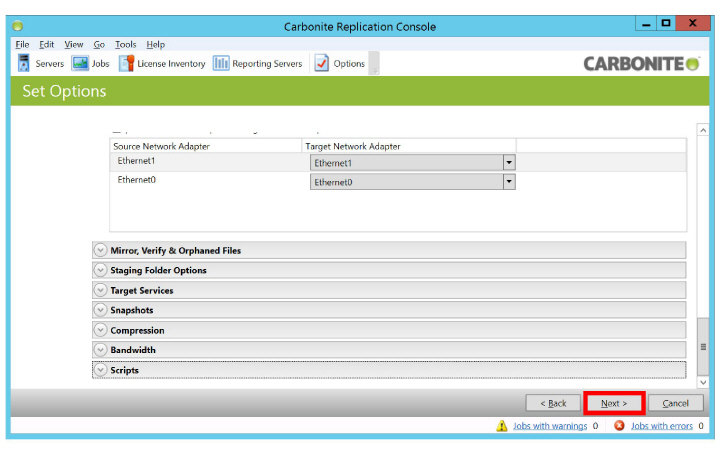
Network Adapter Options
•Under Map source network adapters to target network adapters, use the dropdown menus to match the Primary NIC on the Source server with the Primary NIC on the Target server. Do the same for the Secondary cards.
Leave all other settings at their default values.
Click Next to continue.
9.Review the output and correct any errors that are found. When all items are correct, click Finish.
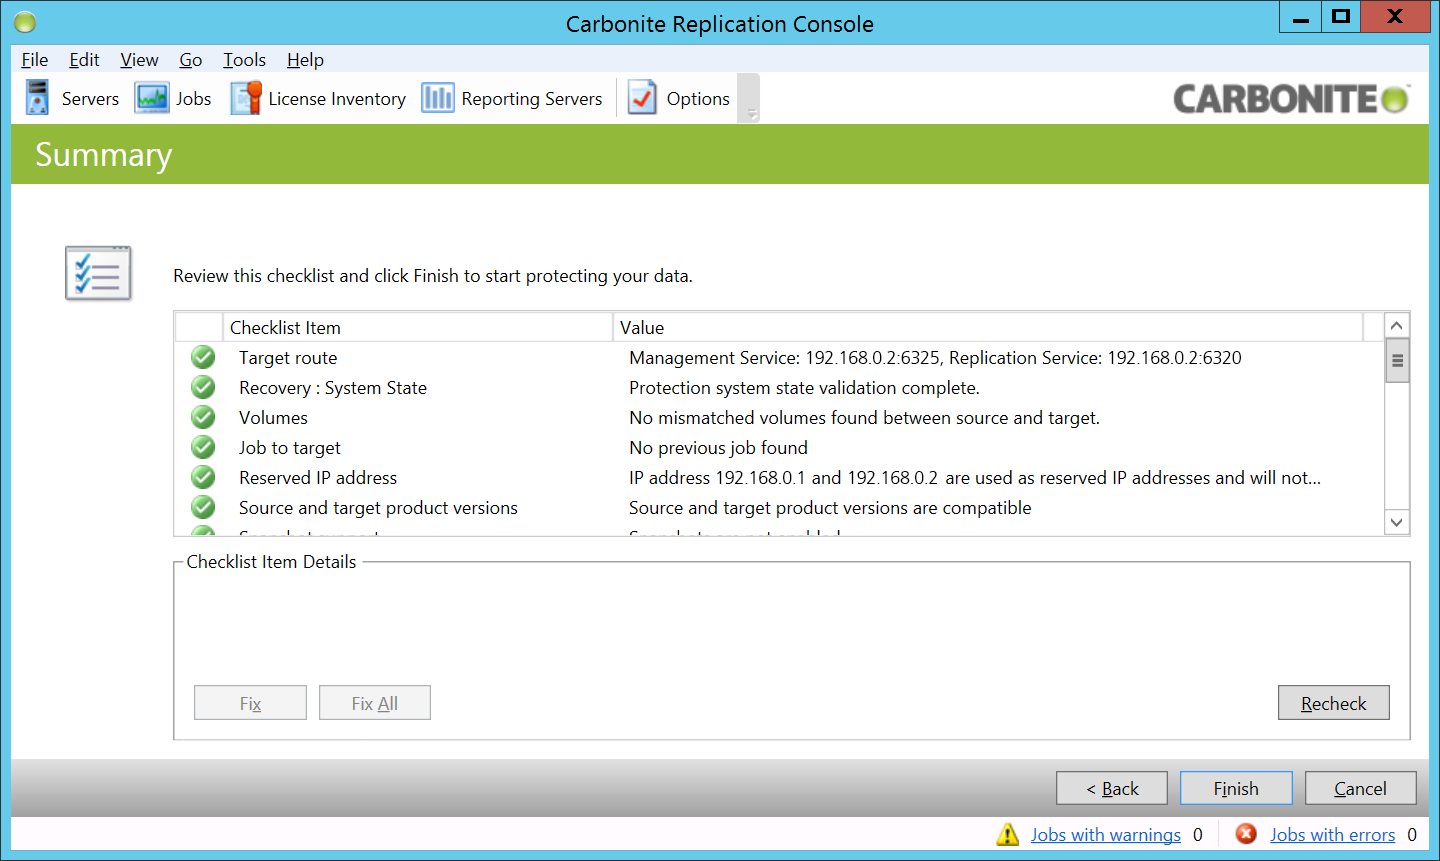
10.The new job has been created. The Target server will begin scanning and copying files. When it has finished, the Source server will be protected with the failover service configured here.
Under normal conditions, the Source will manage the Messaging HA operations, while the Target continuously mirrors the data.
If the Target server stops receiving feedback from the Source for the amount of time specified in the Failover Monitor above, the Target server will initiate a failover. It will change its network settings, computer name and addresses to match the original Source server, reboot, and become the new Source server for the HA system. This happens without the need to reconfigure the remaining servers on the HA system to point to the new machine.
When the original Source server is brought back online, how this is handled by Carbonite Availability depends upon why it failed.
Hard Drive Intact
If the hard drive of the Source was not compromised from the crash, the computer can be returned to service. On boot, Carbonite Availability will detect the IP address conflict with the old Target server and reset the address for the old Source server to another value (i.e. 169.255.xxx.xxx). From the Carbonite Availability console, initiate Reverse Protection. This will cause Carbonite Availability to change the computer name and IP Address to those of the original Target. The original Target machine will continue as the new Source, and the old Source machine becomes the new Target server. The two computers have swapped functions on the network.
Drives Damaged/Formatted/Replaced
If the hard drive or the data on the original Source server is damaged, nothing from the original job can be salvaged. Delete the job from the Carbonite Availability console, configure the recovered computer with the appropriate operating system and settings as outlined above, install Carbonite Availability, and create a new job with this machine now designated as the Target.
The original Target server will continue to operate as the Source.
When the server comes back online, Carbonite will require the credentials for that machine to be entered before the system recovery can start.
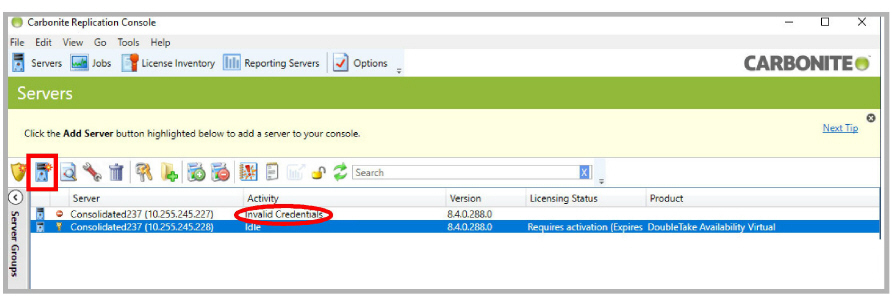
Enter the credentials.
After logging in, the restored server must have Carbonite’s Reverse Protection enabled manually.
Once Reverse Protection has been enabled, the system recovery will begin.
Failover using Carbonite Availability (WAN)
For instances where the Disaster Recovery (DR) site is at a remote location from the primary data center, Carbonite Availability can be configured to offer protection across a WAN, and where a VLAN extension is not possible.
Both the Consolidated server and the Carbonite Availability backup machines must be using the same operating system with identical hardware.
|
Requirements |
Details |
|---|---|
|
Carbonite Availability |
v. 8.2 |
|
Operating System |
Windows Server 2012 or 2012 R2 |
|
Windows Server 2016 |
|
|
Network Cards* |
1 NIC is required in both the Consolidated and Backup servers |
* - When configuring Carbonite Availability to work over a WAN, only a single NIC is required on the Source and on the Target.
Unlike an installation where all servers reside on a single network, in a WAN installation, the source and the target server IP addresses do not change during a failover. Consequently manual intervention is required during a failover.
Carbonite Availability requires additional licensing, available through your Avaya representative, or directly from Carbonite.
Before proceeding, the Messaging servers must be configured and operating properly. The backup server must have the same operating system as the live server, fully installed and patched.
Terminology
Carbonite Availability uses the terms Source and Target to describe the server pairs. The computer that manages the process is known as the client.
Source: This is the live system server. All traffic and processing is handled by the Source machine. This is the computer that is being backed up.
Target: This is the backup server. The Target is a real-time mirror of the Source machine, but does not itself handle any live traffic.
Client: This can be any other computer that has network access to the Source and Target servers. It can be installed on either the Source or Target servers, or one or more other computers on the network. The Client regularly polls the Source. If it gets no response for a set period of time, it will assume that the Source is broken, and a failover condition is set.
Installing Carbonite Availability on the Servers (WAN)
The Carbonite Availability software is downloaded from the link provided by your vendor. Save the file to a local drive and perform the following procedure on both of the servers.
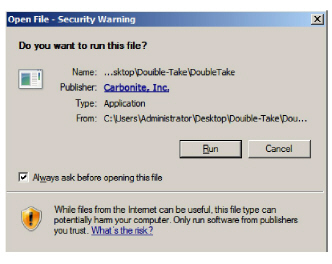
1.Double-click the program to start the installation.
Click Run to continue.
2.Specify the location on your hard drive where the compressed files should be extracted to.
Click Unzip.
3.The files will be unpacked onto your drive. When finished, click OK to continue.
4.From the main screen, select Install Carbonite Availability.
5.Any required applications that are not installed on your system will be added now. Click Install to continue.

6.When prompted to check for the latest installation, select No and click Next to continue.
7.Accept the terms of the license agreement and click Next to continue, then click Next to activate the license.
8.Enable Server Components Only, then click Next.
9.Enter the license key that came with Carbonite Availability into the space provided. Click Add to install the license onto the computer. Click Next to continue.

10.Leave all settings at their defaults. Click Next to continue.
11.Click Next at the Security Groups screen. Click Install to begin adding the program to the server.

12.The program will be installed. Click Finish when prompted.

Installing Carbonite Console on the Client (WAN)
A computer is required to act as the client/manager for the servers. This machine can be any other computer that has network access to both the Source and the Target servers. It can be installed on either of the Source or Target servers, or one or more other computers on the network. The client can be installed on any computer with the same operating system requirements as Carbonite Availability. It can also be installed (32-bit and 64-bit) on Windows XP SP 2+, Windows Vista, Windows 7, or Windows 8. The client can also be installed onto a virtual machine connected to the network.
1.Install the software on the client computer as shown above, but when step 9 is reached, choose Client Components Only instead and continue.

2.Complete the installation.

3.The Carbonite Availability console will be installed onto the client machine. Use this application to configure the disaster recovery and failover details for the servers.
Setting up the details of the failover is done from the client computer using the Carbonite Availability Console.
1.Double-click the console icon on the client computer to open the program.
2.From the main screen, under Servers click Add servers to your console.
3.On the Manual Entry tab, enter the required details for the NIC on one of the servers. Click Add when ready.
Repeat for the NIC on the other server.
Click OK when finished to add both servers to the console.
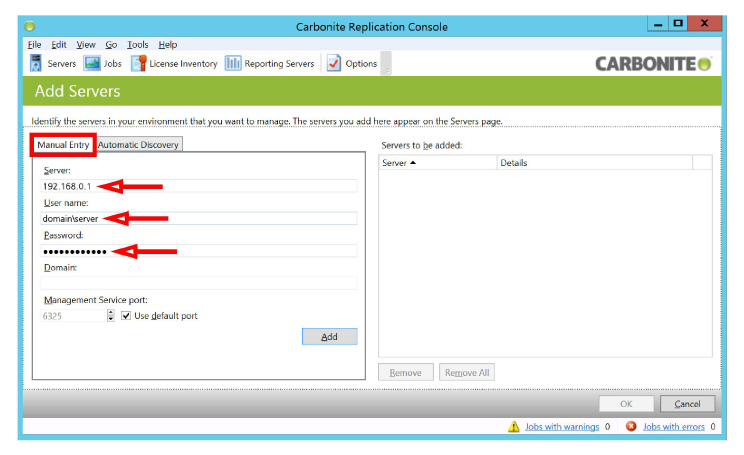
Server: Enter the IP address for the Carbonite server.
User name: Type in the domain, forward slash, and the administrator username in this space. For example, domain/username.
Password: Add the password for the administrator account here.
When ready, click Add.
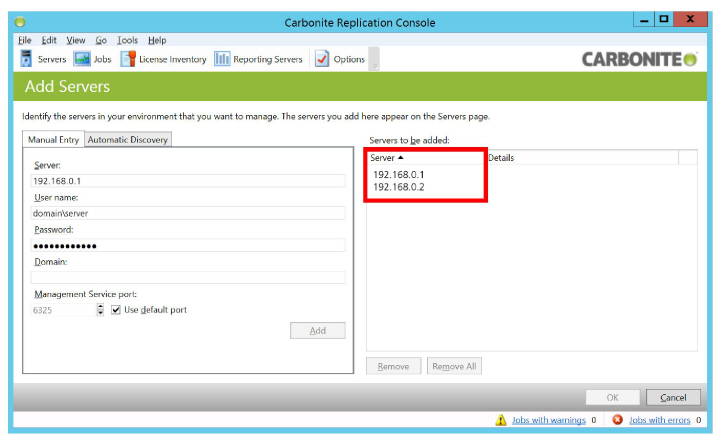
4.Repeat step 3, adding the details for the other Carbonite server.
Both servers will appear in the right hand window of this screen.
5.Under the Activity column, anything other than Idle means that an error has occurred. Delete the server and repeat step 1 to 3 for the affected server.
6.Select a server, click the Create Job icon ![]() , and select Protect.
, and select Protect.
7.On the Choose Data screen, select Full Server and click Next.
8.Select the server where the protected data will be stored, then click Next.
Make the following changes to Set Options.
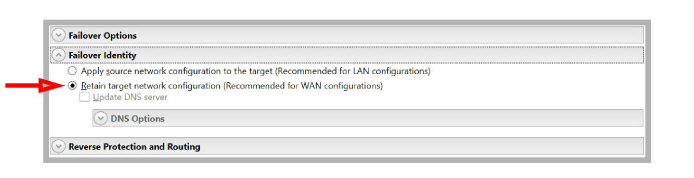
9.Scroll down and expand Failover Options. Enable Wait for user to initiate failover.
10.Scroll down and expand Failover Identity. Enable Retain target network configuration.
11.Scroll down and expand Reverse Protection. Turn off Enable reverse protection.
12.Scroll down and expand Network Adapter Options. Map the network interface adapter card on the Target server to the card on the Source.

13.Leave all other settings at their default values and click Next.
14.The program will make the specified changes and verify all connections. Fix and Recheck any items that failed during testing. When all items appear green, click Finish.

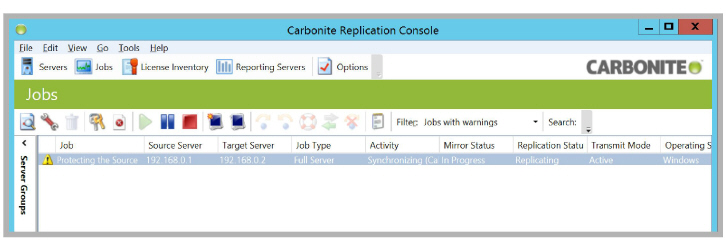
15.The program will begin synchronizing all data. This may take some time. Job errors are normal during this period.
16.Once the synchronization is complete, your system will be protected against a server failure.
In a WAN configuration, the failover is not automatic and requires administrator intervention.
Under normal conditions, the Source will manage the Messaging traffic, while the Target continuously mirrors the data.
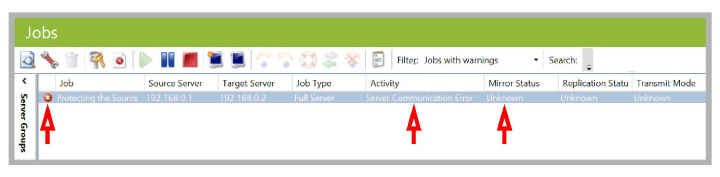
If the Target stops receiving feedback from the Source for the amount of time specified in the Failover Monitor settings, a failover condition is triggered.
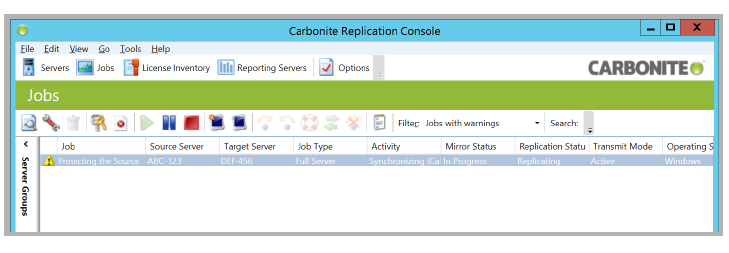
1.Once a failure condition is detected, the console will display a Server Communication Error, and Mirror Status will become Unknown.
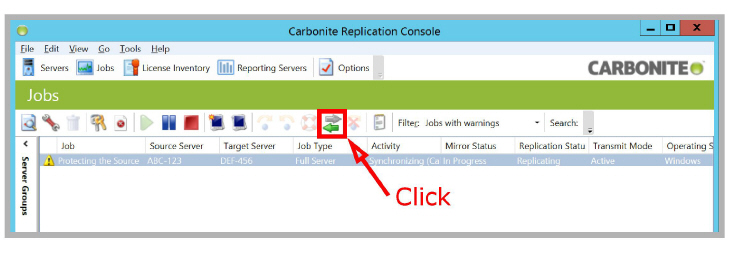
2.The failover procedure is triggered by selecting the job, then clicking the failover icon ![]() .
.
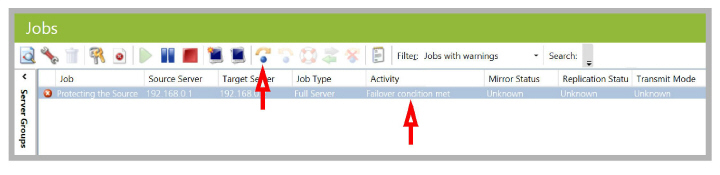
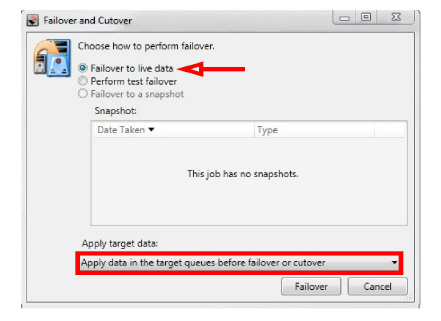
3.Enable Failover to live data.
From the Apply target data menu, select Apply data in the target queues before failover or cutover.
Click Failover when ready to begin Data Recovery.
While the servers are in failure mode, there will be no services.
The time required to complete the failover depends upon the speed of the drives and the amount of data the staging folder contains.
The console allows you to monitor the progress of the failover.
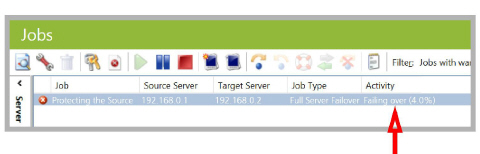
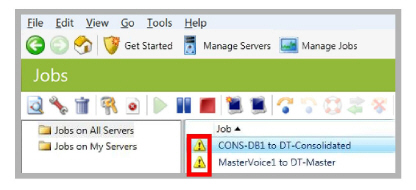
Once the failover is complete, a Failed Over confirmation message appears in the console.
|
Note: The job entry includes a warning icon |
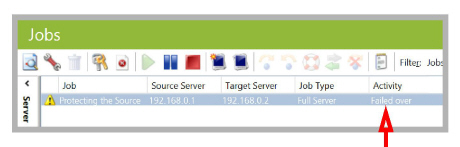
Once failover is complete and the Target is active as the new Source, the voice servers must re-establish communication before voicemail functions will start working.
Enabling Voicemail Functions on HA Servers
For Consolidated Server
After a failover, the IP addresses of the live servers have changed. Update Messaging to re-establish voicemail functions.
1.Stop and disable the SQL Mobilink Service on the Primary and all Secondary servers.
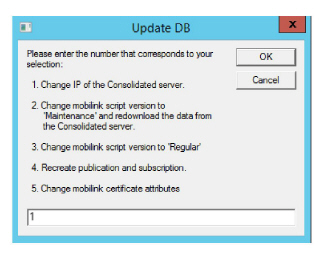
2.Change the IP address of the Consolidated server on the Primary and Secondary servers only. This is the Mobilink connection that allows the servers to sync the database. Run the UpdateDBHA_64.exe utility from the server’s hard drive. This program is available from your vendor.
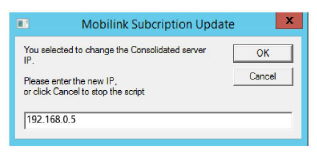
3.At the prompt, enter 1 to change the IP address of the Consolidated server. Click OK.
4.Enter the new IP address of the backup Consolidated server, then click OK.
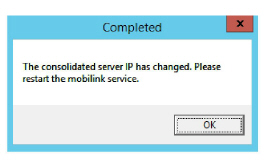
5.The IP Address for the Consolidated server will be changed. Click OK.
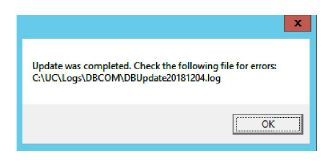
6.Any errors can be viewed in the log file. When finished, click OK to complete the change.
Start the SQL Mobilink service on all servers in the HA environment.
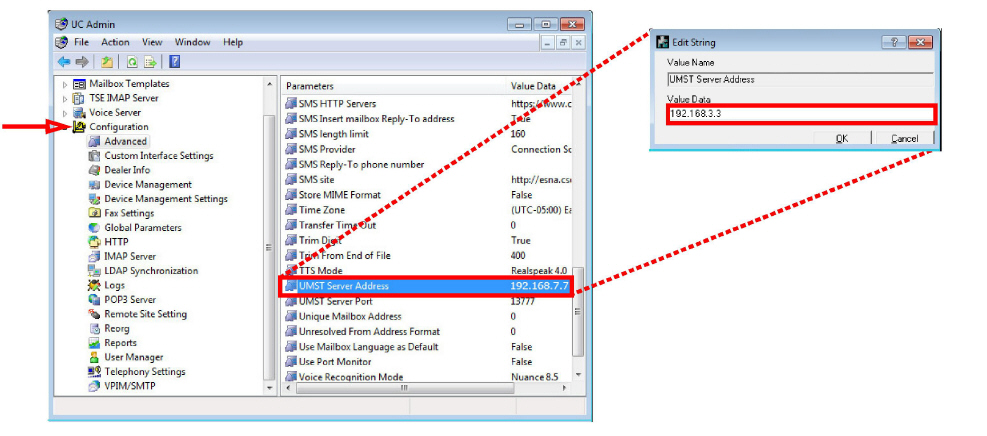
7.Change the IP address of the UMST (Consolidated) server to the IP address the server attained during failover. Open IXM Admin, and go to Configuration > Advanced.
8.Double-click UMST Server Address in the right-hand pane and enter the updated IP address for the UMST server.
Reversing Protection After Failover
After failover, the old Target server has become the new Source server. Once the cause of the failure has been corrected, the original Source can become the new Target, thereby restoring failover protection to the system.
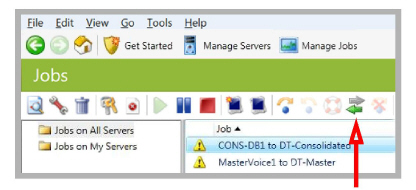
1.Open the Carbonite Availability monitor. Failover protection is no longer active.
2.To initiate Reverse Protection, click the Reverse button ![]() in the toolbar.
in the toolbar.
This initiates a synchronization of the servers, with the original Target as the new Source, and the original Source now the Target. The monitor displays the progress of the synchronization.

When the synchronization is complete, the system is again safe with failover protection.
Compare the configuration from before and after the failover. The two servers have traded positions.
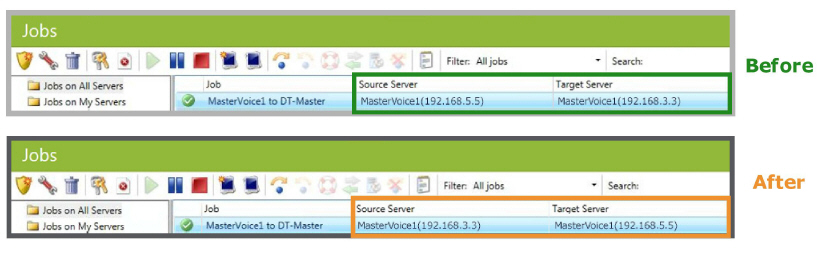
Reverse protection has been enabled successfully.