General Data Protection Regulation (GDPR) Compliance
By default, certain information is collected on all incoming calls through Avaya IX Messaging. This data is collected so that site administrators can generate reports that show traffic flows, system capacity and other usage data. This information includes calling number, caller ID, date and time and length of the call, and so on. Conversations can also be recorded and stored by the system.
Avaya IX Messaging complies with the General Data Protection Regulation (GDPR) standard, allowing site administrators to delete this information from the database after a request from the caller, maximizing personal data security.
Prompts can be setup to be played before each call starts, alerting the caller that the information is being collected. They then have the option to terminate the call, or to request that the details be removed from the database afterwards if security is an issue.
Adding GDPR to Avaya IX Messaging is typically done during the initial program installation procedure, although it can be added afterwards (see Enable / Disable GDPR).
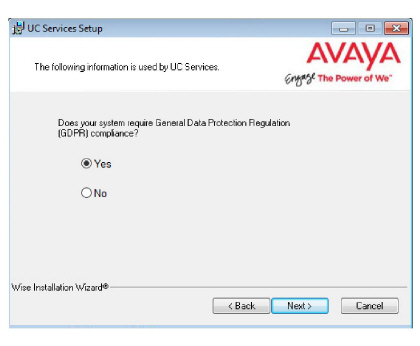
During installation, at the screen where you are asked whether or not you want to include GDPR with the product, enable Yes. This will cause the installer to make the necessary adjustments to the database to accommodate GDPR. It also installs the utility that allows the administrator to remove a caller’s details from the database
Typically, enabling or disabling GDPR is configured during the initial installation of Avaya IX Messaging.

It can always be turned on or off at any time thereafter as required.
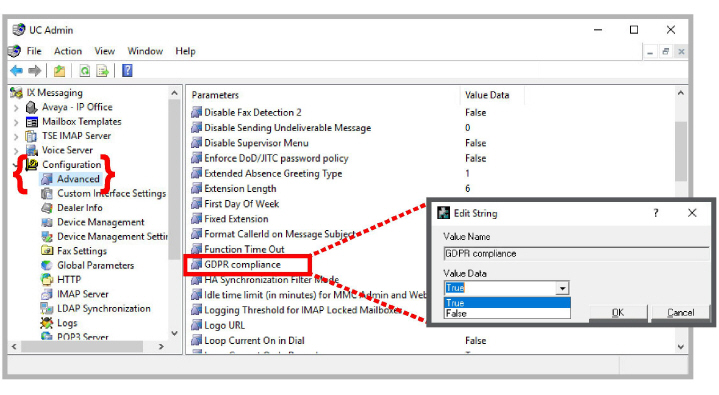
1.Open Messaging Admin on the voice server.
2.Open Configuration > Advanced.
3.In the right-hand pane, double-click GDPR compliance and set the Value Data field to True (to enable) or False (to disable) this feature.
Enabling and Customizing Collection Notification Alerts
An audio alert can be played before an incoming call to notify the caller that their personal information will be collected or that the conversation is being recorded. They have the option to request that this information be deleted.
A standard, generic, system prompt can be used for each case, or you can record custom prompts.
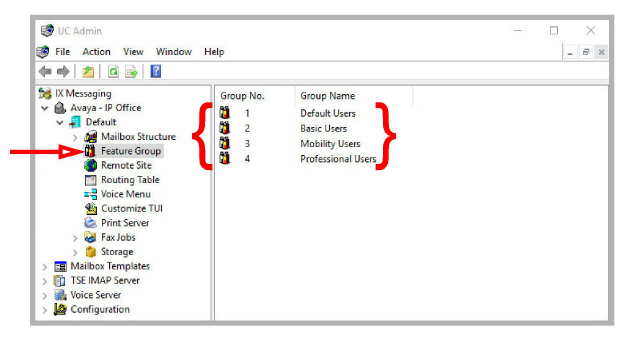
1.Open Messaging Admin on the voice server.
2.Open Company > Default > Feature Group. Select a Feature Group to apply GDPR notifications to and double-click.
3.Go to the Transfer Options tab.
4.In the section for Record Conversation Warning, enable Play record Conversation Warning to play the system prompt for the incoming caller whenever the call will be recorded.
If you have recorded a customized greeting for this event, enable Play record Conversation Custom Warning instead and enter the 4-digit SAL number (digits only) for the custom recording (see Recording a Custom Greeting).
If you do not wish to play a warning when recording a call, disable both options.
5.In the section for Data Collection Warning, select an Announcement Type.
None: This option will disable the warning for data collection.
System Prompt: Plays the system prompt when an incoming caller leaves a message in voicemail.
Custom Prompt: Plays the custom prompt that you recorded when an incoming caller leaves a message in voicemail. Enter the 4-digit SAL number (digits only) for the custom recording (see Recording a Custom Greeting).

Custom greetings are recorded using a desktop telephone.
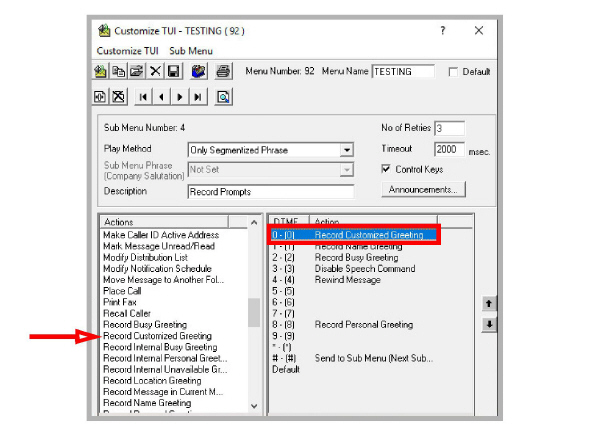
1.On a desktop telephone, connect to the system and navigate to the Record Custom Greeting prompt in your telephone menus.
How to reach this menu item depends upon how your Telephone User Interface (TUI) is configured. If necessary, add the Record Custom Greeting item to one of the telephone menus.
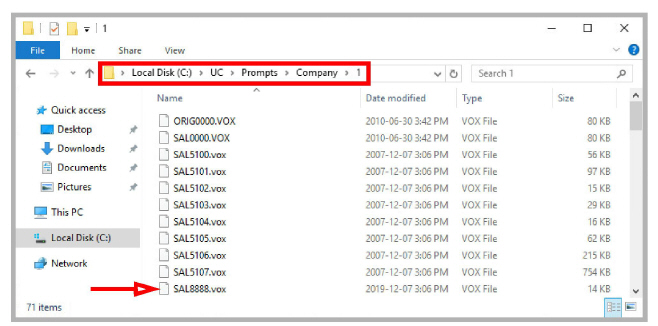
2.When prompted, enter a 4-digit number to identify the file. The recording will be stored in the voice server Prompts folder with the format SALnnnn.vox where nnnn is the number you entered.
Copy this file into the \UC\Prompts\Company\1 folder if it is not there already.
|
Note: The number 1 used in this example is the company number. If your site hosts more than one company on a single voice server, then enter the appropriate number for that company instead. |
|
Important: Make sure that the number you assign to the custom prompt is unique. It must not be the same as any other prompt or the original prompt will be overwritten by the new one. |
This 4-digit number is used when configuring the prompt to play when a recording a meeting, or when a caller chooses to leave a message in a voice mailbox.
Removing a Caller’s Details from the Database
To remove a caller’s collected information from the database, run the ForgetMe tool found in the UC directory.
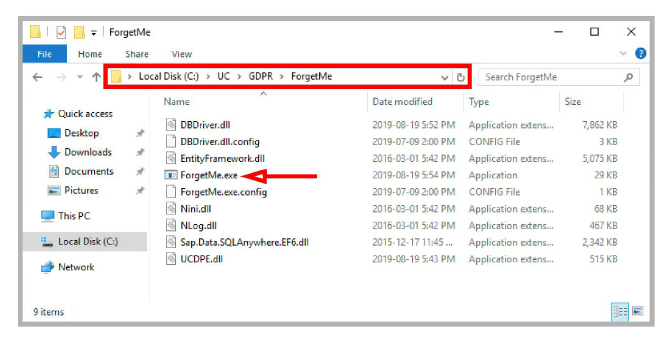
1.In the install directory for Avaya IX Messaging, open the UC > GDPR > ForgetMe folder.
Run (double-click) the ForgetMe.exe application.
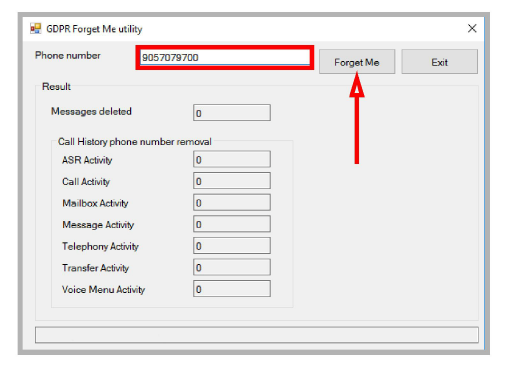
2.Enter the telephone number of the caller to be removed from the database, then click Forget Me.
3.The utility will remove all references from the database associated with that number. The entries removed are tallied and displayed in the appropriate spaces on the screen.
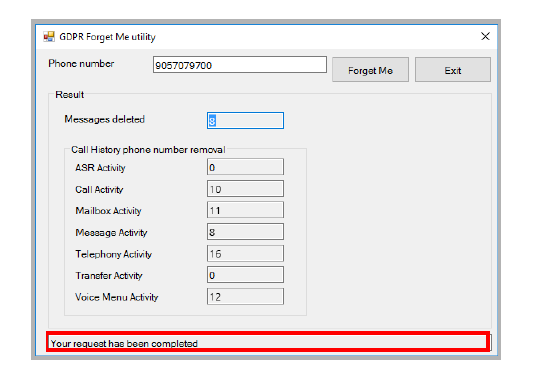
4.Enter another number to delete, or click Exit when finished.