Securing Messaging Communications using TLS
|
Note: Configuring a site to use TLS communications is optional. It is not required for normal operations. |
By default, Avaya IX Messaging communicates with the PBX using UDP (User Defined Protocol). This can be enhanced by activating TLS (Transport Layer Security) if the added security it provides is desirable.
|
Note: The PBX can be either a physical device, or a UC management software program (such as Avaya Aura Communication Manager). |
This is part of all JITC installations, but is also available to all sites where required.
TLS communications are established between the Messaging voice server(s) and the site PBX.
Both ends must be configured to use TLS to make the connection.
For Single Server Installations
Configure the Messaging server to use TLS.
For High Availability Installations
Configure the Primary and all Secondary servers to use TLS.
It is not necessary to configure the Consolidated server to use TLS since there is no link to the PBX.
Configuring TLS on the PBX / UC Manager
Refer to the specific product documentation for details on configuring your PBX / system to use TLS.
Configuring TLS with Messaging for SIP
After Avaya IX Messaging has been installed, modifications must be made to the ETSIPService.ini file. This will enable TLS security with the correct settings for use with Messaging.
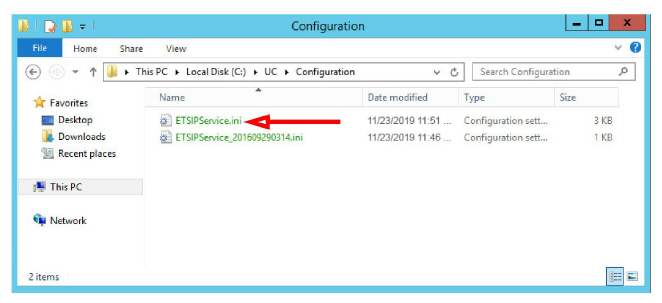
The ETSIPService.ini file is located in the UC/Configuration folder on the voice server hard drive.
Open it using Notepad or any similar text editor.
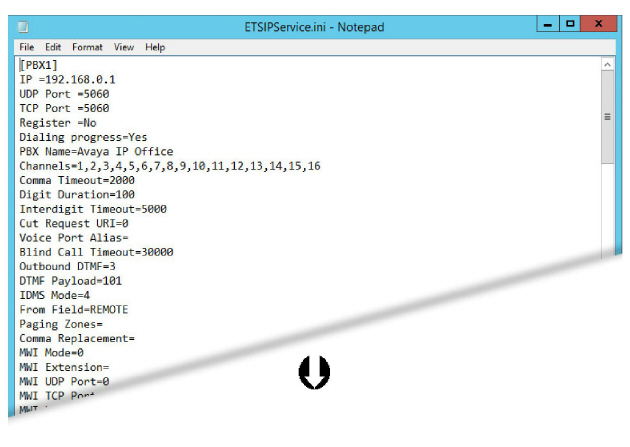
Make the necessary changes to the data in the file.
•Change an existing entry to the value required.
•If the item is not in the file, add it to the appropriate section (shown in [square brackets] ).
Do not create duplicate sections!
•If the section itself does not exist, add a new section to the end of the file and include the value.
[Section Name]
Field Name = Value
This is an example of additions and changes that can be made to the file. Make the changes required for your site.
[PBX1]
Transport protocol=3
MWI TCP Port = 5061
TCP Port = 5061
[SIP settings]
Ignore Local Addresses=Yes
TCP Enabled = Yes
TLS IP = 192.168.0.1:5061,192.168.1.10:5061
[TLS Manager]
FIPS=0
[TLS Server]
Private [email protected]
Certificate Depth=5
Method=2
[TLS Client]
Intermediate [email protected]
Certificate Depth=5
Method=2
Transport protocol: Set this value to 3. A TLS IP address must be defined under SIP settings.
MWI TCP Port / TCP Port: Set both of these values to 5061.
Ignore Local Addresses: Allows control of automatic stack binding with all available interfaces. This must be set to Yes when using TLS.
TCP Enabled: TCP is required for use with TLS. Set this option to Yes.
TLS IP: List all of the TLS local IP addresses for the Messaging server. The format must be address, colon, port. For example, IPAddress:port . Separate multiple server addresses in the list using a comma.
FIPS: Enables the FIPS module for an OpenSSL library.
Private Key: Enter the full path to the private key file (i.e. c:\security\certificates\sip.key). Adding the prefix @ will automatically include the path to the Messaging certificates folder: entering @sip.key expands the path to C:\UC\Certificates\sip.key (where C is the drive where Messaging is installed). The certificate file must be in PEM format.
Certificate: Enter the full path to the certificate file (i.e. c:\security\certificates\sip.crt). Adding the prefix @ will automatically include the path to the Messaging certificates folder: entering @sip.crt expands the path to C:\UC\Certificates\sip.crt (where C is the drive where Messaging is installed).
Certificate Depth: Defines the depth that an engine will consider legal in a certificate chain (certificates authorizing certificates). The default value is 5.
Method: Specify the version of TLS to use. The default value is 2 (TLS 1.2). If your installation requires an earlier version of TLS, change the value accordingly.
|
Value |
Version |
|---|---|
|
4 |
TLS 1.0 |
|
3 |
TLS 1.1 |
|
2 |
TLS 1.2 |
|
1 |
SSL 3.1 |
CA Certificates: Enter the full path to the PEM certificate file. Adding the prefix @ will automatically include the path to the Messaging certificates folder. A TLS engine can trust zero, one or more root certificates. Once an engine trusts a root certificate, it will approve all valid certificates issued by that root certificate.
Intermediate Certificates: Enter the full path to the PEM certificate file. Adding the prefix @ will automatically include the path to the Messaging certificates folder. An engine may hold a certificate that is not issued directly by a root certificate, but by a certificate authority delegated by that root certificate. To add this intermediate certificate to the chain of certificates that the engine will present during a handshake.
Certificate Depth: Defines the depth that an engine will consider legal in a certificate chain (certificates authorizing certificates). The default value is 5.
Method: Specify the version of TLS to use. The default value is 2 (TLS 1.2). If your installation requires an earlier version of TLS, change the value accordingly.
|
Value |
Version |
|---|---|
|
4 |
TLS 1.0 |
|
3 |
TLS 1.1 |
|
2 |
TLS 1.2 |
|
1 |
SSL 3.1 |
|
Note: Some sites may require Mutual Certification between the Messaging voice server and the PBX / UC Manager. To configure this item, copy the Private Key and Certificate elements from TLS Server into the TLS Client section. [TLS Client] |