A number of new features have been added to Avaya Messaging in 10.8.
•Rebranded Esna Officelinx to Avaya IX Messaging.
•New Report Server type available in HA environments. Makes available more of the database for client reporting requirements.
•Compliant with General Data Protection Regulation (GDPR) requirements including the Forget Me utility for data clean-up.
•Now supporting Office 365 integration using Microsoft Graph.
•Support added for Exchange 2019.
•IX Messaging is now using Nuance Recognizer 10 as the ASR Engine.
The Web Report feature of Avaya IX Messaging allows you to generate a variety of reports on key areas of the system, such as calls per hour by PBX and company, port usage and mailbox usage. These reports help administrators adjust server load and performance to ensure maximum productivity.
Web reports is limited by the data that is made available, and by what can be built within the user interface in terms of how it is presented (charts, tables, graphs, etc.).
For companies that want tighter control over their reports, a Report Server can be setup that has direct access to the database. More of the data is made available to whatever program you want to use to display the data and generate meaningful output.
•The Report Server must be used in conjunction with a High Availability installation as it uses features and services (e.g. Mobilink) that are not available when using a Single Server.
•The Report Server feature is included with the HA license. No additional purchase is required.
•The Report Server must be housed on a different computer that any used by the system.
•Multiple Report Servers can be installed.
•The Report Server creates a local, continually updated copy of the database on the Consolidated Server.
•Only usage data is available to the Report Server. System operating information (e.g. passwords, usernames, etc.) is not included.
•The Report Server has no user interface of its own to view the data or generate reports. The data is simply made available to whatever software you already use for your reporting needs. Additional work by the administrator will be required to extract and process the data.
The Report Server must have at least the following.
|
Operating System |
Windows Server 2012 / 2016 / 2019 |
|
CPU |
2 or more CPUs @ 2+ GHz |
|
RAM |
At least 50% of the RAM on the Consolidated Server (min 4 GB) |
|
HDD |
200 GB (100GB for O/S, 100 GB for IX Messaging) |
The Avaya IX Messaging High Availability installation must already be setup and running before adding a Report Server.
A different computer must be connected to the same subnet as the Consolidated Server in order to read the database.
The Windows operating system must be installed, updated and patched.
On the computer that will host the Remote Report Server:
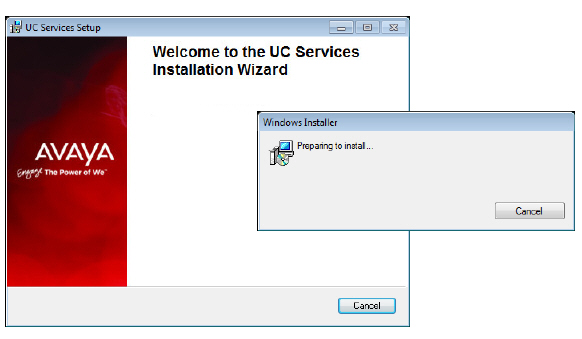
1.Copy the Avaya IX Messaging installation program to this computer. Run Setup.exe as administrator to begin installing.
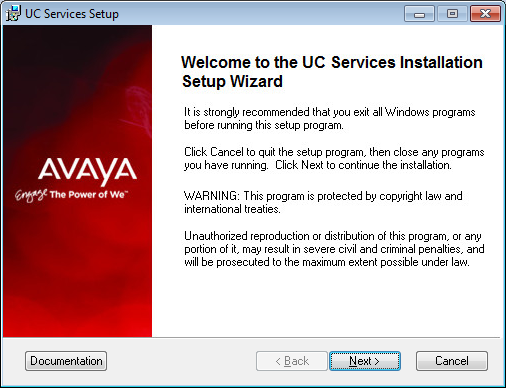
2.Once the Windows components have been verified, click Next to begin the installation.
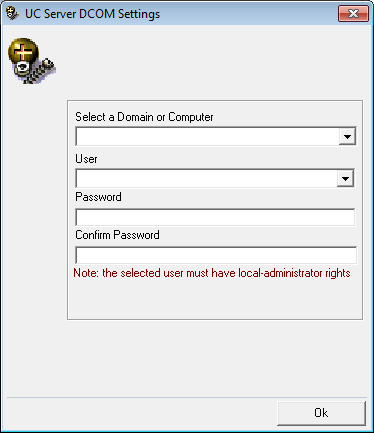
3.Enter the DCOM user info (domain user account which has local administrator rights). This is required by services which use local administrator rights.
Click OK after entering the credentials.
4.Review the EULA and enable I accept the license agreement.
Click Next to continue.

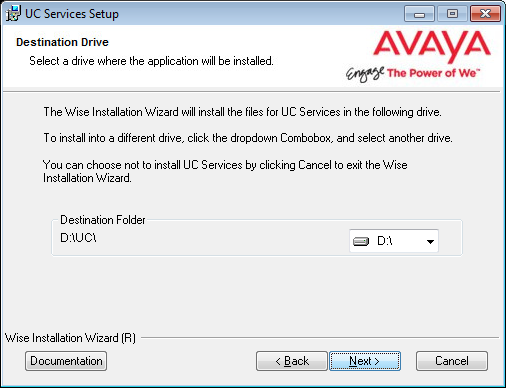
5.You will be asked to select the destination of the installation. You may change the hard drive destination through the drop down menu. By default, the installation will create a UC folder on the C drive.
Click Next to continue.
6.Enable Multiple UC Servers in High Availability.
Click Next.

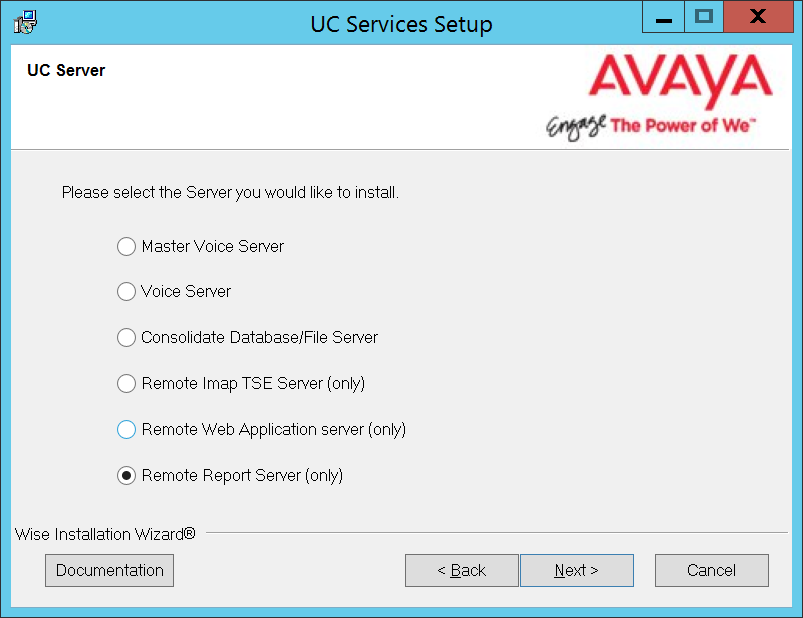
7.Select Remote Report Server (only).
Click Next.
8.Enter a number to identify this Report Server. If you have more than one Report Server, each must be given a unique number.
Click Next.
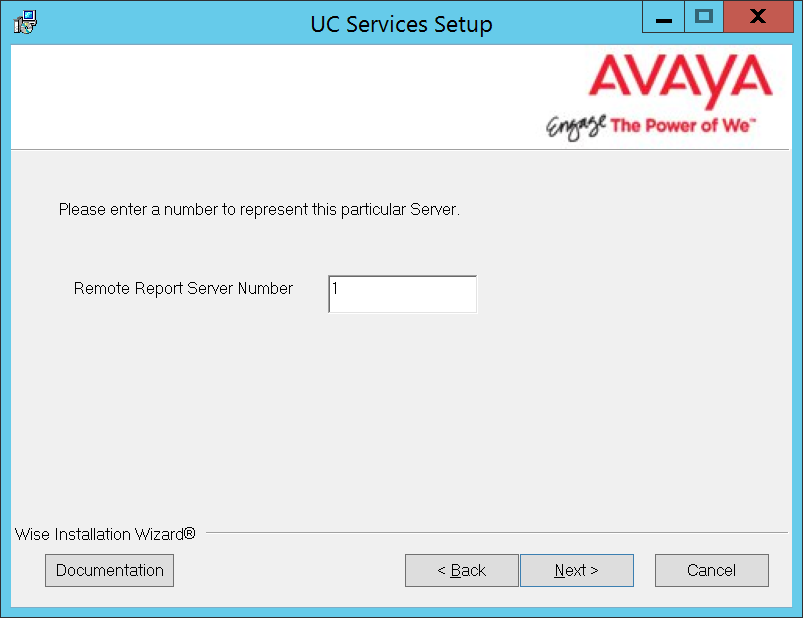
|
Note: This number is independent of any other server identification numbers (i.e. Secondaries, Remote CSEs). |
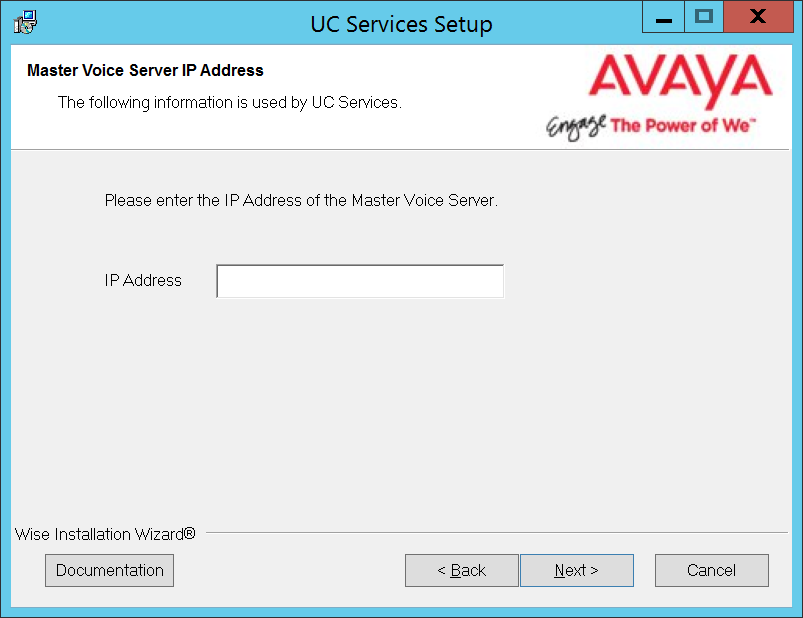
9.Enter the IP Address for the Primary Server.
Click Next.
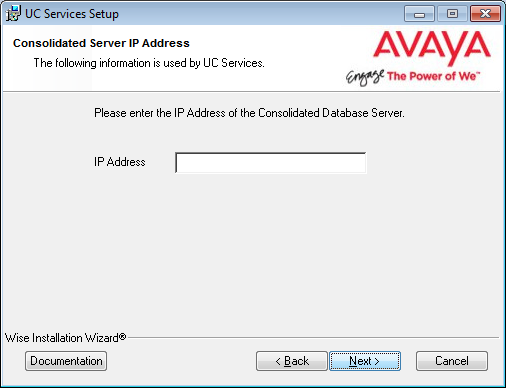
10.Enter the IP Address for the Consolidated Server.
Click Next.
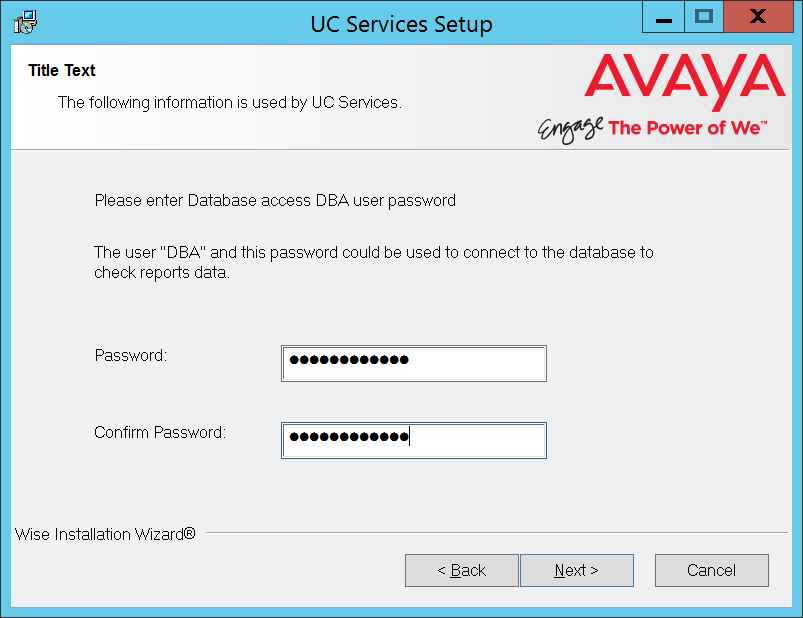
11.Create the Database Access DBA User Password in the space provided. This password will be used by the Report Server to access the database.
Click Next.
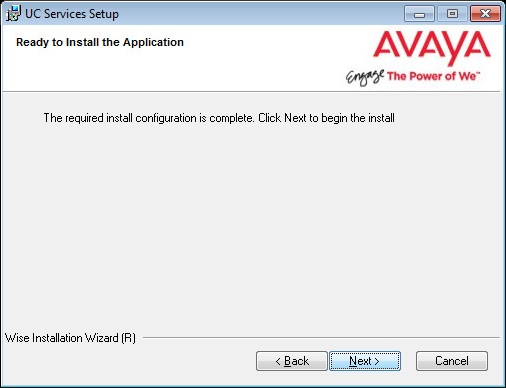
12.The preliminary information required for installation is complete.
Click Next.
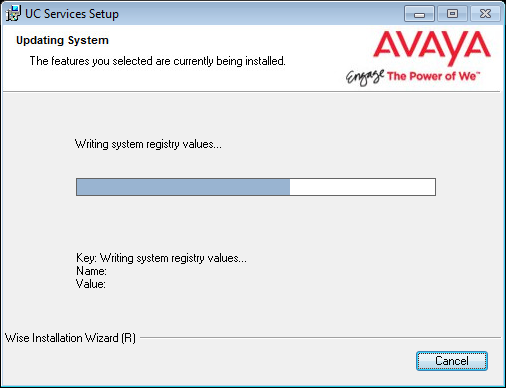
13.The selected components will be installed.
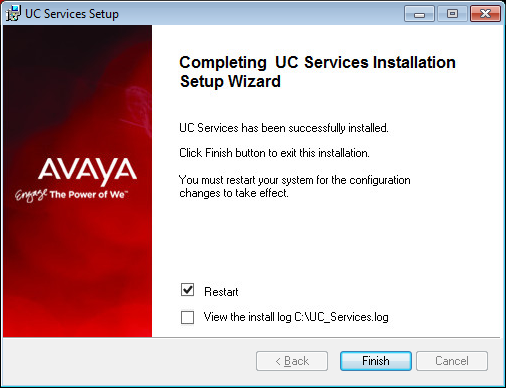
14.The installation of the Report Server is complete.
Click Finish to restart the server.
If you wish to restart your computer at a later time, disable the Restart checkbox then click Finish.
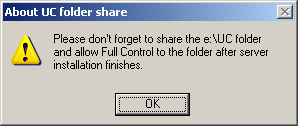
15.This alert is to remind you to properly share the UC installation folder.
Click OK to restart the computer.
The database on the Report Server is only a portion of the full database found on the IX Messaging voice server. It only contains client and system usage data. It does not contain any confidential or system information (i.e. passwords). The Report Server database is continually synchronized with the main database.
On the Report Server, the database is stored in the /UC/DB folder on the installation drive you chose. The database is named EEAM21.db and It is an SQL formatted database. You will need to write scripts to import the information you need into whichever program you are using analyze the data.
Sample JDBC Connection to Retrieve Data
|
Note: The Java Development Kit ( JDK ) must be installed before proceeding with the code sample. |
The following is sample of code using a JDBC connection to access the database.
import java.io.*;
import java.sql.*;
public class JDBCConnect
{
public static void main( String args[] )
{
try
{
String userID = "";
String password = "";
String server = "";
String driver = "jdbc4";
String SQL ="select * from repMailboxActivity";
if( args.length > 0 ) userID = args[0];
if( args.length > 1 ) password = args[1];
if( args.length > 2 ) server = args[2];
if( args.length > 3 ) driver = args[3];
if( args.length > 4 ) SQL = args[4];
Connection con;
if( driver.compareToIgnoreCase( "jdbc4" ) == 0 )
{
con = DriverManager.getConnection(
"jdbc:sqlanywhere:uid=" + userID + ";pwd=" + password + ";servername=" + server);
}
else
{
con = DriverManager.getConnection(
"jdbc:sybase:Tds:localhost:2638", userID, password);
}
Statement stmt = con.createStatement();
ResultSet rs = stmt.executeQuery(SQL);
while( rs != null )
{
while (rs.next())
{
for( int i = 1;
i <= rs.getMetaData().getColumnCount();
i++ )
{
if( i > 1 ) System.out.print(", ");
System.out.print(rs.getString(i));
}
System.out.println();
}
if( stmt.getMoreResults() )
{
System.out.println();
rs = stmt.getResultSet();
}
else
{
rs.close();
rs = null;
}
}
stmt.close();
con.close();
}
catch (SQLException sqe)
{
System.out.println("Unexpected exception : " +
sqe.toString() + ", sqlstate = " +
sqe.getSQLState());
System.exit(1);
}
catch (Exception e)
{
e.printStackTrace();
System.exit(1);
}
System.exit(0);
}
}
Running the Sample Application
1.At a command prompt, change to the %SQLANYSAMP17%\SQLAnywhere\JDBC directory.
2.Set the CLASSPATH environment variable. The SQL Anywhere JDBC driver is contained in sajdbc4.jar.
set classpath=.;%SQLANY17%\java\sajdbc4.jar.
If you are using the jConnect driver instead, then set the CLASSPATH as follows (where jconnect-path is your jConnect installation directory).
set classpath=.;jconnect-path\classes\jconn4.jar
3.Run the following command to compile the example:
javac JDBCConnect.java
4.Run the following command to execute the example:
java JDBCConnect DBA "!Password"
A default SQL query is executed.
If the attempt to connect fails, an error message appears instead. Confirm that you have executed all the steps as required. Check that your CLASSPATH is correct. An incorrect setting may result in a failure to locate a class.
5.Optional. Include SQL queries on the command line:
java JDBCConnect DBA "!Password" jdbc4 "SELECT * FROM Customers"
Legacy SSO
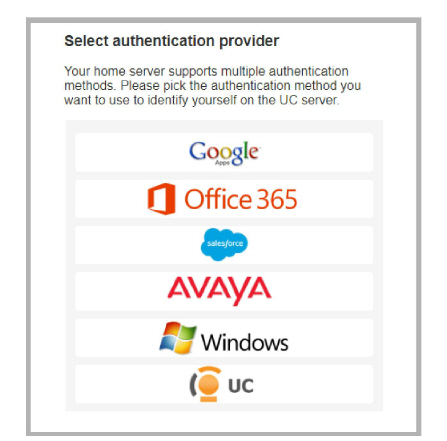
Logging in to Avaya Messaging applications (Web Admin, Web Access, Web Reports and Messaging Admin) is handled using a 3rd party authentication provider, such as Salesforce, Google, Office 365 or Windows. This Single Sign-On process let’s clients use their credentials from the other applications to access Messaging. This is known as Legacy SSO.
Clients open an application, are passed through Messaging and then onto the provider. The client’s credentials are authenticated by the provider and access is granted.
Hybrid SSO
The preferred method for authentication is Hybrid SSO as it offers a higher level of security for your connections by adding a certificate validation layer. The Voice Server, or the Consolidated Server in a High Availability environment, is authenticated on the Avaya licensing server through a certificate enabled handshake. The client then uses whichever login credentials they have available to complete the connection from their current location.
Clients open an application and are passed through to Messaging. If the connection to the accounts.zang.io server has been validated by the certificate, the login request is sent to the provider for authentication. If either the connection is not valid, or if the client’s credentials are incorrect, then access is denied.
|
Important: The Hybrid SSO login procedure requires an active Internet connection. Only Legacy SSO can be used if Internet access is disabled / locked-down (i.e. at high security, isolated sites). |
A the end of the installation routine, you are asked to select the SSO method to employ.
To use the Legacy SSO login method:
•On the SSO Configuration screen, enable Legacy SSO.
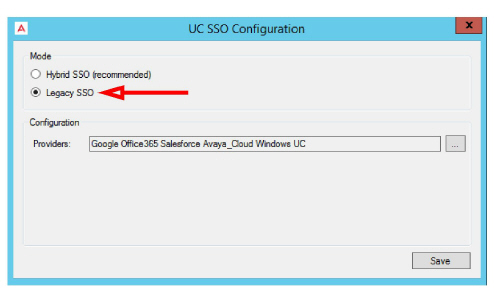
•From the Providers dropdown menu, enable the authentication providers that you want your clients to use to access Web Admin, Web Access, Web Reports and Messaging Admin. Items that are disabled will not appear during login.
Filling out these fields is optional and only required if you make use of OAuth2 when connecting to these providers.
•Client Id: Enter the OAuth2 client ID for the provide you have chosen.
•Client Secret: Enter the OAuth2 client secret value for the provide you have chosen.
•Redirect URL: Enter the URL for your company given by the provider you have chosen.
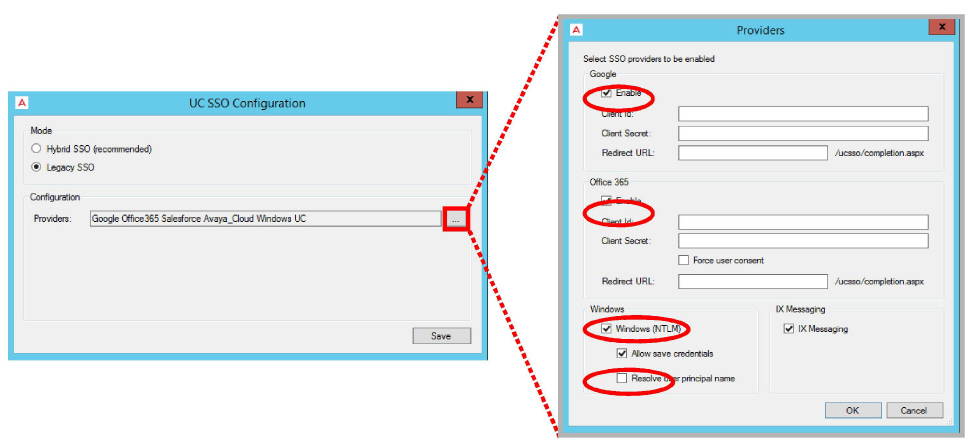
•Enable all that apply, then click OK.
•Click Save when finished.
|
Important: The Hybrid SSO login procedure requires an active Internet connection. Only Legacy SSO can be used if Internet access is disabled / locked-down (i.e. at high security, isolated sites). |
To use the Hybrid SSO authentication method:
•On the SSO Configuration screen, enable Hybrid SSO.
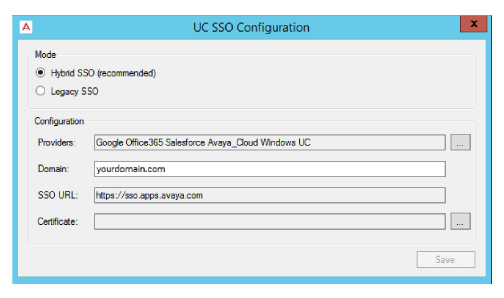
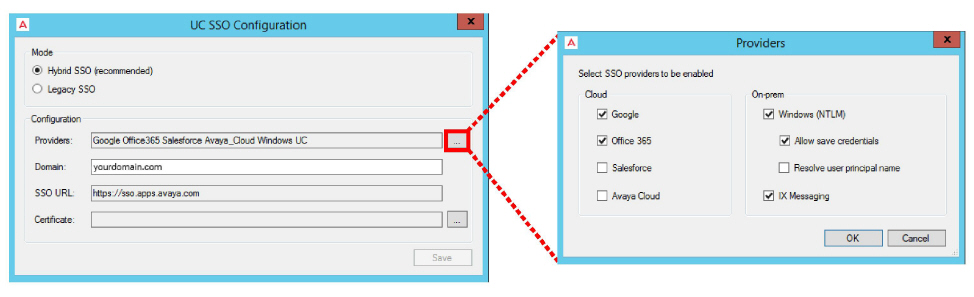
•From the Providers dropdown menu, enable the authentication credentials that you want your clients to use to access Web Admin, Web Access, Web Reports and Messaging Admin. Items that are disabled will not appear during login.
Enable all that apply, then click OK.
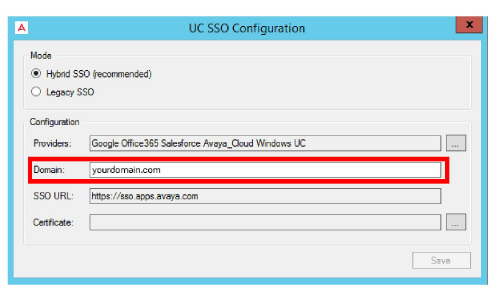
•Enter the domain name where your Voice / Consolidated server is located in the space provided.
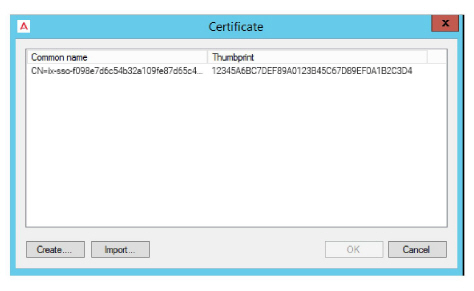
•A certificate is required when using Hybrid SSO. Click the button to the right side of the Certificate field.
Choose Create to have Messaging build a certificate for you. Or if you have a certificate in PFX format that you would rather use, click Import and select that file instead.
Select the certificate to use, then click OK.
•Once back at the SSO Providers screen, click Save.
•Follow the instructions on this window to complete the installation.
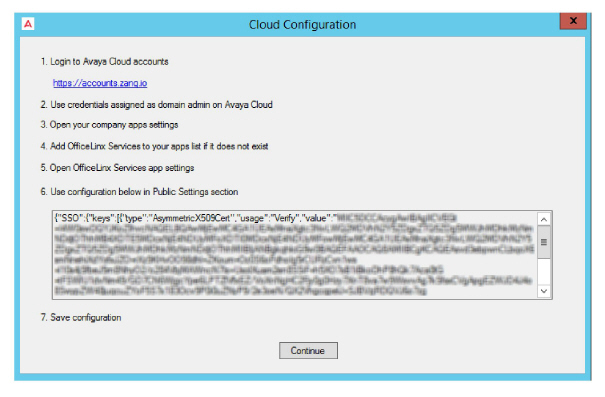
1.Click the link, or enter the URL into the address bar of a web browser to open the Avaya Cloud Accounts site.
2.Login using credentials for an account with administrator rights to the domain.
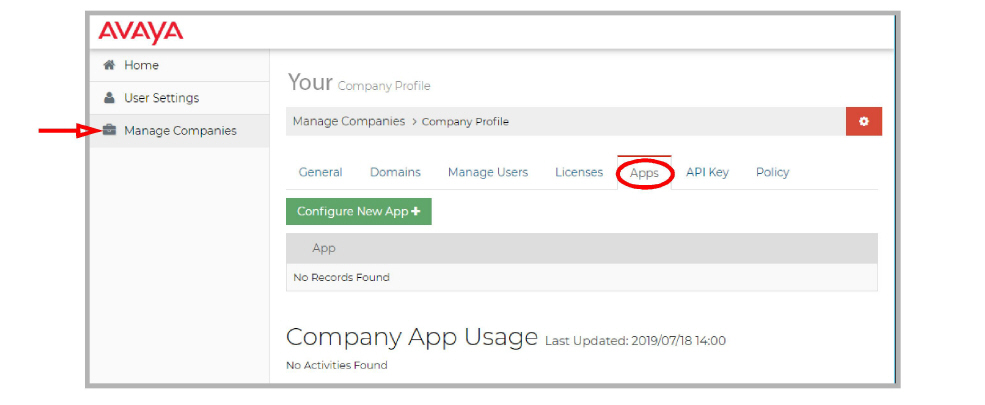
3.Go to Manage Companies, select a company (if more than one), and open the Apps tab.
4.Click Configure New App+. On the Product dropdown menu, select IX Messaging Services.
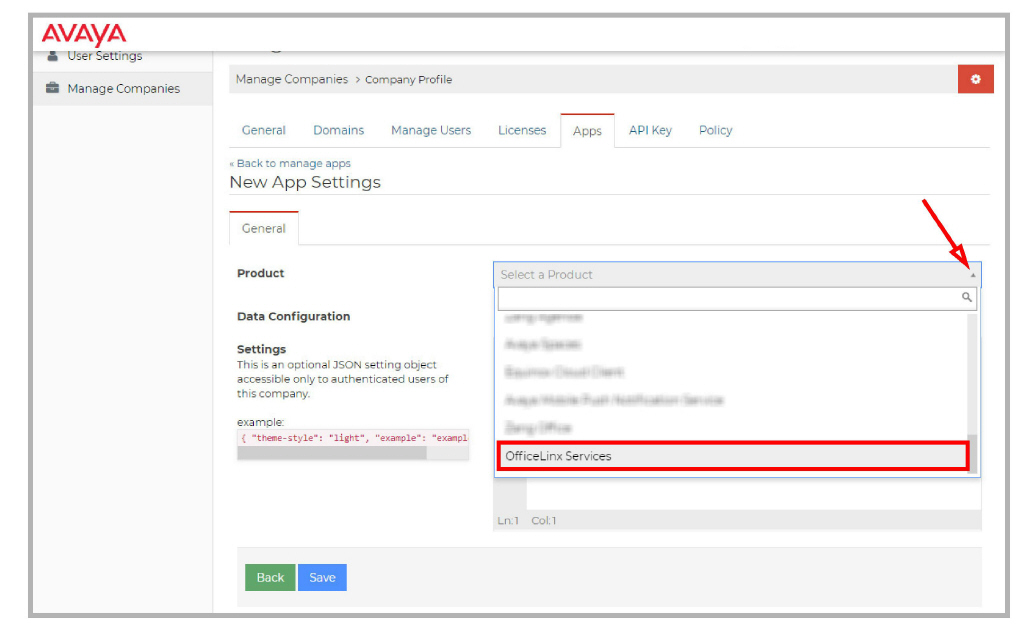
5.You should land on the IX Messaging Services Application Settings page.
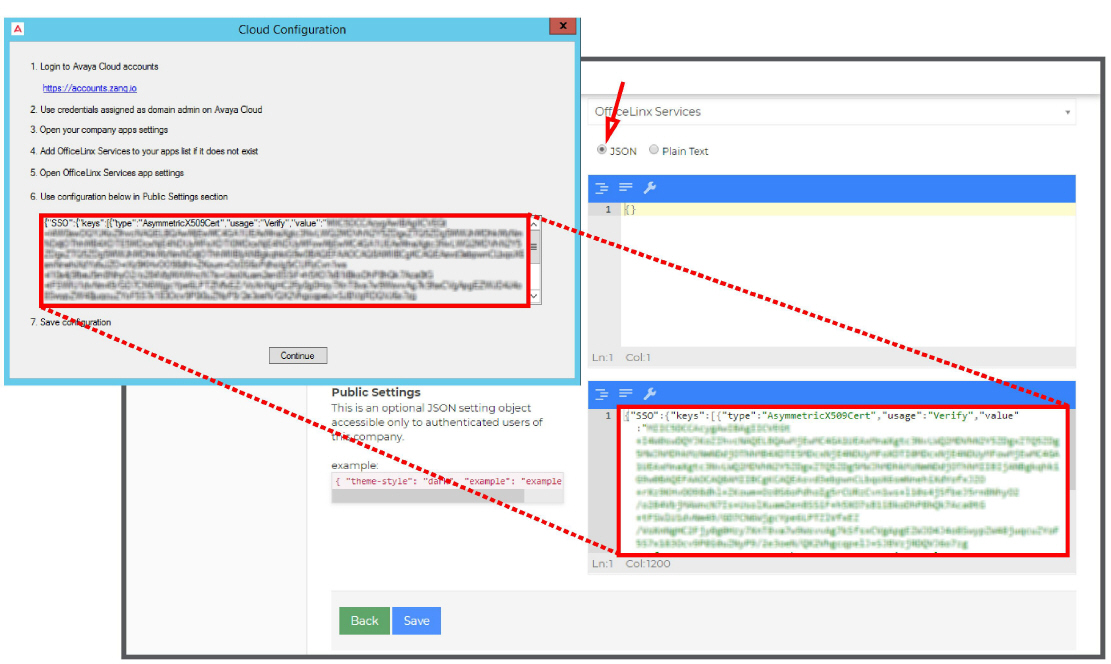
6.Ensure that the option for JSON is enabled then scroll down to Public Settings. Copy the string from the Cloud Configuration panel and paste it into the space provided.
|
Caution: Be careful to copy the entire string from the Cloud Configuration panel. It may extend below the bottom of the pane. |
7.Click Save when ready. Returning to the Cloud Configuration panel, click Continue to complete the Hybrid SSO configuration.
As long as the strings on both the Voice / Consolidated server and the Avaya Cloud server match, users will be able to access the applications using their available credentials.
If these strings are not the same, then users will not be able to login using any credentials.
General Data Protection Regulation (GDPR) Setup
By default, certain information is collected on all incoming calls through Avaya Messaging. This data is collected so that site administrators can generate reports that show traffic flows, system capacity and other usage data. This information includes calling number, caller ID, date and time and length of the call, and so on. Conversations can also be recorded and stored by the system.
Avaya Messaging complies with the General Data Protection Regulation (GDPR) standard, allowing site administrators to delete this information from the database after a request from the caller, maximizing personal data security.
Prompts can be setup to be played before each call starts, alerting the caller that the information is being collected. They then have the option to terminate the call, or to request that the details be removed from the database afterwards if security is an issue.
Adding GDPR to Avaya Messaging is typically done during the initial program installation procedure, although it can be added afterwards (see Enable / Disable GDPR).
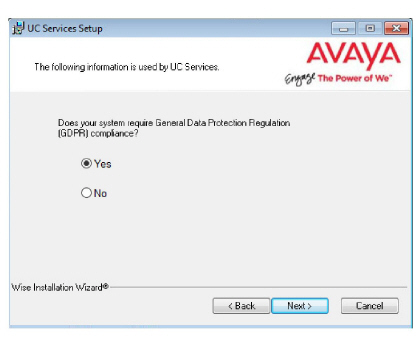
During installation, at the screen where you are asked whether or not you want to include GDPR with the product, enable Yes. This will cause the installer to make the necessary adjustments to the database to accommodate GDPR. It also installs the utility that allows the administrator to remove a caller’s details from the database

Typically, enabling or disabling GDPR is configured during the initial installation of Avaya Messaging.
It can always be turned on or off at any time thereafter as required.
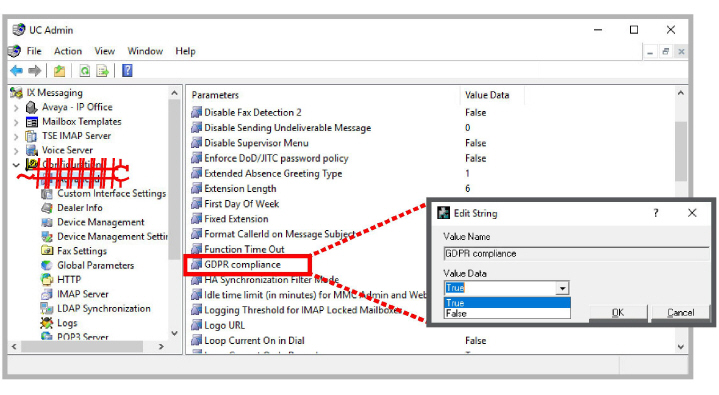
1.Open Messaging Admin on the voice server.
2.Open Configuration > Advanced.
3.In the right-hand pane, double-click GDPR compliance and set the Value Data field to True (to enable) or False (to disable) this feature.
Enabling and Customizing Collection Notification Alerts
An audio alert can be played before an incoming call to notify the caller that their personal information will be collected or that the conversation is being recorded. They have the option to request that this information be deleted.
A standard, generic, system prompt can be used for each case, or you can record custom prompts.
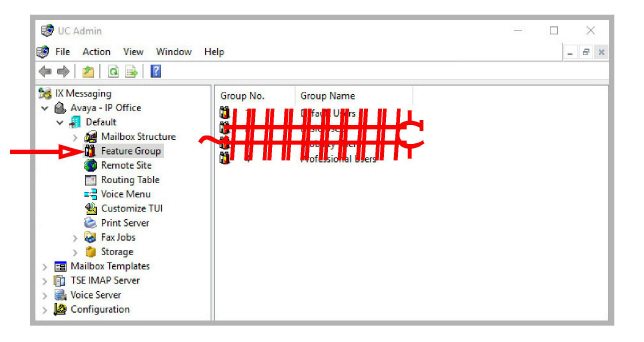
1.Open Messaging Admin on the voice server.
2.Open Company > Default > Feature Group. Select a Feature Group to apply GDPR notifications to and double-click.
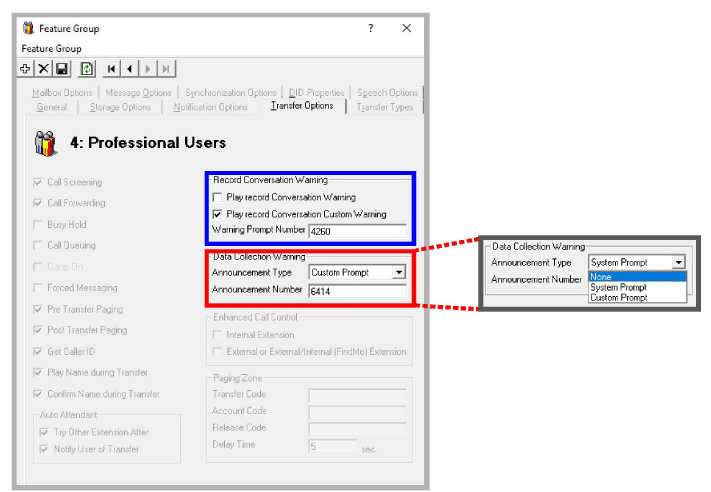
3.Go to the Transfer Options tab.
4.In the section for Record Conversation Warning, enable Play record Conversation Warning to play the system prompt for the incoming caller whenever the call will be recorded.
If you have recorded a customized greeting for this event, enable Play record Conversation Custom Warning instead and enter the 4-digit SAL number (digits only) for the custom recording (see Recording a Custom Greeting).
If you do not wish to play a warning when recording a call, disable both options.
5.In the section for Data Collection Warning, select an Announcement Type.
None: This option will disable the warning for data collection.
System Prompt: Plays the system prompt when an incoming caller leaves a message in voicemail.
Custom Prompt: Plays the custom prompt that you recorded when an incoming caller leaves a message in voicemail. Enter the 4-digit SAL number (digits only) for the custom recording (see Recording a Custom Greeting).
Custom greetings are recorded using a desktop telephone.
1.On a desktop telephone, connect to the system and navigate to the Record Custom Greeting prompt in your telephone menus.
How to reach this menu item depends upon how your Telephone User Interface (TUI) is configured. If necessary, add the Record Custom Greeting item to one of the telephone menus.
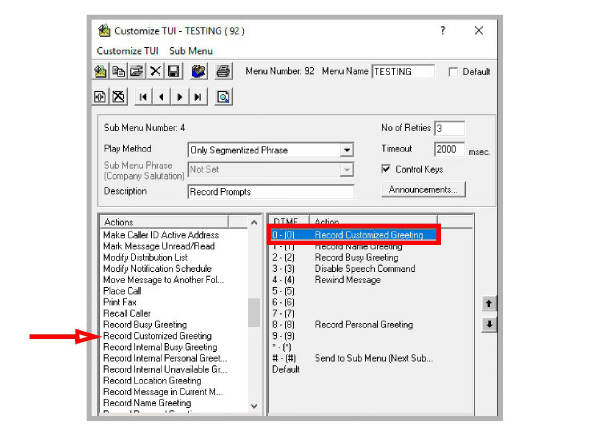
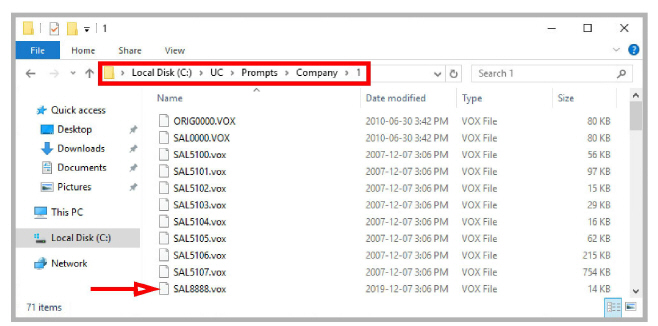
2.When prompted, enter a 4-digit number to identify the file. The recording will be stored in the voice server Prompts folder with the format SALnnnn.vox where nnnn is the number you entered.
Copy this file into the \UC\Prompts\Company\1 folder if it is not there already.
|
Note: The number 1 used in this example is the company number. If your site hosts more than one company on a single voice server, then enter the appropriate number for that company instead. |
|
Important: Make sure that the number you assign to the custom prompt is unique. It must not be the same as any other prompt or the original prompt will be overwritten by the new one. |
This 4-digit number is used when configuring the prompt to play when a recording a meeting, or when a caller chooses to leave a message in a voice mailbox.
Removing a Caller’s Details from the Database
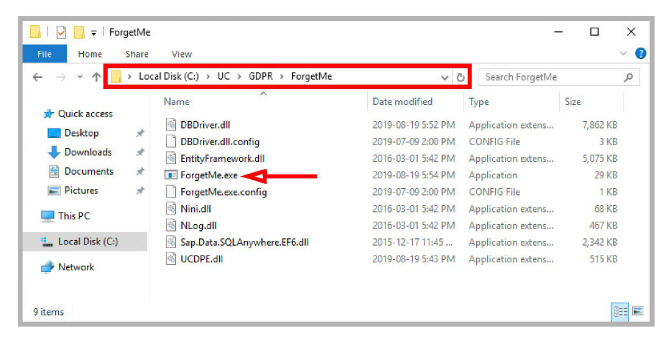
To remove a caller’s collected information from the database, run the ForgetMe tool found in the UC directory.
1.In the install directory for Avaya Messaging, open the UC > GDPR > ForgetMe folder.
Run (double-click) the ForgetMe.exe application.
2.Enter the telephone number of the caller to be removed from the database, then click Forget Me.
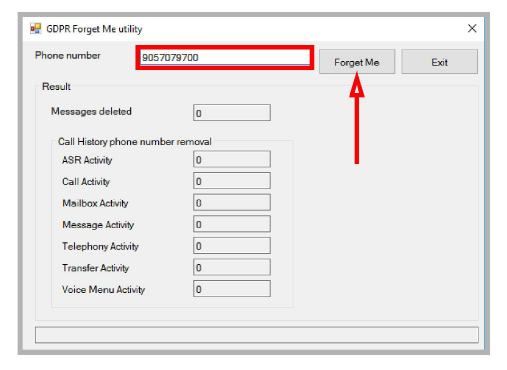
3.The utility will remove all references from the database associated with that number. The entries removed are tallied and displayed in the appropriate spaces on the screen.

4.Enter another number to delete, or click Exit when finished.