High Availability Installation
|
Warning: Avaya Messaging High Availability must only be installed by trained and certified personnel. |
This document provides the installation procedure for Avaya Messaging in High Availability mode (Primary voice, Secondary voice, Primary Consolidated and Secondary Consolidated). The purpose of an HA Installation is operational continuity, in which the array of servers provides your organization with complete Avaya Messaging functionality in case of a server failure.
|
Warning: The instructions found in this guide cannot be guaranteed to work for all installations since each site is unique. Some problems may arise even if you follow these instructions precisely. Therefore, use this document as a reference for your own configuration, making the changes appropriate to your site's specific requirements. |
•If one of the voice servers (Primary or Secondary) fails, traffic if routed away from that server to the still active ones.
•The license is maintained by the Primary Server. If the connection between the Primary voice server and the License server fails, you have 28 days to restore the connection before the system reverts to demo mode.
•If synchronization between the Primary voice server and the Consolidated server fails, you have 10 days to restore the connection before all servers revert to demo mode.
•If the Consolidated Server fails, the remaining voice servers will continue to process voice traffic, but UM services (calendar sync, Email integration, transcription, etc.) will not be available.
|
Requirements |
Details |
|
License |
A Full License for 11.0 that includes HA. |
|
Software |
For details on Avaya Messaging 11.0 Hardware and Software requirements please consult the Technical Operating Guidelines. |
|
Operating System |
Windows Server 2012 R2 Windows Server 2016 Windows Server 2019 |
|
Important: Microsoft Windows is not provided with any version of Avaya Messaging. The customer must install and fully update a suitable, licensed version of Windows onto the hardware platform before proceeding with the Avaya Messaging software installation. |
|
Important: In HA installations, all servers must have the same time zone set under Windows Date / Time. |
A High Availability installation requires a minimum of 3 computers, each setup as a server: Primary Voice server, 1 to 20 additional Secondary Voice servers, and Consolidated server (also called the Database Server).
|
Note: Avaya Messaging should only be installed on dedicated servers specifically intended for the purpose. Sharing system resources with other applications may prevent Avaya Messaging from functioning properly. |
|
Note: Avaya Messaging has only been validated on Windows in English and in French. Other varieties of Windows may not work as intended. |
|
Warning: Once all of the HA servers (Consolidated, Primary and all Secondaries) have been installed, it is important to perform a full synch of all data. Attempting to login to the servers before the synch is complete will corrupt the database preventing all logins on all servers. Refer to Verifying File Sync for complete details. |
Avaya Messaging can be downloaded from the Avaya PLDS portal. The same downloaded file can be used to install any version of the program including Single Server, High Availability (Primary, Secondary, Consolidated), Cloud Gateway, etc.
Download and save the file to a computer hard drive. It is a single, self-extracting executable file. Copy the file to the destination computer(s) and double-click to extract all of the installation files to the local hard drive.
Run the Setup.exe file to launch the installer.
Continue with the chapter appropriate for your operating system (i.e. Windows 2019) or feature set (i.e. JITC).
Antivirus, Firewall and Automatic Updates
It is recommended that any antivirus and firewall applications currently active on the server computer be disabled during installation. It is also necessary to turn off Automatic Updates during the installation.
Any other resource intensive applications or monitoring tools which may cause a conflict with the installation should also be disabled during the installation process.
In an HA installation, all servers must have the same time zone set under Windows Date / Time settings.
Disabling User Access Control Notification
In order to install Avaya Messaging on a Windows Server environment, you must turn off the UAC notification feature on the local Admin user which will be utilized with Avaya Messaging.
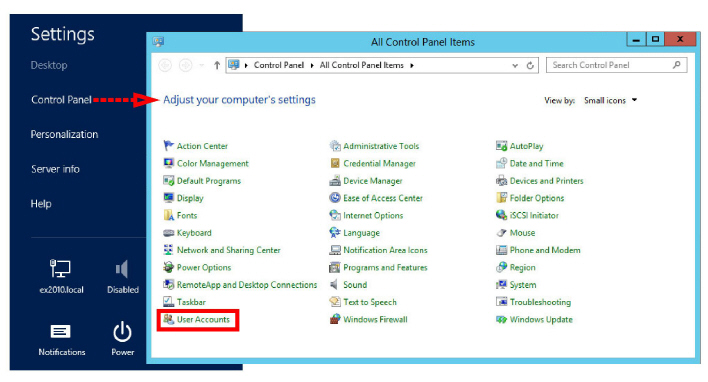
1.Go to Settings > Control Panel. Select User Accounts.
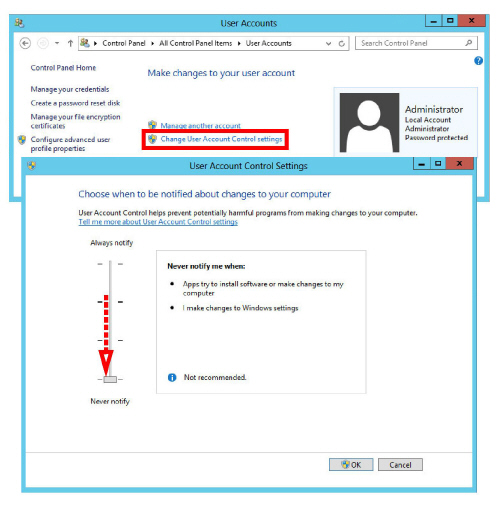
2.Select Change Account Settings.
On the User Account Control Settings screen, click and drag the slider down to Never Notify.
Click OK and Close.
3.On the keyboard, click the Start button, and select Administrative Tools.
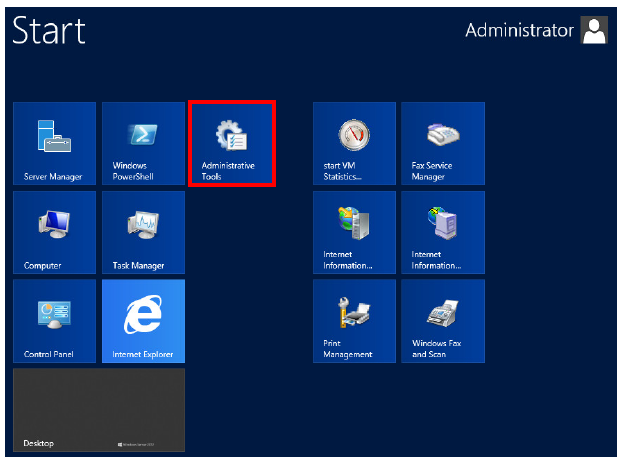
4.Double-click Local Security Policy.
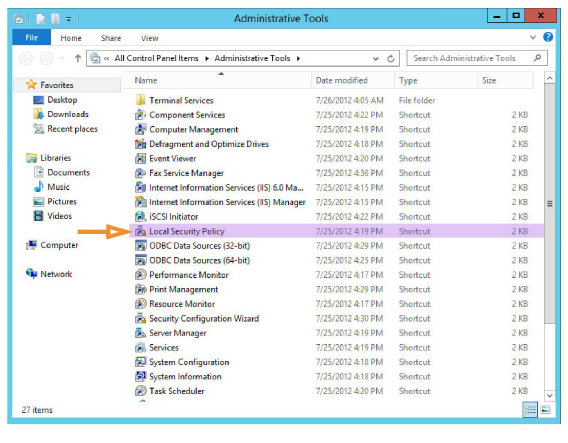
5.Under Security Settings > Local Policies > Security Options, double-click
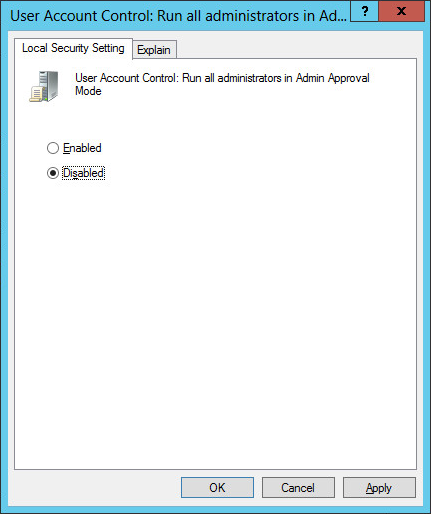
User Account Control: Run all administrators in Admin Approval Mode.
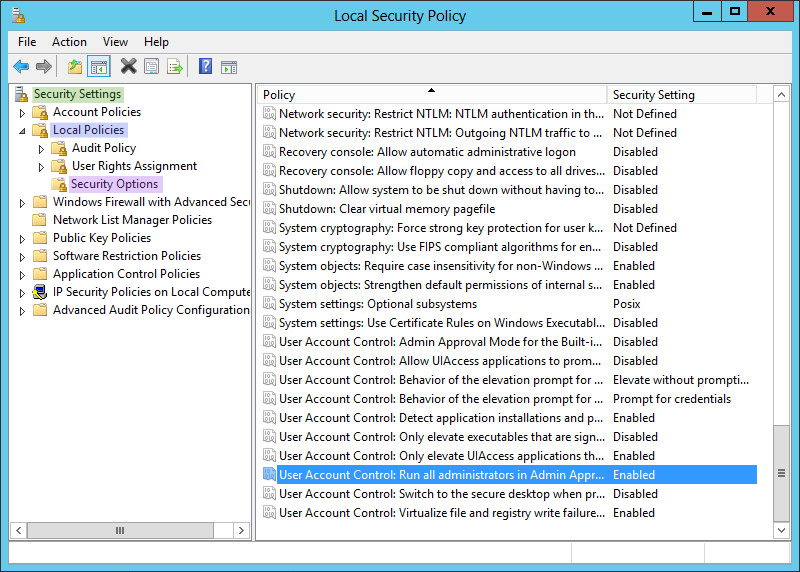
6.Select Disabled. Click OK.
7.Reboot the server.
|
Note: UAC Notifications can be restored after Avaya Messaging has been installed. |
Ensure that all the necessary items are installed on the system before proceeding with Avaya Messaging installation.
|
Important: In HA installations, all servers must have the same time zone set under Windows Date / Time. |
Server Manager Config: Windows 2016/2019 (All Servers)
If your servers have Windows Server 2016 or 2019 installed, use this section. If they are using Windows 2012, go to here.
Perform the following steps on ALL servers; Primary, Consolidated, and all Secondaries.
|
Consolidated: Where necessary, special instructions specific to the Consolidated Server setup are provided where there is a difference in the process from the Primary and Secondary Servers. |
|
Note: Some of these steps may require additional files from the Windows disk or other storage location. |
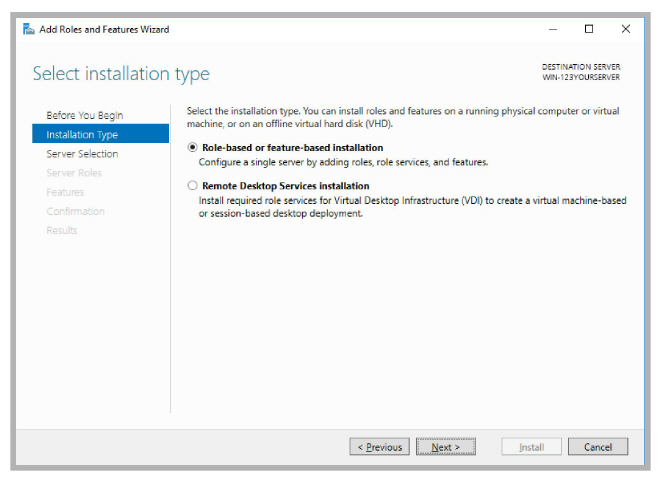
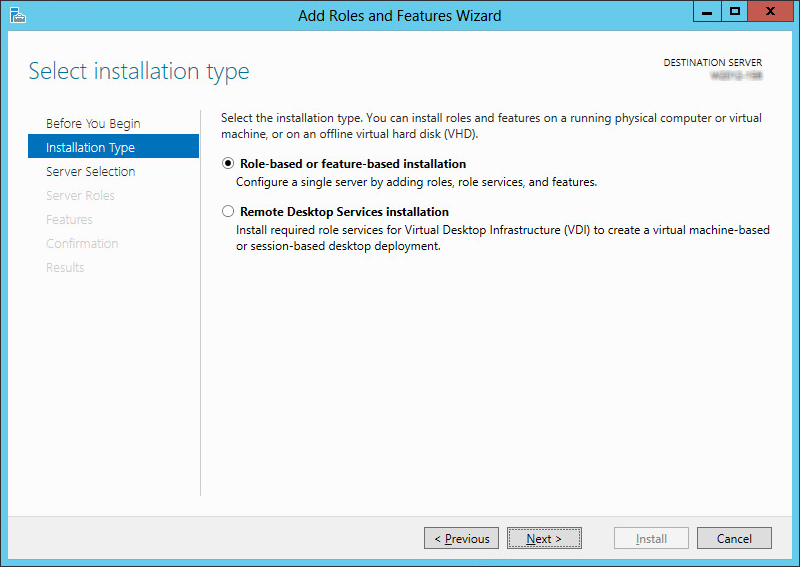
1.From the Server Manager Dashboard, click Add roles and features.
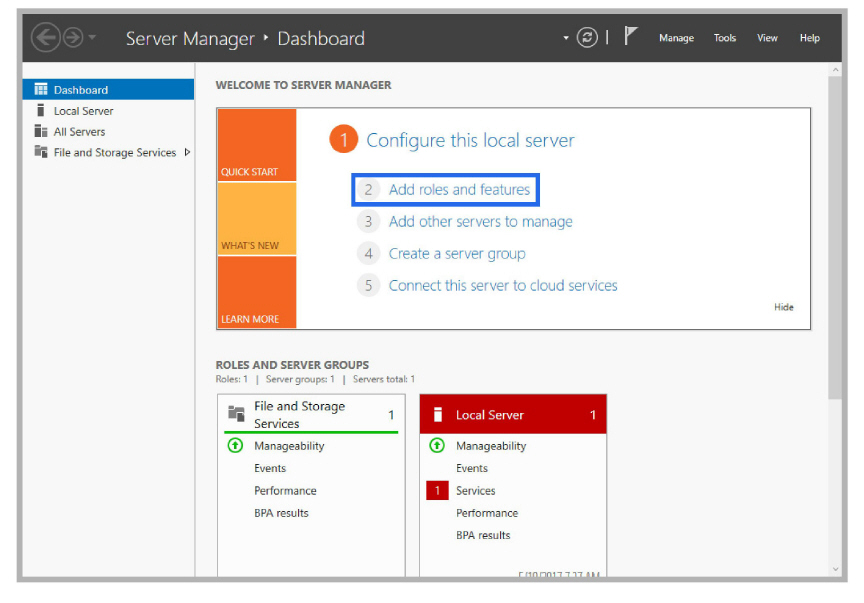
If this screen is hidden, go to View and select Show Welcome Tile.
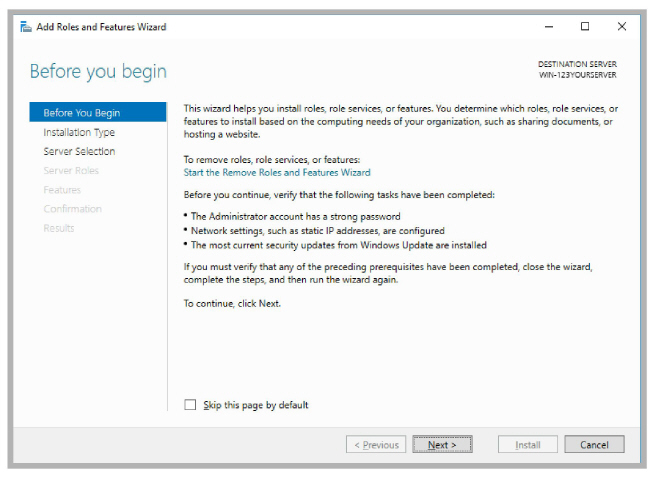
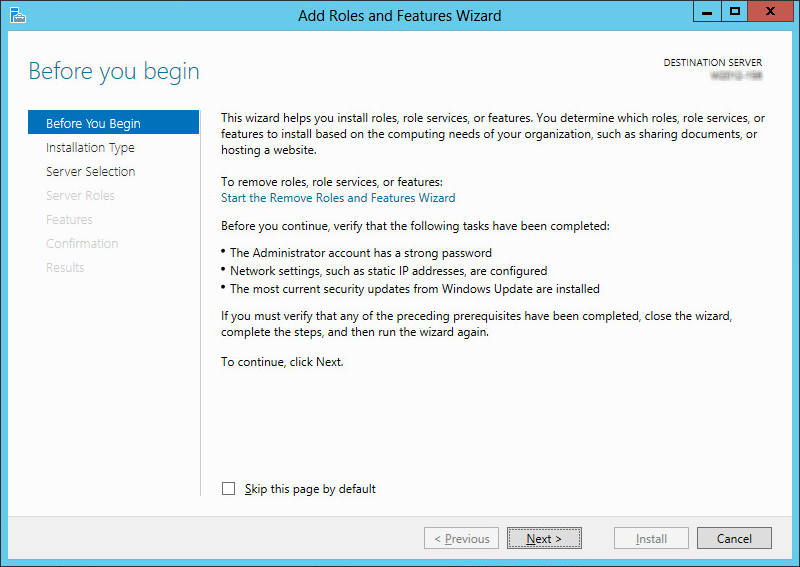
2.Click Next.
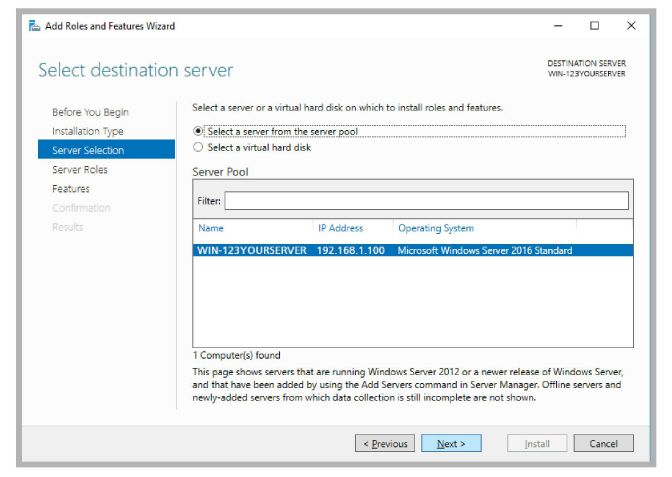
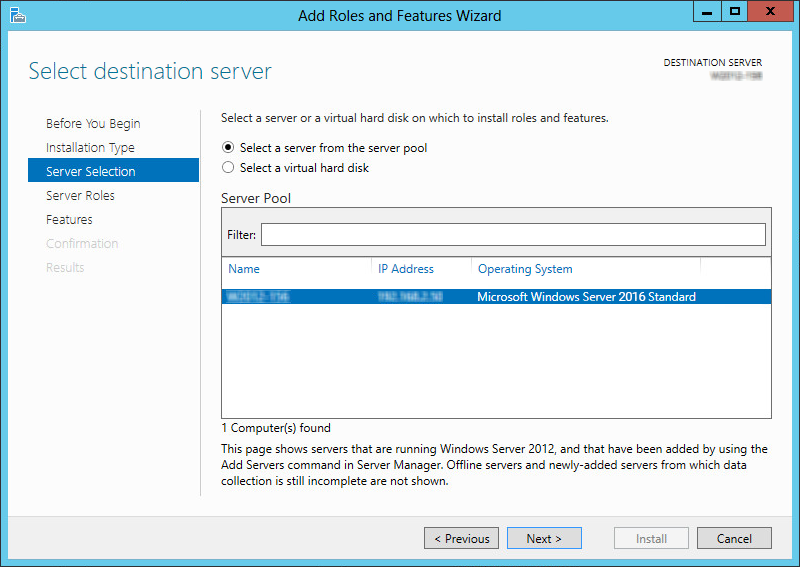
3.Leave the default settings as they are. Click Next.
4.Leave the default settings as they are. Click Next.
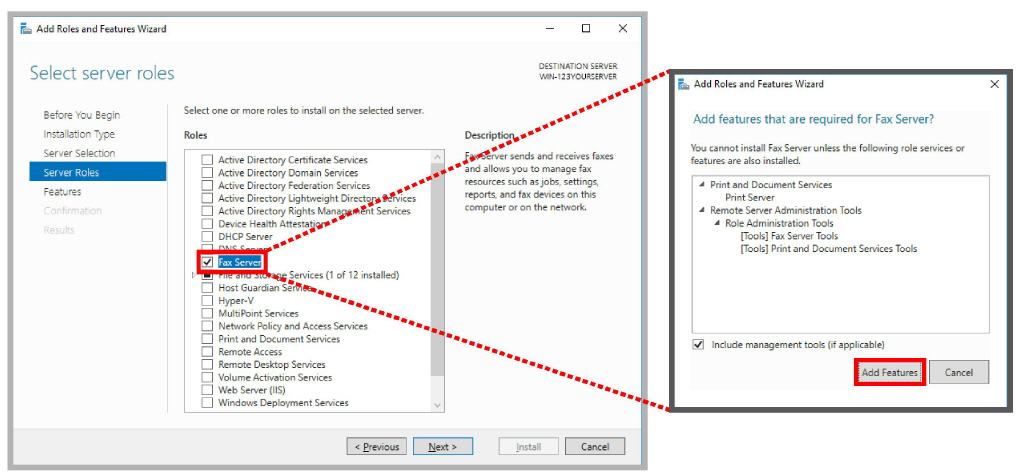
5.Enable Fax Server. When prompted, select Add Features.
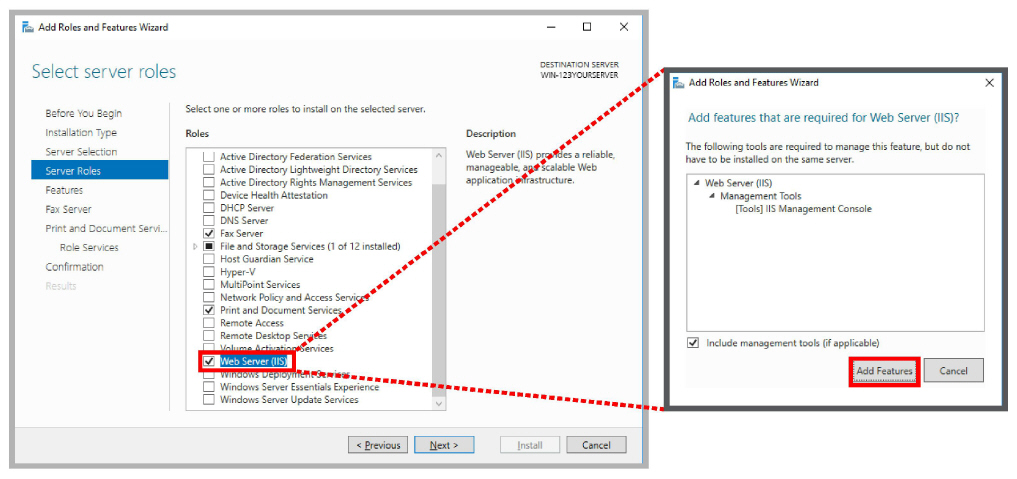
6.Enable Web Server (IIS). When prompted, select Add Features. Click Next.
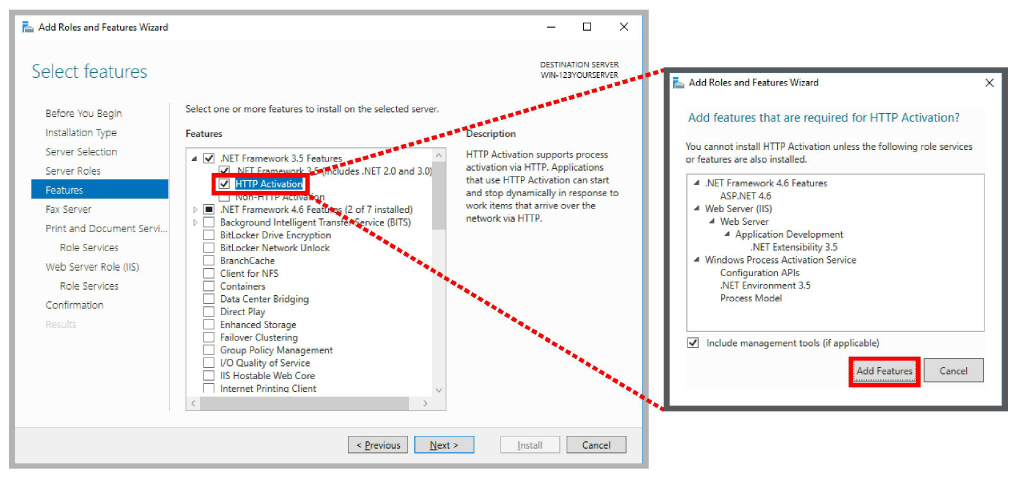
7.On the Features panel, open .NET Framework 3.5 Features and enable HTTP Activation. When prompted, select Add Features.

Optional: If you plan to use SNMP Alarms with Avaya Messaging, the SNMP Service must be added to Windows before the program can be installed. Scroll down and enable SNMP Service. If SNMP Alarms are not required, skip this step.
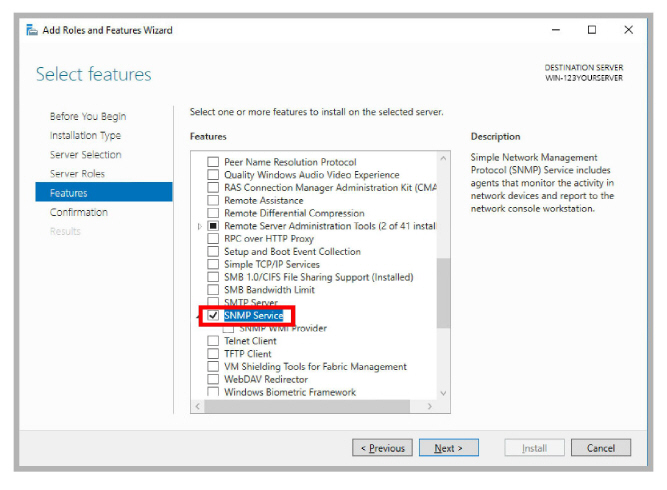
Click Next.
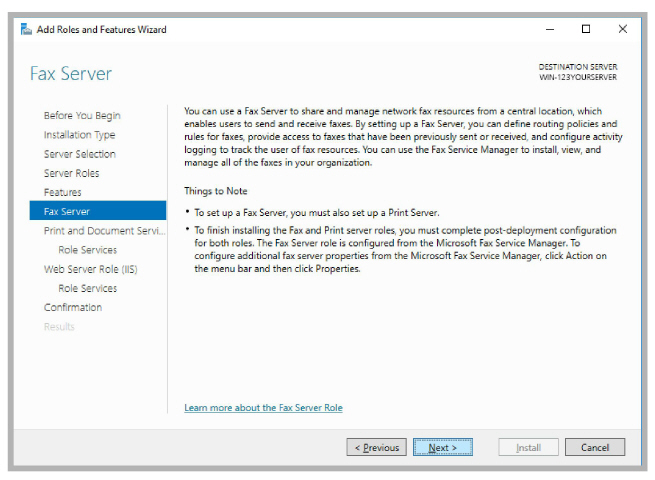
8.On the Fax Server screen, click Next.
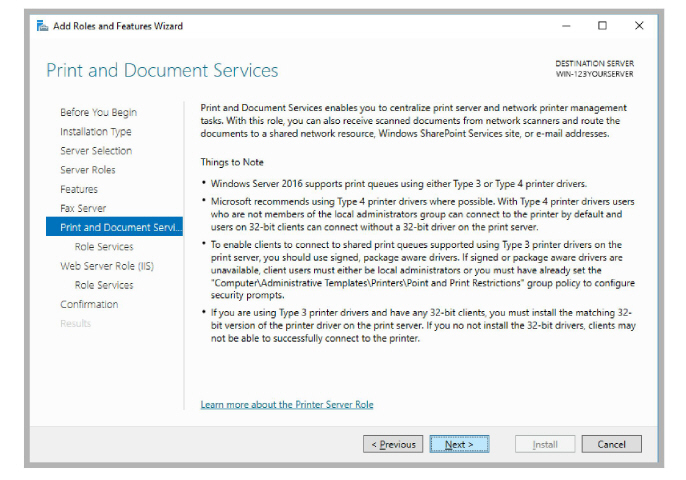
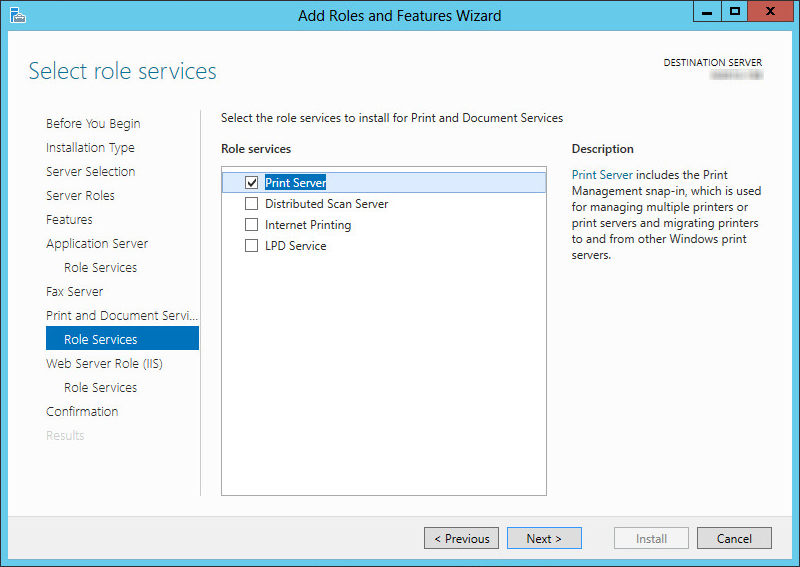
9.On the Print and Document Services screen, click Next.
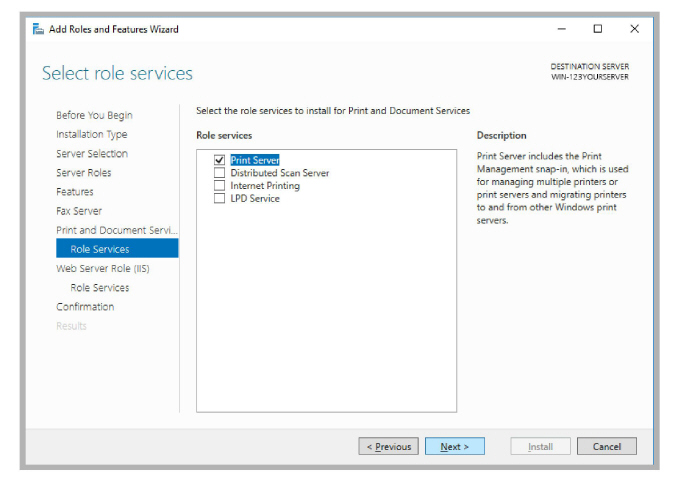
10.No changes are required here. Click Next.
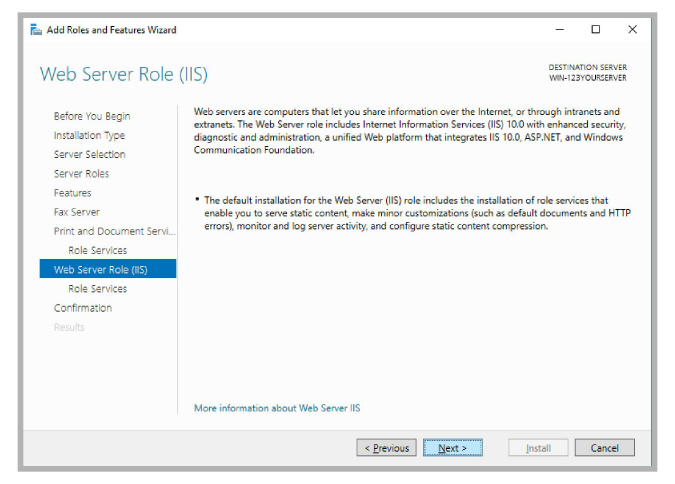
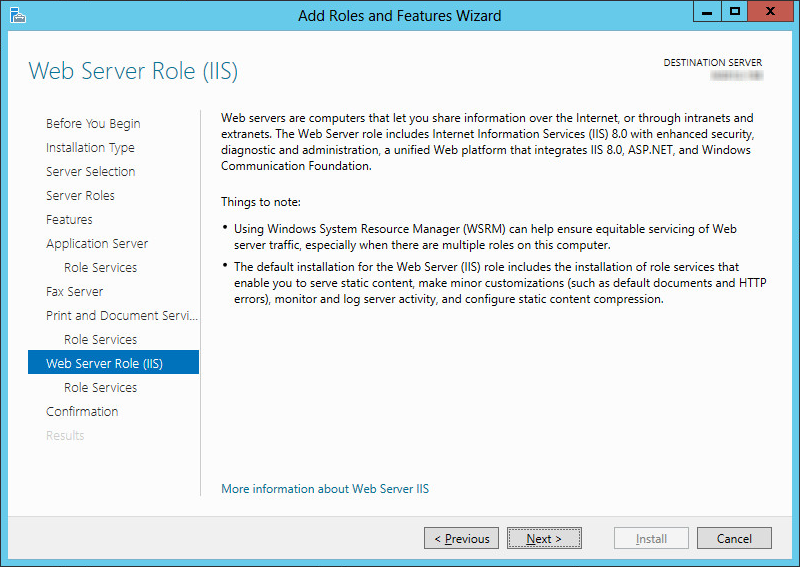
11.On the Web Server Role (IIS) screen, click Next.
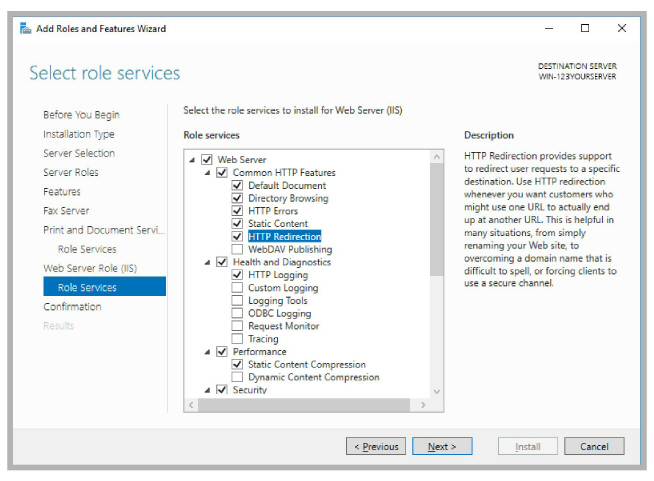
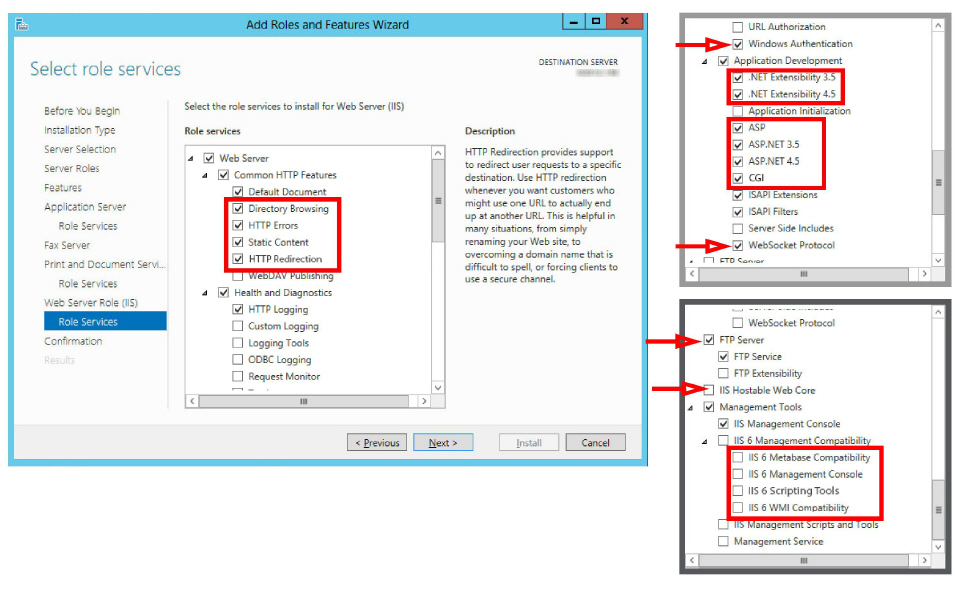
12.Under Web Server > Common HTTP Features, enable HTTP Redirection.
13.Under Web Server > Security, enable Windows Authentication.
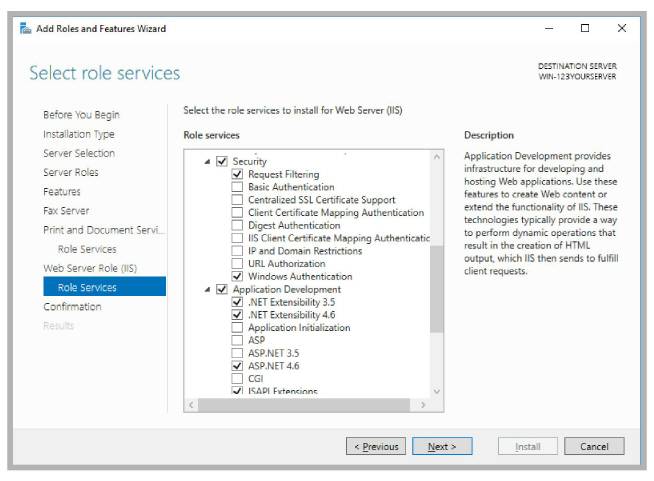
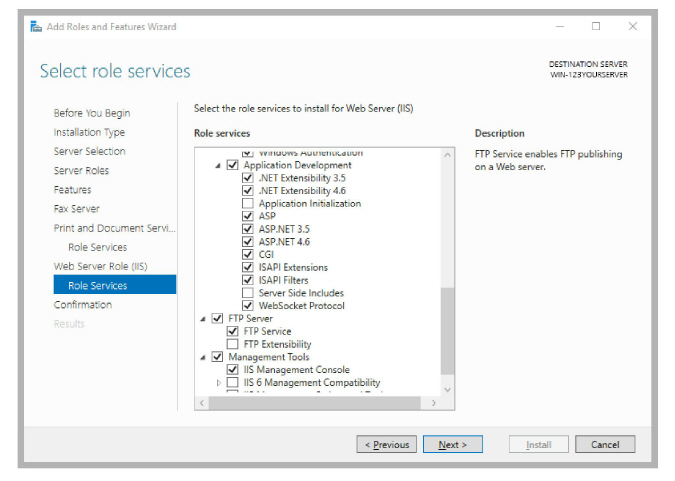
14.Under Web Server > Application Development, enable .NET Extensibility 3.5, .NET Extensibility 4.6, ASP, ASP .NET 3.5, ASP .NET 4.6, CGI, ISAPI Extensions, ISAPI Filters and WebSocket Protocol.
Under FTP Server, enable FTP Service.
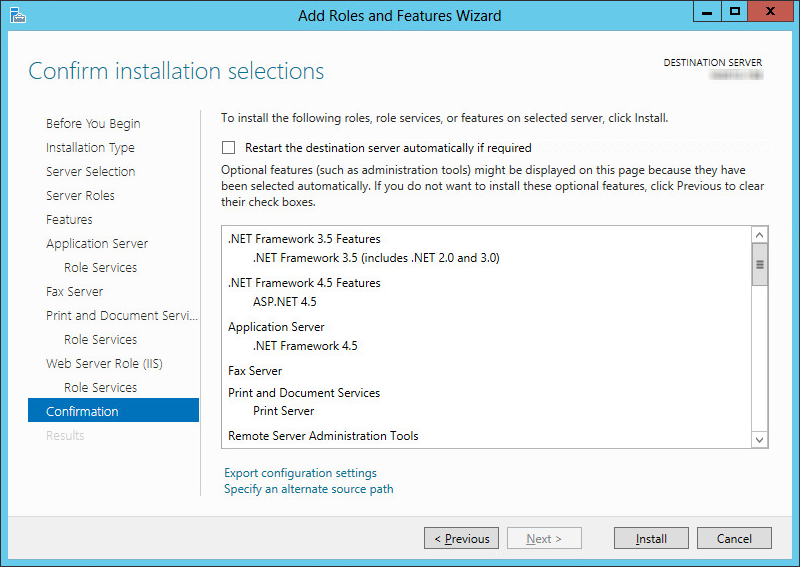
15.Review the selections here. When ready to proceed, click Install.
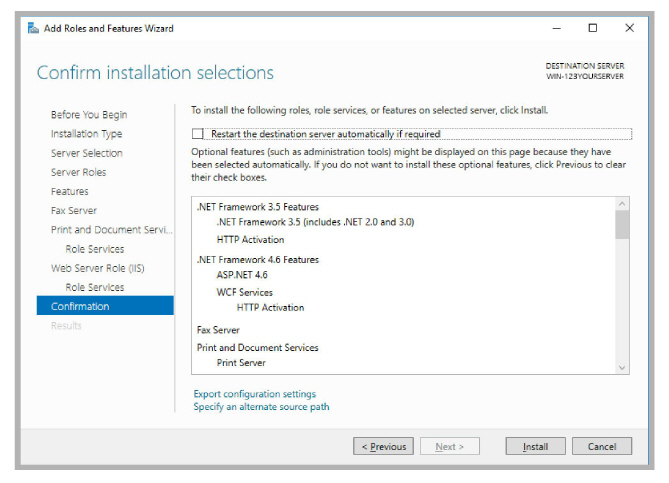
16.Windows will now start the installation process for the chosen items. This process may take a while.
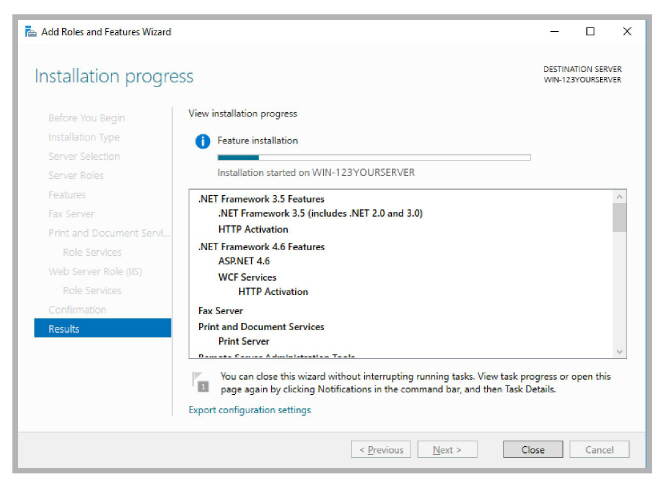
|
Note: This window can be closed without interrupting the installation procedure |
17.Once all changes are complete, Restart the server.
The next section covers Roles and Services for Windows 2012. You can skip ahead to here, IIS Certificates (All Servers).
Server Manager Configuration: Windows 2012 (All Servers)
If your servers have Windows 2012 installed, use this section. If you are using Windows Server 2016 or 2019, go to here instead.
Perform the following steps on ALL servers; Primary, Consolidated, and all Secondaries.
|
Consolidated: Where necessary, special instructions specific to the Consolidated Server setup are provided where there is a difference in the process from the Primary and Secondary Servers. |
|
Note: Some of these steps may require additional files from the Windows disk or other storage location. |
1.From the Server Manager Dashboard, click Add roles and features.
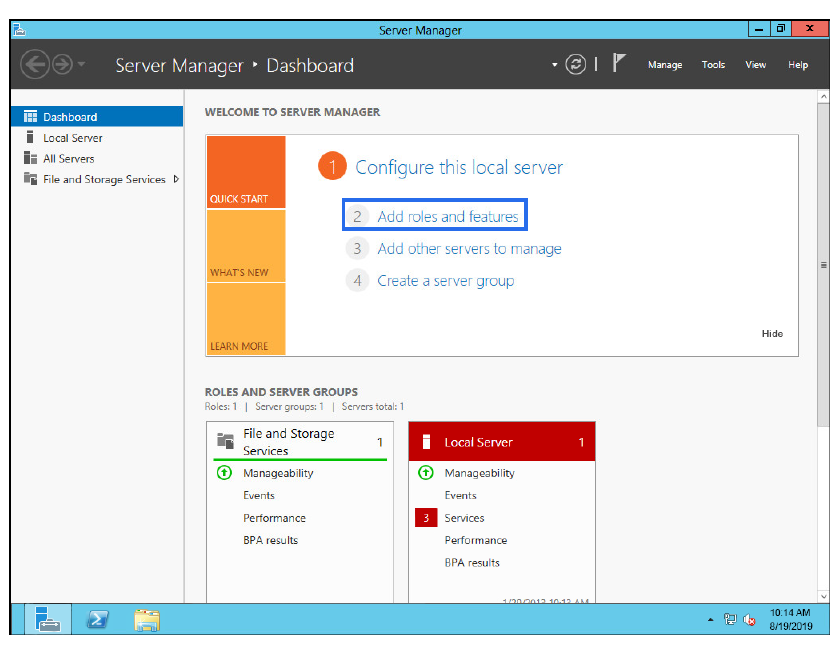
If this screen is hidden, go to View and select Show Welcome Tile.
2.Click Next.
3.Leave the default settings as they are. Click Next.
4.Leave the default settings as they are. Click Next.
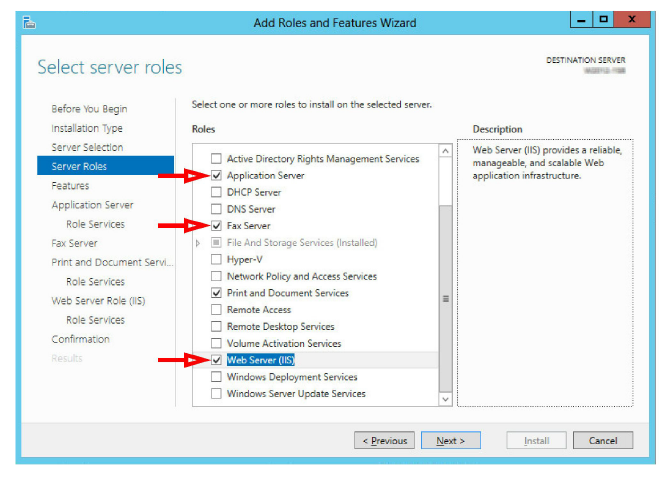
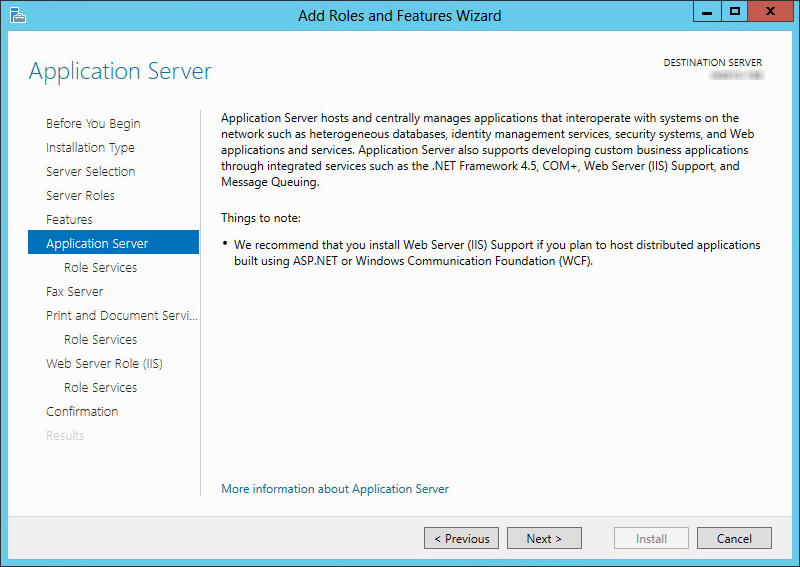
5.Enable the Application Server, Fax Server and Web Server (IIS) checkboxes.
Click Next.
|
Note: Throughout this installation, whenever you are prompted to confirm additions, always select Add Features. 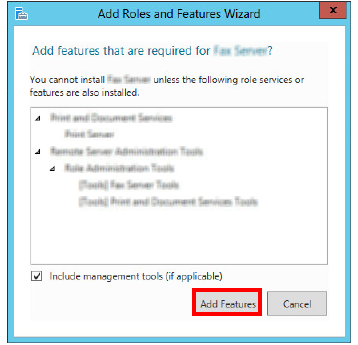
|
6.On the Features panel, open .NET Framework 3.5 Features and enable HTTP Activation. When prompted, select Add Features.
Optional: If you plan to use SNMP Alarms with Avaya Messaging, the SNMP Service must be added to Windows before the program can be installed. Scroll down and enable SNMP Service. If SNMP Alarms are not required, skip this step.

Click Next.
7.Review the information, then click Next.
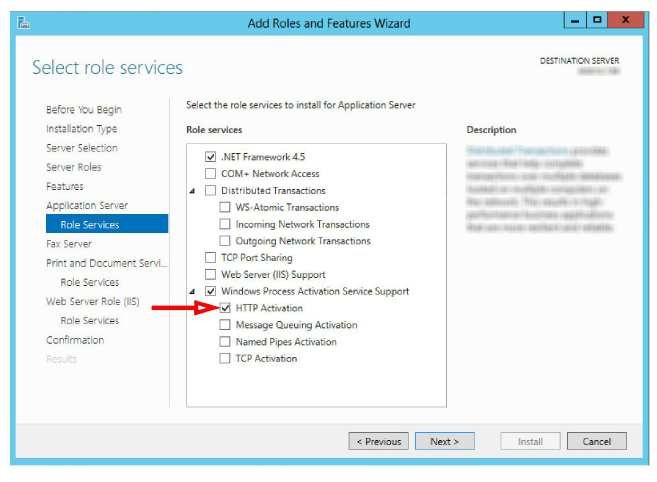
8.Ensure that HTTP Activation, under Windows Process Activation Service Support is enabled. Click Next.
9.On the Fax Server screen, click Next.

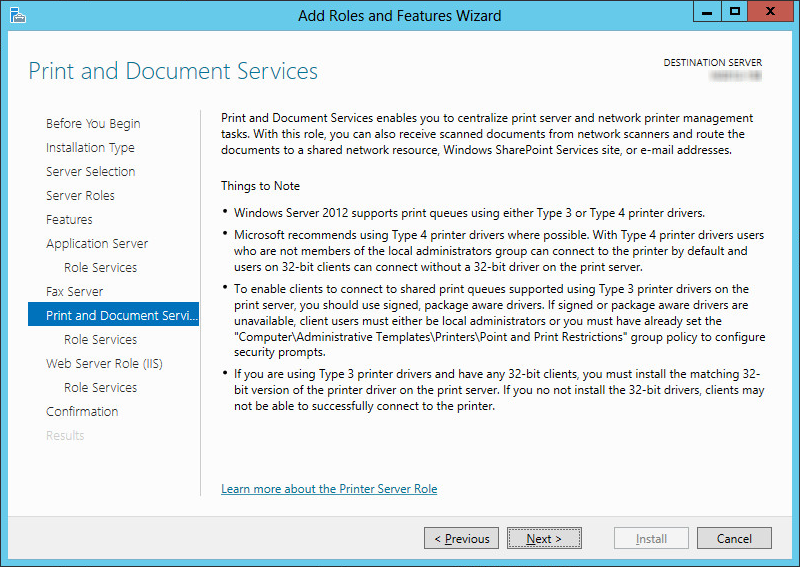
10.On the Print and Document Services screen, click Next.
11.No changes are required here. Click Next.
12.On the Web Server Role (IIS) screen, click Next.
13.Open Web Server > Common HTTP Features. Enable Directory Browsing, HTTP Errors, Static Content and HTTP Redirection.
Scroll down to Security, and enable Windows Authentication.
Under Application Development, enable .NET Extensibility 3.5, .NET Extensibility 4.5, ASP, ASP .NET 3.5, ASP .NET 4.5, CGI, and WebSocket Protocol.
Locate FTP Server and enable FTP Service.
Click Next when ready.
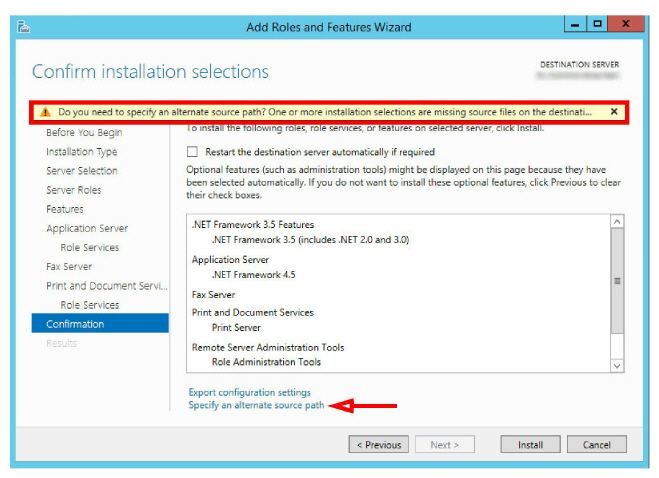
14.Review the selections here. When ready to proceed, click Install.
15.If prompted to provide the Windows disk to load the files, click Specify an alternate source path and direct it to the appropriate drive.
|
Hint: This is particularly important for virtual machine installations where there may not be a drive configured locally. |
16.Windows will now start the installation process for the chosen items. This process may take a while.
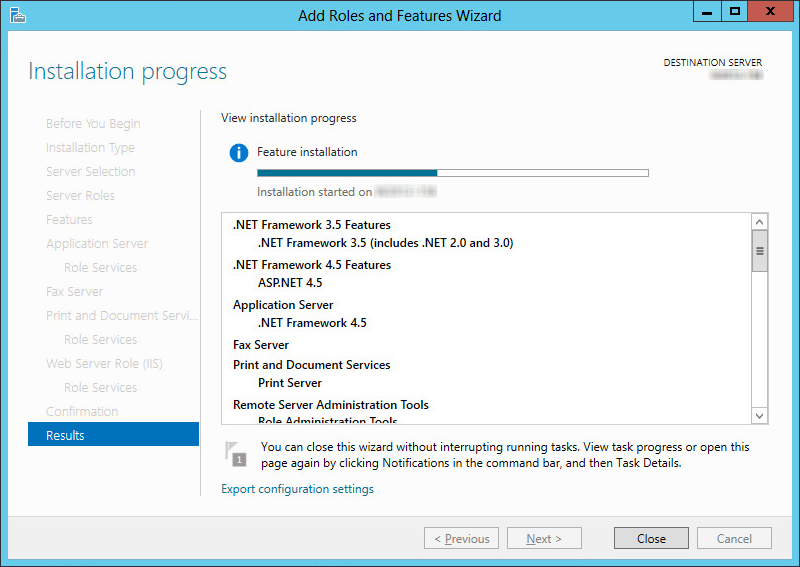
|
Note: This window can be closed without interrupting the installation procedure |
17.Once all changes are complete, Restart the server.
IIS Certificates (All Servers)
The site administrator must install either a self-signed certificate, or a certificate purchased from a Certification Authority.
It is not necessary to install both types of certificate.
|
Note: Corporate security protocols may require the use of certificates purchased from an appropriate authority. High-security (JITC) installations always require a CA issued certificate for the Encrypted File System (EFS). |
Additional information on installing certificates onto the voice server can be found here:
https://technet.microsoft.com/en-ca/library/cc753127(v=ws.10).aspx
Once the certificates have been installed, continue with IIS Certificate Bindings.
To enable an HTTPS connection, a certificate has to be installed on the voice server.
The HTTPS protocol must be enabled, and HTTP disabled.
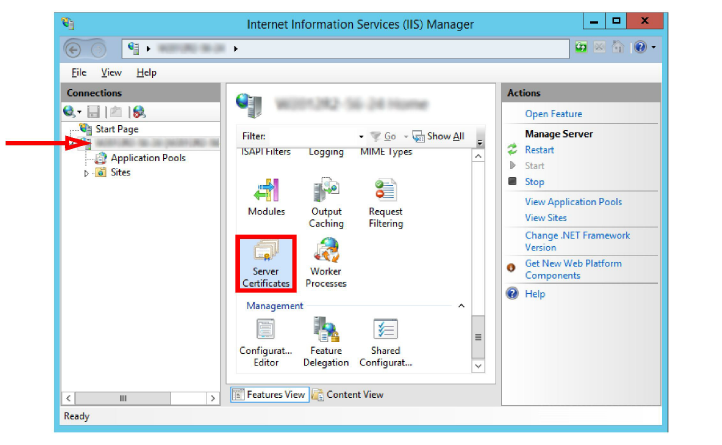
1.On the computer that functions as the web server, open the IIS Manager console.
Select the local computer. Open Server Certificates in the right-hand pane.
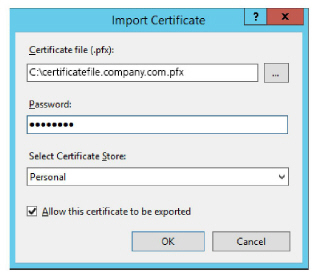
2.Right-click in the right-hand pane and choose Import from the pop-up menu.

3.Enter the path to the certificate file and the password. Select Personal as the Certificate Store. Click OK.
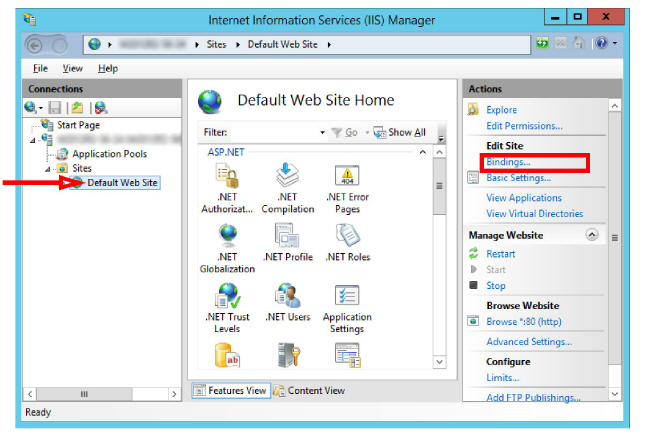
4.Go to Sites > Default Web Site.
Click Bindings....
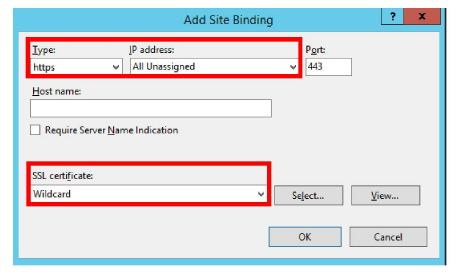
5.Add the HTTPS binding type.
Set the IP Address to All Unassigned. Leave Port at its default.
Change SSL Certificate to the certificate name installed above.
Click OK.
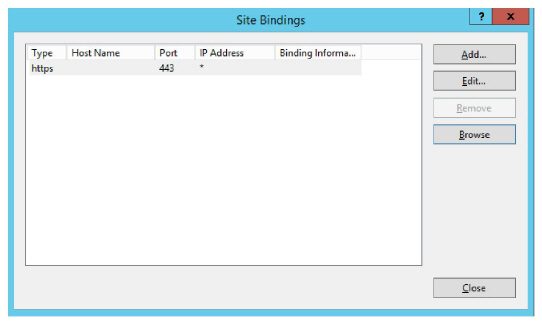
6.Remove HTTP from the list of bindings.
Click Close.
Install Microsoft .Net Framework 4.8+
Perform the following steps on all servers; Primary voice, all Secondary voice, Primary and Secondary Consolidated, Web Servers and Remote CSE servers.
Avaya Messaging requires Microsoft .Net Framework version 4.8 or later to be installed to support various features within the program. If it has not already been installed, the administrator must download it and install it manually.
|
Note: .Net Framework 4.8+ is not installed by default. It may be part of Windows updates, optional updates, or not provided at all. Follow these instruction is it is not installed on your system, or if you do not know if it has been installed. |
1.Open a web browser and go to the Microsoft web site. Search for the latest version of .Net Framework and install the application on the server.
2.Download the file to your server drive. When ready, run the program to install this feature.
3.When finished, restart the server.
These rules are applied to all passwords created or used with Avaya Messaging, including those created during installation (Note: JITC installations have more stringent requirements). These include:
•Length: Passwords must be at least 14 characters long.
•Class: A password can contain upper and lower case characters, numbers and special characters. No minimum requirements for each character class are set by default, but this can be configured by the administrator.
•Repeating Characters: No character can be repeated more than 2 times consecutively (hello, Wrong!!). This value can be modified by the administrator.
•Repeating a Character Class: No class of character can be repeated more than 4 times consecutively (ABCD, !@#$). This value can be modified by the administrator.
•Reusing Passwords: No new password can be the same as a previous password extending back 10 iterations. This value can be modified by the administrator.
•Sharing Passwords: Passwords must not be shared between users. Only one login per account is allowed at one time. Other users must login using different credentials.
|
Note: It is strongly recommended on all fresh installations to logon to Windows with a Service Account with Full Administrative privileges to run the setup.exe. |
|
Note: Using an administrator account to perform routine functions leaves the servers open to malicious software attacks. Therefore, it is strongly recommended that each user with administrative privileges is also assigned a standard user account. To maintain security integrity, the administrator account should only be used when necessary, and should be immediately logged out afterwards. |
The Primary Voice Server MUST be the first server to be setup since the Primary server holds the license for your site. The Consolidated server should be next, and only when the database has synchronized between them should the Secondary Voice servers be installed. See Verifying File Sync on page 323.
|
Important: In HA installations, all servers must have the same time zone set under Windows Date / Time. |
|
Note: Make sure that all of the necessary Roles and Features for your operating system have been installed before proceeding with the installation. Refer to the appropriate section of the Server Installation Guide for details. Also ensure Windows Firewall is disabled, and Windows Automatic Update is turned off. |
1.Download the installation file from (see chapter 4). Run the file (double-click) to extract the contents. Specify the location on your hard drive where you want to save the files.

2.In the extraction folder, run Setup.exe as the DCOM user with local administrator privileges to install Avaya Messaging onto the Primary server.
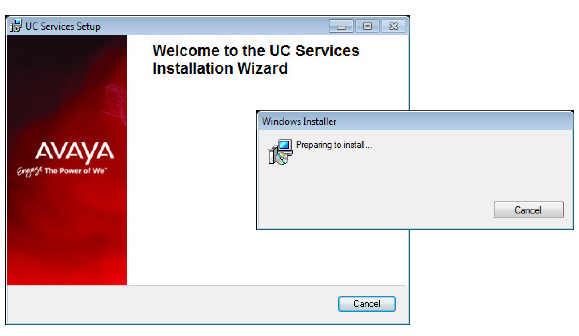
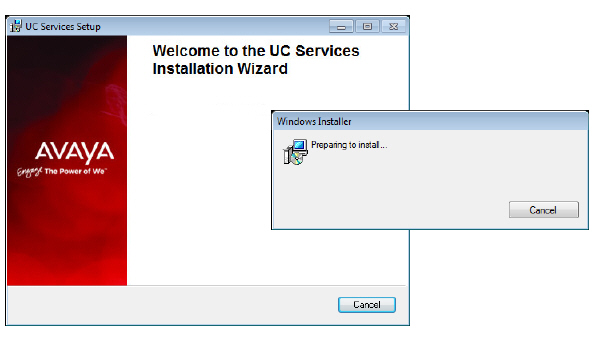
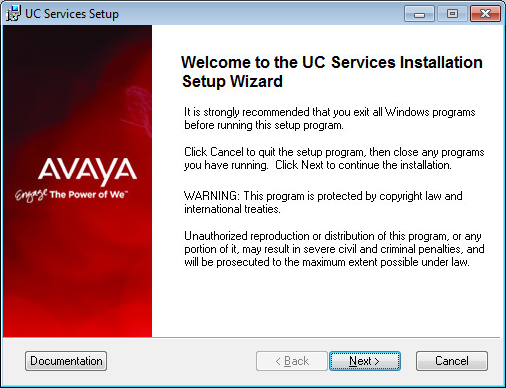
3.Once the Windows components have been verified, click Next to begin the installation.

|
Note: The installer will automatically install the necessary packages at the beginning of the installation if they do not already exist on the system. These packages may include Sentinel Protection, Microsoft Visual C++ Redistributable and Microsoft .Net Framework 4.5. This process may take a while depending on the required components. |
|
Note: Clicking on the Documentation button will provide you with the default set of PDF documents which comprehensively cover most aspects of Avaya Messaging. They can also be accessed from resources.avayacloud.com in both PDF and HTML format. |
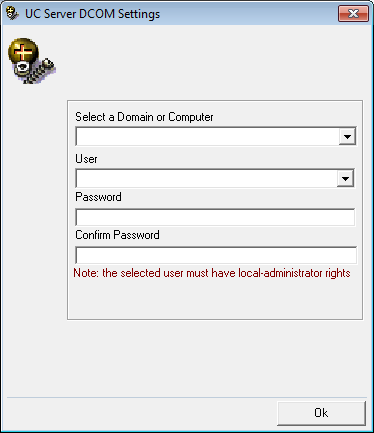
4.Enter the DCOM user info (domain user account which has local administrator rights). This is required by services which use local administrator rights.
Click OK after entering the credentials.
|
Hint: Wherever possible, this password should be setup with no expiration date. If the password does expire, then it must be changed on every computer that uses it. Many services will be unavailable until the change has been made everywhere. |
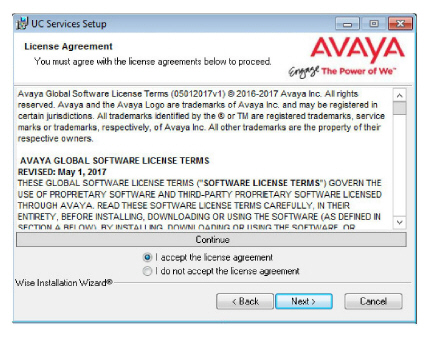
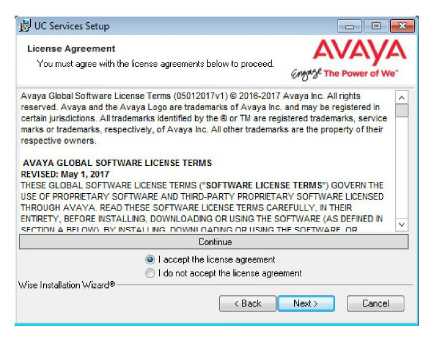
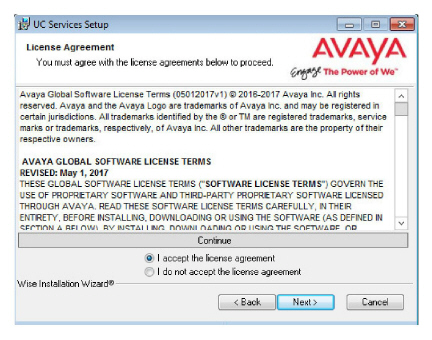
5.Review all the license agreements, click Continue.
When ready, enable I accept the license agreement.
Click Next to continue.
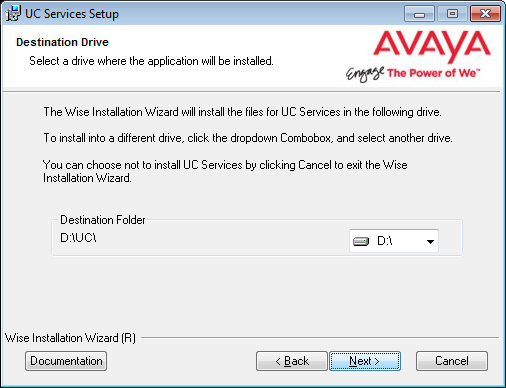
6.You will be asked to select the destination of the installation. You may change the hard drive destination through the drop down menu. By default, the installation will create a UC folder on the C drive.
Click Next to continue.
|
Note: It is highly recommended that you install the program to a drive other than C to prevent any conflicts or performance issues. |

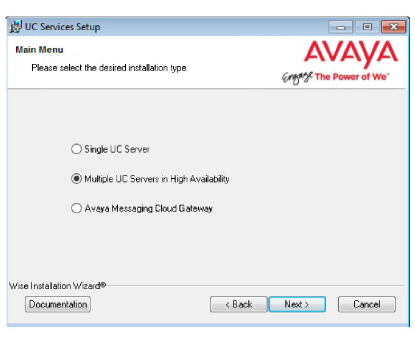
7.Enable Multiple UC Servers in High Availability.
Click Next.
Single UC Server: When operating Avaya Messaging on a single server computer.
Multiple UC Servers in High Availability: When running Avaya Messaging in High Availability mode for redundancy.
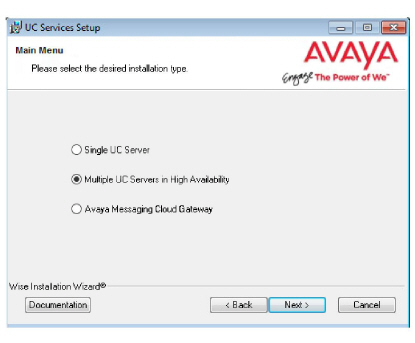
Avaya Messaging Cloud Gateway: Gateway allows end-to-end synchronization between the Avaya Aura Messaging server and Google's Gmail using Avaya Messaging message sync and the CSE.
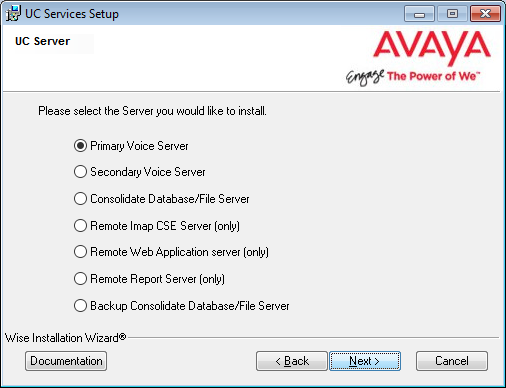
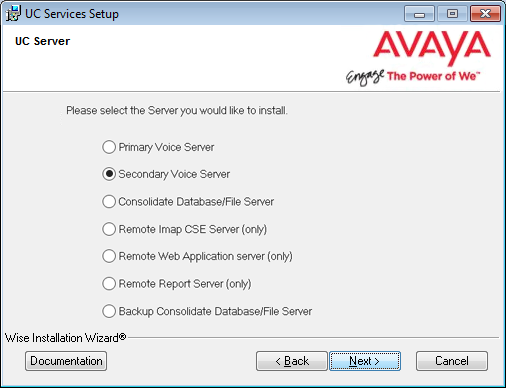
8.Select Primary Voice Server.
Click Next.
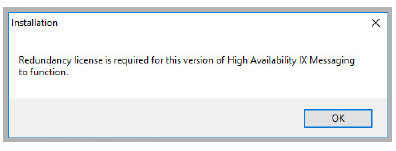
9.This screen is a reminder that HA installations require an HA license. Click OK.
10.Select the license type you will using for this installation.
Most sites will use the Avaya WebLM License option.
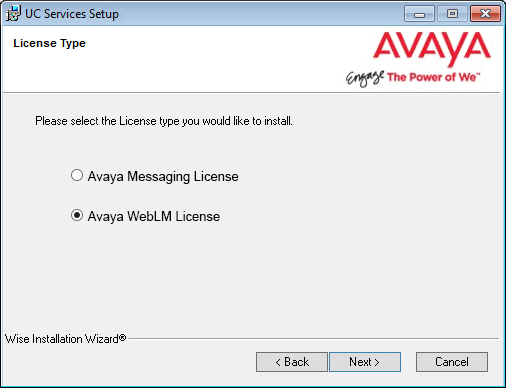
|
Note: If you select Avaya Messaging, go to chapter 13, Installing the Avaya Messaging License. When finished, return here and continue the installation from step 13. Skip step 11 through 12. |
|
Warning: It is essential that the system/PC clock be properly set before activating the license. Any subsequent changes to the clock can adversely affect or terminate the license. |
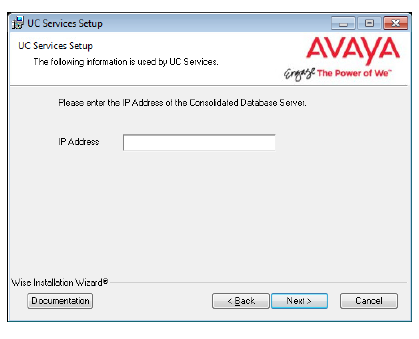
11.The License Upgrade Utility program opens and prompts you to enter the IP Address for the computer that houses the WebLM license engine.
Enter the address in the space provided, then click OK.
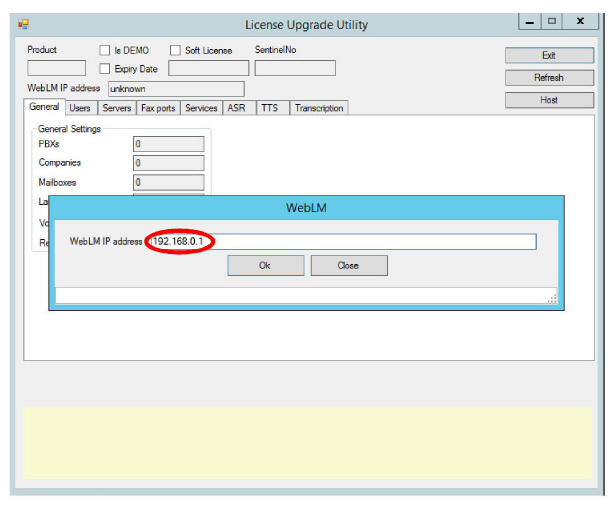
|
Important: This step requires that the Web License Manager has been installed and configured on the license server computer. See Installing the WebLM License and Server on page 535. |
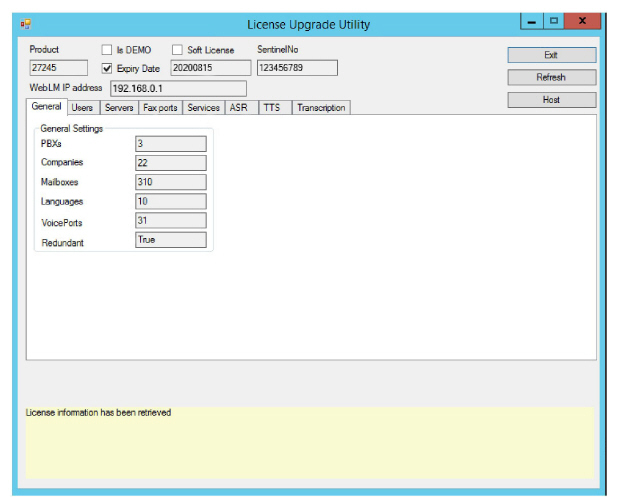
12.The utility will retrieve your license details from the server and display them here. Review the license details and click Exit when ready.
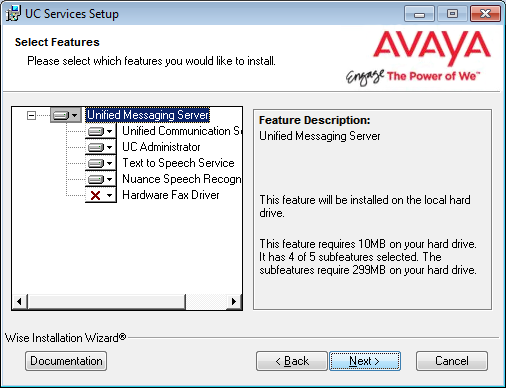
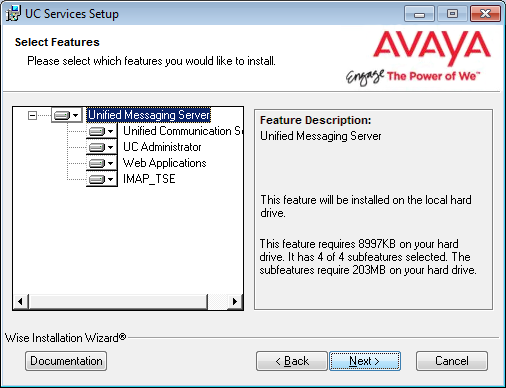
13.Select the Components required at your site.
Click Next.
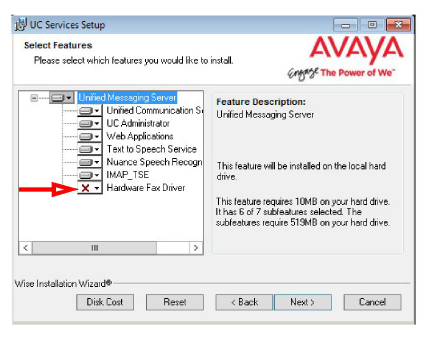
|
Note: If the Dialogic SR140 fax software will be used with this installation, ensure that the Hardware Fax Driver option is enabled here. |
14.This screen shows all of the Windows roles and features that Avaya Messaging requires to operate properly.
|
Note: This screen will only appear if one or more required components are not installed on the computer. |
For all items that are not checked, return to Windows and add any missing pieces to the operating system.
Click Next when finished or to refresh the display.

|
Note: The installation will not continue until all of the required components have been added to Windows. |
15.This screen shows IIS settings that Avaya Messaging requires to operate properly.
|
Note: This screen will only appear if one or more of the required settings has not been made on the computer. |
For all items that are not checked, return to the IIS Manager in Windows and set these options as required.
Click Next when finished or to refresh the display.
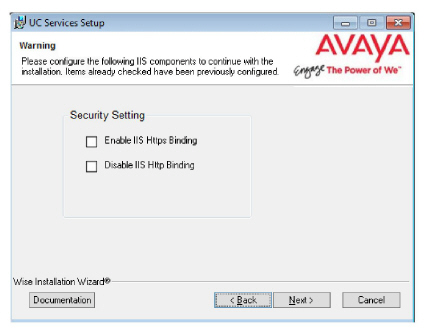
|
Note: The installation will not continue until all of the required IIS settings have been made. |
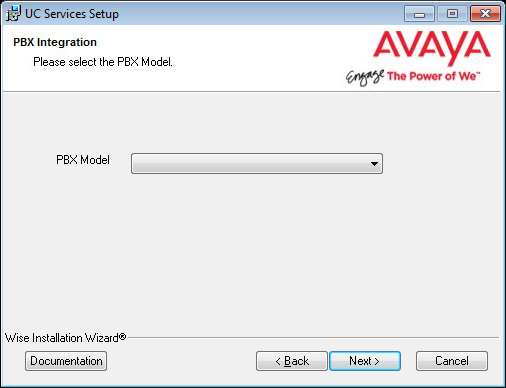
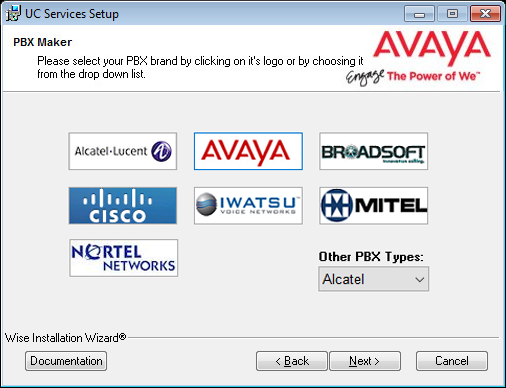
16.Select your PBX Brand then click Next.

17.Select your PBX model from the dropdown menu.
Click Next.
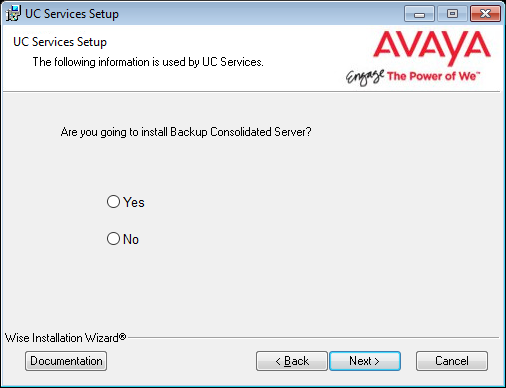
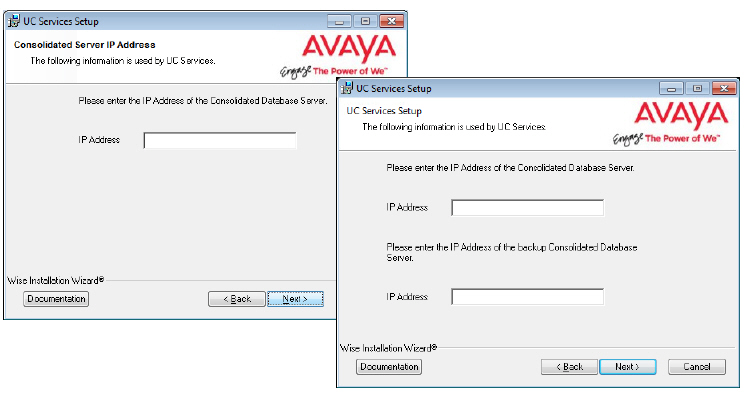
18.If you will be installing a Secondary Consolidated server with your system, click Yes.
Otherwise, choose No.
A Secondary Consolidated server is optional.
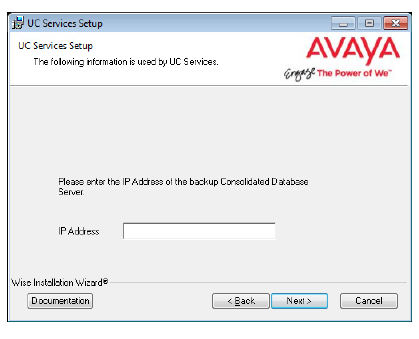
19.Enter the IP Address for the Consolidated Server, and if selected, the IP Address for the Secondary Consolidated Server.
Both Consolidated servers require their own computers, but for now you only need to know their IP Addresses.
Click Next.

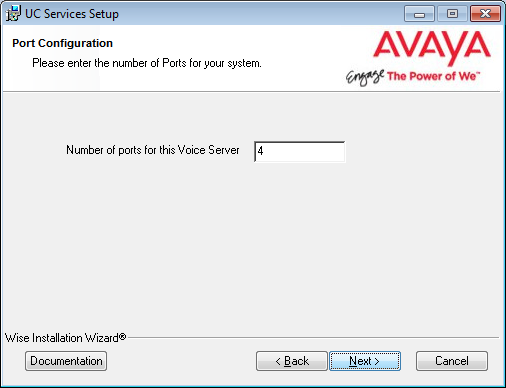
20.Enter the number of ports your system will use.
Click Next.

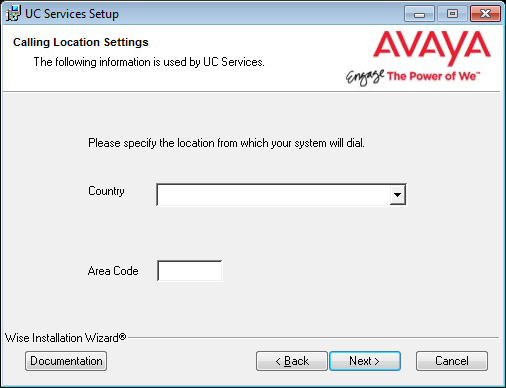
21.Enter the primary location from which most telephone calls will be placed. This will normally be where the corporate office is situated. Additional dialing locations and rules may be defined after the installation is complete.
Select the country from the dropdown menu, and enter the area code in the space provided.
Click Next to continue.

|
Note: If the Phone and Modem Settings under Windows Control Panel have already been configured, this step will not appear. The values entered there will be used automatically. |
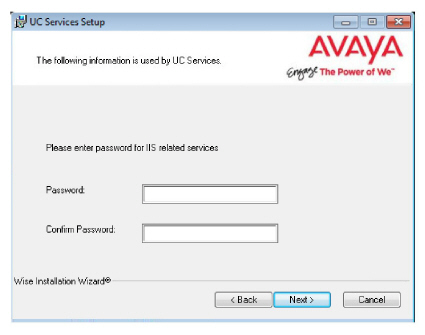
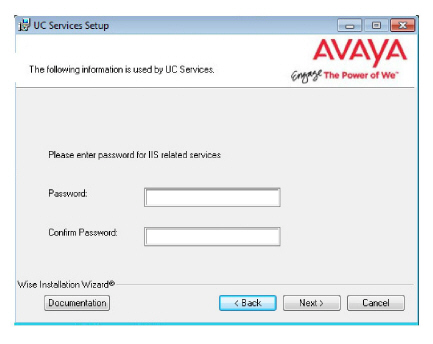
22.Enter and verify the password used for the local UC IIS User. This is used when logging into any associated web applications, such as Web Access.
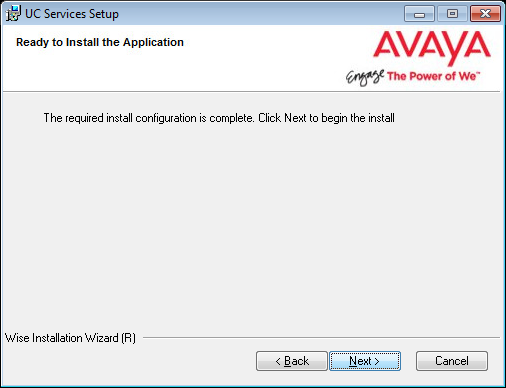
23.The preliminary information required for installation is now complete.
Click Next.
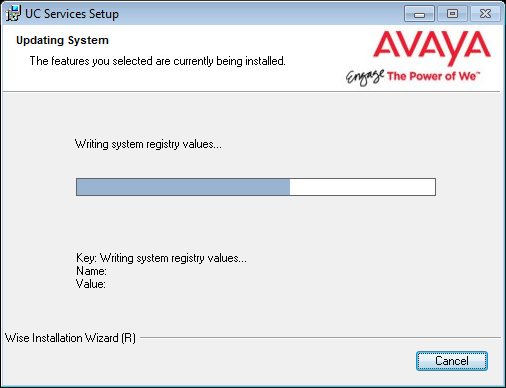
24.The selected components will now be installed. This process may take a while.

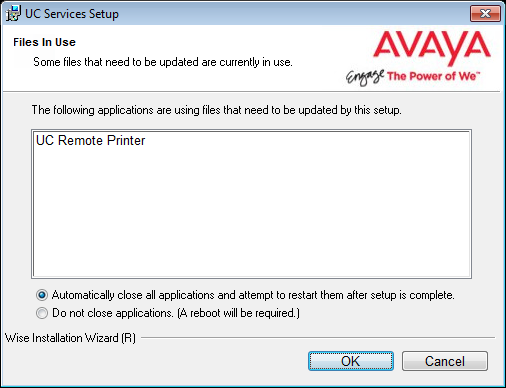
25.If you are warned about components being in use, either use the Automatically Close option or manually close the process which is interfering with the installation.
Click OK when ready.

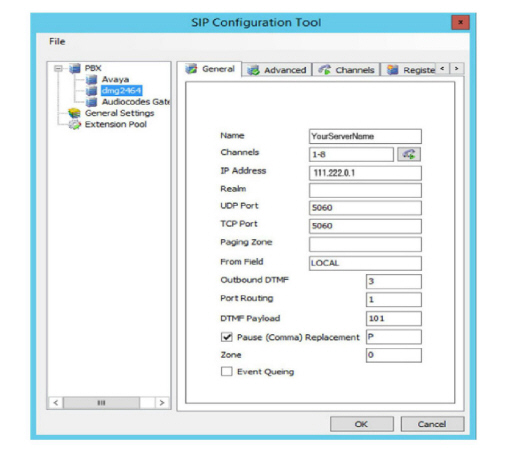
26.After all the components are copied, you may be asked to provide the settings for the PBX that you have chosen. Since this process varies greatly from system to system, please ensure that you configure your site’s PBX exactly as required.
27.Provide any additional settings for SIP integration for your site.
Click Next to continue.
28.After all the components are copied, you may be asked to provide the settings for the PBX that you have chosen. Since this process varies greatly from system to system, please ensure that you configure your site’s PBX as required.
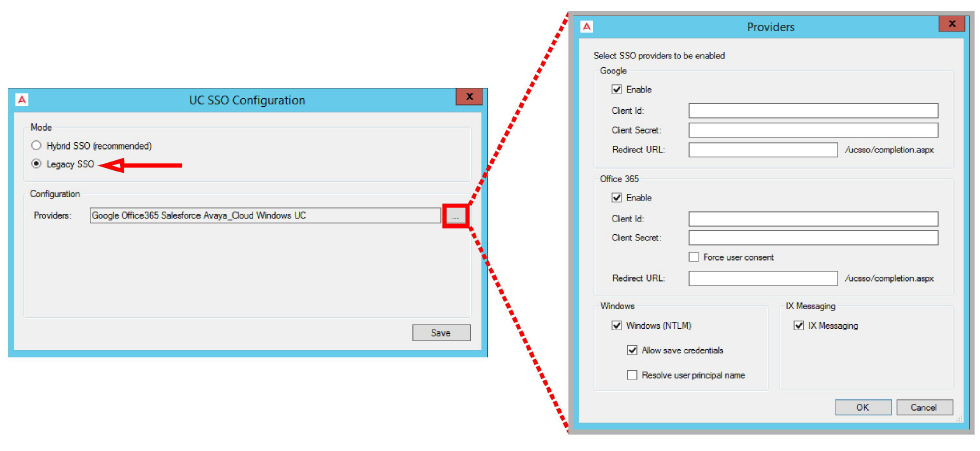
29.On the SSO Configuration screen, enable Legacy SSO. From the dropdown menu, enable the Providers that you want your clients to be able to use to access Web Admin, Avaya Messaging Admin, Web Access, and Web Reports. Items that are disabled will not appear during client login.

|
Note: For more information on the SSO Options, see chapter 26 on page 715: Single Sign-On (SSO). |
30.Click Finish to restart the server.
If you wish to restart your computer at a later time, disable the Restart check box then click Finish.

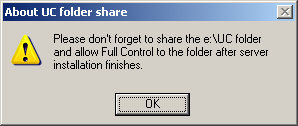
31.This alert is to remind you to properly share the UC installation folder (see here for details).
Click OK to restart the computer.

|
Warning: Once all of the HA servers (Primary, Consolidated, and all Secondaries) have been installed, it is important to perform a full synch of all data. Attempting to login to the Primary or Secondary servers before the synch is complete will corrupt the database preventing all logins on all servers. Refer to Verifying File Sync for complete details. |
The Primary Voice Server MUST be the first server to be setup since the Primary holds the license for your site. The Consolidated Server (Primary) should be next, and only when the database has synchronized between them should the Secondary Servers be installed. See Verifying File Sync on page 323.
|
Important: In HA installations, all servers must have the same time zone set under Windows Date / Time. |
|
Note: Make sure that all of the necessary Services for your operating system have been installed before proceeding with the installation. Refer to the appropriate section of the Server Installation Guide for details. Also make sure that Windows Firewall is disabled, and that Windows Automatic Update is turned off. |
1.Download the installation file (see chapter 4). Run the file (double-click) to extract the contents. Specify the location on your hard drive where you want to save the files.

2.In the extraction folder, run Setup.exe as administrator to install Avaya Messaging onto your Consolidated server.
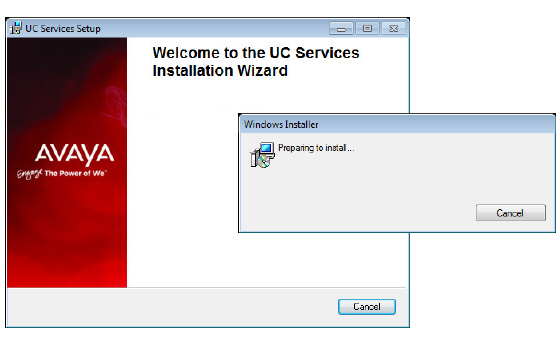
3.Once the Windows components have been verified, click Next to begin the installation procedure.

|
Note: The installer will automatically install the necessary packages at the beginning of the installation if they do not already exist on the system. These packages may include Sentinel Protection, Microsoft Visual C++ Redistributable and Microsoft .Net Framework 4.5. This process may take a while depending on the required components. |
|
Note: Clicking on the Documentation button will provide you with the default set of PDF documents which comprehensively cover most aspects of Avaya Messaging. They can also be accessed from resources.avayacloud.com in both PDF and HTML format. |
4.Enter the DCOM user info (domain user account which has local administrator rights). This is required by services which use local administrator rights.
Click OK after entering the necessary credentials.

|
Hint: Wherever possible, this password should be setup with no expiration date. If the password does expire, then it must be changed on every computer that uses it. Many services will be unavailable until the change has been made everywhere. |
5.Review all the license agreements and select
I accept the license agreement.
Click Next to continue.
6.You will be asked to select the destination of the installation. You may change the hard drive destination through the drop down menu. By default, the installation will create a UC folder on the C drive.
Click Next to continue.
|
Note: It is highly recommended that you install the program to a drive other than C to prevent any conflicts or performance issues. |

7.Enable Multiple UC Servers in High Availability.
Click Next.
Single UC Server: When operating Avaya Messaging on a single server computer.
Multiple UC Servers in High Availability: When running Avaya Messaging in High Availability mode for redundancy.
Avaya Messaging Cloud Gateway: Gateway allows end-to-end synchronization between the Avaya Aura Messaging server and Google's Gmail using Avaya Messaging message sync and the CSE.

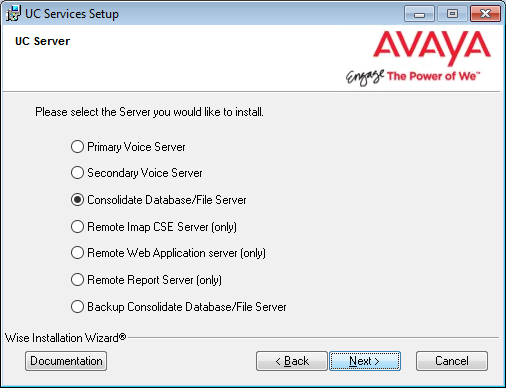
8.Select Consolidated Database/File Server.
Click Next.
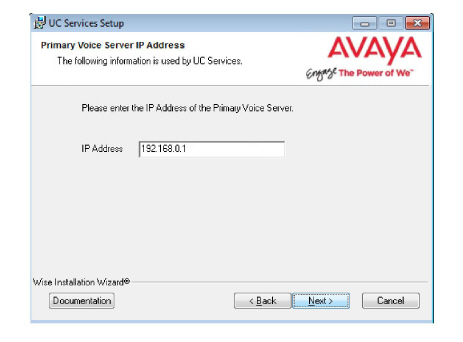
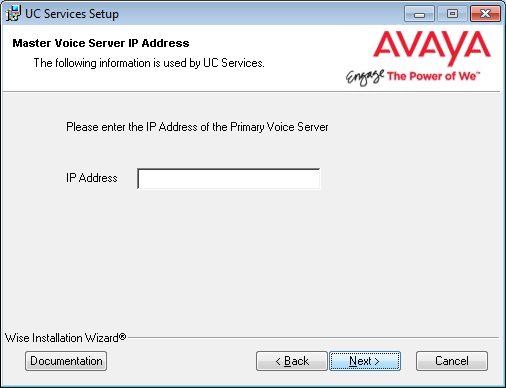
9.Enter the IP Address of the Primary Voice server, then click Next.
10.Select the Components required at your site.
Click Next.

11.This screen shows all of the Windows roles and features that the Consolidated server requires to operate properly.
|
Note: This screen will only appear if one or more required components are not installed on the server. |
For all items that are not checked, return to Windows and install any missing components into the operating system.
Click Next when finished or to refresh the display.

|
Note: The installation will not continue until all of the required components have been added to the server. The screen does not refresh until you click Next. |
12.Select your PBX Brand then click Next.

13.Select your PBX model from the dropdown menu.
Click Next.

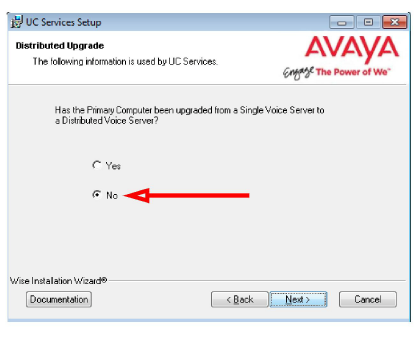
14.Unless the Primary Server has been upgraded from a Single Server installation, choose No.
Click Next.
15.If you will be installing a Secondary Consolidated server with your system, click Yes.
Otherwise, choose No and continue with the next step.
A Secondary Consolidated server is optional.

Enter the Computer Name for the Secondary Consolidated server.
16.Select the Email Server Type from the list of available options. This allows the system to set basic parameters which help to improve performance and reliability.

17.Enter and verify the password used for the local UC IIS User. This is used when logging into any associated web applications, such as Web Access.
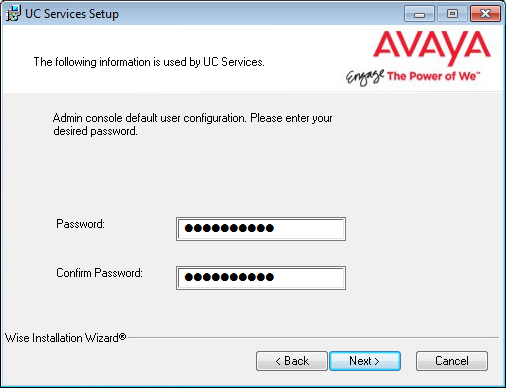
18.Enter a password to provide administrator only access to Avaya Messaging. This account password is used to configure the many elements of the system.
|
Warning: Once all of the HA servers (Consolidated, Primary and all Secondaries) have been installed, it is important to perform a full synch of all data. Attempting to login to the Primary or Secondary servers before the synch is complete will corrupt the database preventing all logins on all servers. Refer to Verifying File Sync for complete details. |
19.Enter the primary location from which most telephone calls will be placed. This will normally be where the corporate office is situated. Additional dialing locations and rules may be defined after the installation is complete.
Select the country from the dropdown menu, and enter the area code in the space provided.
Click Next to continue.
|
Note: If the Phone and Modem Settings under Windows Control Panel have already been configured, this step will not appear. The values entered there will be used automatically. |
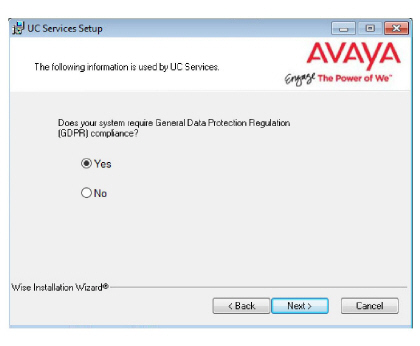
20.Choose either Yes or No to determine whether the system will apply General Data Protection Regulation (GDPR) compliance procedures to your data.
With this option enabled, users and callers are notified that personal information will be collected. This information can also be completely removed from the system upon request.
21.The preliminary information required for installation is now complete.
Click Next.

22.The selected components will now be installed. This process may take a while.
23.On the SSO Configuration screen, enable Legacy SSO. From the dropdown menu, enable the Providers that you want your clients to be able to use to access Web Admin, Avaya Messaging Admin, Web Access, and Web Reports. Items that are disabled will not appear during client login.
|
Note: For more information on the SSO Options, see chapter 26 on page 715: Single Sign-On (SSO). |
24.If you are warned about components being in use, either use the Automatically Close option or manually close the process which is interfering with the installation.
Click OK when ready.
25.After all the components are copied, you may be asked to provide the settings for the PBX that you have chosen. Since this process varies greatly from system to system, please ensure that you configure your site’s PBX exactly as required.
26.Click Finish to restart the server.
If you wish to restart your computer at a later time, disable the Restart check box then click Finish.

27.This alert is to remind you to properly share the UC installation folder (see for here details).
Click OK to restart the computer.
|
Important: Do not proceed with any Secondary Server installations until the synchronization between the Consolidated and Primary Servers has completed or the database may become corrupted. |

The Primary Voice Server MUST be the first server to be setup since the Primary holds the license for your site. The Consolidated Server (Primary) should be next, and only when the database has synchronized between them should the Secondary Servers be installed. See Verifying File Sync on page 323.
|
Important: In HA installations, all servers must have the same time zone set under Windows Date / Time. |
|
Note: Make sure that all of the necessary Services for your operating system have been installed before proceeding with the installation. Refer to the appropriate section of the Server Installation Guide for details. Also make sure that Windows Firewall is disabled, and that Windows Automatic Update is turned off. |
1.Download the installation file (see chapter 4). Run the file (double-click) to extract the contents. Specify the location on your hard drive where you want to save the files.

2.In the extraction folder, run Setup.exe as administrator to install Avaya Messaging onto all of your Secondary servers.
3.Once the Windows components have been verified, click Next to begin the installation.

|
Note: The installer will automatically install the necessary packages at the beginning of the installation if they do not already exist on the system. These packages may include Sentinel Protection, Microsoft Visual C++ Redistributable and Microsoft .Net Framework 4.5. This process may take a while depending on the required components. |
|
Note: Clicking on the Documentation button will provide you with the default set of PDF documents which comprehensively cover most aspects of Avaya Messaging. They can also be accessed from resources.avayacloud.com in both PDF and HTML format. |
4.Enter the DCOM user info (domain user account which has local administrator rights). This is required by services which use local administrator rights.
Click OK after entering the necessary credentials.

|
Hint: Wherever possible, this password should be setup with no expiration date. If the password does expire, then it must be changed on every computer that uses it. Many services will be unavailable until the change has been made everywhere. |
5.Review all the license agreements and enable
I accept the license agreement.
Click Next to continue.
6.You will be asked to select the destination of the installation. You may change the hard drive destination through the drop down menu. By default, the installation will create a UC folder on the C drive.
Click Next to continue.
|
Note: It is highly recommended that you install the program to a drive other than C to prevent any conflicts or performance issues. |
7.Enable Multiple UC Servers in High Availability.
Click Next.
Single UC Server: When operating Avaya Messaging on a single server computer.
Multiple UC Servers in High Availability: When running Avaya Messaging in High Availability mode for redundancy.
Avaya Messaging Cloud Gateway: Gateway allows end-to-end synchronization between the Avaya Aura Messaging server and Google's Gmail using Avaya Messaging message sync and the CSE.
8.Select Secondary Voice Server.
Click Next.
9.Enter the IP Address of the Primary Voice Server.
Click Next.
10.Enter the number for this Secondary Server. Each Secondary server must have a unique identifying number assigned between 2 and 20.
Click Next.
|
Note: The Primary Server is automatically assigned # 1. |

11.Select the Components required at your site.
Click Next.
|
Note: If the Dialogic SR140 fax software will be used with this installation, ensure that the Hardware Fax Driver option is enabled here. |
12.Select your PBX Brand then click Next.
13.Select your PBX model from the dropdown menu.
Click Next.

14.If you will be installing a Secondary Consolidated server with your system, click Yes.
Otherwise, choose No.
A Secondary Consolidated server is optional.

15.Enter the IP Address for the Consolidated Server, and if selected, the IP Address for the Secondary Consolidated Server.
Both Consolidated servers require their own computers, but for now you only need to know their IP Addresses.
Click Next.
16.Enter the number of ports your system will use.
Click Next.
17.Enter and verify the password used for the local UC IIS User. This is used when logging into any associated web applications, such as Web Access.

18.The preliminary information required for installation is now complete.
Click Next.

19.The selected components will now be installed. This process may take a while.

20.If you are warned about components being in use, either use the Automatically Close option or manually close the process which is interfering with the installation.
Click OK when ready.

21.After all the components are copied, you may be asked to provide the settings for the PBX that you have chosen. Since this process varies greatly from system to system, please ensure that you configure your site’s PBX exactly as required.
22.On the SSO Configuration screen, enable Legacy SSO. From the dropdown menu, enable the Providers that you want your clients to be able to use to access Web Admin, Avaya Messaging Admin, Web Access, and Web Reports. Items that are disabled will not appear during client login.

|
Note: For more information on the SSO Options, see chapter 26 on page 715: Single Sign-On (SSO). |
23.Click Finish to restart the server.
If you wish to restart your computer at a later time, disable the Restart check box then click Finish.

24.This alert is to remind you to properly share the UC installation folder (see here for details).
Click OK to restart the computer.

|
Warning: Once all of the HA servers (Consolidated, Primary and all Secondaries) have been installed, it is important to perform a full synch of all data. Attempting to login to the Primary or Secondary servers before the synch is complete will corrupt the database preventing all logins on all servers. Refer to Verifying File Sync for complete details. |
The standard HA installation provides failover backup support for the voice servers at the site. The Primary Voice server and one or more Secondary Voice servers prevent the loss of data if one of those machines should fail. The Consolidated server is not backed up in this way by default.
Avaya Messaging natively supports the creation of a Secondary Consolidated server. This must be another computer system with identical hardware to the Primary Consolidated machine. Installing a Secondary Consolidated server creates a real-time mirror of the Primary Consolidated server. If the Primary Consolidated server stops responding for a selectable amount of time, the system will trigger a failover onto the Secondary Consolidated server.
This is an optional procedure and will not affect the performance of the HA system.
The Consolidated server synchronizes the voice servers (Primary and all Secondaries) and maintains the database. If the Consolidated server fails, the voice servers will continue to process voice traffic, but UM services (calendar sync, Email integration, transcription, etc.) will not be available.
During normal operations, the Primary and Secondary Voice servers communicate with the Primary Consolidated sever only. The Secondary Consolidated server takes no active role in operations. It communicates only with the Primary Consolidated server to mirror its current state and to check its operational status.
If the Primary Consolidated server stops responding to the Secondary Consolidated for a configurable period of time (10 minutes by default), the Secondary Consolidated server will contact each of the remote client servers (i.e. Secondary voice, Remote CSE, Remote Web, Remote Report). Once they have all responded, the Secondary Consolidated will initiate the failover procedure. The Secondary Consolidated now becomes the Primary Consolidated server and all of the client Voice servers begin synchronizing.
Once the old Primary Consolidated server has been repaired and the system detects it again, the now Primary Consolidated server will initiate the failback procedure where the two Consolidated servers switch roles again returning to their original configuration.
If the Primary Consolidated server stops responding to the Secondary Consolidated for a configurable period of time (10 minutes by default), the Secondary Consolidated server will contact each of the remote client servers (i.e. Secondary voice, Remote CSE, Remote Web, Remote Report). Once they have all responded, the Secondary Consolidated will initiate the failover procedure. If any of the client servers do not respond, the Secondary Consolidated server will not failover automatically. In this instance, the administrator must initiate the failover manually.
The executable file (consolfailover.exe) is included with the HA installation in the \UC\DB folder of the installed hard drive on all clients. On the Secondary Consolidated server, open the command prompt, move to the \UC\DB directory and type the following:
consolfailover forcedfailover
This will initiate a failover where the Secondary Consolidated server takes over the functions of the Primary Consolidated server for all of the clients that are currently responding. When communication with the missing client servers is restored, the Secondary Consolidated server will have them failover.
When communication with the Primary Consolidated server is restored, it rejoins the network temporarily as the Secondary Consolidated server. After 10 minutes, the entire system will revert to its original configuration with both Consolidated servers returning to their original roles.
If any client servers do not failover when commanded to do so, the administrator must force the client to switch. On the client server, open the command prompt, move to the \UC\DB directory and type the following:
consolfailover manual IPA_Secondary IPA_Primary
Enter the IP Address for the Secondary Consolidated server, followed by the IP Address of the Primary Consolidated server.
To see all of the possible parameters for this command, enter the following at the command prompt:
consolfailover /?


|
Note: Third party failover software is not supported by Avaya Messaging. |
The installation of the Secondary Consolidated server must be done after the Primary Consolidated server is operational.
|
Important: In HA installations, all servers must have the same time zone set under Windows Date / Time. |
|
Note: Make sure that all of the necessary Services for your operating system have been installed before proceeding with the installation. Refer to the appropriate section of the Server Installation Guide for details. Also make sure that Windows Firewall is disabled, and that Windows Automatic Update is turned off. |
1.Download the installation file (see chapter 4). Run the file (double-click) to extract the contents. Specify the location on your hard drive where you want to save the files.

2.In the extraction folder, run Setup.exe as administrator to install Avaya Messaging onto your Consolidated server.

3.Once the Windows components have been verified, click Next to begin the installation procedure.
|
Note: The installer will automatically install the necessary packages at the beginning of the installation if they do not already exist on the system. These packages may include Sentinel Protection, Microsoft Visual C++ Redistributable and Microsoft .Net Framework 4.5. This process may take a while depending on the required components. |
|
Note: Clicking on the Documentation button will provide you with the default set of PDF documents which comprehensively cover most aspects of Avaya Messaging. They can also be accessed from resources.avayacloud.com in both PDF and HTML format. |
4.Enter the DCOM user info (domain user account which has local administrator rights). This is required by services which use local administrator rights.
Click OK after entering the necessary credentials.

|
Hint: Wherever possible, this password should be setup with no expiration date. If the password does expire, then it must be changed on every computer that uses it. Many services will be unavailable until the change has been made everywhere. |
5.Review all the license agreements and select
I accept the license agreement.
Click Next to continue.

6.You will be asked to select the destination of the installation. You may change the hard drive destination through the drop down menu. By default, the installation will create a UC folder on the C drive.
Click Next to continue.
|
Note: It is highly recommended that you install the program to a drive other than C to prevent any conflicts or performance issues. |

7.Enable Multiple UC Servers in High Availability.
Click Next.
Single UC Server: When operating Avaya Messaging on a single server computer.
Multiple UC Servers in High Availability: When running Avaya Messaging in High Availability mode for redundancy.
Avaya Messaging Cloud Gateway: Gateway allows end-to-end synchronization between the Avaya Aura Messaging server and Google's Gmail using Avaya Messaging message sync and the CSE.

8.Select Secondary Consolidated Database/File Server.
Click Next.

9.Enter the IP Address of the Primary Voice server, then click Next.

10.Select the Components required at your site.
Click Next.
11.This screen shows all of the Windows roles and features that the Consolidated server requires to operate properly.
|
Note: This screen will only appear if one or more required components are not installed on the server. |
For all items that are not checked, return to Windows and install any missing components into the operating system.
Click Next when finished or to refresh the display.

|
Note: The installation will not continue until all of the required components have been added to the server. The screen does not refresh until you click Next. |
12.Select your PBX Brand then click Next.

13.Select your PBX model from the dropdown menu.
Click Next.

14.Unless the Primary Server has been upgraded from a Single Server installation, choose No.
Click Next.

15.Enter the IP Address for the Primary Consolidated server.
16.Select the Email Server Type from the list of available options. This allows the system to set basic parameters which help to improve performance and reliability.

17.Enter and verify the password used for the local UC IIS User. This is used when logging into any associated web applications, such as Web Access.

18.Enter a password to provide administrator only access to the system. This account password is used to configure the many elements of the system.

|
Warning: Once all of the HA servers (Consolidated, Primary and all Secondaries) have been installed, it is important to perform a full synch of all data. Attempting to login to the Primary or Secondary servers before the synch is complete will corrupt the database preventing all logins on all servers. Refer to Verifying File Sync for complete details. |
19.Enter the primary location from which most telephone calls will be placed. This will normally be where the corporate office is situated. Additional dialing locations and rules may be defined after the installation is complete.
Select the country from the dropdown menu, and enter the area code in the space provided.
Click Next to continue.

|
Note: If the Phone and Modem Settings under Windows Control Panel have already been configured, this step will not appear. The values entered there will be used automatically. |
20.Choose either Yes or No to determine whether the system will apply General Data Protection Regulation (GDPR) compliance procedures to your data.
With this option enabled, users and callers are notified that personal information will be collected. This information can also be completely removed from the system upon request.

21.The preliminary information required for installation is now complete.
Click Next.

22.The selected components will now be installed. This process may take a while.

23.On the SSO Configuration screen, enable Legacy SSO. From the dropdown menu, enable the Providers that you want your clients to be able to use to access Web Admin, Avaya Messaging Admin, Web Access, and Web Reports. Items that are disabled will not appear during client login.

|
Note: For more information on the SSO Options, see chapter 26 on page 715: Single Sign-On (SSO). |
24.If you are warned about components being in use, either use the Automatically Close option or manually close the process which is interfering with the installation.
Click OK when ready.

25.After all the components are copied, you may be asked to provide the settings for the PBX that you have chosen. Since this process varies greatly from system to system, please ensure that you configure your site’s PBX exactly as required.
26.Click Finish to restart the server.
If you wish to restart your computer at a later time, disable the Restart check box then click Finish.

27.This alert is to remind you to properly share the UC installation folder (see for here details).
Click OK to restart the computer.
|
Important: Do not proceed with any Secondary Server installations until the synchronization between the Consolidated and Primary Servers has completed or the database may become corrupted. |
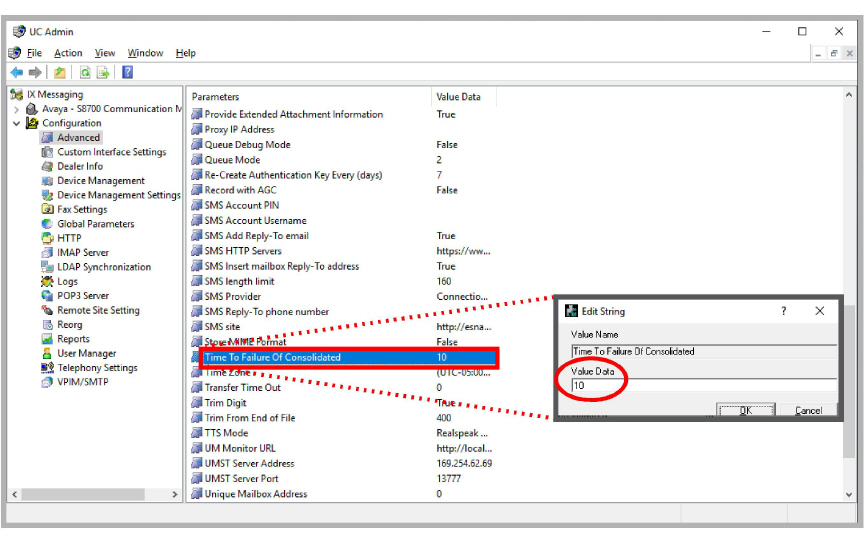
Configuring Consolidated Failover Timing
The Secondary Consolidated server regularly polls the Primary Consolidated server. If the Primary Consolidated server fails to respond for a set period of time, the Secondary Consolidated initiates the failover process.
By default, this is 10 minutes.
This can be changed using the UC Admin program.
On the Primary Consolidated server:
1.Open Avaya Messaging Admin, and go to Configuration > Advanced.
2.Locate Time To Failure Of Consolidated and double-click to change the value.
3.In the Value Data field, enter the time (in minutes) that the Secondary Consolidated server should wait after losing contact with the Primary Consolidated server before starting the failover procedure.
Click OK to save the change.
Verifying Consolidated Server IP Addresses
You can check that the correct IP Address have been entered into the system through UC Admin.
1.Open UC Admin and login using administrator credentials.
2.Go to Advanced and locate Consolidated Server IP in the right-hand pane. Verify that the IP address listed is correct.
Double-click the entry to change the value.
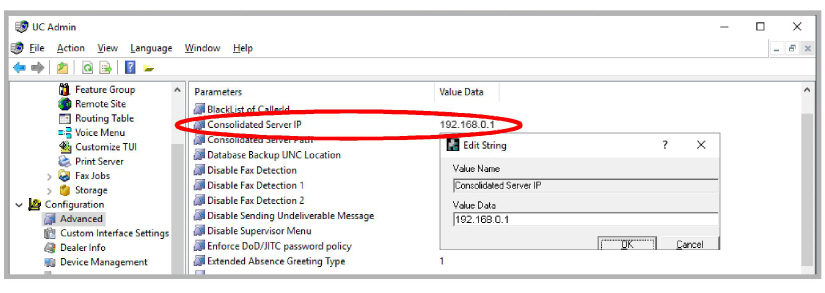
3.Locate Secondary Consolidated Server IP in the right-hand pane. Verify that the IP address listed is correct.
Double-click the entry to change the value.
Once Primary and Consolidated servers have been installed, it is important to complete a full synch of all data before attempting to add any Secondary servers. Once a each Secondary has been attached, it too must be fully synchronized. Attempting to login to the Primary or Secondary servers before the synchronization is complete will corrupt the database preventing all logins on all servers.
Data synchronization will begin once the sync service has been started on each server. On the Consolidated server, it is MobiLink - Consolidated. On the Primary and all Secondary servers, this service called SQL Anywhere - MobiLink Remote.
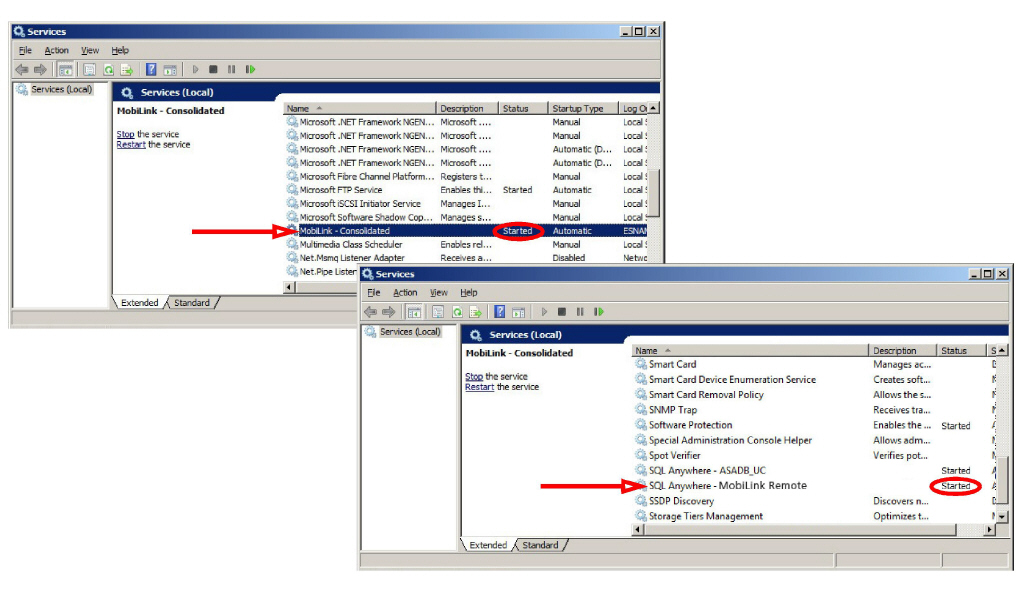
Open the services window and check that the named services are running on each server. If any are not active, then select it and press Start.
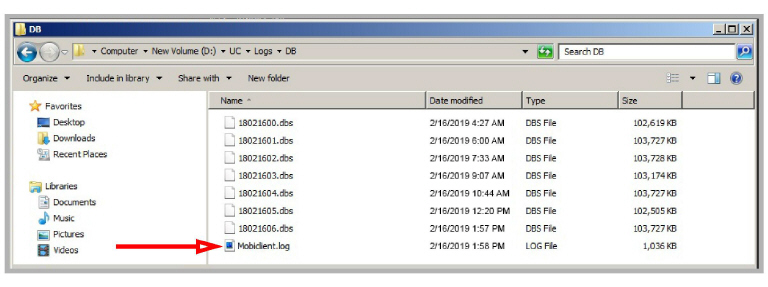
Use any text editor (e.g. Windows Notepad) to open the Mobiclient.log file in the DB/Logs folder of the UC installation directory.
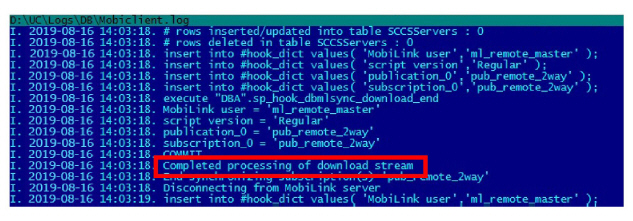
The message Completed processing of download stream will appear once the synch has finished.
It is necessary to share the UC installation folder so that all of the programs and users have the required access.
The following user accounts require full permissions to the UC folder:
UCIIS (local) - this is called UCIISUser.
DCOM (user) - the name of the domain user with admin rights on the local machine. This is
the account used during installation.
Follow this procedure on the Primary, the Consolidated, and on each Secondary server on the system.
Also share the folder if you are using a Remote Web Server.
If you are using Remote CSE Servers, the folder only needs to be shared with the DCOM user.
1.Locate the UC folder in Windows Explorer, then Right-click > Properties > Sharing.
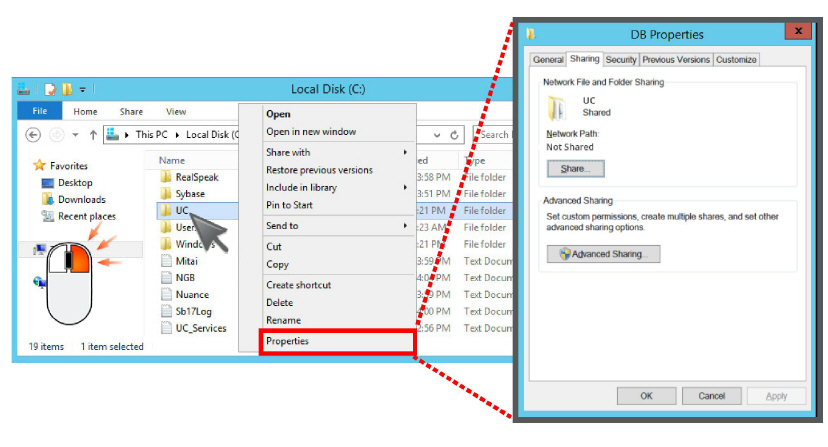
2.Click Advanced Sharing. Enable the Share this folder checkbox.
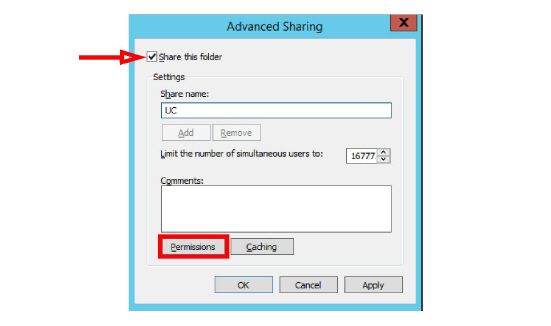
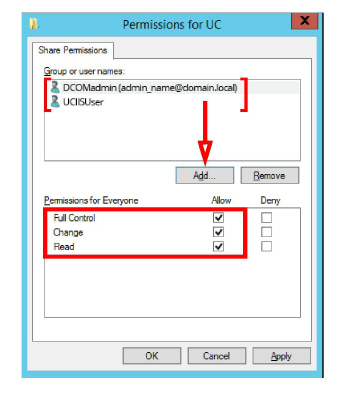
3.Click Permissions, and Add the required users, giving each Full control of the folder.
Remove the user Everyone.
4.Click Apply and return to the Windows desktop.
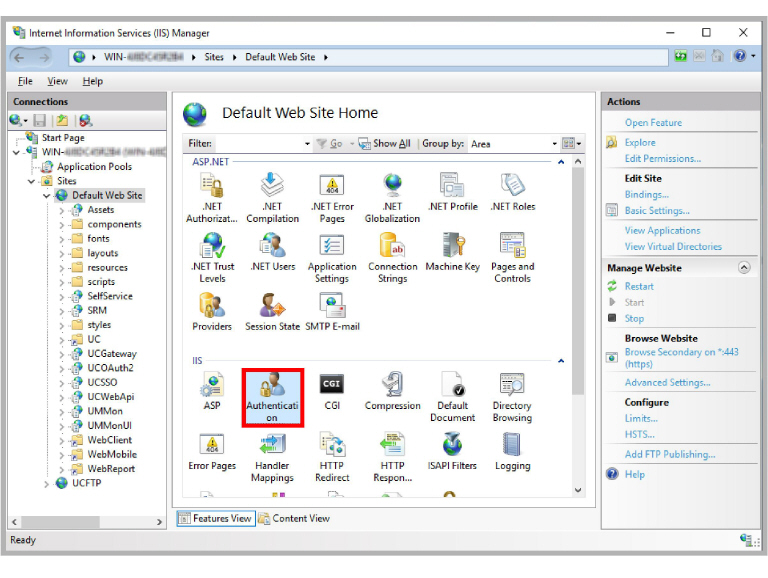
5.Open the IIS Manager. Go to Start > Windows Administrative Tools and open the Internet Information Services Manager.
6.Go to Sites > Default Web Site. In the center panel, under the section for IIS, double-click Authentication.
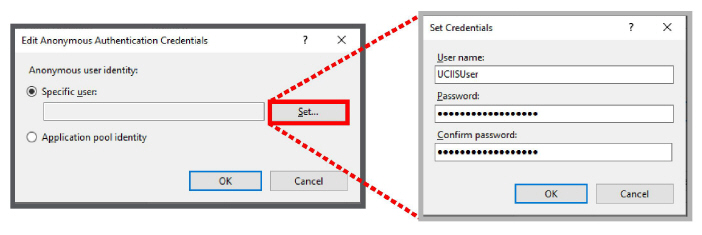
7.Select Anonymous Authentication and choose Edit in the right-hand panel.
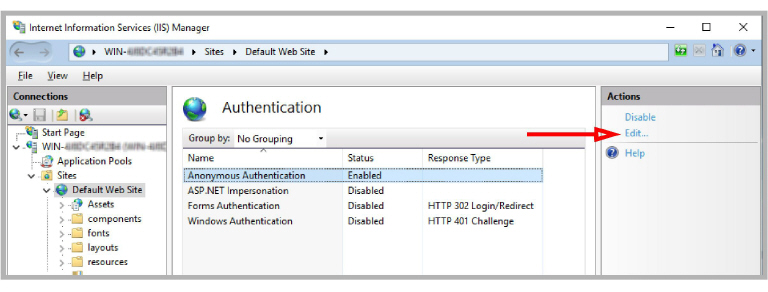
8.Click Set. When prompted, enter UCIISUser as the Specific User.
Enter the password for the UCIISUser in the spaces provided.
When ready, click OK.
By default, during a failover condition, the Message Waiting Indicator (MWI) functions are not automatically re-routed to the alternate servers.
You can manually enable this functionality.
|
Note: This configuration is optional. |
•Add a new line to the ETSIPSERVICE.INI file found in /UC/Configuration folder.
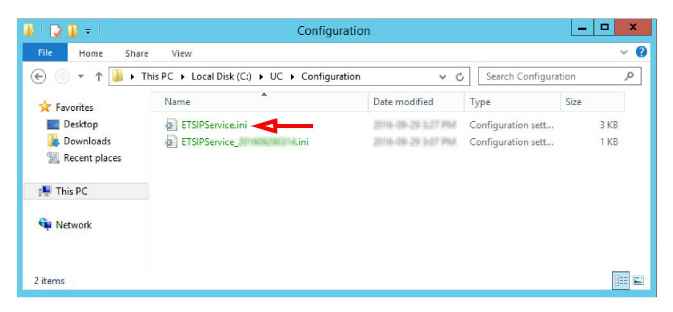
•Open the INI file with a text editor (e.g. Notepad). Locate the PBX section and append the following line:
Fail Over=Yes
•Ensure that Keep Alive is also enabled ( Keep Alive=Yes ).
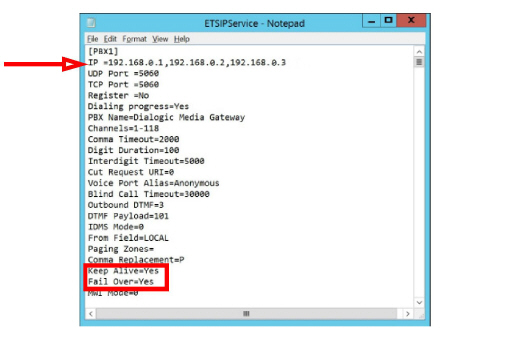
•Verify that there are at least 2 IP addresses listed under IP. These are for your PBXs and can be entered here if necessary, or configured through the SIP Configurator.
•Save the file and reboot the server.
|
Note: This must be done on each voice server (the Primary and all Secondary servers) in the array. |
An Avaya Messaging HA installation can be spread across a geographically distributed network. Geo Redundancy allows a section of the network in one part of the world to go offline without affecting the remaining elements.
Installing Avaya Messaging with Geo Redundancy proceeds the same way as it does with any other HA install, but with some of the servers existing in other locations.
Geo Redundancy has the following network connection requirements to operate properly.
•All Avaya Messaging servers must be on the same network as the PBX.
•All servers must have a minimum 1Gbps connection to the network.
•The maximum round-trip latency for optimum performance is 10ms between servers, with an acceptable tolerance up to 60ms.
•The maximum round-trip latency between the voice servers and the PBX must be no more than 200 ms.
•Optimal round-trip latency is a maximum of 150 ms.
•The path of connectivity must have 20Mbps guaranteed bandwidth with no steady-state congestion.
•At all times, the LAN network connection must provide a min guaranteed 20Mbps upload / download speed.
Contact your dealer if you have any further questions.
Adding Secondary Voice Servers
As your communication traffic expands, it may become necessary to add more Secondary Voice Servers to a High Availability environment to maintain adequate response times.
|
Note: The following procedure only applies to adding voice servers to the system. |
1.Create a new voice server (virtual or physical) with the same hardware parameters as the existing units.
2.Install and configure Windows (Roles and Features) as was done with the original voice servers.
3.Install Avaya Messaging on the new machine, selecting Multiple UC Servers in High Availability when prompted.

4.Continue with the installation and select Secondary Voice Server when prompted.

5.Continue with the installation. At the prompt, enter a number for the new server.
Each Secondary server must have a unique identifying number assigned between 2 and 20.
|
Note: The Primary Server is automatically assigned # 1. |

6.Complete the remaining steps of the Secondary Voice Server installation. When finished, reboot the new server.
7.When the new server has restarted, stop the DBWatcher service on both the new Secondary Voice Server and on the Consolidated Server. This will allow the new server to synchronize all data with the HA system.
8.When the synchronization has completed, restart the DBWatcher service on both the new Secondary Voice Server and on the Consolidated Server.
The new Secondary Voice Server has been added to the HA environment.